Buttermilk Chicken Recipe: Buttermilk chicken is a game-changer in the world of home-cooked meals. It’s the perfect blend of crispy on the outside and juicy on the inside, offering a flavorful, comforting experience that’s tough to beat. Whether you’re preparing a weeknight dinner or impressing friends at a weekend gathering, this dish is a surefire hit.
What Makes Buttermilk Chicken So Delicious?
What makes this dish truly shine is the buttermilk marinade. Buttermilk isn’t just a nostalgic Southern staple—it has a tangy richness and a slight acidity that works wonders for chicken. It tenderizes the meat while infusing it with a depth of flavor that water-based marinades can’t touch. That balance between tart and savory is what sets buttermilk chicken apart.
Plus, when it’s time to cook, the sugars and proteins in the buttermilk help form a golden, crispy crust, especially when combined with seasoned flour or breadcrumbs. This dish is where flavor, texture, and aroma come together to create pure comfort food.
Benefits of Using Buttermilk in Chicken Marinade
Buttermilk is not only tasty—it’s a secret weapon in the kitchen. Here’s why:
- Tenderizes naturally: The lactic acid in buttermilk breaks down the protein in the chicken, making it extra tender without turning mushy.
- Enhances flavor: It’s like a flavor sponge—perfectly seasoned buttermilk seeps into the meat, so every bite is bursting with taste.
- Improves coating adherence: When dredging the chicken in flour or batter, the buttermilk helps it stick, leading to a crunchier and more even crust.
Using buttermilk is like giving your chicken a spa day—it soaks up all the good stuff and comes out better than ever.
Ingredients You’ll Need
Before you dive into the deliciousness, you need to gather the right ingredients. A well-stocked pantry and fridge will set you up for success.
Main Ingredients
Here’s what you’ll need to get started:
- Chicken pieces (bone-in thighs, drumsticks, or breasts – about 2 lbs)
- Buttermilk – 2 cups
- Salt – 1 tablespoon
- Black pepper – 1 teaspoon
- Garlic powder – 1 teaspoon
- Onion powder – 1 teaspoon
- Paprika – 1 teaspoon (smoked paprika for an extra kick)
- Cayenne pepper – ½ teaspoon (optional, for heat)
- Flour – 2 cups (for dredging)
- Oil for frying – vegetable or canola works best
These ingredients form the base of the recipe, but you can tweak them depending on your taste preferences.
Optional Add-ons for Extra Flavor
Want to elevate your buttermilk chicken even more? Consider these flavorful additions:
- Hot sauce – Add a splash to your marinade for tangy heat.
- Fresh herbs – Rosemary or thyme sprigs in the marinade give a garden-fresh punch.
- Honey – A teaspoon or two in the marinade for a hint of sweetness.
- Lemon zest – For a zesty, citrus undertone.
These small tweaks can completely transform the flavor profile, so don’t be afraid to experiment!
Preparing the Buttermilk Marinade
This is where the magic starts. A well-crafted marinade is the heart and soul of buttermilk chicken.
Step-by-Step Marinade Instructions
- In a large bowl, whisk together the buttermilk, salt, pepper, garlic powder, onion powder, paprika, and cayenne pepper.
- Add the chicken pieces and ensure they’re fully submerged. If needed, use a resealable plastic bag instead of a bowl for even coating.
- Cover the bowl or seal the bag and place it in the refrigerator. Let it marinate for at least 6 hours, but overnight is ideal.
This isn’t a rushed process—it’s all about patience. The longer the chicken soaks, the more flavor it absorbs.
Tips for Maximum Flavor Absorption
- Score the chicken: Make small cuts in the meat to help the marinade penetrate deeper.
- Don’t over-marinate: Anything beyond 24 hours might make the texture too soft.
- Mix occasionally: If you’re using a bowl, stir the chicken once or twice during marination.
The result? Chicken that’s moist, flavorful, and ready to become the star of your meal.
Marinating the Chicken
Once your marinade is prepped, the next step is ensuring the chicken gets the full treatment it deserves.
Ideal Marination Time
While 6 hours is the minimum, the sweet spot for marination is 12 to 18 hours. This timeframe allows the buttermilk to work its tenderizing magic without breaking down the meat too much.
For those in a rush, even a quick 2-hour soak will add noticeable flavor, but if you can, plan ahead. Trust us—your taste buds will thank you.
Common Mistakes to Avoid
- Using too much acid: Stick to buttermilk. Adding lemon juice or vinegar can overpower and make the meat mushy.
- Not covering the chicken completely: Every inch of meat should be in contact with the marinade.
- Marinating too long: After 24 hours, the texture may turn unpleasantly soft.
Avoid these pitfalls and you’ll be rewarded with chicken that’s tender and bursting with flavor.
Cooking Methods for Buttermilk Chicken
Once your chicken is well-marinated, it’s time to bring it to life. Cooking buttermilk chicken can go in multiple directions—each offering a unique taste and texture. Whether you’re in the mood for crispy fried chicken or a healthier baked version, there’s a method here for you.
Pan-Frying
Pan-frying is a go-to for many home cooks. It gives you that crispy crust without needing a deep fryer.
- Heat your oil: Pour about ½ inch of vegetable or canola oil into a large skillet and heat it over medium-high heat until shimmering.
- Dredge the chicken: Take the marinated chicken out of the buttermilk, let excess drip off, and coat it thoroughly in seasoned flour.
- Fry in batches: Don’t overcrowd the pan. Cook for 6–8 minutes per side, depending on thickness, until golden brown and cooked through (internal temp of 165°F).
- Drain on paper towels: This keeps it crispy and not greasy.
This method gives you a beautiful, crispy crust and juicy interior—perfect for a satisfying, savory bite.
Baking in the Oven
Want a healthier option? Baking is your best friend.
- Preheat the oven: Set it to 400°F (200°C).
- Prepare a baking sheet: Line it with parchment paper or foil and set a wire rack on top for even airflow.
- Dredge and place the chicken: Coat the chicken with seasoned flour or breadcrumbs and place them on the rack.
- Spray with cooking oil: This helps it crisp up.
- Bake for 35–40 minutes: Flip halfway through for even browning.
Baked buttermilk chicken still delivers on flavor and crunch, with less mess and fat.
Deep-Frying for Crispy Goodness
For those going full Southern comfort mode, deep-frying is the way to go.
- Heat oil to 350°F (175°C): Use a deep fryer or heavy pot with at least 3 inches of oil.
- Dredge and fry: Drop in the coated chicken gently and cook in batches for about 10–12 minutes until golden and cooked through.
- Drain and rest: Always rest on a wire rack or paper towel to remove excess oil.
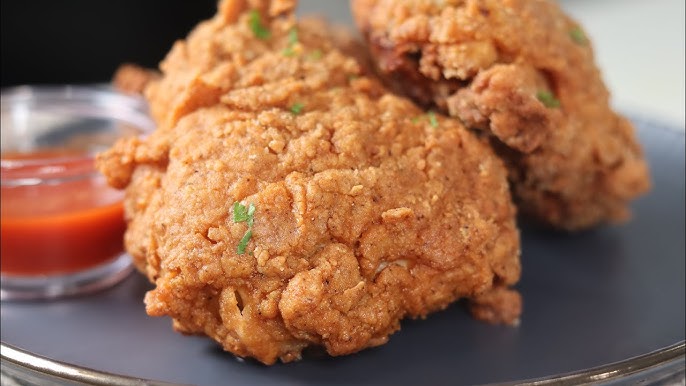
Deep-frying gives that restaurant-style finish with a crunchy crust you can hear.
Serving Suggestions
You’ve cooked the perfect buttermilk chicken—now it’s time to plate it up and make it shine. How you serve it can take this dish from delicious to unforgettable.
Side Dishes That Pair Perfectly
Pairing your buttermilk chicken with the right side dish enhances the meal experience. Here are some go-to options:
- Mashed potatoes: Creamy and buttery, the ultimate comfort side.
- Coleslaw: Crunchy, tangy, and refreshing—balances the richness.
- Cornbread or biscuits: Classic Southern pairings that never fail.
- Mac and cheese: For indulgent nights when you want pure comfort.
- Roasted veggies: Lighten things up with seasonal vegetables.
Mix and match depending on the occasion—whether it’s a family dinner or a picnic in the backyard.
Dips and Sauces to Serve With
Don’t forget the dips! These can make or break the flavor party:
- Ranch dressing: Classic, creamy, and herby.
- Honey mustard: A sweet-tangy delight.
- Hot sauce: For those who like it spicy.
- BBQ sauce: Smoky and bold.
- Garlic aioli: For a gourmet twist.
Offering a variety of sauces lets everyone find their perfect bite. Put out a few and watch your guests light up!
Storing and Reheating
Made a big batch and wondering what to do with the leftovers? Buttermilk chicken stores surprisingly well—if you do it right.
How to Store Leftovers
- Cool first: Let the chicken come to room temperature.
- Use airtight containers: Keeps it fresh and prevents odor transfer.
- Refrigerate: Good for up to 3–4 days.
- Freeze: Wrap in foil and place in a freezer bag—stays good for up to 3 months.
Always label your containers with the date to keep track.
Best Reheating Methods Without Drying It Out
No one wants soggy or dry reheated chicken. Here’s how to avoid that:
- Oven: Preheat to 350°F, place chicken on a baking tray, cover loosely with foil, and heat for 15–20 minutes.
- Air fryer: Crisp it up at 375°F for 6–8 minutes.
- Skillet: Add a splash of water, cover, and reheat gently.
- Avoid microwaving: It tends to dry out the meat and ruin the crispy crust.
Reheating the right way ensures your leftovers taste nearly as good as the fresh batch.
Nutritional Information
Let’s talk numbers—because delicious doesn’t have to mean unhealthy. Understanding the nutritional content of buttermilk chicken helps you enjoy it mindfully, whether you’re watching calories, carbs, or fat intake.
Caloric Breakdown
Here’s a general idea of what you’re consuming per serving (based on a fried thigh or drumstick with skin):
- Calories: 350–450
- Protein: 25–30g
- Fat: 20–25g
- Carbohydrates: 15–20g (mostly from flour coating)
- Fiber: 1g
- Sugars: 1–2g
This can vary depending on cooking method—deep-fried versions obviously have higher fat content compared to baked or air-fried alternatives.
Health tip: Remove the skin and bake the chicken to significantly reduce calories and saturated fat. Pair with veggies or a light salad to balance the plate.
Health Considerations
Buttermilk chicken, when made thoughtfully, can fit into a balanced diet. Some helpful notes:
- Buttermilk is low-fat: Despite its name, most store-bought buttermilk is relatively low in fat compared to cream-based marinades.
- Rich in protein: Chicken is a lean, high-quality protein source.
- Good source of calcium and potassium: Thanks to the buttermilk.
- Potential allergens: Includes dairy and gluten (from dredging flour). Use gluten-free flour or dairy-free buttermilk for dietary restrictions.
If you’re looking to make this recipe healthier, consider using skinless chicken breasts, baking instead of frying, and seasoning with herbs instead of salt-heavy blends.
FAQs about Buttermilk Chicken Recipe
1. Can I use dairy-free buttermilk?
Yes! Mix 1 cup of almond or soy milk with 1 tablespoon of lemon juice or vinegar, let it sit for 10 minutes, and you’ve got a dairy-free buttermilk alternative that works just as well.
2. How long can I marinate the chicken?
Ideally, marinate it for 6 to 18 hours. While overnight is perfect, don’t go beyond 24 hours, as the texture may become too soft and mushy.
3. Can I freeze buttermilk-marinated chicken?
Absolutely. Marinate the chicken, then place it in a freezer-safe bag and freeze for up to 2 months. Thaw overnight in the fridge before cooking.
4. What’s the best cut of chicken to use?
Bone-in thighs or drumsticks are flavorful and juicy, but you can also use breasts or wings depending on your preference.
5. Why is my chicken not crispy?
It could be due to excess moisture. Always let the buttermilk drip off before dredging in flour, and make sure the oil is hot enough (around 350°F) before frying.
Conclusion
There’s a reason buttermilk chicken has stood the test of time—it’s a classic comfort dish that never disappoints. From its tender marinated meat to its crispy golden crust, it’s a flavorful masterpiece that’s as enjoyable to make as it is to eat.
By following this step-by-step guide, you’ve got everything you need to master the art of buttermilk chicken. Whether you fry, bake, or air-fry it, the result is a juicy, crispy, and savory main dish that wins over taste buds every time.
Don’t be afraid to get creative—adjust spices, try different cuts of chicken, or experiment with side dishes. Cooking is about exploration and enjoyment, and this recipe is a delicious place to start.