Butter Mints Recipe: There’s something timeless and comforting about butter mints. You know those little pastel-colored, melt-in-your-mouth morsels that often show up at weddings, baby showers, or sitting in a candy dish at grandma’s house? Yeah, those! Making butter mints from scratch is surprisingly easy and deeply satisfying. This step-by-step guide will walk you through exactly how to create your own soft, sweet, and creamy butter mints that beat the store-bought ones hands down.
Whether you’re a seasoned candy-maker or a beginner in the kitchen, this guide is designed to keep things simple, fun, and totally doable at home. Ready to make a batch? Let’s go!
What Are Butter Mints?
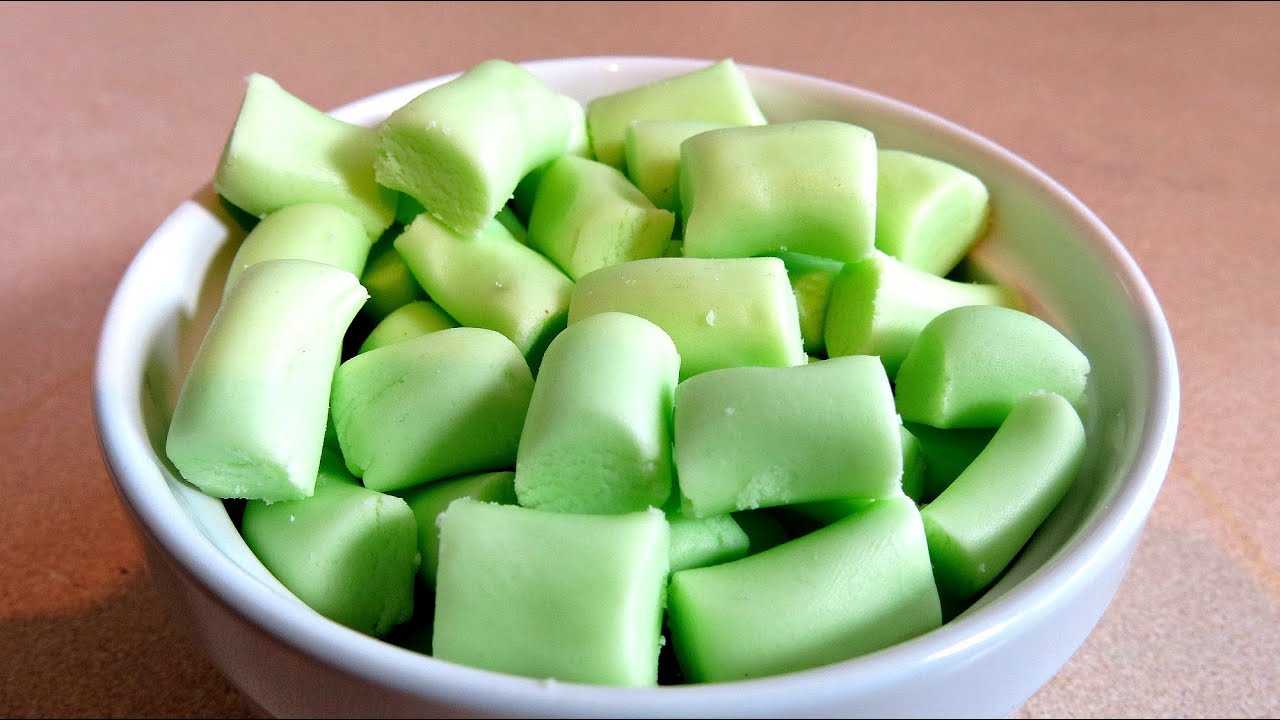
Butter mints are small, creamy candies that are made primarily from butter, powdered sugar, and flavoring—usually peppermint. Unlike hard mints, these little sweets are soft and smooth with a melt-in-your-mouth texture. They’re slightly sweet, mildly minty, and buttery in flavor, making them a favorite treat for people of all ages.
They’re often found in pastel colors and shaped into small pillows, rounds, or even piped shapes. Butter mints are traditionally served at weddings, baby showers, holiday parties, and more. They don’t just look elegant—they add a nostalgic and comforting vibe to any event.
These candies can also be easily customized with different flavors (think vanilla, lemon, almond) and colors to match your celebration. They’re as versatile as they are delicious!
Why You’ll Love This Butter Mints Recipe
Let’s be real: butter mints are one of those treats that make you feel like a kid again. But why make them at home?
- Super simple to make – You only need a few ingredients.
- No cooking or baking required!
- Customize flavors and colors to your liking.
- Perfect for gifting during the holidays or celebrations.
- Budget-friendly compared to store-bought gourmet mints.
- They melt in your mouth with every single bite.
- Make-ahead friendly – they store well and even get better with time.
Once you try making these buttery gems yourself, you’ll never go back to the store-bought kind. Trust me, your guests (and your taste buds) will thank you.
Occasions Perfect for Butter Mints
Butter mints are the perfect little treat for just about any event, but they truly shine in specific situations:
- Weddings – Classic and elegant, often used as part of the dessert table or party favors.
- Baby showers – Their pastel colors fit right in!
- Holiday gatherings – Peppermint mints make the perfect festive treat.
- Birthday parties – Kids and adults alike will love them.
- Tea parties or brunches – Add a touch of sweetness to your setup.
- Graduations or retirement parties – A bite-size sweet to celebrate success.
- Thank-you gifts – Put them in a cute jar with a bow!
Basically, if you’re celebrating something—or even just want to treat yourself—these butter mints are always a good idea.
List of Ingredients You’ll Need
Before you dive into the recipe, gather everything you need. The great thing about butter mints is how minimal the ingredient list is. You probably already have most of these in your kitchen!
Essential Ingredients
- Unsalted butter – 1/2 cup (1 stick), softened to room temperature. Quality butter matters!
- Powdered sugar – About 3 1/2 to 4 cups, sifted.
- Heavy cream or milk – 1 tablespoon (for smoothing out the dough).
- Peppermint extract – 1 to 2 teaspoons depending on your taste.
- Pinch of salt – To balance the sweetness.
Optional Add-Ins for Flavor & Color
- Food coloring – Gel food coloring works best for vibrant shades without thinning your mixture.
- Vanilla, lemon, or almond extract – For a twist in flavor.
- Natural colorings – Like beet powder or matcha for a natural look.
Tip: Don’t go too wild with liquid food coloring—it can change the consistency of the dough.
Tools You’ll Need to Make Butter Mints
You don’t need fancy candy-making tools to make butter mints, which is part of their charm. Here’s what you’ll need:
- Mixing bowls
- Hand mixer or stand mixer
- Spatula
- Measuring cups and spoons
- Plastic wrap
- Baking sheets
- Parchment paper
- Sharp knife or bench scraper
- Sifter for the powdered sugar
- Piping bag (optional, for shaping designs)
How to Choose the Best Butter for This Recipe
When your recipe has so few ingredients, each one counts—especially the butter. Here’s what to look for:
- Unsalted vs Salted: Always go with unsalted butter so you can control the salt content.
- High-fat butter: European-style butter has a higher fat content, making the mints richer and smoother.
- Softened but not melted: Let the butter sit out until it’s soft to the touch, but not greasy.
The better the butter, the creamier your mints will be. It’s worth spending a little extra for high-quality butter here.
How to Add Natural or Artificial Food Coloring
Want to make pretty pastel pinks, greens, blues, or yellows? Color is half the fun when making butter mints!
- Use gel coloring – It’s concentrated, vibrant, and doesn’t water down your dough.
- Add sparingly – Start with a toothpick amount, mix, then adjust. It’s easier to go darker than lighter.
- Knead in color by hand – Once your dough is formed, divide it into sections and add color as desired.
If you prefer all-natural, try these:
- Beet juice powder for pink
- Matcha for green
- Turmeric (just a pinch) for yellow
- Blue spirulina for blue
Get creative and match your mints to your party theme!
Flavoring Ideas for Custom Mints
While peppermint is classic, the possibilities are endless when it comes to flavoring your butter mints:
- Vanilla bean – Elegant and subtle.
- Lemon or orange zest – Add citrus oils for brightness.
- Almond extract – Nutty and warm.
- Lavender – For something floral and unique.
- Cinnamon – Warm and spicy for fall holidays.
- Chocolate mint – Add a hint of cocoa powder and mint extract.
Mix and match flavors to make a whole platter of different mints for your guests to enjoy.
Step-by-Step Guide to Making Butter Mints
Now the fun part—making the mints! Here’s your detailed walkthrough.
Step 1: Cream the Butter
In a mixing bowl, beat softened butter until smooth and creamy. This forms the rich, melt-in-your-mouth base for your mints.
Step 2: Add Powdered Sugar Gradually
Slowly add powdered sugar, about one cup at a time, mixing well after each addition. The mixture should become thick but still pliable—like soft dough.
Step 3: Mix in Flavor and Coloring
Add a few drops of peppermint or vanilla extract for flavor and a tiny bit of food coloring if desired. Stir until evenly combined.
Step 4: Form the Dough
If the dough feels sticky, add a bit more powdered sugar. Knead gently until smooth and easy to shape.
Step 5: Shape and Cut the Mints
Roll the dough into thin ropes on a sugared surface, then cut into small bite-sized pieces.
Step 6: Let Mints Air Dry
Place the pieces on a parchment-lined tray and let them dry uncovered for 12–24 hours until firm. Store in an airtight container—they’ll stay fresh and buttery for weeks!
Tips to Perfect Butter Mints Every Time
Want consistently perfect results? Keep these tips in mind:
- Don’t skimp on sifting the powdered sugar—it prevents lumps.
- Use room temperature butter for easy mixing and smooth dough.
- Avoid over-mixing once the dough comes together, or it can get too sticky.
- Gel food coloring is best—it gives bold color without changing consistency.
- Let them dry long enough—cut one open to test before storing.
Bonus tip: Add a tiny bit of cornstarch (¼ teaspoon) if the dough is too tacky and you’re not getting the firmness you want.
Storage Instructions
Once your mints have dried completely, it’s time to store them—if you can resist eating them all first!
- Store in an airtight container at room temperature.
- Place wax paper between layers to prevent sticking.
- Keep them cool and dry, away from direct sunlight or heat.
They’ll stay fresh for up to 2 weeks at room temp or longer in the fridge.
Want to make them ahead for a party? Perfect—these are the ideal make-ahead treat.
How Long Do Butter Mints Last?
Butter mints, when stored properly, have a pretty impressive shelf life:
- Room temperature: 2 weeks
- Refrigerated: Up to 1 month
- Frozen: Up to 3 months
They’re a great recipe to make in bulk and keep on hand for last-minute gifts or surprise visitors.
Troubleshooting Common Butter Mints Problems
Ran into an issue? Don’t worry—here’s how to fix common butter mint mishaps:
| Problem | Cause | Solution |
|---|---|---|
| Dough too sticky | Too much liquid or not enough sugar | Add more powdered sugar |
| Dough too dry or crumbly | Too much sugar or overmixing | Add 1 tsp milk or cream |
| Mints melting during shaping | Butter too warm | Chill dough for 15 minutes |
| Mints not drying properly | Too humid | Place near a fan or in low oven (no heat, just airflow) |
With a little tweaking, you can bring any batch back to life.
Butter Mints Variations to Try
Ready to take your butter mints to the next level? Try these fun variations:
Peppermint Butter Mints
- Stick to the classic with peppermint extract and green or white coloring.
Vanilla Butter Mints
- Use vanilla bean paste or extract and keep them white or add gold shimmer dust for elegance.
Lemon or Orange Butter Mints
- Add zest and extract from lemon or orange.
- Use yellow or orange coloring to match.
These twists let you match flavors to any theme or preference!
Can You Freeze Butter Mints?
Yes, you absolutely can freeze butter mints, and it’s a great way to prep ahead for holidays or big events.
Here’s how to freeze them properly:
- After drying, place the mints in a single layer on a parchment-lined baking sheet.
- Freeze for about 1 hour until firm. This prevents them from sticking together.
- Transfer to an airtight container or freezer-safe bag. Add parchment or wax paper between layers.
- Label and date the container.
They’ll keep well in the freezer for up to 3 months.
To Use After Freezing:
- Let them thaw in the refrigerator first, then bring to room temperature before serving.
- Avoid thawing at room temp straight from the freezer, or condensation may cause stickiness.
Freezing your butter mints locks in their flavor and texture so they taste just as fresh as the day you made them.
Gifting Ideas with Homemade Butter Mints
Butter mints make adorable and affordable gifts, especially during the holidays, weddings, or baby showers.
Here are some sweet packaging ideas:
1. Glass Jars with Ribbon
Fill small mason jars or spice jars with pastel mints. Add a ribbon and a tag that says “Mint to Be!”
2. Clear Treat Bags
These work great for party favors. Tie with color-coordinated string to match your event theme.
3. Metal Tins
Especially for holidays. Wrap the mints in mini cupcake liners inside the tin for a professional touch.
4. DIY Candy Boxes
Use small paper or cardboard boxes with a printed sticker or handwritten note for a personal touch.
5. Ornament Balls
Clear plastic fillable ornaments can be filled with butter mints and hung on the tree or gifted to guests.
Your homemade mints will not only taste amazing—they’ll look like a thoughtful, handcrafted gift made with love. Plus, they’re perfect for people with dietary restrictions, as they can be made gluten-free and nut-free.
FAQs about Butter Mints Recipe
1. Can I make butter mints without peppermint extract?
Yes! You can use vanilla, lemon, almond, or any other food-safe extract. Customize the flavor to suit your preferences.
2. My butter mints are too sticky to shape. What should I do?
Add more powdered sugar gradually until the dough becomes firm enough to handle. Avoid adding too much liquid.
3. How long should I let butter mints dry before storing them?
Let them dry for 12 to 24 hours at room temperature. They should be firm to the touch but still soft inside.
4. Can I make butter mints dairy-free?
Yes! Use a plant-based butter alternative (like vegan butter) and plant milk to make them dairy-free. The texture may vary slightly, but they’ll still be delicious.
5. Do I need to refrigerate butter mints after making them?
No. They store perfectly at room temperature in an airtight container. You can refrigerate or freeze them for longer storage.
Conclusion
Butter mints are more than just a retro candy—they’re a nostalgic, creamy treat that’s surprisingly easy to make at home. With just a few ingredients and a bit of creativity, you can whip up batches of delicious, melt-in-your-mouth mints that are perfect for any celebration, gift, or just a moment of self-indulgence.
Whether you’re going for the classic peppermint or experimenting with bold colors and new flavors, this butter mints recipe is your go-to guide. No baking, no stress—just smooth, creamy perfection one bite at a time.
So next time you need something sweet and special, skip the store and make your own butter mints. You’ll never look back!