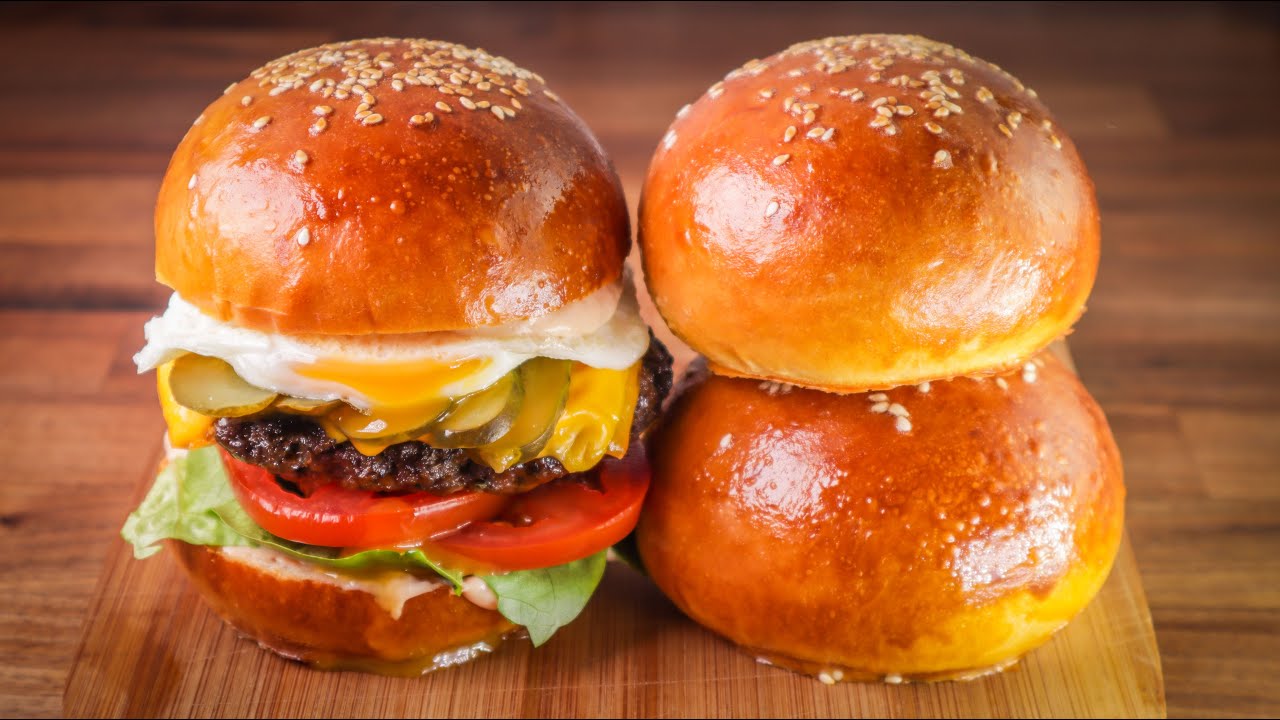
Burger Buns Recipe: Let’s be real for a second—store-bought burger buns just don’t hit the same way. If you’ve ever bitten into a perfectly juicy burger only to be met with a dry, lifeless bun, you know the disappointment. Homemade burger buns are a total game changer. They’re soft, slightly sweet, and have just the right amount of chew to hold up against all your juicy, saucy toppings.
You get full control over the flavor, texture, and size of your buns, and let’s not forget that glorious smell wafting through your kitchen as they bake. Making your own burger buns isn’t just about taste—it’s about taking your burger game to the next level. Whether you’re grilling up beef patties, going plant-based, or slapping together some fried chicken, a freshly baked bun makes everything better.
Besides, making burger buns at home is surprisingly easy. With just a few pantry staples and a bit of patience, you can whip up a batch that rivals any gourmet bakery. And once you’ve tasted the buttery, pillow-soft perfection of a homemade bun, there’s no going back.
Overview of the Baking Process
Making burger buns from scratch involves a few simple steps: preparing the dough, letting it rise (twice), shaping it, baking, and finally—devouring. The process takes around 3-4 hours, but most of that is passive waiting time while the dough rises or bakes. It’s a chill weekend project that rewards you with buns that are golden on the outside, tender on the inside, and perfect in every bite.
Ingredients Needed
Basic Ingredients List
Here’s everything you’ll need to make a batch of 8 medium-sized burger buns:
- 3 ½ cups (440g) all-purpose flour
- 2 ¼ teaspoons (1 packet) active dry yeast
- 1 cup (240ml) warm milk (110°F or 43°C)
- 2 tablespoons unsalted butter, softened
- 1 large egg
- 2 tablespoons sugar
- 1 teaspoon salt
- Optional: 1 egg + 1 tablespoon water (egg wash)
- Optional: Sesame seeds for topping
Each of these ingredients plays a vital role. The flour forms the structure, the yeast provides the rise, and the sugar gives a slight sweetness that balances beautifully with savory fillings. Butter adds richness, while the egg gives the dough a lovely color and tenderness.
Ingredient Substitutions and Variations
If you’re out of something or want to tweak the recipe to suit your dietary needs, here are a few swaps you can try:
- Milk: Use warm water or non-dairy milk (like almond or oat milk) for a dairy-free version.
- Butter: Swap with olive oil or vegan butter.
- Egg: Use a flaxseed egg (1 tbsp flaxseed meal + 3 tbsp water) for a vegan alternative.
- Flour: Whole wheat flour works, though the buns will be denser. Try a 50/50 mix for a healthier compromise.
Want to jazz things up? Add garlic powder, onion flakes, or herbs to the dough for extra flavor. You can even brush the tops with melted butter and sprinkle sea salt for a gourmet finish.
Tools and Equipment
Must-Have Baking Tools
Before you dive into dough-making, gather these tools to make your baking session smooth and stress-free:
- Large mixing bowl
- Measuring cups and spoons
- Whisk
- Dough scraper or spatula
- Baking sheet or tray
- Parchment paper
- Clean kitchen towel or plastic wrap
You don’t need a fancy kitchen setup—just the basics will do. The key is to measure accurately and keep your workspace tidy.
Optional Tools for Better Results
Want to level up your burger bun game? These extras make life easier:
- Stand mixer with dough hook (for effortless kneading)
- Kitchen scale (for precision)
- Bench scraper (for cleanly dividing dough)
- Silicone baking mat (to prevent sticking)
- Oven thermometer (to ensure even baking)
While not necessary, these tools help you achieve consistent results and make the process feel more pro. But if you’re just starting out, don’t sweat it—many bakers make perfect buns with just their hands and a good ol’ oven.
Preparing the Dough
Activating the Yeast
Start by proofing your yeast. This step is crucial to make sure your yeast is alive and ready to work its magic.
- Warm up your milk until it’s just about body temperature—110°F (43°C) is ideal.
- Pour it into a bowl and stir in the sugar and yeast.
- Let it sit for 5-10 minutes. You’ll know it’s working if it starts to foam and bubble.
No foam? Your yeast might be dead. Toss it and start fresh with a new packet—there’s no fixing inactive yeast.
Mixing the Ingredients
Once your yeast is alive and kicking, it’s time to bring everything together.
- Add the egg and softened butter to the yeast mixture. Whisk until smooth.
- Gradually add the flour and salt. Start with half the flour, mix until combined, then add the rest.
Stir until it comes together into a shaggy dough. If it’s too sticky, add a bit more flour, a tablespoon at a time.
Kneading the Dough: Hand vs. Mixer
Now it’s time to knead. This process develops gluten, giving the buns their soft, chewy texture.
- By hand: Turn the dough out onto a floured surface. Push, fold, and turn for about 8-10 minutes until smooth and elastic.
- By mixer: Use a stand mixer fitted with the dough hook. Let it knead on medium speed for 5-6 minutes.
Either way, the dough should feel soft and slightly tacky, but not sticky. Press a finger in—if it bounces back, it’s ready to rest.
First Proofing
Why Proofing is Important
Proofing gives the yeast time to ferment, which makes the dough rise. This not only builds structure and volume but also adds a deeper, richer flavor to your buns.
- Place the kneaded dough in a greased bowl.
- Cover it with a damp towel or plastic wrap.
- Let it rest in a warm place for about 1 to 1.5 hours, or until doubled in size.
A warm, draft-free environment is ideal—think inside an oven (turned off) with the light on or near a sunny window.
How to Know When It’s Done
The easiest way to check if your dough has risen enough is the poke test. Gently press your finger into the dough—if the indentation springs back slowly, it’s ready. If it snaps back instantly, give it more time.
Once it’s doubled and fluffy, it’s go time for shaping your perfect buns.
Shaping the Burger Buns
How to Divide and Shape the Dough
Now that your dough has puffed up like a champ, it’s time to shape it into beautiful, bun-worthy rounds. First, punch down the dough gently—yes, literally give it a soft punch to release the trapped air. Then, transfer it to a lightly floured surface.
Using a bench scraper or knife, divide the dough into equal parts—usually 8 pieces for standard-sized buns. If you’re going for sliders, make 10–12. Want monster buns? Try dividing into 6.
To shape each bun:
- Flatten a piece of dough slightly into a disc.
- Pull the edges into the center like you’re wrapping a present.
- Flip it over, cupping your hand around the dough.
- Roll it gently in circles until you get a smooth, round ball.
This method gives you that smooth, bakery-style finish on top. Place each shaped bun onto a parchment-lined baking sheet, spacing them a few inches apart to allow for rising.
Tips for Perfect Shaping
- Use a scale to weigh each portion if you want perfectly uniform buns.
- Keep the dough covered with a towel while working to prevent it from drying out.
- Don’t overwork the dough while shaping—gentle hands make tender buns.
Second Proofing
Letting the Dough Rise Again
This second rise, or “proof,” gives the buns their final puff before baking. Cover the shaped dough balls loosely with a damp cloth or greased plastic wrap and let them rest for 30–45 minutes in a warm, draft-free place.
During this stage, the buns will puff up and smooth out even more. This is what makes them soft and pillowy rather than dense and flat.
What to Watch For
You want the buns to almost double in size again and become noticeably rounder and fluffier. If they look too poofy or start collapsing, they may be over-proofed—pop them in the oven immediately if that happens.
A gentle finger press that springs back slowly (not instantly) is a great sign they’re ready.
Baking the Buns
Preheating and Oven Setup
While your buns are enjoying their final rise, preheat your oven to 375°F (190°C). This ensures the oven is hot and ready to give the buns that golden crust and even bake.
Place an oven-safe pan of water on the bottom rack if you want extra-soft buns—the steam keeps the crust tender.
Applying the Egg Wash and Toppings
Right before baking, give each bun a gentle brush with an egg wash (1 egg beaten with 1 tbsp water). This step adds a golden, shiny finish that looks as good as it tastes.
Want that classic burger bun look? Sprinkle sesame seeds on top. You can also experiment with:
- Poppy seeds
- Everything bagel seasoning
- Dried herbs like rosemary or thyme
Baking Time and Temperature
Bake the buns for 15–18 minutes until they’re golden brown on top and sound hollow when tapped on the bottom. Rotate the tray halfway through baking for even browning if your oven has hot spots.
Once done, remove them from the oven and transfer to a cooling rack. Resist the urge to cut right in—let them cool for at least 15 minutes to finish setting.
Cooling and Storing
Why Cooling Matters
Cooling your buns on a wire rack is essential. It prevents the bottoms from getting soggy and allows steam to escape. This keeps the texture just right—soft, but not doughy or mushy.
Storing for Freshness
Burger buns are best the day they’re made but can be stored for later. Here’s how:
- Room temperature: Store in an airtight container for up to 3 days.
- Freezer: Wrap each bun in plastic wrap and store in a zip-top freezer bag for up to 2 months. Thaw at room temperature and warm slightly in the oven or toaster for best results.
Avoid storing them in the fridge—it dries them out faster than you’d think.
Serving Suggestions
Best Ways to Use Your Homemade Buns
Sure, you made burger buns—but their uses go far beyond the usual cheeseburger.
- Classic burgers: Pile them high with lettuce, tomato, onion, and your favorite patty.
- Breakfast sandwiches: Fill with eggs, bacon, and cheese for a morning treat.
- Sliders: Make smaller versions for parties or snacks.
- Pulled pork or BBQ chicken: These buns hold up well to saucy fillings.
- Grilled veggie sandwiches: For a hearty, meatless option.
Creative Add-Ons and Toppings
Once you’ve mastered the basic bun, have fun with variations:
- Add cheese to the tops before baking.
- Mix herbs or spices into the dough.
- Try a sweet twist with cinnamon and sugar on top.
Troubleshooting Common Issues
Why Didn’t My Buns Rise?
Few things are more frustrating than flat, lifeless buns. If your dough didn’t rise properly, the culprit is usually the yeast. It might’ve been expired, or the water/milk you used was too hot and killed it. Always test your yeast before mixing it in. Another reason could be that your proofing environment was too cold—try placing the dough in a warmer spot next time.
Why Are My Buns Too Dense or Hard?
Dense buns usually come from over-kneading or using too much flour. While it’s tempting to keep adding flour to sticky dough, too much can dry it out. Stick to the recipe and remember—the dough should be soft and slightly tacky. Also, skipping or rushing the proofing steps can make your buns turn out hard instead of airy and light.
Why Did My Buns Flatten After Baking?
Flattened buns are often a result of over-proofing during the second rise. If they get too puffy and start to collapse when touched or moved, they’ve proofed for too long. Bake them immediately if you see signs of over-proofing. Also, avoid opening the oven door early—it causes temperature drops that deflate your buns.
Nutrition Facts and Health Tips
What’s in a Homemade Bun?
Homemade burger buns are surprisingly wholesome compared to many store-bought versions. Here’s a general nutrition breakdown for one average-sized bun (made with milk and butter):
- Calories: 210–240
- Carbs: 35g
- Protein: 6g
- Fat: 6g
- Sugar: 4g
- Fiber: 1g
No weird preservatives or artificial flavors—just simple, clean ingredients.
How to Make Them Healthier
Looking to lighten things up? Here are a few healthy swaps:
- Use whole wheat flour for added fiber.
- Reduce sugar slightly if you prefer less sweetness.
- Try Greek yogurt in place of butter for more protein.
- Skip the egg wash and use plant milk if reducing fat or cholesterol.
You can also experiment with gluten-free flour blends, though this will require recipe adjustments to maintain structure and rise.
Making Buns Ahead of Time
Prep Tips for Busy Schedules
Want fresh buns without spending hours in the kitchen? You can make the dough ahead of time and refrigerate it overnight after the first proof. Just bring it back to room temperature before shaping and baking the next day.
You can also bake and freeze them ahead of time. Simply reheat before serving, and they’ll taste just like fresh-baked.
Freezing and Reheating Instructions
To freeze baked buns:
- Cool completely.
- Wrap each bun in plastic wrap.
- Store in a freezer-safe bag for up to 2 months.
To reheat:
- Let thaw at room temp.
- Warm in a 350°F (175°C) oven for 5–7 minutes or toast lightly for a crisp finish.
Scaling the Recipe
How to Make More (or Less)
Feeding a crowd or just need a couple of buns? Scaling is easy. This recipe makes 8, but you can double or halve it without issues. Just be sure to adjust the yeast slightly (not always linearly)—when doubling, increase it to about 1.5 packets instead of a full 2.
When scaling up, use a kitchen scale to ensure even portions. Larger batches may also need longer proofing times due to the dough’s volume.
FAQs about Burger Buns Recipe
Q1: Can I use all-purpose flour instead of bread flour?
Yes, you can! While bread flour gives burger buns a chewier texture and better structure, all-purpose flour still works well for soft, fluffy results.
Q2: How do I make my burger buns extra soft?
Use whole milk, butter, and a bit of sugar in your dough. Also, brush the buns with melted butter right after baking for that pillowy softness.
Q3: Why didn’t my buns rise properly?
It’s usually a yeast issue. Make sure your yeast is active and the dough is kept in a warm place to proof. Cold kitchens slow everything down!
Q4: Can I freeze homemade burger buns?
Absolutely. Let them cool completely, wrap individually, and freeze for up to 3 months. Just thaw and toast when needed.
Q5: How long do homemade burger buns last?
Stored in an airtight container at room temperature, they stay fresh for about 3 days. Refrigeration can dry them out, so avoid it unless necessary.
Q6: Can I make the dough ahead of time?
Yes! After the first rise, cover and refrigerate overnight. Let it come to room temp before shaping and baking the next day.
Q7: How do I get that glossy top on my buns?
Brush the tops with an egg wash (1 beaten egg + 1 tbsp water) before baking. Want a richer color? Add a pinch of sugar to the egg wash.
Conclusion
Homemade burger buns may sound intimidating, but once you try them, you’ll never go back to store-bought again. Soft, fluffy, and customizable, these buns are the unsung hero of any great burger. Whether you’re a first-time baker or a kitchen pro, this recipe is a reliable way to up your burger game. So roll up your sleeves, flour your counter, and bake your way to burger bliss. Trust us—your tastebuds will thank you.