Bubble Solution Recipe: Bubbles have a way of making people of all ages smile. Whether you’re a child chasing them across the yard or an adult simply enjoying the nostalgia of blowing bubbles, they bring instant joy. While you can always buy bubble solution from the store, making your own at home is easier than you might think—and the best part is, you can customize it to create bigger, stronger, and longer-lasting bubbles.
Why Make Your Own Bubble Solution?
There are several reasons why making your own bubble solution is worth trying. First, it’s cost-effective. A store-bought bottle of bubbles might last a few days, but when you make it yourself, you can prepare a large batch for just a fraction of the cost. Second, it’s fun and educational, especially for kids. They not only get to play with the bubbles but also learn about mixing and measuring ingredients. And third, you get better results. Homemade solutions often produce bigger, more durable bubbles compared to what you’ll find in commercial options.
Store-Bought vs. Homemade: Which is Better?
Store-bought solutions are convenient and ready to use, but they’re usually made for casual play and not for creating giant bubbles or long-lasting ones. Homemade bubble solutions, on the other hand, can be tweaked with simple ingredients like glycerin or corn syrup to make them stronger. This means you can create giant bubbles that float gracefully through the air or bubbles that last much longer before popping. For families, teachers, or bubble enthusiasts, the homemade version wins every time.
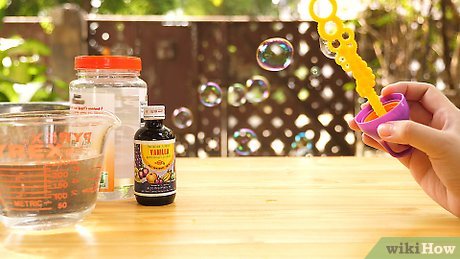
Ingredients You’ll Need for the Perfect Bubble Solution
If you want the best bubbles possible, the ingredients you use make all the difference. Luckily, most of them are already sitting in your kitchen or bathroom.
The Essential Ingredients
- Water – The base of every bubble solution. Distilled water works best because it has fewer impurities than tap water.
- Dish Soap – A good quality brand like Dawn or Joy is recommended since they create stronger bubbles.
- Glycerin or Corn Syrup – These help slow down evaporation, making the bubbles last longer.
Optional Add-Ins for Stronger and Bigger Bubbles
- Sugar – A little sugar can make the solution thicker and help create more resilient bubbles.
- Gelatin – Some recipes use unflavored gelatin for giant bubble mixtures.
- Baking Powder – Helps stabilize the mixture in some cases.
Ingredient Measurements and Ratios
The basic recipe is:
- 6 cups of water
- 1 cup of dish soap
- 1 tablespoon of glycerin or corn syrup
This ratio works well for standard bubbles. If you want bigger bubbles, you can increase the glycerin slightly. Adjusting the soap-to-water ratio also allows you to experiment with bubble strength and size.
Step-by-Step Guide to Making Bubble Solution
Making bubble solution is easy, but small details can make a huge difference in the final result. Follow these steps carefully for the best outcome.
Step 1 – Gather Your Materials
Before you start, make sure you have everything ready: a large container or bowl, measuring cups, a spoon for stirring, and a storage bottle with a lid. This keeps the process smooth and avoids rushing around once you start mixing.
Step 2 – Mix the Base Ingredients
Begin by pouring water into your container. Slowly add the dish soap, being careful not to create too many suds while stirring. A gentle mix is key—stirring too hard will create foam, which weakens the final solution.
Step 3 – Add Special Enhancers (Optional)
If you’re going for stronger bubbles, add glycerin or corn syrup at this stage. This is what makes bubbles last longer and resist popping. For a fun experiment, try making two batches—one with glycerin and one without—and compare the results.
Step 4 – Stir and Rest the Solution
Once all the ingredients are mixed, let the solution sit for at least 12–24 hours before using. This resting period allows the ingredients to blend fully, resulting in a stronger solution. Skipping this step is one of the most common mistakes people make when their bubbles don’t turn out as expected.
Step 5 – Store Properly for Best Results
Pour your bubble solution into a clean bottle with a tight-fitting lid. Store it in a cool place, away from direct sunlight. A sealed container keeps the mixture fresh and ready whenever you need it.
Best Bubble Wands and Tools to Use
Bubbles are only as good as the tools you use to blow them. The right wand can make the difference between small, quick-popping bubbles and huge, floating masterpieces. Thankfully, you don’t need fancy equipment—many bubble wands can be made with everyday household items.
DIY Bubble Wands from Household Items
If you don’t have a store-bought wand handy, no worries! There are countless ways to make your own. Try these creative ideas:
- Wire hangers – Bend them into circles, hearts, or even star shapes.
- Straws and string – Thread string through two straws and tie the ends. This makes a loop that can create giant bubbles.
- Pipe cleaners – Twist them into fun shapes like flowers or animals.
- Cookie cutters – Dip them in the solution and blow bubbles through the open shape.
Homemade wands are not only fun but also a great way to involve kids in the bubble-making process. It becomes an arts-and-crafts project and a science experiment rolled into one.
Store-Bought Bubble Tools Worth Trying
For those who want bigger results with less effort, store-bought bubble toys can be a good investment. Some options include:
- Bubble guns – Great for kids who love constant streams of bubbles.
- Giant bubble kits – Often come with ropes and large pans for dipping.
- Multi-bubble makers – Tools that create dozens of small bubbles at once.
These can be especially handy for parties, outdoor events, or when entertaining groups of kids.
How Wand Shape Affects Bubble Size
Did you know the shape of your wand can affect how bubbles form? While bubbles are always round (thanks to surface tension), the wand’s size controls how big they can grow. A small wand will create tiny, quick-floating bubbles, while a large loop can make massive, floating spheres. If you want to go big, use larger loops of string or wire dipped into a wide, shallow pan of solution.
Tips for Perfect Bubbles Every Time
Even with the best bubble solution, sometimes bubbles just don’t cooperate. They pop too quickly, refuse to form, or break before you can even admire them. Don’t worry—it’s usually not the recipe’s fault, but the conditions you’re blowing them in.
Choosing the Right Weather Conditions
Bubbles love certain weather. Dry, hot, or windy days are not ideal because bubbles evaporate quickly and pop. Instead, aim for cool, humid days with little to no wind. Early mornings or evenings often work best because the air holds more moisture.
The Secret to Long-Lasting Bubbles
The trick to bubbles that last longer lies in three things:
- The solution – Use glycerin or corn syrup for strength.
- The technique – Blow gently instead of forcefully.
- The environment – Higher humidity prevents quick evaporation.
If you want bubbles that float across the yard without bursting, combine these three factors and watch the magic happen.
Common Mistakes to Avoid
Here are some of the biggest bubble mistakes beginners make:
- Using too much soap – More soap doesn’t always mean better bubbles; it can actually make them weaker.
- Not letting the solution rest – Freshly mixed solutions don’t perform as well as those left overnight.
- Blowing too hard – Gentle breaths work better than strong puffs of air.
- Wrong storage – Leaving the solution uncovered or in direct sunlight weakens it over time.
By avoiding these mistakes, you’ll instantly notice an improvement in bubble size and longevity.
Fun Bubble Activities for Kids and Adults
Bubbles aren’t just for kids—they’re fun for people of all ages. Whether you’re planning a family day, a birthday party, or just want to enjoy a relaxing afternoon outdoors, bubbles are a perfect choice.
Bubble Games for Children
Kids never get tired of chasing bubbles, but you can make it even more exciting with a few creative games:
- Bubble Tag – Instead of tagging each other, players pop bubbles to stay in the game.
- Catch the Bubble – See who can keep a bubble on their hand the longest without it popping.
- Bubble Races – Blow bubbles and race to see whose bubble floats the farthest before popping.
These games are not only fun but also improve coordination and focus.
Creative Bubble Art Projects
Bubbles aren’t just for blowing—they can also be used for art. Mix a few drops of food coloring with bubble solution, then blow bubbles onto paper. As they pop, they leave behind colorful, circular patterns. This is an easy and fun way to combine science, art, and play.
Outdoor Bubble Challenges
For older kids and adults, giant bubble challenges are always a hit. Try competing to see who can make:
- The biggest bubble
- The longest bubble chain
- The bubble that lasts the longest before popping
These challenges add a competitive edge and turn bubble-making into a fun outdoor event.
Science Behind Bubbles
Behind all the fun, bubbles are a great way to learn about science in action. Every time you blow one, you’re actually creating a fascinating mix of physics and chemistry.
Why Do Bubbles Form?
Bubbles form because soap reduces the surface tension of water. Normally, water molecules stick together tightly, making it hard to stretch into a film. Soap molecules slide in between them, creating a flexible layer that traps air inside—thus forming a bubble.
The Role of Soap and Water
Soap and water work together to create a thin film. The soap molecules line up with their hydrophilic (water-loving) heads pointing inward and hydrophobic (water-hating) tails pointing outward. This double layer gives bubbles their signature shimmer and stability.
How Additives Strengthen Bubbles
Glycerin and corn syrup help by making the water evaporate more slowly. This slows down the process of bubbles popping, giving them more time to float through the air. Additives also thicken the solution, which makes the bubble film stronger and more resistant to breaking.
Safety Tips When Making and Playing with Bubbles
Bubbles are fun, but like any activity, it’s important to keep safety in mind—especially if young kids are involved. Luckily, making and playing with bubble solution is generally safe as long as you follow a few simple precautions.
Safe Ingredients to Use Around Kids
The great thing about bubble recipes is that most ingredients are household items, but some are safer than others. For example, dish soap is safe in small amounts, but it shouldn’t be swallowed. Always supervise children while mixing and playing. If you want an even gentler version, try using baby shampoo instead of dish soap. It’s softer on the skin and less irritating if it accidentally gets in the eyes.
Eco-Friendly Bubble Solutions
Did you know bubbles can be eco-friendly too? Standard soap-based mixtures are already biodegradable, but if you’re playing outdoors in a garden or park, you may want to go greener. Using organic soaps and natural sweeteners like sugar instead of synthetic chemicals makes your bubble mix safer for plants, animals, and the environment.
Handling Spills and Slippery Surfaces
One thing people often forget: spilled bubble solution can make floors extremely slippery. If you’re playing indoors or on patios, mop up any spills immediately to avoid falls. Outdoors, it’s less of a problem, but still keep an eye out for slippery spots where children may run. A simple towel or bucket of water nearby can make cleanups quick and easy.
Storing and Preserving Your Bubble Solution
You’ve taken the time to make the perfect bubble mix—now you need to make sure it lasts. Proper storage is key to keeping your solution fresh and ready to go whenever you feel like playing.
Best Containers for Storage
A sturdy, airtight container is essential. Mason jars, plastic bottles with screw-top lids, or old detergent bottles work perfectly. Make sure the container is clean before filling it—any leftover residue can weaken your bubble mix.
How Long Does Bubble Solution Last?
If stored properly, bubble solution can last for weeks, even months. In fact, some people say it gets better the longer it sits, as the ingredients bond together more completely over time. Just give it a gentle stir before using, and you’re good to go.
Tips for Keeping It Fresh
- Store in a cool, dark place away from direct sunlight.
- Avoid shaking the container too much—it creates foam that breaks down the solution.
- If the solution starts looking cloudy or watery, add a little more soap and glycerin to revive it.
With these simple steps, you’ll always have bubble solution ready for spontaneous fun.
FAQs about Bubble Solution Recipe
1. Can I make bubble solution without glycerin?
Yes, but glycerin or corn syrup helps make the bubbles stronger. Without it, your bubbles may pop faster, but they’ll still work for casual play.
2. Why do my bubbles keep popping too quickly?
This usually happens when the air is too dry or windy. Try playing on humid days, or add more glycerin to strengthen the mix.
3. How can I make giant bubbles at home?
Use a strong solution with extra glycerin and a large DIY wand made from string and straws. A shallow dish for dipping is also helpful.
4. What is the best soap to use for bubbles?
Dawn and Joy dish soaps are favorites among bubble enthusiasts because they create stronger, longer-lasting bubbles. Baby shampoo is also a good choice for gentle solutions.
5. Can I store bubble solution for months?
Absolutely! If kept in a sealed container away from sunlight, bubble solution can last for months. Some even say it improves with age.
Conclusion
Bubbles are more than just a simple pastime—they’re a mix of science, creativity, and pure joy. By making your own bubble solution at home, you not only save money but also get the chance to customize your mix for stronger, bigger, and longer-lasting bubbles. Whether you’re crafting DIY wands, experimenting with different recipes, or organizing bubble games, the fun possibilities are endless.
From sunny backyard afternoons to classroom experiments, bubbles bring people together in the most magical way. With the right ingredients, tools, and a little know-how, you’ll be creating floating works of art that amaze both kids and adults alike. So go ahead—mix up a batch, grab your wand, and let the bubble fun begin!