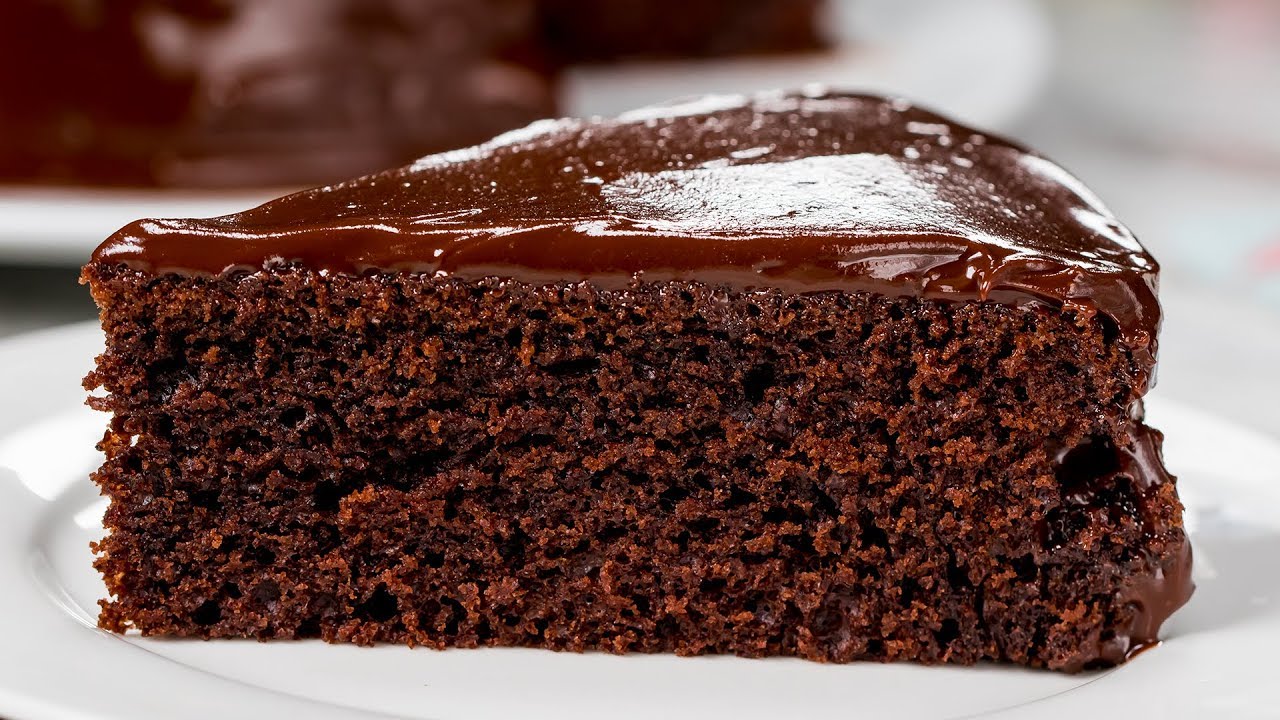
Brownie Cake Recipe: Who doesn’t love brownies, right? Now imagine combining the gooey, fudgy richness of brownies with the moist fluffiness of a cake. Welcome to the ultimate dessert fusion – Brownie Cake. Whether you’re prepping for a birthday party, a cozy weekend treat, or just a sugar fix, this step-by-step guide will walk you through making the most irresistible brownie cake from scratch. And trust me, once you bake this, there’s no going back to boxed mixes.
List of Ingredients You’ll Need
Before we dive into the fun part – baking – let’s make sure you’ve got everything ready. Here’s a complete breakdown of what you’ll need to whip up this mouthwatering brownie cake.
Dry Ingredients
- 1 cup all-purpose flour – gives the cake its structure
- ¾ cup unsweetened cocoa powder – for that rich, chocolatey flavor
- 1 ½ cups granulated sugar – sweetness is key!
- 1 tsp baking powder – adds a little lift
- ½ tsp salt – enhances all the flavors
Wet Ingredients
- 2 large eggs – they bind the ingredients and add richness
- ½ cup melted unsalted butter – because butter makes everything better
- 1 tsp vanilla extract – a flavor booster
- ¼ cup milk (optional) – for a slightly lighter texture
Optional Add-ins
Want to customize your brownie cake? Here are some add-ins that take it up a notch:
- ½ cup chocolate chips – double the chocolate!
- ¼ cup chopped walnuts or pecans – adds a crunchy surprise
- 1 tbsp espresso powder – deepens the chocolate flavor
- Swirl of caramel or peanut butter – for a twist
Now that your ingredients are lined up, let’s gear up with the tools you’ll need.
Equipment You’ll Need
Cooking doesn’t have to feel like a science lab, but having the right tools can make your brownie cake turn out perfectly.
- Mixing bowls – one for wet, one for dry ingredients
- Electric mixer or hand whisk – either works
- Measuring cups and spoons – accuracy is everything
- Spatula – for scraping every last bit of batter
- 8×8 or 9×9 inch baking pan – square pans are ideal
- Parchment paper – to keep things clean
- Oven – obviously!
Ready to bake? Let’s go step by step.
Step-by-Step Brownie Cake Guide
Step 1: Preheat Your Oven
Always start by preheating your oven. Set it to 350°F (175°C). It might feel like an extra step, but it ensures your brownie cake bakes evenly from the get-go. Putting batter in a cold oven can totally throw off your baking time and result in uneven texture. So flip that switch and let your oven warm up while you prep the rest.
Step 2: Prepare Your Baking Pan
Grease your baking pan generously with butter or spray it with non-stick cooking spray. For added security, line it with parchment paper – trust me, this makes removing the brownie cake effortless. Cut the parchment so it fits the bottom with some overhang on the sides – makes lifting the cake out super easy once it’s done.
Step 3: Combine the Dry Ingredients
In a large mixing bowl, sift together the flour, cocoa powder, sugar, baking powder, and salt. Sifting isn’t just fancy – it actually helps get rid of lumps and aerates the mixture, which means a fluffier texture in your final cake. Give it a quick whisk to make sure everything is well mixed.
Step 4: Melt the Butter and Combine with Sugar
In a separate bowl, melt your butter in the microwave or over low heat on the stove. Once melted, mix it with the sugar. This combination should turn a bit glossy – that’s exactly what you want. It means the sugar has started to dissolve, giving you that signature brownie crackle on top.
Step 5: Add Eggs and Vanilla
Next, whisk in the eggs one at a time into the butter-sugar mixture. Take your time here – each egg should be fully incorporated before you add the next. Then stir in your vanilla extract. This step adds richness and depth of flavor. If you’re adding milk, this is the time to whisk it in.
Step 6: Mix Dry and Wet Ingredients Together
Pour the wet mixture into the dry mixture and stir gently with a spatula or wooden spoon. Avoid overmixing – it can make your brownie cake tough. Mix until just combined. You should have a thick, glossy batter. Don’t worry if it looks dense – that’s what makes the brownie cake fudgy.
Step 7: Fold in Add-ins (Optional)
If you’re going for extra indulgence, now’s the time to fold in your chocolate chips, nuts, or other add-ins. Gently fold them into the batter so they’re evenly distributed. Pro tip: toss chocolate chips in a bit of flour first to keep them from sinking to the bottom.
Step 8: Pour Batter into Pan
Spoon your batter into the prepared baking pan. Use your spatula to spread it out evenly. Give the pan a few gentle taps on the counter to remove any air bubbles. This also helps level out the batter so it bakes uniformly.
Step 9: Bake Your Brownie Cake
Slide your pan into the preheated oven and set a timer for 30 to 35 minutes. Now, this is where things get exciting—and a little nerve-wracking. The trick to brownie cake is not overbaking it. You want the edges to be firm and slightly pulling away from the pan, but the center should still have a slight jiggle.
To test doneness, insert a toothpick or skewer into the center. If it comes out with a few moist crumbs but not wet batter, you’re golden. Remember, it will continue to cook a bit even after you remove it from the oven due to residual heat. Overbaking will turn your dreamy brownie cake into a dry disappointment—nobody wants that!
Every oven is a bit different, so keep an eye on it. If you like a gooier center (who doesn’t?), err on the shorter side of the baking time.
Step 10: Let It Cool
The moment of truth… but don’t rush it!
Once baked, let your brownie cake cool in the pan for at least 20-30 minutes. If you used parchment paper with overhang, you can gently lift the cake out of the pan and place it on a wire rack to cool completely. This step is crucial for texture and clean slicing.
Slicing too soon while it’s still hot might cause it to fall apart or look messy. Patience pays off here. And hey, the cooling time is a great excuse to clean up—or make some frosting.
Frosting or Topping Ideas
Want to take your brownie cake over the top? There are so many fun ways to dress it up. Here are a few ideas to make it next-level delicious:
- Chocolate Ganache – Simply heat equal parts heavy cream and chopped chocolate, stir until smooth, and pour over your cake.
- Dusting of Powdered Sugar – Classic and elegant.
- Whipped Cream – Light and fluffy contrast to rich brownie.
- Ice Cream – Vanilla, salted caramel, or cookies and cream are perfect pairings.
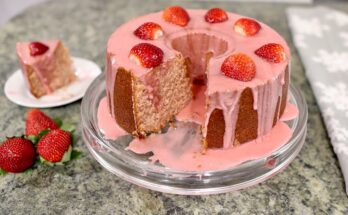
- Fresh Berries – Strawberries or raspberries balance the richness.
You can also drizzle caramel sauce or top with a scoop of Nutella. Get creative—this is your moment to shine.
Serving Suggestions
Serving brownie cake is almost as fun as eating it. Here are a few tips to present it perfectly:
- Use a sharp knife and wipe it clean between cuts to get neat slices.
- Serve warm with a scoop of ice cream or chilled with hot coffee or milk.
- Cut into squares for casual snacking or serve triangular slices for a fancier presentation.
- Add a sprig of mint or a few berries on the side to elevate the look.
You can even cut it into mini squares for party platters—these bite-sized pieces disappear fast!
Storage and Shelf Life
Here’s how to keep your brownie cake tasting fresh for days:
- Room Temperature: Store in an airtight container for up to 3 days.
- Refrigerator: Will keep for up to 1 week, though it may firm up. Just reheat slices for 10–15 seconds in the microwave to bring back that gooey texture.
- Freezer: Yes, you can freeze brownie cake! Wrap tightly in plastic wrap and then foil, or place in a zip-top freezer bag. Keeps for up to 3 months. Thaw at room temp or microwave to reheat.
Always make sure it’s fully cooled before storing to avoid condensation and sogginess.
Troubleshooting Common Mistakes
Brownie cake seems simple, but a few missteps can mess things up. Here’s how to avoid the usual pitfalls:
1. Undercooked Middle
- Solution: Make sure you’re baking at the right temperature. Use a toothpick to test. If it’s too gooey, give it another 5 minutes but keep a close eye.
2. Dry and Crumbly
- Solution: You may have overbaked or used too much flour. Be precise with measurements and pull it out as soon as it’s done.
3. Too Bitter or Not Sweet Enough
- Solution: Use high-quality cocoa and measure sugar accurately. A pinch more vanilla or a handful of chocolate chips can fix bitterness.
4. Cake Sinks in the Middle
- Solution: This could be due to underbaking or opening the oven door too early. Let it bake undisturbed for at least 25 minutes before checking.
5. Sticking to the Pan
- Solution: Always grease your pan and use parchment paper. That way, the whole thing lifts out easily with no mess.
Why You’ll Love This Brownie Cake
Let’s be real—there’s a lot to love about brownie cake. It’s the perfect balance between cakey and fudgy, offering the best of both worlds in one pan. The outside is slightly crisp, while the inside stays moist and rich.
It’s a crowd-pleaser. Whether it’s for birthdays, holidays, or an after-dinner treat, this brownie cake wins everyone over. You can customize it endlessly—add nuts, swirl in caramel, or top with ganache.
And perhaps best of all, it’s easy to make. No fancy techniques, no expensive ingredients—just a few pantry staples and some good vibes in the kitchen.
FAQs about Brownie Cake Recipe
1. Can I make this brownie cake without eggs?
Yes! You can substitute each egg with ¼ cup of unsweetened applesauce or mashed banana. You can also use commercial egg replacers for a vegan version.
2. How do I make it gluten-free?
Swap the all-purpose flour with a 1:1 gluten-free flour blend. Almond flour can also work but may alter the texture slightly.
3. What’s the difference between brownie cake and regular brownies?
Brownie cake has a slightly lighter, more cake-like texture while still keeping that rich, fudgy brownie flavor. It’s the best of both worlds!
4. Can I double the recipe?
Absolutely. Just use a larger baking pan (like a 9×13 inch) and increase the baking time slightly. Keep an eye on it after 35 minutes.
5. How do I know when the brownie cake is perfectly baked?
Look for a set edge and a slightly soft center. A toothpick inserted should come out with moist crumbs but no wet batter.
Conclusion
There you have it—the ultimate brownie cake recipe in all its gooey, chocolatey glory. From prepping your ingredients to adding the final flourish, this step-by-step guide ensures you’ll end up with a treat that’s both impressive and addictive. Whether you’re baking for yourself (no shame in that!) or sharing with friends, this recipe is guaranteed to become a go-to favorite in your kitchen.
Now that you’ve got the blueprint, it’s time to bake your masterpiece. And when you do, don’t forget to share the love—because good food is meant to be enjoyed together.