Broth Beef Recipe: There’s something soul-warming about a pot of beef broth simmering on the stove. Whether you’re battling a cold, cooking up a rich stew, or just looking for a comforting beverage, beef broth delivers deep flavor, essential nutrients, and that homemade charm you can’t get from store-bought boxes. It’s not just a cooking staple—it’s a tradition in many households.
So why take the time to make it from scratch? Easy. Store-bought broths are often loaded with preservatives, excess sodium, and lack the depth of real, slow-simmered flavor. Making your own ensures quality, freshness, and the chance to control every ingredient that goes in.
Plus, beef broth isn’t just tasty—it’s incredibly nutritious. Packed with collagen, minerals like calcium and magnesium, and amino acids that support gut health, it’s one of those foods that taste amazing and make you feel amazing.
And here’s the best part: making beef broth is a lot easier than it sounds. All it takes is a few simple ingredients, a large pot, and some patience. Ready to level up your kitchen game? Let’s dive in.
Ingredients You’ll Need
Before you get started, let’s make sure your kitchen is stocked with the right ingredients. Beef broth doesn’t require anything fancy—just a mix of bones, vegetables, and a few aromatics. Here’s what you’ll need:
Core Ingredients
- 4-5 lbs beef bones (marrow bones, knuckle bones, oxtail, short ribs, or a mix)
- 1 large onion (quartered, skin on)
- 2 carrots (cut into chunks)
- 2 celery stalks (cut into chunks)
- 3-5 garlic cloves (crushed)
- 2 tablespoons apple cider vinegar (helps draw nutrients from bones)
- 12-16 cups cold water
Optional Flavor Enhancers
- 1-2 bay leaves
- 1 tsp black peppercorns
- Fresh thyme or parsley stems
- 1-2 star anise (for a slightly sweet, aromatic twist)
- 1 tbsp tomato paste (for richness)
Choosing the Right Bones
The bones you choose matter. Here’s a quick breakdown:
- Marrow bones: great for flavor and fat
- Knuckle bones: rich in collagen and gelatin
- Oxtail: adds both meat and gelatin
- Short ribs: brings deep meaty flavor
Pro tip: Ask your butcher for a mix of bones—this creates a well-balanced, rich broth.
Kitchen Tools Required
You don’t need a fancy setup to make beef broth, but having the right tools makes it easier and more efficient.
Must-Have Tools
- Large stock pot (at least 8-quart capacity)
- Strainer or fine mesh sieve
- Large mixing bowl
- Tongs or slotted spoon
- Knife and cutting board
Optional (But Helpful) Tools
- Cheesecloth (for ultra-clear broth)
- Slow cooker or Instant Pot
- Mason jars or freezer-safe containers
- Labeling tape or marker for storage
Set everything out before you begin—it’ll save you time and hassle once the broth is cooking.
Step-by-Step Guide to Making Beef Broth
Step 1: Choose the Right Beef Bones or Cuts
For a rich, flavorful broth, use a mix of marrow bones, knuckles, oxtail, and shanks. The best broth comes from combining meaty bones (for taste) with marrow-rich bones (for body and nutrients). This balance gives you both depth of flavor and a silky texture.
Step 2: Roast the Bones for Deeper Flavor
Roasting brings out deep, savory notes you won’t get from raw bones. Spread the bones on a baking tray and roast at 220°C (425°F) for 35–45 minutes, turning halfway. They should be well-browned but not burnt.
Step 3: Prepare the Vegetables
Roughly chop onions, carrots, and celery. You can keep onion skins, carrot peels, and vegetable ends—these add extra nutrients and color to the broth. No need for fine chopping; large chunks are perfect.
Step 4: Combine Ingredients in the Pot
Place the roasted bones in a large pot, then layer the vegetables on top. Add a splash of vinegar (about 1–2 tablespoons) to help extract minerals from the bones. Toss in herbs like bay leaves, thyme, or parsley stems.
Step 5: Add Water and Simmer Slowly
Pour in cold water until everything is just covered. Bring to a gentle boil, then reduce to a low simmer. Skim off any foam or impurities that rise to the surface during the first 30 minutes.
Step 6: Long Simmering – Time Makes It Perfect
Let the broth simmer for 8–24 hours. Longer simmering means deeper flavor and more nutrients. You can do this on the stovetop, in a slow cooker, or in an Instant Pot (about 2–3 hours on high pressure).
Step 7: Strain the Broth Properly
Remove the large bones and vegetables, then strain the liquid through a fine-mesh sieve or cheesecloth to get a clear broth.
Step 8: Cool and Store the Broth
Cool the broth quickly by placing the pot in an ice bath. Store in airtight containers in the fridge for up to 5 days or freeze for several months.
Step 9: Skim the Fat (Optional)
Once chilled, the fat will solidify on top. Skim it off if desired, or save it for cooking—it’s full of flavor.
Step 10: Use Your Beef Broth Creatively
Use your broth for soups, stews, gravies, or cooking rice. You can even drink it warm for comforting, nourishing benefits.
Starting the Broth Base
Now that everything is prepped and ready, it’s time to bring those ingredients together and start building your broth.
1. Combine Ingredients in a Large Pot
Place your roasted bones into your large stock pot. Add in the chopped vegetables—onion, carrots, celery—along with the garlic cloves, apple cider vinegar, and any herbs or spices you’re using. The vinegar is important; it helps extract the minerals and collagen from the bones.
2. Fill with Cold Water
Cover everything with cold water—about 12 to 16 cups depending on the size of your pot. Make sure the water covers the bones by at least an inch or two, but don’t overfill. Leave space at the top to prevent boiling over.
3. Bring to a Gentle Boil
Turn the heat to medium-high and slowly bring the pot to a gentle boil. You’ll start to see some foam and impurities rise to the surface. That’s totally normal—those need to be skimmed off.
Simmering for Maximum Flavor
This is where the magic happens. Patience is key here. The longer you simmer, the deeper and more concentrated your broth will be.
1. Reduce to a Low Simmer
As soon as the pot reaches a boil, reduce the heat to low. You want a gentle, quiet simmer—not a rolling boil. Boiling too hard can make your broth cloudy and greasy.
2. Skim the Surface
Use a ladle or spoon to gently skim off the foam and scum that forms on the surface during the first hour. This helps your broth stay clean and clear.
3. Let it Simmer for 12–24 Hours
Yes, you read that right. For the best results, simmer your broth at least 12 hours, and ideally up to 24 hours. This long, slow cook extracts all the nutrients, collagen, and flavor from the bones.
If you’re using a slow cooker, just set it on low and forget it for the full 24 hours. If you’re using an Instant Pot, you can pressure cook for about 2–3 hours for a faster version (though traditional simmering yields better flavor and texture).
Straining the Broth
When the simmering is complete, it’s time to separate the liquid gold from the solids.
1. Remove the Large Solids
Use tongs or a slotted spoon to remove the bones, veggies, and herb stems. Don’t worry if some bits are left behind—you’ll strain those out next.
2. Strain Through a Fine Mesh
Place a fine mesh strainer over a large bowl or pot. Pour the broth slowly through the strainer. For an even clearer broth, line the strainer with cheesecloth.
Avoid pressing down on the solids—this can cloud the broth. Let the liquid strain naturally.
Cooling and Storing the Broth
Proper storage is key to keeping your broth fresh and usable for weeks or even months.
1. Cool Safely
Let the broth cool for 20–30 minutes at room temperature. Then place the container in an ice bath or refrigerate to bring it down to a safe temperature quickly. Avoid leaving it out too long—it can spoil.
2. Store in Jars or Containers
Once cooled, transfer your broth into glass jars, BPA-free plastic containers, or silicone freezer molds. Store in the fridge for up to 5 days, or freeze for up to 6 months.
3. Label Everything
Label your containers with the date and amount. If you’re freezing, leave a little space at the top for the liquid to expand.
Tips and Tricks for the Perfect Beef Broth
Want to take your broth from good to gourmet? These pro tips can help you do just that:
Add a Pop of Umami
- Add a splash of fish sauce, soy sauce, or a dried mushroom or two while simmering to bring a savory depth.
Don’t Salt Too Early
- It’s best to add salt at the end, after straining. This gives you better control of the final flavor and prevents the broth from becoming too salty after reducing.
Use Ice Cube Trays
- Pour broth into ice cube trays and freeze for small, quick-use portions. Great for flavoring rice, stir-fries, or sauces.
Mix in a Few Meaty Cuts
- Adding some short ribs, shank, or stew meat will give your broth a richer, beefier flavor and even make it suitable for sipping on its own.
Avoid Metal Reactivity
- Use non-reactive cookware (like stainless steel or enameled cast iron) to avoid metallic flavors.
How to Use Your Homemade Beef Broth
Once you’ve got your flavorful, nutrient-rich beef broth, the possibilities are endless.
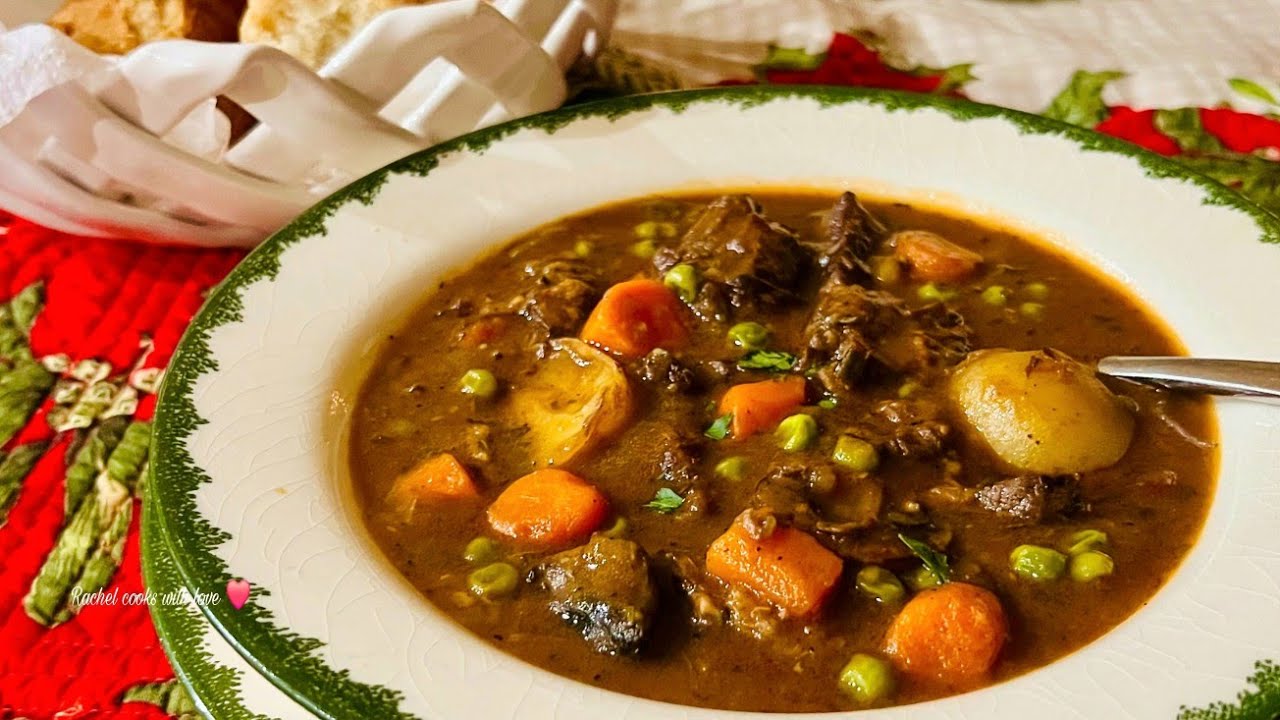
Soups & Stews
- Beef broth makes the perfect base for classics like French onion soup, beef barley soup, chili, or beef stew.
Cooking Grains & Pasta
- Use it instead of water to cook rice, quinoa, or couscous for an extra flavor punch.
Sipping as a Hot Beverage
- Pour it into a mug, add a pinch of salt, and sip it like tea. It’s soothing, warming, and great for digestion or post-workout recovery.
Deglazing Pans
- Splash some broth into your pan after searing meat to lift up all those flavorful bits and create an easy pan sauce.
Common Mistakes to Avoid
Even though broth-making is simple, a few common pitfalls can ruin your batch:
Boiling Too Hard
- High heat creates a cloudy, greasy broth. Always simmer gently.
Skipping the Roasting Step
- Roasting bones adds caramelized flavor you just won’t get otherwise.
Adding Salt Early
- You risk ending up with a too-salty broth, especially if you reduce it later.
Not Skimming the Foam
- Leaving that foamy gunk floating on top can make your broth taste “off.”
Nutritional Value of Homemade Beef Broth
Homemade beef broth is more than just a flavorful base for soups—it’s a nutritional powerhouse that offers real benefits for your body. When you simmer beef bones slowly over a long period, you unlock a unique combination of vitamins, minerals, amino acids, and collagen that are not just nourishing but healing, too.
Rich in Collagen and Gelatin
One of the biggest benefits of beef broth is its high collagen content. Collagen is the most abundant protein in your body and is essential for healthy skin, joints, and gut lining. As the bones simmer, collagen breaks down into gelatin, which gives your broth that desirable jiggly texture when cold. Gelatin also supports digestion and helps heal leaky gut syndrome.
Packed with Minerals
Beef bones are loaded with calcium, magnesium, phosphorus, and potassium—all crucial for strong bones and overall cellular health. Simmering the bones with apple cider vinegar helps extract these minerals into the broth, making them easier for your body to absorb.
Supports Immune Health
Homemade beef broth is a time-tested remedy for colds and flu for a reason. It’s hydrating, warming, and contains amino acids like glutamine, glycine, and proline, which are known to boost the immune system and reduce inflammation.
Low in Calories, High in Protein
One cup of homemade beef broth typically has 30-50 calories but delivers a surprising amount of protein—often 6-10 grams depending on how long you simmered the bones and what kind you used. It’s a great snack for anyone watching their weight or needing a high-protein diet.
Gut and Joint Support
Because of the gelatin, glycine, and glutamine, beef broth can help repair the gut lining, reduce joint pain, and improve mobility. Athletes, people with digestive issues, or anyone recovering from illness can benefit greatly from regular consumption.
Beef Broth Variations You Can Try
Once you’ve mastered the classic beef broth, you can get creative! Depending on the herbs and spices you use, beef broth can take on a variety of international flavors.
Asian-Inspired Beef Broth
- Add ginger, star anise, soy sauce, scallions, and a touch of sesame oil.
- This is great for noodle soups like pho or ramen.
Mexican-Style Spicy Broth
- Add cumin, chili powder, oregano, garlic, and jalapeños.
- Perfect for tortilla soup or pozole-style dishes.
Herbal & Aromatic European Blend
- Add rosemary, thyme, bay leaves, peppercorns, and leeks.
- This blend works beautifully in French onion soup or any rich stew.
Italian-Style Beef Broth
- Use tomato paste, basil, oregano, and a splash of red wine for a rustic Italian flavor.
- Excellent for risottos, pasta sauces, and braises.
Bone Broth with Apple & Cinnamon (Unusual but Delicious)
- Add a halved apple, cinnamon stick, and a bit of nutmeg.
- Surprisingly comforting and great for sipping during cold weather.
FAQs about Broth Beef Recipe
1. Can I use raw beef bones without roasting them first?
Yes, you can, but roasting adds depth and rich flavor. If you skip roasting, your broth may turn out lighter in both color and taste.
2. How long can I store beef broth in the freezer?
You can store homemade beef broth in the freezer for up to 6 months. Make sure to use airtight, freezer-safe containers and label them with the date.
3. What’s the difference between beef stock and beef broth?
Beef stock is usually made only with bones and has a more gelatinous texture, while broth includes meat and veggies, making it more flavorful and lighter in texture. Stock is often unsalted; broth may be seasoned.
4. Can I reuse the bones for a second batch?
Yes! You can reuse the bones once, especially if they’re thick and marrow-rich. The second batch will be lighter in flavor and nutrients but still useful for soups or rice.
5. Is it okay to add salt during the cooking process?
It’s best to wait until the end to season your broth. Simmering reduces the liquid, and if you add salt too early, it might become too salty.
Conclusion
Making your own beef broth might seem like a slow and old-fashioned process, but that’s exactly what makes it so valuable. In a world full of fast, processed foods, creating something nourishing from scratch is a form of self-care—and once you taste the difference, you’ll never go back to store-bought.
This isn’t just about flavor—it’s about taking control of your health and what goes into your body. Whether you use it to craft mouthwatering soups, boost your protein intake, or warm up on a cold night, beef broth is a kitchen staple you’ll never want to be without.
So next time you visit your butcher, grab some bones, set aside a day, and let your pot do the work. You’ll end up with jars of gold in your fridge or freezer—and a recipe you’ll want to pass down.