Brittle Recipe: Brittle is a classic, crunchy candy made from sugar, butter, and nuts that’s been delighting sweet lovers for generations. Imagine the satisfying snap of a thin, golden sheet filled with roasted nuts—it’s simple, sweet, and addictively crunchy. At its core, brittle is all about the contrast: the sweetness of caramelized sugar paired with the nutty, toasted flavor of peanuts, almonds, or any nut you like. While peanut brittle is the most famous variety, there are many ways to mix it up with different nuts, seeds, or even spices.
It’s a candy that’s surprisingly easy to make at home, though it requires a bit of precision and care. The process is straightforward, but it does demand your attention, especially when it comes to heating the sugar mixture. A little mistake can turn your caramel from perfect to burnt in seconds! But once you get the hang of it, making brittle becomes one of those rewarding kitchen activities that feels like magic every time.
A Brief History of Brittle
Brittle has roots in many cultures and goes back centuries. Some believe it originated in the Middle East, while others credit early American settlers who crafted the candy from readily available ingredients like peanuts and molasses. It’s known by different names around the world, such as “chikki” in India and “croquant” in France. Despite its varied origins, one thing remains the same: it’s always made by cooking sugar to a hard crack stage and mixing in nuts or seeds for texture and flavor.
In the United States, peanut brittle gained massive popularity in the 19th century. It became a holiday staple, often made in large batches and given as gifts. It’s not just about tradition; it’s about sharing a treat that’s both nostalgic and delicious.
Ingredients for Making Brittle
Core Ingredients
To make a basic brittle, you only need a handful of pantry staples. Here’s a simple list of the essential ingredients you’ll need:
- Sugar: The star of the show, granulated white sugar caramelizes to form the sweet, crunchy base.
- Corn Syrup: This helps prevent the sugar from crystallizing, giving the brittle that smooth, glassy texture.
- Water: Just enough to help dissolve the sugar and get things cooking evenly.
- Salt: A pinch enhances flavor and balances the sweetness.
- Butter: Adds richness and a smoother texture.
- Baking Soda: The magical ingredient that aerates the mixture and makes the brittle lighter and crispier.
- Nuts: Peanuts are traditional, but almonds, pecans, or cashews also work beautifully.
These are your must-haves. If you’re sticking to a classic recipe, these ingredients will yield a sweet, nutty brittle with that perfect shatter when you break it apart.
Optional Add-Ins for Flavor and Texture
Want to elevate your brittle game? Consider adding these ingredients:
- Vanilla Extract: Just a teaspoon can deepen the flavor.
- Spices: A touch of cinnamon, cayenne, or even nutmeg can give your brittle a surprising kick.
- Chili Flakes: For those who like sweet heat.
- Chocolate Drizzle: Melted chocolate over the cooled brittle adds richness and visual flair.
- Seeds: Sunflower, pumpkin, or sesame seeds can bring a whole new texture.
Feel free to experiment here. The beauty of brittle lies in its flexibility—you can tailor it to suit your taste.
Essential Tools You’ll Need
Kitchen Equipment Checklist
Before you get started, make sure you have these tools ready:
- Candy Thermometer: Crucial for getting the sugar to the perfect temperature.
- Heavy-Bottomed Saucepan: Ensures even heating and prevents burning.
- Silicone Spatula or Wooden Spoon: For stirring the mixture.
- Baking Sheet: This is where your hot brittle will cool and harden.
- Parchment Paper or Silicone Baking Mat: Prevents sticking and makes cleanup a breeze.
- Measuring Cups and Spoons: Precision matters in candy-making.
- Oven Mitts: You’re dealing with hot sugar—safety first!
Having everything prepped and within arm’s reach makes the process smoother and safer. Trust me, once the sugar hits that hard-crack stage, things move fast!
Step-by-Step Guide to Making Brittle
Step 1: Prepare the Baking Sheet
Before you start cooking, line a baking sheet with parchment paper or a silicone baking mat. You can also lightly butter the sheet if you don’t have parchment. This step is crucial because the brittle sets quickly once poured, and you won’t have time to do it later.
Place the lined baking sheet on a heatproof surface or cooling rack. Keep your spatula or spoon nearby, along with your measured ingredients like baking soda and butter, so you can add them quickly when needed.
This prep step might seem simple, but it’s all about being ready. Think of it like setting up a race—you need everything in place before the starting gun goes off.
Step 2: Combine the Ingredients
In a heavy-bottomed saucepan, combine 1 cup of sugar, ½ cup of light corn syrup, ¼ cup of water, and a pinch of salt. Stir to mix everything together before you place it over the heat. Once on the stove, turn the heat to medium and keep an eye on the mixture as it begins to boil.
Do not stir constantly once it starts boiling—this can cause the sugar to crystallize. Instead, just swirl the pan gently every so often. You’re looking for the sugar to dissolve fully and the syrup to turn a light amber color.
Patience is key here. Rushing the process can lead to uneven cooking or even burnt sugar, which is bitter and unusable.
Step 3: Heat and Stir the Mixture
This is where things start getting serious. Keep your candy thermometer clipped to the side of the saucepan, making sure the tip is submerged in the syrup but not touching the bottom of the pan. Heat the mixture until it reaches 300°F (149°C)—this is known as the hard crack stage.
At this point, the sugar mixture should be a beautiful amber color, not too dark, not too pale. If it goes too dark, it’s on the verge of burning. If it’s too light, it might not set properly and could stay chewy instead of becoming crisp.
You’ll want to stir only sparingly to avoid sugar crystallization. Swirl the pan gently and evenly. When the temperature hits 280°F (138°C), you can stir in your nuts. This gives them a chance to toast slightly and infuse the syrup with flavor without burning.
This part of the process requires full attention. Don’t multitask—boiling sugar waits for no one. And remember, sugar syrup is extremely hot, so wear oven mitts and handle with care.
Step 4: Add Baking Soda and Butter
Once your candy thermometer reads a steady 300°F (149°C), remove the pan from heat immediately. Working quickly but carefully, stir in 2 tablespoons of butter, 1 teaspoon of baking soda, and 1 teaspoon of vanilla extract if you’re using it.
The mixture will foam up and become lighter in color due to the chemical reaction between the baking soda and the hot sugar. That’s a good sign—it’s what gives brittle that airy, crispy texture. Be sure to stir vigorously to distribute everything evenly.
This part happens fast, so don’t hesitate. If you delay, the mixture can harden in the pan, making it impossible to pour and spread later. As soon as everything is mixed in, get ready to pour.
Think of this moment like a finish line. You’ve prepped, stirred, and watched temperatures rise—now you’re seconds away from brittle bliss.
Step 5: Pour and Spread the Mixture
Immediately pour the hot mixture onto your prepared baking sheet. Use a heatproof spatula or the back of a spoon to spread it into an even layer. Aim for a thickness of about ¼ inch, but don’t stress if it’s not perfectly uniform—imperfections add character!
As the mixture begins to cool, it will harden rapidly, so move fast. Avoid overworking it, as this can cause the brittle to lose its light, airy texture. If you want a more rustic look, don’t worry about perfect edges. Some people even tilt the baking sheet gently to let gravity help spread the mixture.
Let it sit undisturbed for at least 30 minutes. It needs to cool and set completely before you attempt to break it into pieces.
Step 6: Cool and Break Into Pieces
Once your brittle has fully cooled and set, it’s time for the fun part—breaking it up! You can use your hands, the back of a spoon, or even tap it gently on a cutting board. The brittle should break into jagged shards with a satisfying snap.
Store the pieces in an airtight container at room temperature. If stored properly, your brittle can last for up to two months without losing its crunch.
Don’t refrigerate brittle—it can cause condensation, leading to sticky, soft candy. Keep it dry, keep it cool, and you’ll have a go-to snack for weeks. Brittle also makes a fantastic homemade gift—just wrap it in cellophane with a ribbon, and you’ve got a charming present.
Tips for Perfect Brittle Every Time
Temperature Control
One of the biggest keys to a successful brittle is mastering temperature. If the sugar mixture doesn’t hit the hard crack stage (300°F), your brittle won’t harden correctly and may end up sticky or chewy. Conversely, if it goes too far past 300°F, it will burn, turning bitter and unusable.
Using a reliable candy thermometer is non-negotiable for beginners. If you’re more experienced, you might get away with the cold water test—drop a bit of syrup into a glass of ice water. If it forms hard, brittle threads that break when bent, it’s ready.
Also, make sure to add baking soda and butter only after removing from heat. This preserves the texture and avoids scorching.
Storage and Shelf Life
To keep your brittle fresh:
- Use airtight containers: Moisture is the enemy of brittle.
- Avoid the fridge: It creates humidity.
- Layer with parchment: If storing multiple layers, separate them to avoid sticking.
With these tips in mind, your brittle will stay crisp, tasty, and ready for snacking any time.
Variations of Brittle Recipes
Peanut Brittle
Peanut brittle is the gold standard—the classic that probably comes to mind when someone says “brittle.” It’s made using the exact base method we’ve covered but uses salted or unsalted roasted peanuts. The salty crunch of the peanuts balances beautifully with the caramelized sugar, giving it that timeless flavor that’s both nostalgic and satisfying.
If you’re new to making brittle, start with this version. It’s forgiving, flavorful, and beloved by just about everyone. You can also customize your peanut brittle by:
- Using raw peanuts, which will roast slightly during the cooking process.
- Adding a pinch of cayenne or chili powder for a spicy twist.
- Drizzling with dark chocolate once cooled for a richer, fancier finish.
Peanut brittle is perfect for holidays, gifts, or just to keep in a jar on your kitchen counter for whenever that sweet craving hits.
Almond or Cashew Brittle
Almond brittle has a slightly more refined flavor profile. Almonds bring a toasty, slightly buttery note that pairs beautifully with vanilla and a touch of sea salt. Cashew brittle, on the other hand, is softer and richer. Cashews melt in your mouth compared to crunchier nuts, giving the brittle a more indulgent feel.
Both nuts hold up well to high temperatures, making them ideal for this recipe. Here’s a quick tip: if you’re using whole nuts, give them a rough chop before adding them to the sugar mix so the brittle pieces are easier to bite into.
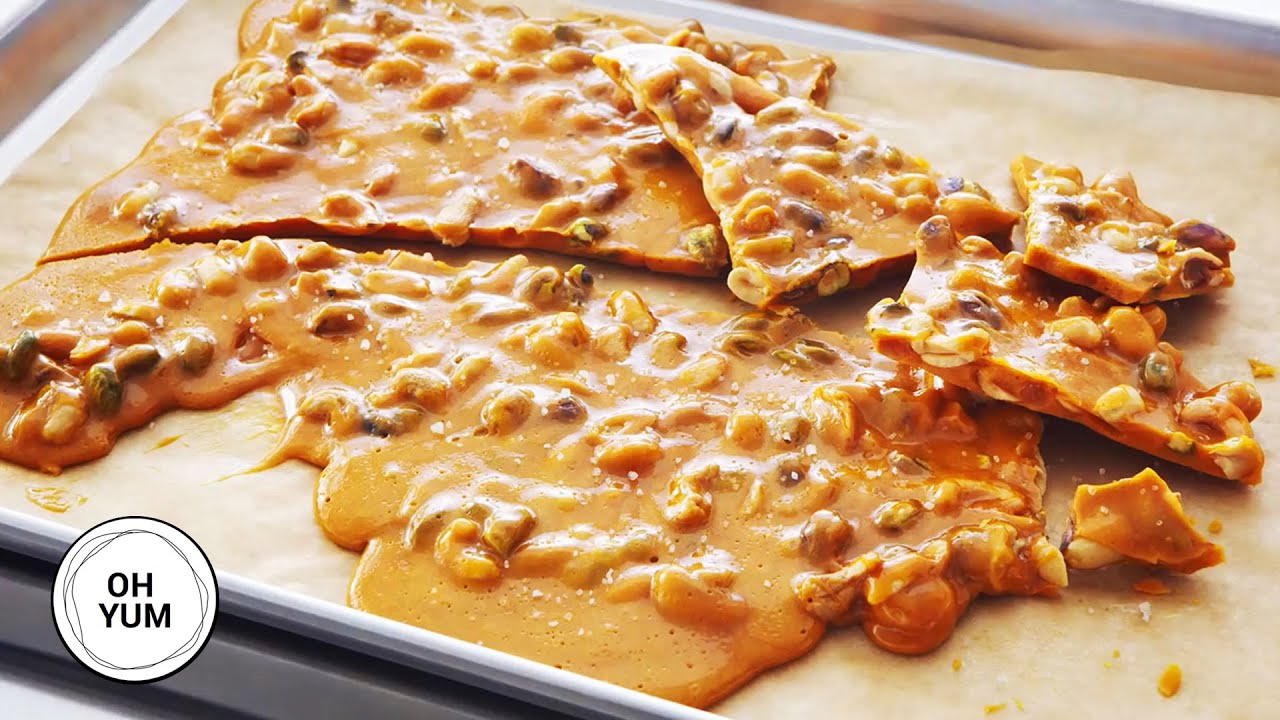
You can even combine multiple nuts—try a mix of pistachios, almonds, and cashews for a colorful, gourmet look and taste. A sprinkle of sea salt or edible gold dust (if you’re feeling fancy) right before the brittle sets can give it a professional touch.
Chocolate-Dipped Brittle
If you want to take your brittle to another level, chocolate is your best friend. Once the brittle is fully cooled and broken into pieces, dip each piece halfway into melted dark, milk, or white chocolate. Lay them on a parchment-lined tray and let them set.
You can get creative with toppings too:
- Crushed peppermint
- Toasted coconut
- Crushed pretzels
- Sea salt flakes
Chocolate-dipped brittle makes for an incredibly impressive homemade gift. It looks elegant and tastes amazing. Plus, who doesn’t love a little chocolate with their crunch?
FAQs about Brittle Recipe
What’s the best nut to use for brittle?
Peanuts are traditional, but almonds, cashews, pecans, and pistachios are all excellent options. Choose based on your personal taste or try a mixed nut version for variety.
Can I make brittle without a candy thermometer?
Yes, but it’s trickier. Use the cold water test—drop a small bit of syrup into cold water; if it forms hard, brittle threads that snap, it’s ready.
Why is my brittle chewy instead of crunchy?
It likely didn’t reach the hard crack stage (300°F). Always use a thermometer or cold water test to confirm the right temperature.
How long can I store homemade brittle?
When stored in an airtight container at room temperature, brittle can last up to two months. Keep it dry and cool to maintain crunch.
Can I use honey or maple syrup instead of corn syrup?
You can, but the texture may vary. Honey and maple syrup tend to make the brittle softer and more prone to stickiness.
Conclusion
It’s a recipe that brings out your inner candy-maker and rewards you with that unmistakable snap and crackle in every bite. Whether you’re making it for a holiday, a party, or just to snack on while watching TV, brittle delivers joy in every shard.
So, roll up your sleeves, prep your pans, and get ready to impress your taste buds—and maybe even a few friends or family—with your homemade brittle. Trust me, once you make it yourself, you’ll never want to buy store-bought again.