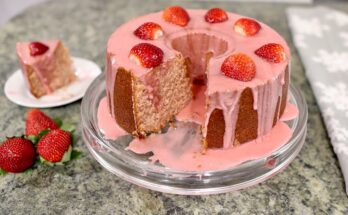
British Scone Recipe: There’s nothing quite like the charm of a freshly baked British scone, golden on the outside and fluffy on the inside, served warm with clotted cream and a generous dollop of strawberry jam. Whether you’re prepping for a cozy afternoon tea or just craving a homely treat, this foolproof guide will walk you through creating the perfect British scones — from ingredients to serving.
If you’ve ever wondered why your scones turn out dry or flat, or you just want to master that perfect crumb, this guide is exactly what you need. With detailed steps, tips, and secrets, you’ll soon be baking like a pro.
What Makes British Scones Unique?
Unlike American scones, British scones are light, less sweet, and traditionally served with tea. They have a short ingredient list but require precise technique. The British scone isn’t a dessert by itself — it’s a vessel for the beloved clotted cream and jam, forming the ultimate trio that defines the cream tea experience.
Their texture is soft and tender, never crumbly, with a slight crisp on the top when fresh out of the oven. You won’t find chocolate chips or heavy glazes here. Instead, it’s about delicate flavors and buttery richness. The subtlety of British scones is what makes them so addictive and beloved across generations.
The History Behind the British Scone
Scones have graced British tea tables since the early 1500s, with roots possibly tied to Scottish oat cakes or Irish soda bread. Over time, they’ve evolved into a staple of English afternoon tea, particularly in the southwest regions of Devon and Cornwall — two areas that still debate whether jam or cream should go first on the scone (spoiler: there’s no wrong answer, just fierce opinion).
They were popularized in the 1840s when Anna, the Duchess of Bedford, began serving them as part of her afternoon tea ritual. Since then, scones have become a treasured tradition across the UK and beyond.
List of Ingredients You’ll Need
Making perfect scones starts with simple, quality ingredients. Here’s your full shopping list:
Essential Dry Ingredients
- Plain flour – 350g (about 2¾ cups), sifted
- Baking powder – 1 tbsp (gives that lovely rise)
- Caster sugar – 2–3 tbsp, depending on taste
- Salt – just a pinch to balance sweetness
Key Wet Ingredients
- Cold unsalted butter – 85g (about 6 tbsp), cubed
- Whole milk – 175ml (¾ cup), plus extra for brushing
- Large egg – 1, lightly beaten (for egg wash)
Optional Add-ins for Flavor
- Sultanas or currants – 50g (if you like fruity scones)
- Vanilla extract – ½ tsp for subtle sweetness
- Lemon zest – optional for a zesty kick
These ingredients come together quickly and easily, but every detail — from butter temperature to flour type — plays a role in creating the perfect scone texture.
Tools & Equipment You’ll Need
Before you get your hands into that dough, make sure you have:
- Large mixing bowl
- Metal or plastic pastry cutter
- Rolling pin
- 5cm round cutter (or any shape you like)
- Baking tray
- Parchment paper
- Pastry brush
- Cooling rack
Having everything on hand streamlines the baking process and ensures you don’t overwork the dough while scrambling for a cutter.
Choosing the Right Flour for Perfect Scones
The kind of flour you use can make or break your scones. British recipes typically call for plain flour (all-purpose flour), which provides enough structure without being too tough. You could use self-raising flour as well — just skip the baking powder if you do.
Pro tip: Always sift your flour to remove lumps and aerate it. It helps your scones rise better and creates that signature lightness.
If you’re feeling adventurous, try mixing a little cake flour with all-purpose flour to make an even lighter crumb. Just don’t use bread flour — it has too much gluten and will make your scones chewy instead of tender.
Why Cold Butter Is Non-Negotiable
This isn’t optional. Cold butter is crucial for creating that flaky, airy texture. When cold cubes of butter are rubbed into the flour, they leave behind small pockets that melt during baking, resulting in steam that helps the dough puff up.
Tips:
- Chill your butter in the freezer for 10 minutes before starting.
- You can even chill your flour and mixing bowl.
- Use a pastry cutter or fingertips (not palms!) to mix butter into the flour.
Warm butter equals sad, flat scones. We don’t want that.
The Secret to the Fluffiest Scone Texture
The magic lies in not overworking the dough. Once the milk hits the flour, gluten begins to develop. If you knead or mix too much, your scones will be tough instead of light and pillowy.
Here’s how to nail the texture:
- Mix just until everything comes together — a shaggy dough is perfect.
- Don’t roll the dough too thin — aim for about 2.5cm (1 inch) thickness.
- Let the scones rest for 10 minutes before baking.
Also, make sure your oven is preheated and blazing hot. That initial burst of heat helps the scones rise tall and proud.
How to Mix Without Overmixing
Let’s be honest: overmixing is the silent killer of good scones. Keep it gentle. Think of it like handling a delicate little cloud.
Here’s how:
- Once the milk is in, switch from spoon to hands.
- Bring the dough together by folding, not kneading.
- Use a light touch. It’s not bread dough.
You’re aiming for something that just barely holds its shape — not a smooth ball. Slightly messy is perfectly okay.
Step-by-Step British Scone Recipe
Step 1: Preheat the Oven
Set your oven to 220°C (200°C fan) / 425°F / Gas 7. A hot oven gives you that all-important rise.
Step 2: Prepare Your Baking Tray
Line your baking sheet with parchment paper or lightly dust it with flour to prevent sticking.
Step 3: Sift the Dry Ingredients
In a large bowl, sift together:
- 350g plain flour
- 1 tbsp baking powder
- Pinch of salt
- 2 tbsp sugar
This step helps with lightness — don’t skip it.
Step 4: Rub in the Butter
Add 85g cold cubed butter. Use your fingertips to rub the butter into the flour until the mixture looks like fine breadcrumbs. Work fast to keep the butter cold.
Step 5: Add the Wet Ingredients
Make a well in the center and pour in:
- 175ml milk (reserve 1 tbsp for brushing)
- Optional: ½ tsp vanilla extract or lemon zest
Mix gently using a knife or your fingers until the dough comes together. Don’t overmix.
Step 6: Form the Dough
Tip the dough onto a lightly floured surface. Gently fold it over a couple of times to smooth it out. Pat or roll it to 2.5cm thickness.
Step 7: Roll and Cut
Use a floured 5cm round cutter. Press straight down — no twisting! Twisting seals the edges and ruins the rise.
Gather the scraps, re-roll once, and cut more scones.
Step 8: Bake to Golden Perfection
Place scones on the tray, spaced slightly apart. Brush tops with the reserved milk or beaten egg for golden tops.
Bake for 12–15 minutes or until risen and lightly browned.
Step 9: Cool and Serve
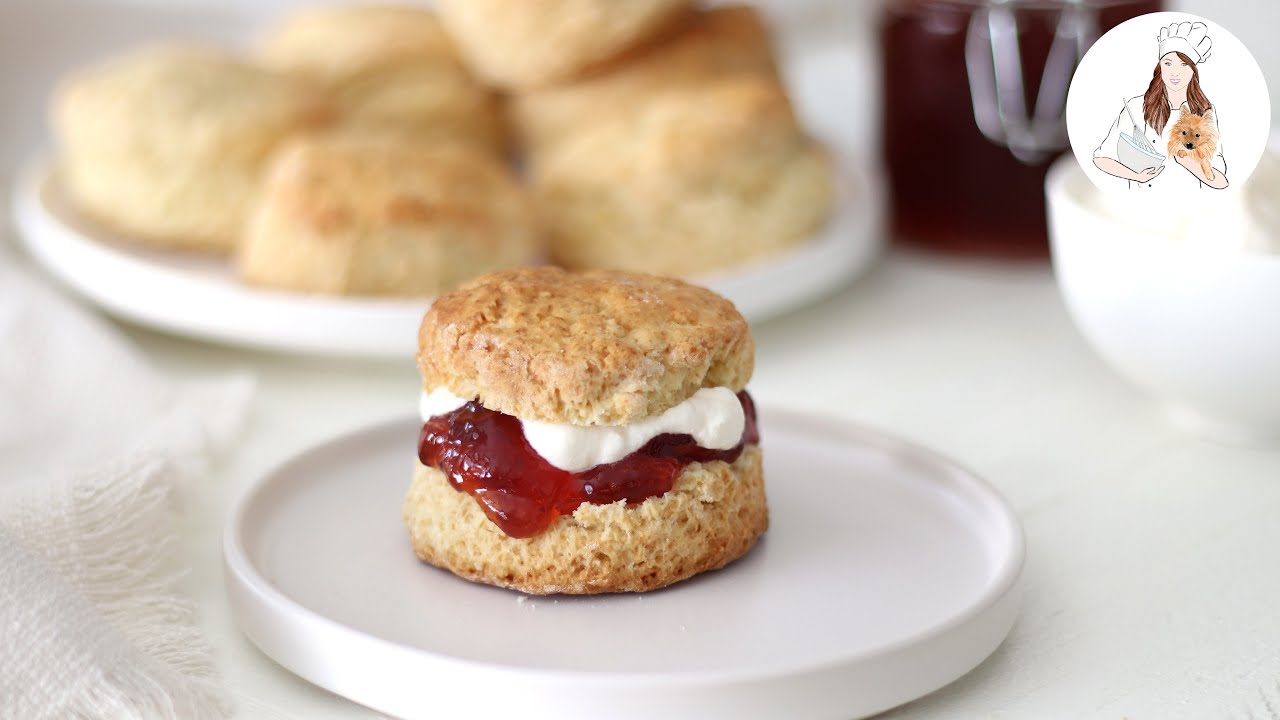
Cool on a wire rack for 5–10 minutes. Serve warm with clotted cream and jam. Bliss!
Tips for Making Scones Like a Pro
Perfecting the British scone is all about the little things. Even though the ingredients are simple, how you handle them makes all the difference. Here are some expert tips to help you level up your scone game:
- Handle the dough as little as possible. The more you knead, the more you activate gluten — which means tougher scones.
- Use cold everything. Cold butter, cold milk, even a cold mixing bowl if your kitchen is warm. It all helps.
- Don’t twist your cutter. Just press straight down. Twisting seals the sides and keeps your scones from rising tall.
- Use a sharp cutter. A dull edge can press the dough instead of cutting through, also affecting the rise.
- Let the dough rest. A quick 10-minute rest before baking helps relax the gluten and gives a better texture.
- Brush with milk or egg wash only on top. Avoid the sides — if the wash runs down, it can prevent proper rising.
- Bake at high heat. A hot oven gives that perfect golden crust and quick rise.
These tips might seem small, but when it comes to baking, small things make a big difference. Your future self (and your guests) will thank you.
How to Serve British Scones Properly
So, you’ve baked the perfect batch of scones. Now comes the best part — serving them. Traditionally, British scones are a central part of a cream tea, which means they’re enjoyed with clotted cream and jam, and a cup of proper black tea (like Earl Grey or Assam).
Here’s the right way to enjoy them:
- Split the scone in half horizontally — never slice all the way through.
- Spread a generous layer of clotted cream on each half.
- Top with strawberry jam — or raspberry if you prefer.
- Pair with a warm cup of tea. Milk, no sugar is the British way.
Or… switch it up:
- Try lemon curd for a tangy twist.
- Add butter for a more everyday treat.
- Make them savory by skipping the sugar and adding cheese and herbs.
And of course, there’s the age-old question: jam first or cream first?
- Cornish method: jam first, then cream.
- Devon method: cream first, then jam.
Whichever side you choose, just don’t microwave your scones. That’s treason in the UK.
British Scones vs. American Scones: What’s the Difference?
Though they share the same name, British and American scones are quite different creatures. Here’s a quick breakdown:
| Feature | British Scones | American Scones |
|---|---|---|
| Texture | Light, fluffy, tender | Dense, crumbly |
| Sweetness | Lightly sweet | Much sweeter |
| Shape | Round | Usually triangular |
| Add-ins | Often plain or with sultanas | Loaded with chocolate, nuts, fruits |
| Serving | With cream and jam | Eaten as-is, sometimes with glaze |
| Fat source | Cold butter | Often includes cream or more butter |
British scones are meant to be the base for other flavors (cream, jam), whereas American scones are often desserts in themselves. Different purposes, different textures — both delicious in their own right.
Common Mistakes to Avoid
Even experienced bakers can fall into a few traps when it comes to scones. Here’s what to watch out for:
- Overmixing the dough. This toughens the gluten and leads to rubbery scones.
- Using warm ingredients. Cold butter is essential for those steam pockets.
- Cutting dough too thin. Your scones won’t rise if the dough is under 2cm.
- Opening the oven too soon. This drops the temperature and stops the rise.
- Letting the dough sit too long before baking. The raising agent starts to lose effectiveness.
Remember: scones aren’t muffins, they’re not biscuits, and they’re definitely not bread. Handle with care and bake immediately once shaped.
Storing and Reheating Your Scones
Scones are best enjoyed freshly baked, ideally within a few hours of coming out of the oven. But if you’ve made a big batch, here’s how to store and reheat them:
- Room temperature: Keep in an airtight container for up to 2 days.
- Reheat in oven: Pop them in a 180°C (350°F) oven for 5–7 minutes. They’ll crisp back up and taste like new.
- Avoid microwaves: They turn fluffy scones into chewy bricks.
You can also wrap them individually in foil and refresh them the next day. Still tasty — especially with warm jam or melting butter.
Can You Freeze British Scones?
Yes, absolutely — scones freeze wonderfully. Here’s how to do it:
- Freeze before baking: Cut your scones, place them on a tray, and freeze until solid. Then store in a ziplock bag. Bake from frozen, adding 2–3 minutes to the bake time.
- Freeze after baking: Cool completely, wrap in foil or plastic wrap, and store for up to 3 months.
To serve, reheat in the oven (never microwave!) and enjoy just like fresh. Freezing is a great way to have a cream tea on demand.
FAQs about British Scone Recipe
1. Can I use self-raising flour instead of plain flour?
Yes! Just skip the baking powder if you’re using self-raising flour. Keep an eye on the dough, as it might rise a little quicker.
2. How do I keep scones from getting dry?
Don’t overbake them and make sure your butter is cold. A slightly sticky dough is better than a dry one. You can also brush them with a little milk before baking to keep the tops soft.
3. What’s the best way to reheat scones?
Use the oven! 5–7 minutes at 180°C (350°F) works wonders. Avoid the microwave — it ruins the texture.
4. Can I make scones without eggs?
Yes, you can skip the egg wash and just brush with milk. Some recipes don’t include egg at all — the milk and butter do most of the work.
5. What do you traditionally serve with British scones?
Clotted cream and jam are the gold standard. Add a pot of tea and maybe some fresh berries, and you’ve got the perfect cream tea setup.
Conclusion
British scones are more than just baked goods — they’re a piece of culinary heritage. Light, buttery, and perfect with tea, they bring people together in a way few foods can. Whether you go cream-first or jam-first, use currants or keep them plain, the real secret lies in the technique.
Start with cold butter, handle the dough gently, and serve them warm. With the tips and detailed step-by-step guide above, you’ll be whipping up bakery-worthy scones from your own kitchen in no time.
And hey, once you’ve nailed the basics, don’t be afraid to experiment — lemon and poppyseed, cheddar and chive, or even chocolate chip for a dessert twist. But always, always make sure to serve with love (and tea).