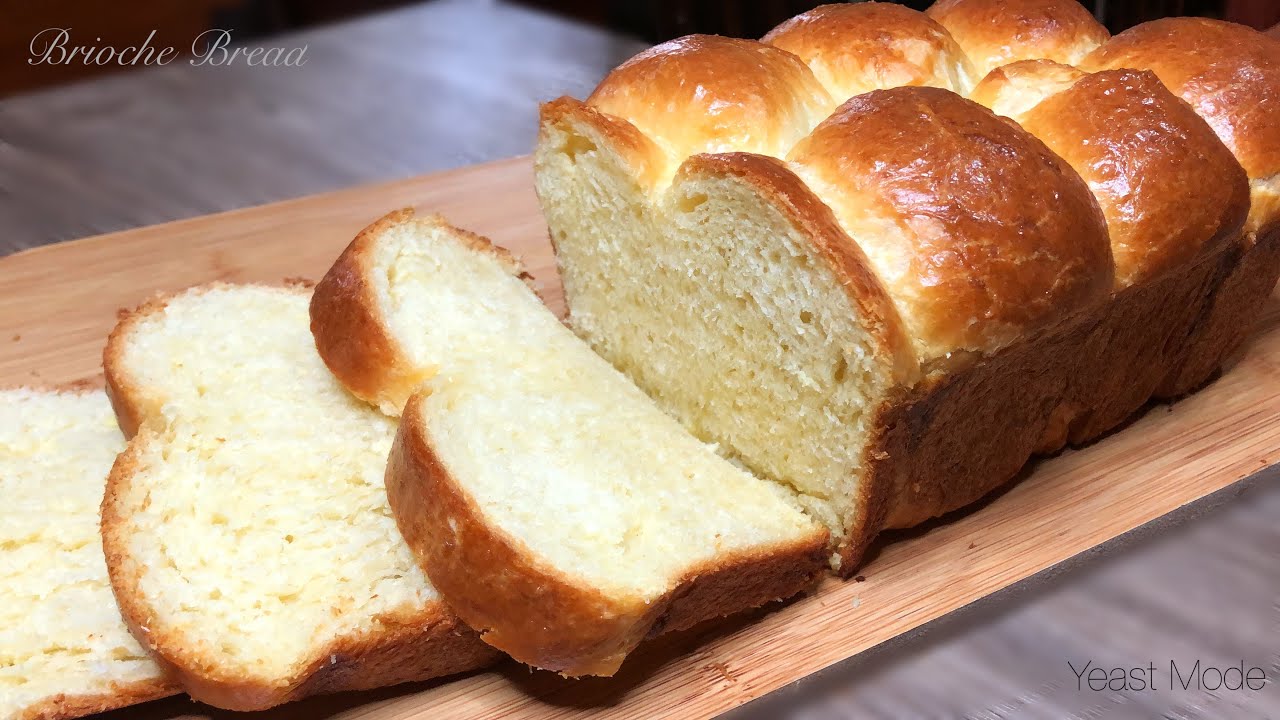
Brioche Bread Recipe: If you’ve ever bitten into a slice of soft, buttery bread that practically melts in your mouth, chances are you’ve encountered brioche. Originating in France, brioche is a rich, slightly sweet bread that’s famous for its delicate texture and golden crust. Unlike regular bread, it’s made with an abundance of eggs and butter, giving it a decadent taste. While it may sound fancy or difficult to make, I promise you, with a little patience and the right steps, you can bake your own brioche at home that rivals any bakery.
Ready to dive in? Let’s walk through the entire process step by step.
Ingredients Needed
To create that perfect fluffy texture, you’ll need the following ingredients:
- All-purpose flour (or bread flour) – 4 cups
- Unsalted butter – 1 cup (softened)
- Eggs – 5 large (plus 1 for egg wash)
- Milk – ½ cup (warm)
- Sugar – 3 tablespoons
- Salt – 1 teaspoon
- Active dry yeast – 2 teaspoons
Using high-quality ingredients makes a difference, especially when it comes to the butter and eggs. The rich flavor of brioche depends on these elements, so go for organic or farm-fresh if possible.
Equipment Required
Before you begin, gather the tools you’ll need:
- Mixing bowls
- Measuring cups and spoons
- Stand mixer (optional but recommended)
- Dough hook attachment (if using a mixer)
- Baking sheet or loaf pan
- Pastry brush (for egg wash)
No stand mixer? Don’t worry! You can knead the dough by hand—it’ll just take a bit more muscle and time.
Understanding the Dough
Brioche dough is unlike your average bread dough. It’s enriched with butter and eggs, which give it a luxurious, tender crumb. Because of this high fat content, it’s much softer and more delicate to work with.
The key to a successful brioche lies in the balance between hydration and structure. While the butter adds richness, it also affects how the dough holds together, so kneading and proofing times are crucial. Mastering these elements is what will make your brioche airy and light rather than dense and dry.
Step 1: Preparing the Ingredients
Preparation is everything when it comes to baking. Start by measuring your ingredients carefully. Baking is a science, and even a small deviation in measurements can throw off your results. Here are a few tips:
- Bring the butter and eggs to room temperature. This ensures they mix more easily into the dough.
- Warm the milk slightly (about 110°F/45°C). This helps activate the yeast without killing it.
- Whisk the dry ingredients (flour, sugar, salt) in one bowl to distribute them evenly.
Once your ingredients are prepped, you’re ready to move on to mixing the dough.
Step 2: Mixing the Dough
In a large bowl (or stand mixer), begin by activating the yeast. Combine the warm milk and sugar, then sprinkle the yeast on top. Let it sit for about 5-10 minutes until it becomes frothy.
Next, add the eggs and gradually mix in the dry ingredients. If you’re using a mixer, switch to a dough hook and knead on medium speed for about 5 minutes. The dough will be sticky at first, but don’t panic—this is normal!
Once the initial mixing is done, the dough should be soft, slightly elastic, and ready for kneading.
Step 3: Kneading the Dough
Now comes the workout! If you’re kneading by hand, turn the dough onto a floured surface and use the heel of your hand to push the dough away from you, then fold it back. Repeat this motion for about 10 minutes.
If you’re using a stand mixer, let the dough hook do the work for 8-10 minutes. You’ll know the dough is ready when it feels smooth and elastic, and it bounces back when you press it lightly with your finger.
Step 4: First Rise (Fermentation)
Once the dough is kneaded to perfection, it’s time for the first rise. This step is essential to develop the flavor and structure of your brioche. Here’s what to do:
- Lightly grease a large mixing bowl with oil or butter to prevent the dough from sticking.
- Place the dough in the bowl, cover it with plastic wrap or a clean kitchen towel, and let it rest in a warm spot.
- Allow the dough to rise until it doubles in size, which usually takes about 1.5 to 2 hours.
If your kitchen is chilly, you can place the dough inside an oven with the light on or near a warm window. Fermentation time may vary depending on the room temperature, so keep an eye on the dough rather than relying strictly on the clock.
Step 5: Adding Butter and Final Knead
This is the step where brioche gets its signature richness. You’ll gradually add softened butter to the dough, incorporating it fully without breaking down the dough’s structure.
- Cut the butter into small chunks and let it come to room temperature if it isn’t already.
- Gently punch down the risen dough to release excess gas, then transfer it to a clean surface or your stand mixer bowl.
- Knead the dough while slowly adding the butter, one piece at a time. If you’re using a mixer, do this on medium speed with the dough hook.
This step may take some patience, as the butter can make the dough slippery at first. However, after a few minutes, the dough will become smooth, shiny, and elastic.
Step 6: Shaping the Dough
Now that the butter is fully incorporated, it’s time to shape the dough. Depending on your preferences, you can make a brioche loaf, individual buns, or even braided shapes.
Here are a few common shaping techniques:
- Classic Loaf: Divide the dough into three equal parts, roll them into logs, and place them side by side in a greased loaf pan.
- Brioche Buns: Shape the dough into small, round balls and arrange them on a parchment-lined baking sheet.
- Braided Brioche: Divide the dough into three strands, braid them together, and place the braid on a baking sheet.
Once shaped, cover the dough with plastic wrap or a towel to prevent drying out during the second proofing.
Step 7: Second Proofing
The second rise (proofing) is critical for achieving the light, fluffy texture that brioche is known for. After shaping, allow the dough to rise again for about 45 minutes to 1 hour, or until it has doubled in size.
Here are a few tips for successful proofing:
- Keep the dough in a warm, draft-free spot.
- Avoid over-proofing, as this can lead to a weak structure and cause the dough to collapse.
During this stage, you’ll notice the dough becoming soft and pillowy. Once it’s fully proofed, it’s almost time to bake!
Step 8: Baking the Brioche
Preheat your oven to 375°F (190°C) while the dough completes its second proof. Just before baking, brush the surface of the dough with an egg wash (1 egg beaten with a tablespoon of water). This will give your brioche a shiny, golden crust.
- Place the brioche in the preheated oven and bake for about 25-30 minutes for loaves or 18-22 minutes for smaller buns.
- Rotate the pan halfway through baking to ensure even browning.
- The brioche is done when it’s deep golden brown and sounds hollow when tapped on the bottom.
Avoid over-baking, as this can dry out the bread. If you notice the crust browning too quickly, you can tent the brioche with foil during the final 10 minutes.
Step 9: Cooling the Bread
Once baked, remove the brioche from the oven and let it cool in the pan for about 10 minutes. Then transfer it to a wire rack to cool completely.
Why is cooling important? If you slice the brioche too soon, the steam inside can escape too quickly, resulting in a dense texture. Allowing it to cool preserves the bread’s light, airy crumb.
Serving Suggestions
Brioche is incredibly versatile and can be enjoyed in countless ways. Here are some ideas:
- Simple and classic: Spread butter and jam over a warm slice.
- French toast: Brioche makes for the most decadent French toast you’ll ever have.
- Sandwiches: Use brioche buns for burgers or breakfast sandwiches.
- Dessert: Serve slices with whipped cream and fresh berries.
Whether you keep it simple or go all out with toppings, brioche is guaranteed to impress.
Storage and Shelf Life
Brioche is best enjoyed fresh, but you can extend its shelf life with proper storage:
- Store leftover brioche in an airtight container at room temperature for up to 2 days.
- For longer storage, wrap the bread tightly in plastic wrap and freeze it for up to 3 months.
- To reheat, thaw the bread at room temperature and warm it in the oven at 350°F (175°C) for 5-10 minutes.
Avoid refrigerating brioche, as this can cause the bread to dry out faster.
Troubleshooting Common Problems
Making brioche can be tricky, so here are solutions to common issues:
- Dough didn’t rise: Check that your yeast was fresh and that the milk wasn’t too hot when activating it.
- Dense or heavy texture: Under-kneading or insufficient proofing could be the culprit.
- Overly dry bread: Be sure not to over-bake, and avoid slicing the bread before it cools.
With practice, you’ll become a brioche master in no time!
Health and Nutritional Information
Since brioche is rich in butter and eggs, it’s higher in calories and fat than regular bread. Here’s a rough nutritional breakdown per slice:
- Calories: 150-200
- Carbohydrates: 20-25g
- Fat: 7-10g
- Protein: 4-6g
For a lighter version, you can reduce the butter or substitute it with plant-based alternatives, though this will affect the flavor and texture.
FAQs about Brioche Bread Recipe
1. What ingredients do I need for brioche bread?
To make brioche bread, you will need flour, sugar, eggs, yeast, milk, salt, and butter. Ensure all ingredients, especially the butter and eggs, are at room temperature to achieve the best results.
2. How long does it take to make brioche bread?
Preparing brioche bread typically takes about 3 to 5 hours, including proofing time. The actual hands-on preparation time is about 20 minutes, but the dough needs to rise twice, each time for about 1 to 2 hours.
3. Can I make brioche bread without a stand mixer?
Yes, you can make brioche bread without a stand mixer, but be prepared for a workout! Mixing the dough by hand is possible but will require considerable effort to fully incorporate the butter into the dough.
4. Why is my brioche bread so dense?
A dense brioche can result from not enough proofing time, old yeast that isn’t as active, or not kneading the dough enough. Make sure your yeast is fresh and that the dough has enough time to rise until it’s puffy and light.
5. Can I add fillings to my brioche bread?
Absolutely! Brioche is versatile and can be filled with a variety of ingredients such as chocolate chips, fruits like blueberries or strawberries, or even savory options like cheese and herbs before baking.
6. How do I know when my brioche bread is done baking?
Brioche bread is typically done when it has a deep golden-brown crust. An internal temperature reading with a thermometer should be around 190°F (88°C) when fully baked.
7. Can brioche dough be made in advance?
Yes, you can prepare brioche dough in advance. After the initial kneading, the dough can be refrigerated overnight for the first rise. This not only enhances the flavor but also makes the dough easier to handle.
8. How should I store brioche bread?
Brioche bread should be stored wrapped in plastic wrap or in an airtight container at room temperature. It usually stays fresh for about 2 to 3 days. For longer storage, you can freeze it for up to a month.
9. Is brioche bread suitable for vegetarians?
Yes, traditional brioche bread is suitable for vegetarians as it contains no meat products. However, vegans would need to substitute the eggs and butter for plant-based alternatives.
10. What makes brioche different from regular bread?
Brioche is richer than regular bread, containing higher amounts of eggs, butter, and sugar. This gives it a tender crumb and a rich, golden color, distinguishing it from other types of bread.
Conclusion
Congratulations—you’ve now mastered the art of making brioche! While it may take some time and effort, the reward is well worth it. Homemade brioche is a showstopper, perfect for everything from breakfast to dessert. Don’t be afraid to experiment with different shapes, fillings, and flavors as you gain confidence in your baking skills.