Bread Recipe: There’s something truly magical about baking your own bread at home. Not only does it fill your kitchen with that comforting aroma, but homemade bread has a freshness and flavor that store-bought versions can’t compete with.
Whether you’re a complete beginner or looking to refine your technique, this step-by-step guide will walk you through the process of making delicious, soft, and perfectly baked bread.
Ingredients Required for Basic Bread
Before diving into the process, let’s go over the essential ingredients. For a classic loaf of bread, you will need:
- 4 cups of all-purpose flour
- 1 tablespoon of sugar
- 2 teaspoons of salt
- 2 ¼ teaspoons of active dry yeast (1 packet)
- 1 ½ cups of warm water (110°F/45°C)
- 2 tablespoons of vegetable oil or melted butter
Why Fresh Ingredients Matter:
Using fresh ingredients, especially yeast, is key to ensuring your bread rises properly and has the best flavor. Expired yeast or stale flour can dramatically affect the final result.
Essential Equipment for Bread Baking
You don’t need a fancy bakery setup to make great bread, but having the right tools can make the process easier. Here’s a list of what you’ll need:
- Large mixing bowl
- Measuring cups and spoons
- Wooden spoon or dough whisk
- Clean kitchen towel or plastic wrap
- Baking sheet or loaf pan
- A cooling rack
Substitute Tip:
If you don’t have a loaf pan, don’t worry. You can still shape your dough into a round or oval loaf and bake it on a baking sheet.
Step-by-Step Guide to Making Bread
Now that we’ve covered the basics, let’s get into the detailed steps of making bread.
Step 1: Preparing the Ingredients
Start by gathering all your ingredients. Measure them accurately and ensure your yeast is fresh. Dissolve the yeast in warm water and allow it to sit for about 5 minutes until it’s foamy—this shows that the yeast is active.
Step 2: Mixing the Dough
In a large bowl, combine the flour, sugar, and salt. Once the yeast has activated, add the yeast mixture to the dry ingredients along with the oil or melted butter. Stir the ingredients together until a shaggy dough forms.
Step 3: Kneading the Dough
Turn the dough onto a lightly floured surface. Knead it by pressing it forward with the heel of your hand, folding it back, and rotating. Repeat this process for about 10 minutes. The dough should become smooth and elastic. If it’s too sticky, add a small amount of flour as needed.
Step 4: Letting the Dough Rise (First Proofing)
Place the dough in a lightly greased bowl, cover it with a clean kitchen towel or plastic wrap, and let it rise in a warm place for about 1 to 2 hours. The dough should double in size.
Step 5: Punching Down the Dough
After the dough has risen, gently punch it down to release the gas that has built up inside. This helps create a uniform texture.
Step 6: Shaping the Dough
Turn the dough onto your work surface again and shape it into your desired form. For a loaf, gently flatten the dough into a rectangle and roll it up tightly. Pinch the seams closed and place it into a greased loaf pan.
Step 7: Second Proofing (Final Rise)
Cover the shaped dough and let it rise again for another 45 minutes to an hour, or until it has puffed up nicely.
Step 8: Baking the Bread
Preheat your oven to 375°F (190°C). Bake the bread for about 30-35 minutes. The bread should turn a golden brown, and when you tap on the bottom of the loaf, it should sound hollow.
Step 9: Cooling the Bread
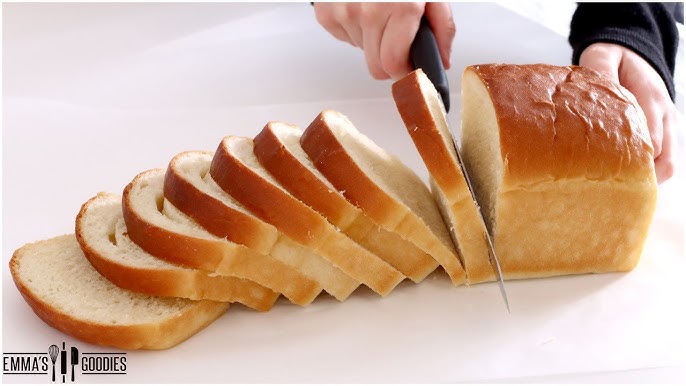
Once baked, remove the bread from the oven and place it on a cooling rack. Allow it to cool completely before slicing, as cutting too early can make the inside gummy.
Tips for Perfect Bread
- Proper Kneading: Kneading is crucial because it develops gluten, which gives bread its structure. If your dough isn’t kneaded enough, the bread might not rise properly.
- Avoid Over-Proofing: Over-proofing can cause the bread to collapse during baking. Keep an eye on the dough during the rise stages.
- Elasticity Check: Your dough should be stretchy but not tear easily. If it breaks too quickly, it needs more kneading.
Different Types of Bread You Can Make
Once you’ve mastered basic bread, you can experiment with different variations.
- White Bread: A simple and classic recipe with a soft texture.
- Whole Wheat Bread: Adds a nutty flavor and more nutrients by using whole wheat flour.
- Sourdough Bread: A tangy bread made with wild yeast and a longer fermentation process.
Common Mistakes to Avoid
- Not Using Fresh Yeast: Old yeast won’t allow your bread to rise properly, resulting in a dense loaf.
- Over-Kneading or Under-Kneading: Knead too much, and the bread will be tough; knead too little, and it won’t have enough structure.
- Inaccurate Measuring: Use proper measuring cups and spoons to ensure the right ingredient ratios.
How to Store Your Bread
Short-Term Storage: Store your bread at room temperature in a breadbox or a sealed bag. Avoid refrigerating it, as this can dry out the bread.
Long-Term Storage: For longer storage, you can freeze your bread. Wrap it tightly in plastic wrap or aluminum foil and store it in a freezer bag.
How to Revive Stale Bread
Reviving in the Oven: Preheat your oven to 350°F (175°C), sprinkle some water on the bread, and bake it for about 5-10 minutes. This will soften it up.
Making Croutons: If your bread is too stale to eat, cube it up, toss it in olive oil and seasonings, and bake until crispy for homemade croutons.
Troubleshooting Common Bread Problems
Why Didn’t My Bread Rise?
- Your yeast might have been expired or killed by water that was too hot.
- The dough might not have had enough time to rise.
Fixing Dense or Heavy Loaves
Dense bread often results from under-kneading or not allowing enough time for the dough to rise.
FAQs about Bread Recipe
1. What ingredients are needed for a basic bread recipe?
A basic bread recipe typically includes flour, water, yeast, salt, and sugar. Some recipes may also call for butter or oil for added richness.
2. How long should I knead the dough?
For most bread recipes, kneading takes about 8-10 minutes by hand or 5-7 minutes using a stand mixer. Kneading helps develop the gluten, which gives the bread structure.
3. How do I know when my dough has risen enough?
The dough should double in size during the first rise. You can test it by gently pressing a finger into the dough—if the indentation stays, it’s ready.
4. Can I substitute all-purpose flour for bread flour?
Yes, you can use all-purpose flour, but bread flour contains more protein, which results in a chewier texture. Your bread may be softer with all-purpose flour.
5. Why is my bread dough sticky?
Sticky dough usually means it has too much moisture. Try adding small amounts of flour, a tablespoon at a time, until it becomes smooth and elastic.
6. What is the best way to store homemade bread?
Store homemade bread in a bread box or a paper bag to keep it fresh for a few days. For longer storage, wrap it tightly and freeze it for up to three months.
7. Can I make bread without yeast?
Yes, you can make yeast-free bread like soda bread, which uses baking soda as a leavening agent. It has a denser texture than yeast-based bread.
Conclusion
Making homemade bread is more than just a rewarding kitchen project—it’s a way to enjoy fresher, healthier, and tastier bread. The effort is well worth it when you experience the satisfaction of kneading the dough and the aroma of fresh bread filling your home. Plus, homemade bread is free from preservatives and can be tailored to your preferences.
Don’t be afraid to experiment with flavors and techniques. Try adding herbs, seeds, or even cheese for a twist, or explore different types of flour to create unique textures. Baking bread allows you to get creative while also mastering the basics, so have fun and enjoy the process!
References
For further reading and validation of the information provided in this bread recipe, we recommend checking out these reputable sources:
- King Arthur Baking – A trusted resource for professional baking tips and in-depth recipes.
- The Kitchn – Offers practical advice on baking techniques and easy-to-follow bread recipes.
- Bon Appétit – Features expert insights into bread making and culinary expertise.
- Serious Eats – Provides detailed bread recipes and thorough discussions on the science of baking.
These references ensure the credibility of our content and offer more opportunities for you to explore and perfect your bread-making skills.


