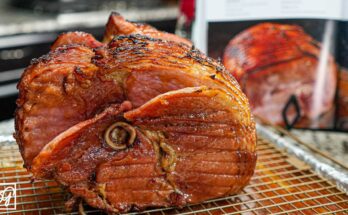
Bread Machine Recipe: Bread machines are a game-changer for anyone who loves fresh, warm bread but doesn’t want to knead dough or keep a close eye on rise times. Imagine waking up to the aroma of a loaf that’s been baking overnight—yes, that’s totally possible with a bread machine.
Why Use a Bread Machine?
Why knead by hand when your bread machine does it all for you? From mixing and kneading to rising and baking, this appliance handles everything in a neat, compact cycle. It’s ideal for busy people or anyone new to baking. No mess, no fuss—just add your ingredients and let the machine handle the heavy lifting.
Benefits of Making Your Own Bread
Making your own bread means full control over ingredients. No preservatives, no additives—just honest, wholesome bread. Plus, it’s cheaper than store-bought artisan loaves, and you can customize it endlessly. Want cheese and jalapeño? Go for it. Craving something sweet like cinnamon raisin? You got it.
Essential Ingredients for Bread Machine Bread
You don’t need a pantry full of items to bake bread. Just a few key ingredients will do.
Flour Types and Their Roles
Bread flour is the gold standard—it’s high in protein and gluten, which gives bread its chewy texture and sturdy rise. All-purpose flour can be used too, but expect a softer loaf. Want to go hearty? Try whole wheat flour. Just note that it absorbs more liquid and results in a denser loaf.
Yeast – The Rising Star
There’s a big difference between active dry yeast and bread machine yeast (aka instant yeast). Instant yeast is designed to be added directly to your ingredients without proofing. For bread machines, this type is king. Always check the expiration date—old yeast won’t rise, and you’ll be left with a brick instead of a loaf.
Additional Ingredients (Salt, Sugar, Fats, Add-ins)
- Salt: Controls yeast activity and enhances flavor.
- Sugar: Feeds the yeast and helps browning.
- Fats (butter, oil): Soften the bread and add richness.
- Add-ins: Think seeds, nuts, dried fruit, or cheese—added after the initial knead to avoid getting crushed.
Choosing the Right Bread Machine Settings
Bread machines come with several preset programs. It’s not just about hitting “Start” and hoping for the best.
Basic Bread Setting
Use this for white bread or recipes that call for simple ingredients. It’s the go-to setting when you’re just starting out.
Dough, Whole Wheat, and Gluten-Free Options
- Dough Setting: Preps your dough so you can shape and bake it in the oven—great for pizza or rolls.
- Whole Wheat: Uses a longer rise time due to heavier flour.
- Gluten-Free: Kneads gently and uses a different baking cycle for lighter texture.
Step-by-Step Bread Machine Recipe Guide
Here’s how to make a simple, delicious loaf that turns out perfectly every single time.
Step 1 – Gather and Measure Ingredients Accurately
Baking is a science. Even a little too much flour or not enough liquid can throw things off. Use measuring cups for dry ingredients and liquid measuring cups for wet. Level off everything for accuracy.
Basic Bread Recipe:
- 1 cup warm water (110°F)
- 2 tablespoons sugar
- 2 ¼ teaspoons instant yeast (or 1 packet)
- 3 cups bread flour
- 1 ½ teaspoons salt
- 2 tablespoons oil or softened butter
Step 2 – Layer the Ingredients Correctly in the Bread Pan
Always follow your bread machine’s instructions, but the general rule is: Liquids first, then dry ingredients, yeast last. This keeps the yeast separate from the liquids until the machine starts mixing—especially important for delayed starts.
Step 3 – Select the Right Program and Start the Machine
Choose the right program (usually “Basic” or “White Bread”) and crust color if you can. Hit start and let it do its thing. The whole cycle usually takes 3 to 4 hours depending on the machine and recipe.
Step 4 – Monitor During the First Kneading (Optional but Useful)
Check in during the first 5–10 minutes. Is the dough forming a smooth ball? If it’s too dry, add water a teaspoon at a time. Too sticky? Sprinkle in some flour. This minor adjustment can be the difference between an average loaf and bakery-level greatness.
Step 5 – Let the Machine Work Its Magic
Now, you can walk away. Go read a book, run errands, or binge-watch your favorite show. When the bread is done, remove it promptly and place it on a wire rack to cool. This prevents sogginess on the bottom.
Tips for Perfect Bread Every Time
Mastering bread making in a machine is all about the details. Small adjustments can lead to big improvements in taste and texture.
Ingredient Temperature and Freshness
Use room-temperature ingredients unless the recipe says otherwise. Cold ingredients slow down the yeast, while hot ones can kill it. Water should be warm—around 110°F (43°C) is ideal. Also, make sure your yeast is fresh. If it’s been in the pantry for a year, do a quick proof test: mix it with warm water and sugar. If it doesn’t foam within 10 minutes, toss it.
Another game changer? Fresh flour. Older flour loses its potency and might result in a bland or flat loaf. Keep your flour in an airtight container and away from heat or sunlight.
Preventing a Dense or Sunken Loaf
A dense loaf often means too much flour or not enough liquid. On the flip side, if your loaf rises too much and then sinks, it might be overproofed or contain too much yeast. Stick to the recipe quantities and don’t open the lid during baking—it can deflate your loaf.
Humidity also plays a role. On very humid days, you might need slightly less liquid. On dry days, maybe a tad more. Pay attention to your dough during the first mix—it should be tacky but not sticky, smooth but not stiff.
Want fluffier bread? Add a tablespoon of vital wheat gluten to your recipe. It boosts elasticity and helps the bread rise better, especially useful in whole wheat or gluten-free recipes.
Common Mistakes and How to Avoid Them
Even seasoned bakers run into trouble. Knowing what can go wrong helps you dodge those pitfalls.
Overproofing or Underproofing
Bread machines automate the rise times, but if your room is particularly hot or cold, it can still mess with the process. Overproofed dough becomes weak and collapses during baking, while underproofed dough won’t rise fully and ends up dense.
To fix this, try using the dough setting and letting the dough rise in a more controlled environment (like a slightly warm oven turned off) before shaping and baking.
Using the Wrong Flour or Yeast Type
Not all flours are created equal. Cake or pastry flour lacks the gluten strength needed for bread. Stick with bread flour for best results unless your recipe specifies otherwise. And remember, bread machine yeast or instant yeast works best. Active dry yeast needs proofing and might not activate quickly enough in a bread machine cycle.
Also, never swap baking powder or baking soda for yeast. They don’t work the same way and will ruin your loaf.
FAQs about Bread Machine Recipe
Q1: Can I use all-purpose flour in my bread machine?
Yes, you can! While bread flour gives better rise due to higher gluten content, all-purpose flour works just fine in most recipes. Just expect a slightly softer loaf.
Q2: Do I need to proof yeast before adding it to the bread machine?
Nope. Most bread machine recipes use instant or bread machine yeast, which doesn’t need proofing. Just add it last, on top of the dry ingredients.
Q3: Why is my bread machine bread dense or heavy?
This could be from too much flour, too little yeast, or even expired yeast. Always measure ingredients carefully and use fresh yeast for a fluffy loaf.
Q4: Can I open the bread machine while it’s running?
Yes—but only during the kneading cycle. Lifting the lid to check dough consistency is fine early on, but don’t interrupt the baking stage!
Q5: How do I stop my bread from sticking to the pan?
Grease the pan lightly before each use, or use a silicone spatula to ease the loaf out. Non-stick pans can still stick over time.
Q6: Can I use my bread machine to make just the dough?
Absolutely! Most machines have a “Dough” setting, perfect for pizza dough, rolls, or artisan loaves that you finish baking in the oven.
Q7: How long does a typical bread machine cycle take?
Most basic white bread cycles take about 3 to 4 hours, depending on your machine and loaf size. Quick breads? Usually 1.5 to 2 hours.
Conclusion
There you have it—your full guide to becoming a bread machine master. Whether you’re baking for health, budget, or just the joy of it, this method puts fresh, delicious bread within easy reach. With a bit of practice and some attention to the little things, you’ll be turning out bakery-quality loaves with the push of a button. Happy baking!