Bread Crumbs Recipe: Ever find yourself with a stale loaf of bread that’s just too tough to eat? Don’t toss it! Transform that leftover bread into golden, crunchy bread crumbs that’ll become your secret kitchen weapon. Bread crumbs might seem like a small detail, but they’re the quiet MVP in everything from crispy chicken cutlets to creamy casseroles. Store-bought versions work, sure, but nothing beats the freshness, flavor, and satisfaction of homemade bread crumbs.
Why go homemade? Because you control the texture, flavor, and ingredients—no weird preservatives or added sugars hiding inside. You’ll be amazed how simple the process is, and once you get the hang of it, you’ll never look back.
Plus, you’ll be reducing food waste like a pro. Old bread? Turn it into crispy gold. Need a gluten-free option? Use your favorite gluten-free bread. The possibilities are endless.
Benefits of Making Bread Crumbs at Home
Let’s be real—why buy a plastic container of mystery crumbs when you can make a better version in under 20 minutes at home?
1. Cost-Effective: Bread that would’ve ended up in the trash becomes treasure. You save money while upgrading your meals.
2. No Preservatives or Additives: Commercial bread crumbs often contain artificial preservatives to extend shelf life. Homemade crumbs are 100% clean—just bread, maybe some seasoning if you’re feeling fancy.
3. Zero Waste Cooking: Got bread that’s too tough for sandwiches but not moldy? That’s your starting point. This method keeps waste down and your pantry stocked.
4. Customizable: Want Italian-style crumbs? Add herbs. Want low-sodium? You control the salt. Gluten-free? Use gluten-free bread. The power is yours.
5. Better Texture and Flavor: Fresh crumbs are crispier and more flavorful. Toasted or untoasted, chunky or fine—you decide.
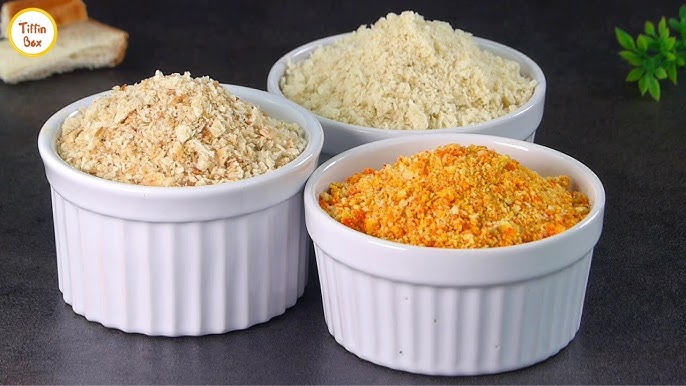
Types of Bread Crumbs
Not all bread crumbs are created equal. Understanding the types helps you decide which one works best for your recipe.
• Fresh Bread Crumbs: Soft, moist crumbs made from fresh bread. Great as a binder in meatballs or meatloaf.
• Dry Bread Crumbs: These are the crunchy crumbs used for coating or topping. Perfect for baked casseroles or crispy fried foods.
• Panko Bread Crumbs: Japanese-style bread crumbs that are larger, flakier, and crispier. They give fried foods an extra crunch.
Each type has its own best use, and with just a few tweaks, you can make all of them at home.
List of Ingredients You’ll Need
This is the best part—your ingredient list is incredibly short.
Primary Ingredient:
- Bread (any kind! White, whole wheat, sourdough, baguette, even gluten-free)
Optional Add-ins for Flavor:
- Dried herbs (oregano, thyme, basil)
- Garlic powder
- Onion powder
- Parmesan cheese (for cheesy crumbs)
- Salt & pepper
- Red pepper flakes (for a spicy kick)
Tip: Stale bread works best because it’s already dried out, making it easier to crumble and toast.
Kitchen Tools You’ll Need
No fancy gadgets required—just your basics.
Essentials:
- Food Processor or Blender (to grind the bread)
- Baking Sheet (for drying and toasting)
- Oven or Air Fryer (optional but helpful)
- Airtight Containers or Zip Bags (for storing)
- Knife and Cutting Board
Alternative Method: Don’t have a food processor? No problem. Tear the bread into pieces and use a rolling pin or even a mallet to crush it in a ziplock bag.
Step-by-Step Guide: How to Make Bread Crumbs
Let’s break it down into easy, bite-sized steps.
Step 1: Select the Right Bread
Use what you have on hand—white, wheat, rye, gluten-free—it all works. Day-old or stale bread is ideal because it’s drier and easier to crumble. Avoid moldy bread, though.
Cut the bread into smaller chunks so it dries and blends faster.
Step 2: Dry the Bread
You have two options:
Option 1: Air Dry
- Lay the bread chunks out on a baking sheet.
- Leave uncovered at room temp for 24–48 hours.
Option 2: Oven Method (Faster)
- Preheat oven to 250°F (120°C).
- Arrange bread on a baking sheet in a single layer.
- Bake for 15–20 minutes, flipping halfway through.
Bread should feel dry and slightly crisp but not toasted yet.
Step 3: Crumble the Bread
Once dry, add the pieces to a blender or food processor. Pulse a few times until you reach your desired consistency.
Want fine crumbs? Blend longer.
Want chunky crumbs? Just a few quick pulses will do.
Step 4: Toast for Extra Crunch (Optional)
For dry, golden crumbs:
- Spread the ground crumbs on a baking sheet.
- Toast in the oven at 300°F (150°C) for 10–15 minutes, stirring halfway.
Let them cool completely after toasting.
Step 5: Cool and Store
Cool crumbs completely before storing to prevent moisture buildup.
- Store in an airtight container for up to 2 weeks at room temperature.
- Freeze for up to 3 months in zip-top bags or jars.
How to Make Panko-Style Bread Crumbs at Home
Craving that signature crispiness of panko bread crumbs? Good news—you can make them right at home without hunting down a specialty store.
Here’s what makes panko different: Panko crumbs are light, airy, and have a larger flake than traditional bread crumbs. They’re made without the crust and are baked in a unique way that keeps them from absorbing too much oil during cooking, which is why they stay extra crispy.
Step-by-Step for Homemade Panko:
- Use crustless white bread.
Slice off the crusts from white sandwich bread or pull-apart rolls. - Grate or pulse gently.
Instead of fully blending, use a grater or a food processor with quick pulses to keep the crumbs flaky and airy. Don’t over-process. - Dry but don’t toast.
Spread the flakes on a baking sheet and bake at a low temp (around 250°F / 120°C) for 15–20 minutes. You want them dry, not browned. - Cool and store.
Once cooled, store just like regular bread crumbs. These are excellent for tonkatsu, tempura, or ultra-crispy onion rings.
Bonus Tip: If you’re using panko in baked dishes, give the crumbs a quick pan-toast in butter before adding them on top. It makes a world of difference!
Flavor Variations for Homemade Bread Crumbs
Plain crumbs are great, but why not spice things up? You can easily infuse your crumbs with bold flavors by mixing in herbs, spices, and even cheese. This lets you match your crumbs to your dish and elevate the taste instantly.
Here are some popular flavor combos:
Italian Style:
- Add dried basil, oregano, garlic powder, onion powder, and grated parmesan.
- Perfect for breading chicken parmesan or meatballs.
Garlic & Herb:
- Mix in dried parsley, thyme, garlic powder, and a pinch of rosemary.
- Great for casseroles or as a topping for baked pasta.
Spicy Chili Crumbs:
- Add red pepper flakes, smoked paprika, and a hint of cumin.
- Amazing for coating spicy fried chicken or roasted veggies.
Cheesy Blend:
- Mix in finely grated parmesan or romano cheese with black pepper.
- Ideal for topping mac and cheese or baked potatoes.
How to mix them in: Add your seasonings after grinding the crumbs but before storage. Mix well and taste a pinch—yes, raw! Adjust as needed. Just remember that if you’re using fresh herbs or cheese, store the crumbs in the fridge and use them sooner.
How to Store Bread Crumbs
Proper storage keeps your crumbs fresh and ready to use at a moment’s notice.
Short-Term Storage (Up to 2 Weeks):
- Store in an airtight container in a cool, dry pantry.
- Label it with the date, especially if you’ve added any seasonings or cheese.
Long-Term Storage (Up to 3 Months):
- Freeze in zip-top bags or reusable containers.
- Press out as much air as possible before sealing.
- Label with type and date.
When using frozen bread crumbs, no need to thaw! Just use them straight from the freezer.
How Long Do Homemade Bread Crumbs Last?
Here’s a quick guide to shelf life based on storage methods:
| Storage Method | Plain Crumbs | Seasoned Crumbs | With Cheese |
|---|---|---|---|
| Pantry (Airtight) | 2 weeks | 1 week | Not recommended |
| Refrigerator | 3 weeks | 2 weeks | 1 week |
| Freezer | 3 months | 2 months | 1 month |
Always give them a sniff or small taste before using if they’ve been stored a while. If they smell off or stale, toss and make a fresh batch.
How to Use Bread Crumbs in Recipes
This is where the fun begins—bread crumbs can completely transform a dish. Whether it’s texture, flavor, or binding power, they work in so many ways.
1. As a Coating (Frying or Baking)
- Dredge chicken, fish, or tofu in flour, egg, then bread crumbs.
- Bake or fry for a golden, crispy crust.
2. As a Topping
- Sprinkle over casseroles, mac and cheese, or baked pasta.
- Mix with melted butter for extra crunch before baking.
3. As a Binder
- Add to meatloaf, meatballs, or veggie patties.
- Helps absorb moisture and hold the mixture together.
4. As a Thickener
- Add to soups or stews to thicken slightly.
- Perfect when you’ve run out of flour or cornstarch.
Creative Recipes Using Bread Crumbs
Want to put those homemade crumbs to good use? Here are a few tasty ideas:
• Breaded Chicken Tenders
- Coat chicken strips in seasoned bread crumbs, bake until golden.
- Serve with honey mustard or ranch for dipping.
• Mac and Cheese Topping
- Combine crumbs with butter and parmesan.
- Sprinkle on mac and cheese before baking—instant comfort food upgrade.
• Stuffed Mushrooms
- Mix crumbs with garlic, herbs, and cream cheese.
- Stuff into mushroom caps and bake for a savory appetizer.
• Crispy Roasted Veggies
- Toss zucchini or cauliflower with olive oil and bread crumbs.
- Roast until golden and crispy.
• Homemade Fish Cakes
- Use bread crumbs to bind flaky fish with egg, onion, and herbs.
- Pan-fry until crispy on the outside and tender inside.
Troubleshooting & Tips
Let’s cover a few common issues you might run into:
What If My Bread Crumbs Are Too Wet?
You didn’t dry the bread enough. Pop them back in the oven at 250°F (120°C) for 10–15 minutes, stir halfway.
Why Are My Crumbs Uneven?
It’s all in the processing. Pulse instead of blending continuously to get consistent crumb size. Shake the bowl and repulse any large chunks.
How Can I Avoid Mold?
Always cool crumbs completely before sealing them in storage. Any trapped moisture leads to mold.
Can I Make Bread Crumbs Without an Oven?
Yes! Air dry slices for 2 days, then crush using a rolling pin or food processor. It takes longer but works just as well.
FAQs about Bread Crumbs Recipe
1. Can I use gluten-free bread to make bread crumbs?
Absolutely! Gluten-free bread works just as well. Just make sure it’s fully dried before processing.
2. What’s the best way to make fine crumbs?
Use a food processor and pulse until the crumbs are your desired texture. For ultra-fine crumbs, sift them through a mesh strainer.
3. Can I season bread crumbs before or after toasting?
You can do both, but it’s best to season after toasting so the herbs don’t burn in the oven.
4. Do I need to refrigerate homemade bread crumbs?
Not unless you’ve added cheese or fresh herbs. Otherwise, a cool, dry pantry is fine for short-term storage.
5. How can I revive stale bread crumbs?
Spread them on a baking sheet and lightly toast them in the oven at 300°F (150°C) for 10 minutes. They’ll crisp right back up!
Conclusion
There you have it—a complete, foolproof guide to making bread crumbs at home. It’s easy, customizable, and a perfect way to use up leftover bread instead of letting it go to waste. Whether you prefer them soft for meatballs or extra-crispy for chicken cutlets, homemade crumbs bring flavor and texture you simply can’t get from store-bought.
Plus, you’re not just cooking—you’re becoming a smarter, more sustainable chef. So the next time you spot a half-eaten loaf sitting on the counter, don’t toss it—transform it.


