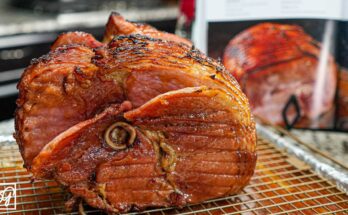
Bread Bowl Recipe: If you’ve ever dug into a hearty soup served inside a warm, crusty bread bowl, you know it’s not just about eating—it’s an experience. Bread bowls are edible dishes made from round loaves of bread with their centers hollowed out to hold soups, stews, or even creamy dips. Think of them as the ultimate comfort food—soft on the inside, crispy on the outside, and ready to soak up every last drop of deliciousness.
What makes bread bowls so popular? First, they’re super functional. You don’t need extra dishes, and there’s no waste because you can eat the whole thing! But beyond practicality, they bring that extra “wow” factor to your table, whether you’re serving a rich broccoli cheddar soup or a gooey spinach dip. It’s a rustic, cozy vibe you can’t get from a regular bowl.
Now, why should you make your own bread bowls at home instead of buying them? For starters, homemade bread always tastes better. You have control over the ingredients—no preservatives, no artificial junk. Plus, baking bread from scratch is easier than most people think. With just a few pantry staples and a little patience, you can whip up fresh, bakery-style bread bowls in your own kitchen.
Whether you’re impressing guests or just elevating your weeknight dinner, mastering the bread bowl will give your cooking game a serious boost. Let’s roll up those sleeves and dive in!
Ingredients You’ll Need
You don’t need anything fancy to make bread bowls at home. Most of these ingredients are already in your kitchen. Here’s what you’ll need:
Basic Ingredients:
- All-purpose flour (4 cups) – This forms the base of your dough. You can also use bread flour for a chewier texture.
- Warm water (1½ cups) – Helps activate the yeast.
- Active dry yeast (2¼ teaspoons) – The magic that makes the dough rise.
- Sugar (1 tablespoon) – Feeds the yeast and adds a subtle sweetness.
- Salt (1½ teaspoons) – Balances flavor.
- Olive oil (2 tablespoons) – Adds moisture and richness.
Optional Flavor Boosters:
- Garlic powder or Italian seasoning – Sprinkle a bit into your dough for an herby kick.
- Shredded cheese – Mix into the dough or sprinkle on top before baking.
- Cornmeal or semolina flour – For dusting the pan and getting that bakery-style crust.
Want to go the extra mile? Use high-quality flour or even mix in some whole wheat for a rustic twist. The beauty of bread bowls is that they’re super customizable to your taste.
Tools and Equipment Required
Making bread bowls doesn’t require a full-blown bakery setup. A few common kitchen tools are all you need to get that perfect round loaf with a golden crust.
Must-Have Tools:
- Large mixing bowl – For combining and proofing your dough.
- Wooden spoon or stand mixer with dough hook – To mix and knead.
- Baking sheet or pizza stone – A sturdy surface for baking.
- Sharp knife or kitchen scissors – For scoring the tops.
- Clean kitchen towel or plastic wrap – To cover the dough while it rises.
Nice-to-Have Extras:
- Bench scraper – Helpful for shaping dough.
- Pastry brush – To brush the tops with water or egg wash before baking.
- Instant-read thermometer – To check doneness (bread is done at 190-200°F internally).
Substitutes and Hacks:
No stand mixer? No problem—knead by hand. No pizza stone? Just preheat your baking sheet in the oven to mimic one. With a little creativity, you can work with what you have and still bake up stellar bread bowls.
Step-by-Step Instructions to Make Bread Bowls
Ready to get baking? Here’s how to make bread bowls from scratch—broken down step by step so you can follow along easily, even if it’s your first time baking bread.
Step 1: Preparing the Dough
Start by activating your yeast. In a small bowl, combine warm water (not hot—aim for around 105°F) and sugar, then sprinkle in the yeast. Let it sit for 5-10 minutes until it becomes foamy. This tells you the yeast is alive and ready to work.
In a large mixing bowl, combine the flour and salt. Make a well in the center, pour in the yeast mixture and olive oil, and stir everything together until it forms a sticky dough.
Pro tip: If your dough is too dry, add a tablespoon of water at a time. If it’s too wet, add a little more flour. You’re looking for a soft, pliable dough that holds together but isn’t sticking like crazy to your hands.
Step 2: Kneading and First Rise
Turn the dough out onto a floured surface and knead it for about 8-10 minutes (or use a mixer with a dough hook for 5-6 minutes). The dough should become smooth and elastic—this step builds the structure that will trap air bubbles and give your bread that nice chewy texture.
Once kneaded, place the dough in a lightly oiled bowl. Cover it with a towel or plastic wrap and let it rise in a warm spot for about an hour, or until it doubles in size.
Step 3: Shaping the Bread Bowls
After the dough has doubled in size, it’s time for some hands-on action—shaping those beautiful bread bowls. Gently punch down the dough to release the air. Transfer it to a lightly floured surface and divide it into 4 to 6 equal pieces, depending on how large you want each bread bowl to be.
Take each piece and form it into a tight, round ball. The key here is surface tension—tucking the dough under itself while rotating helps create a smooth, tight outer layer. This helps the bread hold its shape and rise evenly in the oven. If you’re not sure how to do it, think of it like pulling the sides toward the bottom, kind of like wrapping a gift tightly.
Place your shaped dough balls on a parchment-lined or cornmeal-dusted baking sheet, leaving enough space between each to allow for a second rise. Cover them loosely with a clean towel or plastic wrap and let them rise again for about 30-45 minutes. This step is important—it gives the dough a final puff before baking.
Optional tip: Right before baking, you can score the tops of each dough ball with a sharp knife or scissors to help control how they expand in the oven. Plus, it adds a nice artisan touch!
Step 4: Second Rise and Prepping for Baking
Now that your dough balls have risen again and are nice and puffy, it’s almost time to bake! Preheat your oven to 425°F (220°C) about 20 minutes before baking so it’s nice and hot when the dough goes in. A hot oven helps the bread develop that golden, crusty exterior.
If you want a glossy crust, lightly brush the tops with water or an egg wash (1 beaten egg mixed with a tablespoon of water). You could also sprinkle some flour or cornmeal on top for a rustic look.
To create steam—which helps make the crust extra crispy—place an oven-safe pan of water on the bottom rack of your oven while the bread bakes. Or, you can spritz the sides of the oven with water using a spray bottle just after putting the bread in.
Bake for 20-25 minutes, or until the tops are golden brown and the loaves sound hollow when tapped. If you’re using a thermometer, the internal temp should be around 190-200°F.
Let them cool on a wire rack before you attempt to hollow them out. It’s tempting, but cutting into hot bread can make the inside gummy instead of soft and fluffy.
Step 5: Baking the Bread Bowls
This step overlaps slightly with the previous one, but let’s talk specifically about the baking part in more detail—because it can make or break your bread bowl.
Once the loaves are in the oven, resist the urge to open the door constantly. Consistent heat is essential for proper oven spring (the rise that happens in the first 10 minutes of baking). The first half of baking sets the shape, while the second half builds the crust and color.
If your oven has hot spots, rotate the baking sheet halfway through to ensure even browning. If you notice your bread browning too quickly, loosely cover the tops with foil for the remaining bake time.
When they’re done, take them out and tap the bottom of a loaf—it should sound hollow. That’s a good sign your bread is cooked all the way through. Set the loaves on a wire rack and let them cool completely before slicing.
Freshly baked bread bowls should have a crisp, crackly crust and a soft, airy interior—perfect for holding hot, creamy soup without collapsing.
Hollowing Out and Serving Ideas
Once your bread bowls have cooled, it’s time to turn them into actual bowls! Take a sharp knife and cut a circle around the top of each loaf—about ½ inch from the edge. Think of it like carving a pumpkin, just smaller and tastier.
Gently remove the top (you can serve this as a “lid” or use it for dipping), and use your hands or a spoon to hollow out the inside, leaving about ¾ inch of bread around the sides and bottom. Don’t scoop too much—you want it thick enough to hold liquid without leaking.
Here’s where the fun begins: what you put inside your bread bowl is entirely up to you. Here are a few crowd-pleasing ideas:
Soups:
- Broccoli cheddar (a classic!)
- Creamy tomato basil
- Potato leek
- Clam chowder
- Loaded baked potato
Dips:
- Spinach and artichoke dip
- Buffalo chicken dip
- Chili cheese dip
- Queso fundido
Cold Fillings:
- Chicken salad
- Egg salad
- Cold pasta salad
You can even serve pasta or casseroles inside a bread bowl for a hearty twist. Want a dessert version? Try filling mini bread bowls with chocolate mousse or fruit salad.
And don’t forget the carved-out bread chunks! Toast them up and serve them on the side as dippers.
Tips for Perfect Bread Bowls Every Time
Making bread bowls from scratch can be super rewarding—but like any homemade bread project, a few hiccups can happen along the way. Here are some tried-and-true tips to make sure your bread bowls turn out bakery-quality every single time:
1. Don’t Rush the Rise
Let your dough rise properly. If you’re in a rush and try to speed it up with too much heat, you’ll risk killing the yeast or developing weak flavor. The first rise should at least double the dough’s size, and the second rise (after shaping) gives the final volume and softness.
2. Measure Flour Correctly
Too much flour leads to dry, dense bread. Instead of scooping with your measuring cup (which packs it down), spoon the flour into the cup and level it off. Better yet, use a kitchen scale for precise results.
3. Use Warm (Not Hot) Water
Hot water can kill your yeast. You’re aiming for water that’s warm to the touch—around 105-110°F is perfect for activating yeast without harming it.
4. Don’t Over-Knead or Under-Knead
Kneading develops the gluten, which gives bread its structure. Under-kneaded dough will fall flat, while over-kneaded dough becomes tough. Knead until the dough is smooth, elastic, and springs back when you press it.
5. Keep the Oven HOT
Bread needs an initial burst of heat (called oven spring) to rise properly. Preheat your oven thoroughly before baking, and use steam (via a pan of water or spray bottle) to get a crusty exterior.
6. Watch the Size
If your bowls are too small, they won’t hold much filling. Too large, and they may collapse under the weight of soup. A grapefruit-sized dough ball typically yields a great medium bread bowl.
7. Customize with Care
Adding too many mix-ins (like cheese or herbs) can weigh down the dough. If you’re adding extras, do so in moderation so you don’t affect the rise and texture.
With these tips in your back pocket, your bread bowls will come out warm, fluffy, and strong enough to hold the heartiest of soups.
Storage and Reheating Tips
Let’s be real—bread bowls are so good they rarely last more than a day or two. But if you’ve got leftovers or want to prep ahead, here’s how to store and reheat them like a pro.
How to Store Bread Bowls:
- Room Temperature: Once completely cooled, store the bread bowls in a paper bag or wrap loosely in foil. Keep them at room temp for up to 2 days.
- Freezing: Bread bowls freeze beautifully. Wrap them tightly in plastic wrap, then place in a freezer bag or airtight container. They’ll stay fresh for up to 2 months.
Tip: Don’t hollow out your bread bowls before freezing—do that after you thaw and reheat. This keeps the structure strong and avoids sogginess.
Reheating Instructions:
- Oven (Best Method): Preheat to 350°F. Place the thawed or room-temperature bread bowls directly on the oven rack or a baking sheet. Bake for 10-12 minutes until warm and crusty.
- Microwave (Quickest): Wrap the bread bowl in a damp paper towel and microwave for 20-30 seconds. This method softens the bread but won’t make the crust crispy.
- Toaster Oven: Great for smaller bread bowls or halves. Toast for 5-8 minutes until the inside is warm and the crust is crisp.
Once reheated, cut the top, hollow it out, and fill it with your favorite hot soup or creamy dip. Don’t forget to toast the top and inside scoops as croutons or dippers!
FAQs about Bread Bowl Recipe
Q1: What kind of bread is best for bread bowls?
A: Crusty, round loaves like sourdough or artisan boules work best. They hold their shape and don’t get soggy quickly.
Q2: Can I make bread bowls ahead of time?
A: Yes! You can bake them a day in advance. Just store in an airtight container and warm them slightly before serving.
Q3: How do I hollow out a bread bowl without tearing it?
A: Use a serrated knife to cut a lid, then scoop the insides gently with your hands or a spoon, leaving at least an inch of bread around the edges.
Q4: Can bread bowls go in the oven after filling?
A: Absolutely. If your soup or dip needs warming, just pop the filled bread bowl into the oven for 10–15 minutes at 350°F.
Q5: What can I do with the bread I scooped out?
A: Don’t waste it! Use it for croutons, bread pudding, stuffing, or even breadcrumbs.
Q6: Can I freeze bread bowls?
A: Yes, you can. Wrap tightly in plastic wrap and freeze for up to 3 months. Thaw and re-crisp in the oven when ready to use.
Conclusion
There’s something downright magical about a bread bowl. It’s not just a vessel—it’s a part of the meal. With its crispy golden shell and pillowy-soft interior, it adds a rustic, comforting touch to any dish you put inside it. From thick soups to cheesy dips, bread bowls transform simple ingredients into a show-stopping centerpiece.
The best part? Making them at home is totally doable. With a handful of everyday ingredients, a little time, and some baking confidence, you can whip up bakery-worthy bread bowls from scratch. Plus, it’s an experience—kneading the dough, shaping the loaves, and serving your favorite soup in a warm, edible bowl is both fun and satisfying.
So next time you’re craving something cozy, skip the store-bought stuff. Pull out your flour, roll up your sleeves, and create a meal that’s equal parts comfort food and edible masterpiece.