Boston Butt Recipe: Boston Butt, despite its name, doesn’t come from the rear end of the pig. It’s actually cut from the upper shoulder of the hog. This cut is rich in marbled fat and connective tissue, which makes it ideal for low and slow cooking methods. Whether you’re a barbecue enthusiast or a weekend cook trying your hand at something hearty, Boston Butt is a go-to choice for pulled pork that melts in your mouth.
This recipe is a detailed guide for beginners and experienced cooks alike. We’ll walk you through each step, so you can nail that perfectly tender, juicy Boston Butt every single time. The beauty of this dish is in its simplicity—good seasoning, the right cooking method, and patience are all you need to create magic.
Ingredients Needed
Before you even touch the meat, let’s make sure you’ve got everything ready. Here’s a list of ingredients you’ll need:
Basic Ingredients:
- 1 Boston Butt (5-8 lbs)
- 1/4 cup yellow mustard (binder)
- 1/2 cup BBQ rub (store-bought or homemade)
- Salt and black pepper
- Olive oil
Optional Ingredients for Extra Flavor:
- Garlic powder, onion powder, smoked paprika
- Apple cider vinegar (for spritzing)
- Brown sugar
- Liquid smoke (if not smoking)
For Serving:
- BBQ sauce
- Buns or tortillas
- Coleslaw
Stocking your pantry with these items beforehand ensures a smoother cooking experience. The dry rub is where you can personalize your flavor—whether you like it spicy, sweet, or smoky.
Preparing the Boston Butt
Choosing the Right Cut: Go for a bone-in Boston Butt if you can find it. The bone adds flavor and helps retain moisture. It should be well-marbled with a good fat cap on one side. Avoid pieces that are too lean or trimmed too much.
Trimming and Seasoning: Start by trimming off any excess fat from the meat, but don’t remove the entire fat cap—it adds flavor and keeps the meat juicy. Next, apply a thin layer of mustard or olive oil as a binder; this helps the seasoning stick better. Then coat the entire surface with your rub. Be generous—rub it into every crevice. If you have time, wrap it up and let it sit overnight in the fridge. This dry brining process enhances the flavor.
This prep stage is crucial. It’s where you build the foundation of taste that will carry through the entire cook. Take your time and do it right—it’s worth it.
Cooking Methods
You’ve got options when it comes to cooking Boston Butt. Here are three of the most popular:
1. Smoking: The most authentic method. Set your smoker to 225°F and use wood like hickory, apple, or pecan. Smoke the butt for 8-12 hours depending on its size. Spritz with apple cider vinegar every hour after the bark forms (about 3-4 hours in).
2. Oven-Roasting: Set your oven to 275°F. Place the seasoned butt in a roasting pan with a rack. Cover loosely with foil and cook for about 6-8 hours. Uncover in the last hour to crisp the bark.
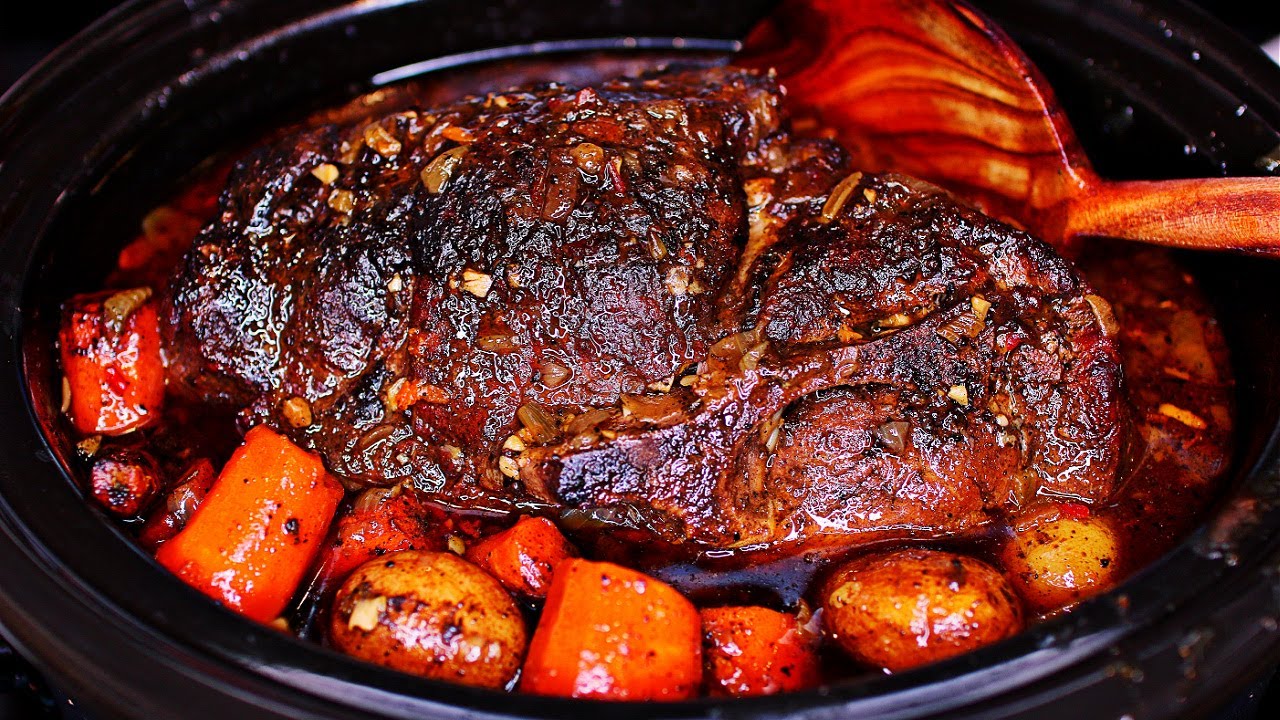
3. Slow Cooker: For an easier, hands-off method, place the butt in a slow cooker with a splash of apple juice or broth. Cook on low for 8-10 hours. While it won’t have a smoky flavor, it’ll still be melt-in-your-mouth delicious.
Each method has its pros. Smoking gives you that unbeatable bark and smoky flavor, while oven-roasting and slow cooking offer convenience and consistent results. Choose what works best for your schedule and gear.
Step-by-Step Cooking Instructions
Step 1: Prepping the Meat
First things first, your Boston Butt needs some attention before it hits the heat. Remove it from the fridge and let it sit at room temperature for at least 30-60 minutes. Cold meat straight from the fridge won’t cook evenly. While it’s warming up, use this time to pat it dry with paper towels—moisture is the enemy of a good bark.
Apply your binder—mustard or olive oil works best—and coat every inch of the meat. Then, get generous with the dry rub. Make sure it’s packed into every crack and crevice. Don’t be afraid to press it in firmly. If you have the time, let it sit overnight in the refrigerator. This allows the seasoning to penetrate deep into the meat.
Step 2: Seasoning and Marinating
Seasoning is the soul of your Boston Butt. A good rub will usually include a blend of salt, pepper, paprika, garlic powder, onion powder, cayenne, and brown sugar. For extra flavor, consider injecting the meat with a marinade of apple juice, cider vinegar, and spices. While this isn’t essential, it’s a great way to add depth, especially if you’re cooking in the oven or slow cooker.
Marinate for at least 4-6 hours if you can. Overnight is ideal. This long rest helps the flavors sink in and also begins tenderizing the meat, especially when using acidic ingredients like vinegar or citrus.
Step 3: Cooking Low and Slow
Whether you’re using a smoker, oven, or slow cooker, the magic of Boston Butt comes from low-and-slow cooking. For smoking, preheat your smoker to 225°F. Place the meat fat-side up and insert a meat thermometer into the thickest part—away from the bone.
Expect it to take around 1.5 to 2 hours per pound. So, an 8-pound butt will need 12-16 hours. Yes, it’s a long wait, but it’s totally worth it.
If you’re roasting, place it on a wire rack in a roasting pan. This allows airflow all around, which helps form that crusty bark. For slow cookers, just set it and forget it—use the low setting for best results.
Step 4: Checking for Doneness
You’ll hit a “stall” around 160°F—don’t panic. That’s normal. The internal temperature plateaus while moisture evaporates from the surface. To get through it, you can wrap the meat in foil or butcher paper (this is known as the “Texas Crutch”). This traps heat and moisture, pushing the internal temperature forward.
You’ll know it’s done when the internal temperature reaches 195°F to 205°F. At this point, the collagen has melted into gelatin, and the meat will practically fall apart. Don’t rush it. If you pull it too early, you’ll be left with chewy, tough pork.
Step 5: Resting and Pulling the Meat
This step is just as important as cooking. Once your Boston Butt hits that perfect temp, take it off the heat and wrap it in foil. Let it rest for at least an hour. This allows juices to redistribute and makes pulling it apart a breeze.
After resting, shred the meat using two forks or your hands (wear gloves—it’ll still be hot). Discard any large pieces of fat or gristle. What you’ll have now is rich, juicy, flavorful pulled pork ready to be devoured.
Tips for Perfect Boston Butt
- Monitor the Temperature: Invest in a good quality meat thermometer. Internal temperature is the key to doneness—not time.
- Be Patient: Don’t rush the cook. Low and slow is your best friend here.
- Keep It Moist: Spritz the meat every hour after the first few hours of cooking to prevent it from drying out.
- Don’t Skip the Rest: Resting lets juices reabsorb, making the meat more tender and flavorful.
- Wrap at the Stall: If you’re short on time, wrapping in foil can help push through the dreaded stall period without sacrificing moisture.
Serving Suggestions
Now that your Boston Butt is cooked to perfection, how should you serve it? Here are a few tasty ideas:
1. Pulled Pork Sandwiches:
- Load it onto a toasted bun.
- Add a drizzle of your favorite BBQ sauce.
- Top with creamy coleslaw for crunch.
2. Boston Butt Tacos:
- Use warm corn tortillas.
- Add pulled pork, avocado slices, pickled onions, and a squeeze of lime.
3. Loaded Nachos:
- Layer tortilla chips with pulled pork, cheese, jalapeños, and beans.
- Bake until melted and top with sour cream and salsa.
4. BBQ Pizza:
- Use pulled pork as a topping on homemade or store-bought pizza dough.
- Add mozzarella, onions, and a swirl of BBQ sauce.
5. Pork Mac & Cheese:
- Mix pulled pork into creamy mac and cheese.
- Top with breadcrumbs and bake for a crispy finish.
Serving is where the real fun begins. Get creative and let the flavors shine in multiple dishes.
Storage and Reheating Tips
After spending hours perfecting your Boston Butt, you’ll likely have leftovers—great news, because it reheats beautifully and the flavors often deepen overnight. But to keep it tasting just as delicious the next day (or even the next week), you need to store and reheat it properly.
Storing Your Leftovers:
- Refrigeration: Place the pulled pork in an airtight container or wrap it tightly in foil. Store in the refrigerator for up to 4-5 days.
- Freezing: Boston Butt freezes well. Portion it into freezer-safe bags, squeeze out the air, and freeze for up to 3 months. Label the bags with the date so you don’t lose track.
Make sure to let the meat cool to room temperature before storing it. Putting hot meat directly into the fridge or freezer can cause condensation, which leads to sogginess and potentially unsafe bacterial growth.
Reheating Without Losing Moisture:
Reheating meat can be tricky—do it wrong, and you’re left with dry, chewy pork. Here’s how to keep it juicy:
- Oven Method: Preheat the oven to 250°F. Add a bit of apple juice or broth to the meat and cover with foil. Warm for about 20–30 minutes until it reaches a safe internal temp (165°F).
- Stovetop: Place the pork in a skillet with a splash of liquid. Heat on medium-low, stirring occasionally, until warmed through.
- Microwave: Only use this if you’re in a rush. Cover the pork with a damp paper towel and microwave in 30-second intervals, stirring in between.
- Sous Vide (for pros): If you have a sous vide setup, it’s the best method for even reheating without drying out. Seal the meat in a bag and heat in water at 165°F for 45 minutes.
Always aim to reheat only what you’ll eat. Constantly reheating and cooling meat will reduce its quality and freshness over time.
Common Mistakes to Avoid
Even seasoned cooks make slip-ups now and then. Here are some of the most common Boston Butt mistakes and how to avoid them:
1. Cooking Too Fast: Trying to crank up the heat to speed up the process? Big mistake. The connective tissue in Boston Butt needs low, slow heat to break down properly. Fast cooking equals tough meat.
2. Skipping the Thermometer: Guessing doneness based on time is a gamble. Use a meat thermometer to know exactly when your pork is ready (195°F–205°F for pulling).
3. Not Letting It Rest: Pulling the meat straight from the heat and tearing into it immediately is tempting—but resist. Resting for at least an hour allows juices to redistribute, making every bite more flavorful.
4. Under-seasoning: Boston Butt is thick and meaty—it needs a robust rub to match. Don’t be shy with your spices. And if possible, let it marinate overnight.
5. Forgetting the Spritz: When smoking or roasting, spritzing with apple cider vinegar or juice keeps the meat moist and enhances the bark. Start around the 3-hour mark and continue hourly.
6. Using the Wrong Wood: If you’re smoking, stick with fruitwoods like apple, cherry, or hickory. Too much mesquite can overpower the pork’s natural flavors.
Avoid these errors, and you’ll be well on your way to barbecue glory.
FAQs about Boston Butt Recipe
What is Boston Butt?
Despite the name, Boston butt is actually a cut from the upper part of the pork shoulder. It’s well-marbled with fat, making it ideal for slow cooking, roasting, or smoking.
Is Boston Butt the same as pork shoulder?
Boston butt is a part of the pork shoulder. The shoulder is divided into two cuts: the Boston butt (upper portion) and the picnic shoulder (lower portion). The butt is more tender and preferred for pulled pork recipes.
Should I cook Boston Butt fat side up or down?
For best results, cook Boston butt fat side up. This allows the fat to slowly baste the meat during cooking, keeping it juicy and flavorful.
What’s the best internal temperature for Boston Butt?
For pull-apart tenderness, cook Boston butt to an internal temperature of 195°F to 205°F. This breaks down the connective tissues, resulting in perfectly tender meat.
Can I cook Boston Butt in an oven instead of a smoker?
Absolutely! Boston butt can be roasted in the oven at a low temperature (around 250°F to 300°F) for several hours until it reaches the desired tenderness.
How long should I rest the pork after cooking?
Let the cooked Boston butt rest for 20–30 minutes before slicing or shredding. This helps redistribute the juices and keeps the meat moist.
Can I freeze leftover Boston Butt?
Yes! Store cooled leftovers in an airtight container or freezer bag. It can be frozen for up to 3 months and reheated when ready to enjoy again.
Conclusion
Boston Butt isn’t just another pork cut—it’s the heart of soul-satisfying barbecue. Whether you smoke it traditionally, slow cook it for simplicity, or oven-roast it indoors, the key is low and slow. With the right seasoning, a little patience, and proper technique, you can create fall-apart tender pork bursting with flavor.
It’s a recipe that rewards time and care with incredible results—rich, smoky, and versatile enough to use in dozens of ways. Perfect for gatherings, meal prepping, or just a weekend treat, Boston Butt is more than a meal—it’s a celebration of cooking.
So, get your apron on, prep that pork, and treat yourself to one of the most satisfying cooking experiences you’ll ever have.