Bone Stock Recipe: Ever tasted a soup that felt like a warm hug from the inside out? That, my friend, was probably made with a rich, slow-simmered bone stock. Bone stock is one of those old-school kitchen staples that your grandma swore by—and guess what? She was absolutely right. This golden liquid isn’t just flavorful; it’s also loaded with nutrients and packed with body-loving goodness. But what really is bone stock, and how’s it different from your average broth?
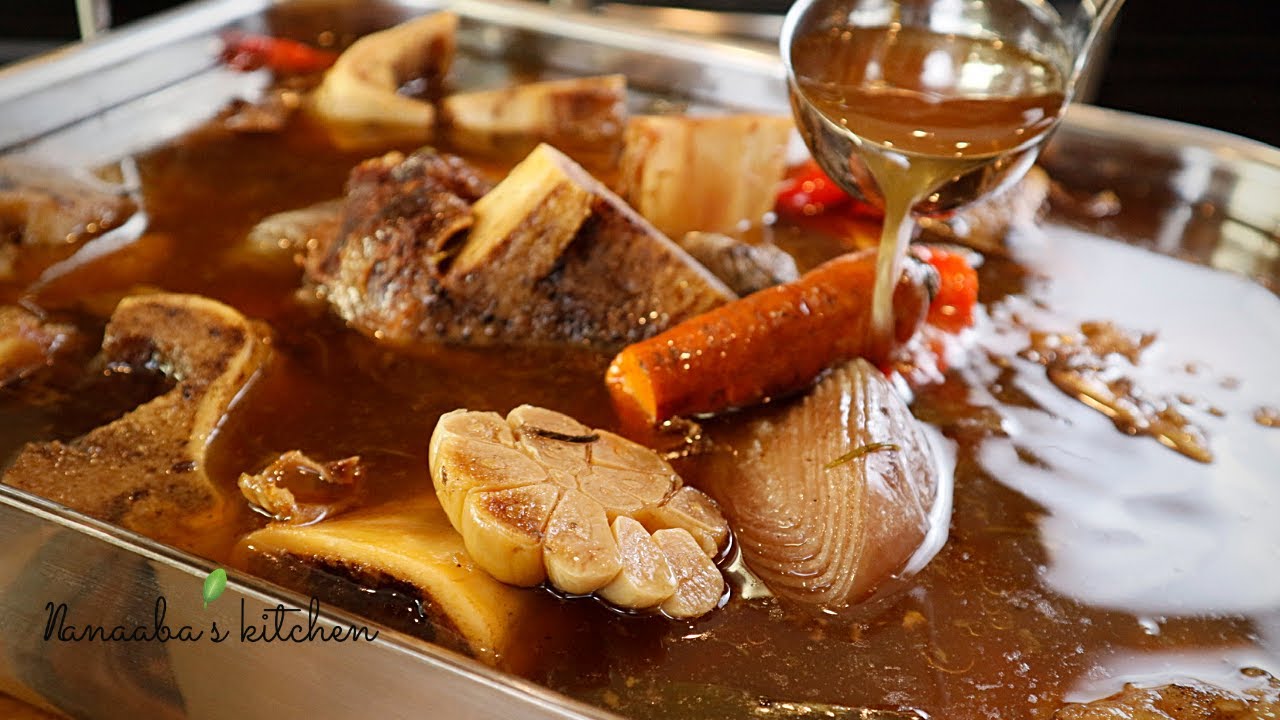
Let’s break it down. Bone stock is made by simmering bones (often roasted) along with aromatics and veggies for hours—sometimes even over 24 hours. This slow extraction process draws out minerals, collagen, and marrow, creating a nutrient-dense liquid that’s both healing and delicious. Broth, on the other hand, is usually made by simmering meat, not bones, and typically for a shorter time. Broth has more flavor but less nutrition; bone stock has both if done right.
So why should you care? Because once you learn how to make your own bone stock, you’ll never go back to those store-bought cartons again. Trust me, your soups, risottos, gravies, and even mashed potatoes will thank you.
Ready to get started? Let’s dive into the heart of what makes this magical elixir tick.
Benefits of Homemade Bone Stock
Let’s talk about why you should be making bone stock at home—besides just sounding like a total kitchen wizard. First off, it’s incredibly nutrient-rich. We’re talking about minerals like calcium, magnesium, and phosphorus—all of which come straight from those simmered-down bones. Plus, when you cook the bones long enough, they release collagen, which turns into gelatin in the stock. That’s the stuff that gives bone stock its rich, silky texture and helps support joint health, skin elasticity, and even gut repair.
Another major benefit? It’s super versatile. You can use bone stock as a base for soups, stews, sauces, gravies, and even as the cooking liquid for rice and grains. It adds that deep umami flavor that water or store-bought broth just can’t deliver.
And let’s not forget—making your own bone stock is a great way to reduce food waste. Got leftover chicken carcass or beef bones from last night’s roast? Don’t toss ‘em. Toss ‘em into a pot instead. It’s the ultimate way to stretch your grocery dollar while eating better.
Still not convinced? Some people swear by bone stock as a remedy for colds, flu, and even hangovers. While the science is still out on that, it certainly doesn’t hurt to have a steaming mug of warm stock when you’re feeling under the weather.
Types of Bones to Use
The kind of bones you use can make or break your stock—literally and figuratively. Each type of bone brings a different flavor profile and nutrient content. Here’s a quick breakdown:
Chicken Bones
These are light and cook fairly quickly (6–12 hours). Use carcasses, wings, feet (they add tons of gelatin), and necks.
Beef Bones
Great for rich, hearty stock. Look for knuckles, shanks, and marrow bones. These require longer cooking (12–24+ hours) to break down.
Pork Bones
These give a slightly sweet flavor and are excellent in Asian-style stocks. Use neck bones, hocks, or feet.
Fish Bones
Light and fast-cooking (1–2 hours). Ideal for seafood-based soups. Use heads and spines, but avoid oily fish like salmon—they can turn bitter.
Pro Tip:
Always mix joint bones (which are rich in collagen) with meaty bones (which offer flavor) for the best of both worlds.
List of Ingredients You’ll Need
Before we roll up our sleeves and get cooking, let’s make sure you’ve got everything you need. The beauty of bone stock is that it’s pretty forgiving, so you can work with what you have. But here’s a solid base:
Essential Ingredients:
- Bones: 2-4 lbs (chicken, beef, pork, or a mix)
- Water: Enough to cover the bones by 2 inches
- Apple Cider Vinegar: 2 tablespoons (helps draw minerals out of bones)
- Salt: To taste (or add after cooking to avoid oversalting)
Aromatic Vegetables:
- 2 carrots, roughly chopped
- 2 celery stalks, chopped
- 1 onion, quartered (leave the skin on for color)
- 2-4 garlic cloves, smashed
Optional Flavor Enhancers:
- Bay leaves
- Fresh herbs (thyme, parsley, rosemary)
- Black peppercorns
- Ginger (great for digestion)
- Leek tops or fennel fronds
Optional Additions for Extra Gelatin:
- Chicken feet
- Beef knuckles
- Pig’s feet
Remember, this isn’t a strict recipe. You can get creative, use up your veggie scraps, or adapt the flavor profile depending on how you plan to use the stock.
Tools and Equipment Needed
Alright, before you start tossing bones into a pot, let’s talk gear. You don’t need a fancy chef’s kitchen to make great bone stock, but having the right tools makes the process smoother, safer, and way less messy. Trust me, you’ll thank yourself later.
1. Large Stockpot
This is your MVP. Go for at least an 8-quart pot. Stainless steel or enameled cast iron works best. Make sure it’s deep enough to hold the bones, veggies, and water with some room to spare—you don’t want this boiling over on your stove.
2. Slow Cooker (Optional)
Perfect for “set-it-and-forget-it” bone stock. You can simmer it overnight or while you’re at work. It’s energy-efficient and ideal for people who don’t want to babysit a pot for 12+ hours.
3. Pressure Cooker or Instant Pot (Optional)
If you’re short on time, pressure cooking is a lifesaver. You can get decent bone stock in just 2–3 hours, with most of the nutrients and flavor still intact.
4. Strainer or Cheesecloth
When you’re done simmering, you’ll want to strain the liquid. Use a fine-mesh sieve, colander, or cheesecloth to remove all the bits. Trust me, nothing ruins a silky stock like a stray bone shard.
5. Tongs and Ladle
Tongs make it easier to handle hot bones, and a ladle is essential for skimming fat and transferring stock into containers without making a mess.
6. Storage Containers
Use glass jars, mason jars, or BPA-free plastic containers for storage. You can also freeze in silicone molds or ice cube trays for easy portioning.
7. Thermometer (Optional)
Want to be extra careful? A food thermometer helps you cool the stock to a safe temperature quickly before storing.
Having the right setup will save you a ton of frustration and make you feel like a pro in your own kitchen. It’s not about having the fanciest gadgets—it’s about having the right ones for the job.
Preparing the Bones
Before we dive into the actual cooking process, let’s talk prep work. You can’t just dump raw bones in water and expect magic to happen. Well, technically you can, but you’ll get meh results. Properly preparing the bones gives you a richer, cleaner, more flavorful stock. Here’s how to do it right:
1. Roasting the Bones (Highly Recommended)
Roasting is the secret sauce for flavor. It caramelizes the meat and fat stuck to the bones, adding depth and richness.
How to Roast:
- Preheat oven to 425°F (220°C).
- Spread bones in a single layer on a baking sheet.
- Roast for 30–45 minutes, turning once halfway through.
- You want them deep golden-brown, not burned.
2. Blanching the Bones (Especially for Beef or Pork)
This step helps remove impurities, blood, and that weird foamy scum that floats to the top during simmering. It’s especially useful for a clearer stock.
How to Blanch:
- Place bones in a large pot.
- Cover with cold water and bring to a boil.
- Boil hard for 10–15 minutes.
- Drain and rinse bones under cold water to remove residue.
Pro tip: You can do both roasting and blanching. Roast first for flavor, then blanch to clean. It’s an extra step, but if you want ultra-clean, rich stock, it’s worth it.
Step-by-Step Guide to Making Bone Stock
Here we go—the heart of this whole guide. You’ve got your bones, veggies, and tools all lined up. Now it’s time to transform those scraps into liquid gold. Follow these steps closely, and you’ll have a stock that even chefs would envy.
Step 1: Gather Ingredients and Prep Bones
Make sure all your bones are prepped (roasted, blanched, or both). Chop your aromatics—carrots, celery, onions, garlic—into large chunks. No need to peel the carrots or onions (unless they’re dirty), just give them a good wash.
Step 2: Add Bones and Vegetables to Pot
Place bones at the bottom of your stockpot. Add the chopped vegetables on top. Toss in garlic, herbs, bay leaves, and any spices you’re using. Don’t overdo the seasoning—stock is best when it’s neutral and can be seasoned later.
Step 3: Add Water and Vinegar
Pour in cold water until everything is covered by about 2 inches. Add 1–2 tablespoons of apple cider vinegar. This is the secret weapon for pulling minerals out of the bones. Let it sit for 20–30 minutes before heating—this “soaking” time makes a difference.
Step 4: Bring to a Boil, Then Simmer
Crank up the heat and bring everything to a gentle boil. You’ll start seeing foam and scum rise to the top. That’s normal. Once boiling, reduce the heat immediately to a bare simmer. It should be just a few bubbles now and then—not a rolling boil.
Step 5: Simmering Time (By Bone Type)
- Chicken bones: 6–12 hours
- Beef or pork bones: 12–24+ hours
- Fish bones: 1–2 hours max
The longer it simmers, the more nutrients and flavor you extract. Some people simmer beef bones for 48 hours, topping off with water as needed.
Step 6: Skimming Impurities
During the first couple of hours, skim off the scum and foam that floats to the top using a ladle or spoon. This helps keep your stock clear and clean-tasting.
Step 7: Straining the Stock
Once the simmering time is done, remove the pot from heat. Use a fine-mesh strainer or cheesecloth to strain the liquid into a large bowl or another pot. Discard the solids—they’ve done their job.
Step 8: Cooling and Storing
Cool your stock quickly to avoid bacteria growth. The best way? Fill your sink with ice water and nestle the pot into it. Stir occasionally until it’s cool enough to refrigerate. Store in the fridge (up to 5 days) or freeze (up to 6 months).
How Long to Simmer Bone Stock
Ah, the simmering question—literally. How long should you simmer your bone stock? The answer depends on the type of bones you’re using and what you’re trying to get out of them. You’re not just cooking here—you’re extracting. Nutrients, flavor, collagen… it all takes time.
Minimum vs. Ideal Simmering Times
Here’s a general rule of thumb:
- Chicken Bones: Minimum 6 hours, ideal 8–12 hours
- Beef Bones: Minimum 12 hours, ideal 18–24 hours
- Pork Bones: Minimum 8 hours, ideal 12–16 hours
- Fish Bones: 1–2 hours max
Fish bones are delicate, and cooking them too long will turn your stock bitter and cloudy. On the other hand, beef and pork bones need the long haul. That’s when the magic happens—the collagen breaks down, the marrow dissolves, and the minerals seep out.
When is it “Done”?
The stock is ready when:
- It has a deep, rich aroma
- The bones look brittle and broken down
- The water level has reduced by about 20–30%
- It feels slightly sticky to the touch (gelatin!) when cool
Remember, longer isn’t always better. If you cook too long and don’t top up with water, it might reduce too much and become bitter or overly concentrated.
Pro Tips for Simmering:
- Keep the heat low. You want tiny bubbles, not a roaring boil.
- Add water as needed to keep bones submerged.
- Cover with a lid slightly ajar to reduce evaporation but allow steam to escape.
This isn’t just cooking—it’s a slow alchemy. Be patient, let it ride, and your reward will be a pot full of gold.
Flavor Tips and Tricks
So you’ve got the bones, you’ve got the simmer—now let’s talk flavor. This is where your bone stock goes from “meh” to “whoa, what is that deliciousness?” The truth is, bone stock can be as plain or as powerful as you want. Here’s how to bump up the flavor.
1. Roast the Bones (Again, Yes!)
We already talked about this, but it’s worth repeating: roasting = flavor. That browned, caramelized goodness is pure umami. Don’t skip this step if you want your stock to taste rich and meaty.
2. Don’t Forget the Veggies
Classic aromatics like onion, carrot, and celery form a solid base. But you can also toss in:
- Leek tops
- Garlic
- Mushrooms (for earthy depth)
- Ginger (especially in Asian-style broths)
- Fennel or parsnips
Avoid starchy vegetables like potatoes—they’ll cloud your stock and turn it into mush.
3. Spice and Herb Enhancers
Keep it subtle. You’re building a base, not making a soup (yet). Add during the last few hours:
- Bay leaves
- Black peppercorns
- Fresh thyme or rosemary
- Parsley stems
- Star anise or cloves (for exotic flavors)
4. Add Salt Later
Salting your stock while it simmers is a rookie mistake. As the stock reduces, the salt concentrates. Wait until the end—or better yet, salt when you use it in a recipe.
5. Want a Boost? Add Umami Bombs
For extra depth, try:
- A splash of soy sauce or fish sauce
- A piece of kombu (dried seaweed)
- Dried mushrooms
- Tomato paste (small spoon for sweetness and body)
Think of your stock as a symphony—every ingredient plays a note. Don’t overwhelm it. Keep things balanced, and you’ll have a masterpiece.
Common Mistakes to Avoid
Even though bone stock is simple in theory, there are a few sneaky mistakes that can mess up your liquid gold. Here’s what not to do.
1. Boiling Instead of Simmering
This is the #1 sin of stock-making. A rolling boil breaks down fats and proteins too aggressively, making your stock cloudy, greasy, and bitter. Keep it low and slow—gentle bubbles are your best friend.
2. Not Roasting or Blanching Bones
If you skip these prep steps, expect a weaker flavor and a murky result. Roasting adds depth; blanching removes impurities. Do one or both depending on your goal.
3. Using Too Much Water
Over-diluting your stock with water will leave it bland. Only use enough to cover the bones by about 2 inches. As it simmers, the flavors will concentrate.
4. Cooking Too Short or Too Long
Too short? You won’t extract enough collagen or flavor. Too long without topping off water? You’ll burn the bottom or make the stock bitter. Find that sweet spot.
5. Forgetting to Skim the Scum
That gray foam that rises in the first hour? It’s made of coagulated proteins and impurities. Skim it off regularly with a spoon or ladle for a cleaner, tastier stock.
6. Adding Too Many Strong Flavors
Avoid overpowering ingredients like cabbage, broccoli, or excessive garlic. They can make your stock funky and hard to use in other dishes.
7. Storing It Wrong
Hot stock straight into the fridge? Bad move. You risk bacteria growth. Always cool stock quickly in an ice bath before refrigerating or freezing.
Avoid these common traps and you’ll be sipping on the smoothest, silkiest, most flavorful bone stock imaginable.
How to Store Bone Stock
Made a big batch? Perfect! Bone stock stores beautifully, and if you do it right, you’ll always have a magic potion on hand when cooking. Let’s cover your options.
Refrigeration (Short-Term)
- Cool the stock quickly by placing the pot in a sink full of ice water.
- Transfer into glass jars or airtight containers.
- Label with date.
- Keeps for 4–5 days in the fridge.
Pro Tip: You’ll notice a thick layer of fat on top after it chills. That’s good! It acts as a natural seal and preserves freshness. Leave it on until you’re ready to use.
Freezing (Long-Term)
- Pour into freezer-safe containers, leaving 1 inch of headspace (stock expands as it freezes).
- You can also use silicone molds or ice cube trays for small, quick-use portions.
- Once frozen, transfer cubes into zip-top bags.
- Keeps for up to 6 months.
Pro Tip: Freeze in 1-cup or 2-cup portions for easy recipe use. No more guessing!
Shelf-Stable Options (Advanced)
If you’re really serious, you can pressure-can bone stock for shelf stability. But this requires a proper pressure canner, not just a boiling water bath. It’s worth exploring if you make stock often.
Proper storage keeps your stock fresh, safe, and always ready to add richness to any dish.
Creative Uses for Bone Stock
Okay, so now you’ve got a batch of beautifully made, flavorful bone stock—now what? Sure, it’s great for soups, but that’s just the tip of the iceberg. Bone stock is one of the most versatile ingredients in the kitchen, and once you start using it creatively, you’ll never want to be without it.
1. Soups and Stews
This one’s a given. Use bone stock as the base for:
- Chicken noodle soup
- Beef stew
- French onion soup
- Ramen or pho
- Vegetable soups
It provides a deep, rich foundation that water or boxed broth just can’t match.
2. Cooking Grains
Want fluffier rice with more flavor? Replace water with bone stock. It works wonders with:
- White or brown rice
- Quinoa
- Couscous
- Bulgur wheat
- Risotto (game-changer!)
It infuses the grains with a subtle meaty richness that elevates any side dish.
3. Sauces and Gravies
Bone stock is the perfect liquid for deglazing a pan or making a reduction sauce. Whether it’s a creamy mushroom sauce or a pan gravy for roasted meats, it adds a savory depth that water or wine alone can’t provide.
4. Braising Liquid
Slow-cook meats or veggies in bone stock for unbeatable tenderness and taste. Think pot roasts, braised short ribs, or even braised cabbage.
5. Sipping Broth
Heat it, season it lightly with salt and herbs, and sip it straight from a mug. Great as a warming drink on cold days or as a pick-me-up when you’re under the weather.
6. Stir-Fry and Saute Base
Splash a bit into your pan while stir-frying vegetables or sautéing onions and garlic—it lifts all those caramelized bits and adds serious flavor to your dish.
7. Poaching Liquid
Poach eggs, chicken, or fish in bone stock instead of water for extra flavor and tenderness.
8. Mashed Potatoes & Veggies
Instead of just milk or cream, add a splash of bone stock to mashed potatoes, cauliflower mash, or any purée. It brings creaminess and a savory kick.
Once you get used to having bone stock around, you’ll start seeing opportunities to use it everywhere. It’s like having a flavor amplifier on standby.
Bone Stock vs. Bone Broth
They sound almost identical, right? But there are a few key differences that are worth pointing out, especially if you’re trying to pick the right one for your health or cooking needs.
1. Ingredients
- Bone Stock: Uses bones, often with some meat still on them. Typically includes veggies and herbs. Collagen-rich parts like knuckles and feet are key.
- Bone Broth: Also made from bones but often includes more meat. Sometimes referred to as a cross between stock and broth.
2. Cooking Time
- Bone Stock: Long simmer time—8 to 24+ hours depending on the bones.
- Bone Broth: Often simmered for similar lengths if it’s the health-focused kind, but traditional broths simmer for 1–2 hours.
3. Texture and Appearance
- Bone Stock: Should gel when chilled, thanks to the collagen. Rich, often darker.
- Bone Broth: May be more liquidy and clear. Less likely to gel unless bones are heavily used.
4. Purpose
- Bone Stock: Base for cooking—soups, sauces, braises. Rich and savory but not always seasoned.
- Bone Broth: Often sipped straight as a drink. Usually lightly seasoned with salt, herbs, or even spices.
So, while the lines can blur (especially in marketing), if you’re after something to sip for health benefits—go with a properly made bone broth. But if you’re cooking and want that robust base, bone stock is your kitchen hero.
Nutritional Information of Bone Stock
You’ve probably heard bone stock hyped as a superfood—and for good reason. This stuff is loaded with nutrients, especially when you make it the traditional, slow-simmered way. Let’s break it down:
1. Collagen and Gelatin
Collagen from bones and connective tissues breaks down into gelatin when cooked. This gelatin:
- Improves gut health by restoring the gut lining
- Helps with joint support
- Aids in skin elasticity and hydration
- Supports hair and nail growth
Ever notice your stock turns into jelly in the fridge? That’s a good sign—it means it’s full of gelatin!
2. Amino Acids
Bone stock contains several important amino acids, including:
- Glycine: Calming to the nervous system; may improve sleep and cognitive function.
- Proline: Supports collagen production.
- Glutamine: Key for gut health and immune function.
- Arginine: Helps with inflammation and circulation.
3. Minerals
Slow-simmered bones release minerals like:
- Calcium
- Magnesium
- Phosphorus
- Potassium
Though bone stock isn’t a massive source of these minerals, every little bit helps—especially when it’s so tasty.
4. Low in Calories
Despite being nutrient-dense, bone stock is relatively low in calories (especially when skimmed of fat). This makes it a great option for those on low-calorie or fasting-style diets.
5. Hydration and Electrolytes
Sipping bone stock can help you stay hydrated and replenish electrolytes—especially helpful during illness or after workouts.
It’s like a multivitamin, but warm, comforting, and delicious.
FAQs about Bone Stock Recipe
1. Can I reuse the bones after making stock?
Yes, you can reuse bones, especially if they still feel solid after the first simmer. They’re called “second-run bones” and can be used for another (lighter) batch. Just know the second stock will be weaker in flavor and gelatin.
2. Is bone stock safe for dogs?
Generally, yes! Plain bone stock (no onions, garlic, or salt) is great for dogs. It can support joint and digestive health. Just be sure there are no added ingredients that are toxic to pets.
3. How do I know if my stock has gone bad?
Trust your senses. If it smells sour, off, or “funky,” toss it. Also, check for mold or unusual texture after refrigeration. Stock should last 4–5 days in the fridge.
4. Can I make bone stock in an Instant Pot?
Absolutely. It’s a time-saver! Set the pressure cooker to 2 hours on high for beef bones or 1 hour for chicken. Let it release pressure naturally for best results.
5. What vegetables should I avoid in bone stock?
Skip cruciferous veggies like broccoli, cauliflower, and Brussels sprouts—they turn bitter. Also avoid starchy ones like potatoes, which can make the stock cloudy and gluey.
Conclusion
So there you have it—your ultimate, no-BS guide to making bone stock from scratch. Whether you’re doing it for the health perks, the flavor boost, or just because you want to feel like a kitchen badass, homemade bone stock is 100% worth your time.
It’s a recipe that connects us to traditions, stretches our groceries, reduces waste, and makes even the simplest meals taste gourmet. The beauty of it? There’s no one perfect way. It’s flexible, forgiving, and fully customizable.
Don’t be intimidated by the long simmer times or the big pot. Just start small. Toss some bones and veggies into a pot, let it do its thing, and before you know it, you’ll have a pot full of nutrient-rich, flavor-packed magic.
Once you’ve tasted your own homemade bone stock, you’ll never look at store-bought broth the same way again.