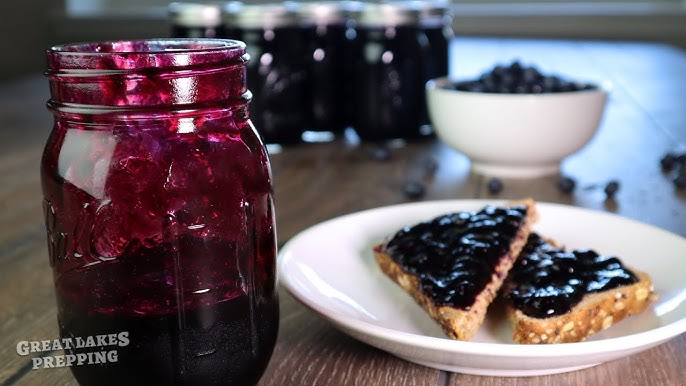
Blueberry Preserves Recipe: Ever tasted a spoonful of homemade blueberry preserves on warm toast or drizzled over pancakes? If not, you’re in for a treat. Blueberry preserves aren’t just a breakfast staple—they’re a little jar of summer you can enjoy all year round. Whether you’re a kitchen newbie or a home-cooking enthusiast, making your own blueberry preserves is surprisingly easy and ridiculously rewarding.
Forget the overly processed store-bought stuff. Homemade blueberry preserves are all about real fruit flavor, just the right amount of sweetness, and zero artificial ingredients. With a few ingredients, a pot, and a little time, you can whip up a batch that’ll wow your taste buds and impress anyone lucky enough to try it.
Let’s dive into everything you need to know, from ingredients to canning techniques, with a fully detailed, foolproof guide. Ready? Let’s get cooking!
What Are Blueberry Preserves?
Blueberry preserves are a type of fruit spread that sits somewhere between jam and jelly. But what’s the difference?
- Jelly is made from fruit juice and is smooth.
- Jam includes crushed fruit and is thick but spreadable.
- Preserves, on the other hand, contain whole or large pieces of fruit suspended in a sweet syrup or gel. This gives them a chunkier, more rustic texture—and a punch of real fruit flavor in every bite.
Blueberry preserves in particular are known for their vibrant color, bold flavor, and versatility. You can spread them on toast, swirl them into yogurt, or even use them as a glaze for meat. They’re naturally high in antioxidants and have a nice balance of sweet and tangy, making them a go-to in many kitchens.
Benefits of Making Blueberry Preserves at Home
Why go the DIY route when the grocery store shelves are full of options? Because nothing compares to homemade. Here’s why:
- Freshness: You control the ingredients—no high-fructose corn syrup, no preservatives, just pure fruit goodness.
- Customization: Want it less sweet? Add a spice or herb? Done. You’re the boss.
- Cost-effective: When blueberries are in season or on sale, you can make batches for a fraction of store prices.
- Satisfying and fun: There’s something magical about sealing up your own jars and stocking your pantry with creations you made yourself.
- Gifting potential: A cute jar of blueberry preserves makes a thoughtful, delicious gift.
If you’ve never made preserves before, don’t worry—it’s simpler than baking a cake. All you need is a bit of time, patience, and the right ingredients.
List of Ingredients You’ll Need
Before you get started, here’s your shopping list:
Basic Ingredients:
- 4 cups fresh or frozen blueberries – Washed and sorted. Frozen works great if fresh berries aren’t in season.
- 2 cups granulated sugar – You can adjust to taste or substitute with alternatives like honey or agave.
- 2 tablespoons lemon juice – Fresh-squeezed is best. It helps the preserve set and balances sweetness.
Optional Ingredients:
- 1 package liquid or powdered pectin – For quicker setting (not required if you’re doing a traditional slow-cook).
- 1 teaspoon vanilla extract or cinnamon – For added depth and warmth.
- Lemon zest or fresh mint leaves – To elevate the flavor.
Always try to source the best ingredients you can. Organic blueberries and raw sugar make a noticeable difference in flavor. If you’re doing a low-sugar or sugar-free version, look for specialized pectin designed for that purpose.
Kitchen Tools and Equipment
Making preserves doesn’t require fancy gear, but a few essentials will make your job easier:
- Large saucepan or Dutch oven – Stainless steel or enameled cast iron is ideal.
- Wooden spoon or silicone spatula – For stirring without damaging your pot.
- Canning jars with lids and bands – Use 4 oz, 8 oz, or 16 oz mason jars depending on your preference.
- Jar lifter and canning funnel – Helps you fill and handle hot jars safely.
- Ladle – Makes transferring preserves from pot to jar easy.
- Thermometer (optional) – Helps monitor when the preserve reaches gel stage (around 220°F or 104°C).
- Clean towels and paper towels – For wiping rims and handling spills.
Prep everything ahead of time so you’re not scrambling while your preserves are bubbling away. Having everything laid out “mise en place” style will make the process smooth and enjoyable.
How to Choose the Best Blueberries
Let’s talk blueberries—because quality in, quality out. The better your berries, the better your preserves will be.
Fresh vs. Frozen
Fresh blueberries are ideal, especially if they’re in season. They offer vibrant flavor, a firmer texture, and less water content. However, don’t stress if you can’t find fresh berries—frozen blueberries are an excellent alternative and often picked at peak ripeness.
What to Look For
When selecting fresh blueberries, here’s what to check:
- Color: Deep blue to almost black. A silvery-white “bloom” on the skin is a natural protective coating—totally normal and a good sign.
- Firmness: Gently squeeze a berry. It should be plump and slightly firm, not mushy.
- Avoid: Wrinkled, moldy, or overly soft berries. They won’t hold up during cooking and may add off flavors.
If you’re picking your own berries or buying from a local farmer’s market, even better. You’ll get them ultra-fresh and likely pesticide-free.
Cleaning and Prepping
- Rinse thoroughly under cold water in a colander.
- Remove stems and leaves, and discard any shriveled or squished berries.
- Dry gently on paper towels or a clean kitchen towel before cooking. Extra moisture can dilute the preserves and extend cooking time.
Prepping your fruit properly makes a huge difference in flavor and texture, so take your time here—it’s worth it.
Preparing Your Workspace and Sterilizing Jars
Sterilization isn’t just a fancy step—it’s critical for food safety and shelf stability. Even a tiny amount of bacteria or residue can ruin your hard work. Luckily, sterilizing jars is easy and quick.
Why Sterilization Matters
When sealing hot preserves in jars for long-term storage, especially without refrigeration, sterilization:
- Prevents mold and bacterial growth
- Ensures your preserves last 6 months to a year (or more)
- Maintains freshness and taste
How to Sterilize Jars:
Boiling Water Method:
- Place jars and lids in a large pot.
- Cover completely with water and bring to a rolling boil.
- Boil for 10–15 minutes.
- Keep the jars warm in the hot water until ready to fill.
Oven Method:
- Preheat oven to 275°F (135°C).
- Wash jars in warm, soapy water and rinse.
- Place jars (not lids) on a baking tray and heat for 10–15 minutes.
Dishwasher Method (for less risk of breakage):
- Run a full cycle on the hottest setting with no soap.
- Use right away while jars are hot.
Pro Tip: Always use new lids for canning to ensure a proper seal. Bands can be reused, but lids should be fresh.
Make sure your workspace is clean, organized, and clutter-free before you begin. Once the preserves start cooking, things move fast!
Step-by-Step Guide to Making Blueberry Preserves
Now, let’s get into the heart of it—the actual process. Follow this step-by-step and you’ll have delicious, chunky, spreadable blueberry preserves in no time.
Step 1: Wash and Prep the Blueberries
As covered earlier, rinse, remove stems, and pick out any bad berries. Let them dry fully before cooking to avoid unnecessary water in your mix.
Step 2: Combine Ingredients
In your large saucepan or Dutch oven, add:
- 4 cups of blueberries
- 2 cups of sugar
- 2 tablespoons of lemon juice
Optional: Add vanilla extract, a cinnamon stick, or lemon zest for extra flavor.
Let the mixture sit for 15–30 minutes. This “macERATION” stage helps the sugar draw out the juices and softens the fruit, making cooking more even and flavorful.
Step 3: Bring to a Boil
Place the pot over medium-high heat. Stir gently until the sugar dissolves. Once it starts bubbling, turn the heat down to a gentle boil.
Stir frequently to prevent sticking or burning, especially as the mixture thickens.
Step 4: Simmer and Reduce
Let the mixture simmer for 25–40 minutes, depending on your desired consistency. During this time:
- Berries will break down (you can gently mash some for a smoother texture).
- Foam may rise—skim it off with a spoon for a clearer preserve.
- Stir regularly to avoid scorching.
Optional: If using pectin, follow package instructions and add it during this stage.
Step 5: Test for Doneness
There are a few ways to check if your preserves are ready:
- Thermometer: Gel stage is at 220°F (104°C) at sea level.
- Plate Test: Put a small plate in the freezer. Drop a spoonful of hot preserves on it. After 1 minute, run your finger through it. If it wrinkles and holds shape, it’s ready.
- Visual Cue: The mixture should coat the back of a spoon and fall off in thick drops.
Step 6: Fill and Seal the Jars
- Use a ladle and funnel to fill hot, sterilized jars, leaving ¼ inch headspace.
- Wipe rims with a clean, damp cloth.
- Place lids on top and screw bands on just until fingertip tight.
You can either refrigerate the jars or proceed to can them for long-term storage.
Tips for Perfect Blueberry Preserves Every Time
Even if it’s your first time, these tips will help you nail it like a pro:
- Don’t rush: Let the mixture simmer slowly to develop full flavor and proper consistency.
- Taste as you go: You can always adjust sugar, lemon juice, or spices midway.
- Avoid overcooking: Over-reducing can turn preserves into thick paste.
- Use wide pots: This increases surface area for faster evaporation and better thickening.
- Cool completely: Let the preserves cool before storing or using to allow full thickening.
Adding Your Own Twist to the Recipe
One of the best things about making homemade blueberry preserves? You can personalize it to match your tastes. Once you’ve mastered the basic recipe, the sky’s the limit when it comes to flavor variations. Whether you’re into warm spices, refreshing herbs, or even blending fruits, here’s how to get creative with your preserves.
Flavor Add-ins
These additions can bring a whole new dimension to your preserves without overpowering the blueberries:
- Vanilla extract: Add 1 tsp toward the end of cooking for a smooth, mellow flavor.
- Cinnamon stick: Toss one in during simmering and remove before jarring for a cozy twist.
- Nutmeg or allspice: A pinch goes a long way and pairs beautifully with berries.
- Fresh herbs: Try adding a sprig of rosemary or thyme during cooking for a unique aromatic depth.
- Citrus zest: Lemon, lime, or even orange zest adds zing and brightens the whole batch.
Fruit Combinations
Love blueberries but want to mix it up? Try these dynamic duos:
- Blueberry-Lime: Add lime zest and juice for a tropical touch.
- Blueberry-Peach: Add 1 cup diced peaches for a sweet and juicy variation.
- Blueberry-Strawberry: Half and half makes a classic berry blend that’s great for kids and adults alike.
- Blueberry-Cherry: Perfect for a deeper, richer flavor with a hint of tartness.
Make sure to adjust the sugar and lemon juice slightly when adding other fruits, depending on their sweetness and acidity.
Low-Sugar or Sugar-Free Versions
Want a healthier option? You can totally make low-sugar or sugar-free preserves without sacrificing flavor:
- Use low-sugar pectin: Brands like Pomona’s Universal Pectin let you control the sweetness.
- Natural sweeteners: Honey, maple syrup, stevia, or monk fruit sweetener work well.
- Cook it down longer: With less sugar, the mixture may take a bit more time to thicken naturally.
Experimenting is half the fun. Keep notes on what you try so you can recreate your favorite batches (or avoid ones that didn’t hit the mark).
Proper Canning Techniques for Long-Term Storage
If you’re not going to use your preserves right away—or want to give them as gifts—canning is essential. It’s easier than you think and makes your preserves shelf-stable for months, sometimes even a year or longer.
Water Bath Canning Method
This is the most common and safest method for home canning fruit preserves.
What You’ll Need:
- Large stockpot or canner with a rack
- Canning jars, lids, and bands
- Jar lifter and canning funnel
- Clean kitchen towels
Steps:
- Prep the jars: Fill them with hot preserves, wipe rims clean, and add lids and bands (finger-tight).
- Submerge the jars: Place them upright in a canner with at least 1 inch of water above the lids.
- Boil: Bring water to a full rolling boil. Process jars for 10 minutes (adjust for altitude if needed).
- Cool: Remove jars and place them on a towel. Let sit undisturbed for 12–24 hours.
- Check the seals: Press the center of each lid. If it doesn’t pop back, it’s sealed correctly.
Shelf Life
Properly canned blueberry preserves can last:
- In pantry: Up to 12 months
- In fridge (after opening): 3–4 weeks
- In freezer (if not canned): Up to 6 months
Label your jars with the date and batch flavor so you can track freshness.
How to Store and Preserve Your Blueberry Preserves
So you’ve made your preserves—now how do you keep them fresh and tasty?
Short-Term Storage (No Canning)
If you’re planning to eat your preserves within a few weeks, you can simply store them in the fridge:
- Let jars cool completely
- Screw on the lids tightly
- Refrigerate for up to 3–4 weeks
This method is great for small batches or if you’re testing out new flavor combinations.
Long-Term Storage (Canned)
Use the water bath canning method above to make your preserves shelf-stable. Once canned, store jars:
- In a cool, dark place (like a pantry or cupboard)
- Away from direct sunlight and heat sources
Always inspect your jars before use—if you see signs of spoilage (like bulging lids or mold), toss them.
Freezing Blueberry Preserves
Not into canning? Freezing is a super simple alternative:
- Let preserves cool completely
- Pour into freezer-safe containers (leave room for expansion)
- Freeze for up to 6 months
Thaw in the fridge overnight before using. The texture may be slightly different, but the flavor holds up well.
Creative Ways to Use Blueberry Preserves
Blueberry preserves aren’t just for toast—though they’re incredible on a warm, buttery slice of bread. Here are some delicious ways to enjoy your homemade batch:
Breakfast Ideas
- Swirl into Greek yogurt for a quick, healthy parfait
- Top pancakes, waffles, or French toast instead of syrup
- Add to overnight oats for fruity goodness on busy mornings
- Spread on bagels with cream cheese for a sweet and tangy bite
Baking & Desserts
- Fill thumbprint cookies or linzer tarts
- Layer into cakes or cupcakes for a fruity surprise
- Mix into cheesecake batter or as a topping
- Drizzle over ice cream or frozen yogurt
Savory Pairings
- Glaze meats like pork, chicken, or duck with warmed preserves
- Serve with cheese boards—blueberry pairs beautifully with brie, goat cheese, or aged cheddar
- Whisk into vinaigrettes for a sweet-tart salad dressing
Once you start using blueberry preserves creatively, you’ll wonder how you ever lived without them.
FAQs about Blueberry Preserves Recipe
1. Can I make blueberry preserves without pectin?
Yes! Blueberries can be made into preserves without added pectin by cooking them longer to reduce the liquid and allow natural pectins to help it gel. Lemon juice helps in setting too, so don’t skip it.
2. How long does it take for preserves to fully set?
Preserves often continue to thicken as they cool and may take 24–48 hours to fully set after canning. If after that time it’s still runny, you can reheat and cook it longer.
3. Can I use frozen blueberries instead of fresh?
Absolutely. Just make sure to thaw and drain them first to remove excess liquid. They still offer great flavor and are often more economical.
4. Are blueberry preserves healthy?
They can be! Blueberries are full of antioxidants and nutrients. If you limit the sugar or use natural sweeteners, you can make a healthier version without sacrificing taste.
5. What can I substitute for lemon juice?
You can use bottled lemon juice (for consistent acidity), lime juice, or a mix of vinegar and citrus zest. Lemon juice plays a critical role in setting and flavor, so some acidic component is necessary.
Conclusion
Making blueberry preserves at home is more than just a kitchen project—it’s a way to savor the seasons, create something delicious from scratch, and feel that simple, wholesome satisfaction of doing it yourself. With just a handful of ingredients and a little patience, you can create jars of rich, fruity goodness that brighten up breakfast, desserts, and even savory meals.
Whether you’re spreading it on toast, stirring it into yogurt, or gifting a beautifully labeled jar to a friend, homemade preserves are pure joy in every spoonful. And the best part? You can keep tweaking, testing, and improving your own signature recipe batch after batch.
So the next time blueberries go on sale—or start ripening in your garden—you’ll know exactly what to do. Get out the jars, gather your ingredients, and enjoy the sticky-sweet adventure of homemade blueberry preserves.
Happy preserving!