Blueberry Jam Recipe: Who doesn’t love spreading a thick, sweet layer of blueberry jam on warm toast? Making your own jam at home not only gives you control over the ingredients but also fills your kitchen with the irresistible aroma of fresh blueberries.
Plus, it’s surprisingly easy once you follow the right steps. Whether you’re preserving blueberries from a bountiful harvest or simply want to experiment with homemade jam, this guide will walk you through every step.
Ingredients Needed for Blueberry Jam
The key to perfect blueberry jam lies in using the right ingredients in the correct ratios. Here’s what you’ll need:
- 2 pounds (approx. 900g) of fresh blueberries: Ensure they are ripe and free of mold.
- 4 cups of sugar: This provides sweetness and helps the jam set.
- 2 tablespoons of lemon juice: Enhances the flavor and preserves freshness.
- Optional ingredients: A splash of vanilla extract or cinnamon for added flavor (if desired).
The simplicity of this recipe is what makes it a favorite for beginners and jam enthusiasts alike.
Equipment and Tools Required
Having the right tools can make the process much easier. Here’s what you’ll need:
- A large saucepan: To cook the jam evenly without overflowing.
- A wooden spoon: For stirring the mixture regularly.
- Sterilized jars and lids: Essential for storing the jam safely.
- A funnel (optional): To prevent mess when filling jars.
- A ladle: For transferring the jam into jars.
- A candy thermometer (optional): To check the jam’s temperature.
These tools help ensure a smooth, stress-free jam-making experience.
How to Make Blueberry Jam – Step by Step Guide
Step 1: Preparing the Ingredients
Before you start cooking, it’s important to prep your ingredients properly.
- Clean the blueberries: Rinse thoroughly under running water, removing any stems or damaged berries.
- Measure out your sugar and lemon juice: Have everything ready so you can work efficiently during the cooking process.
By preparing ahead of time, you’ll reduce the risk of mistakes later on.
Step 2: Cooking the Blueberries
Once your ingredients are ready, it’s time to start cooking.
- Heat the blueberries: In a large saucepan, add the blueberries and begin cooking over medium heat.
- Stir occasionally: As the berries heat up, they’ll begin to release their natural juices.
- Add sugar and lemon juice: Once the blueberries soften, stir in the sugar and lemon juice. This helps balance the flavor and activate the natural pectin.
Allow the mixture to cook for about 10–15 minutes until the blueberries break down completely.
Step 3: Boiling and Thickening the Jam
This step is crucial for achieving the right texture and consistency.
- Bring the mixture to a rolling boil: Increase the heat and let the jam bubble vigorously.
- Stir constantly: Prevent the mixture from sticking to the bottom of the pan.
- Check for thickness: After 10–12 minutes of boiling, the jam should begin to thicken.
If you notice the mixture still looks watery after 20 minutes, you may need to add more cooking time.
Step 4: Testing for Jam Readiness
Wondering how to tell if your jam is done? Here are two simple tests:
- Spoon test: Dip a spoon into the jam, then tilt it. If the jam drips off slowly and forms a thick sheet, it’s ready.
- Plate test: Place a small amount of jam on a chilled plate. Let it cool for a minute, then push it with your finger. If it wrinkles, it’s done.
Both tests help ensure your jam has reached the perfect consistency.
Step 5: Sterilizing Jars and Lids
To prevent spoilage, it’s crucial to sterilize your jars properly.
- Boil the jars and lids: Place them in a pot of boiling water for 10 minutes.
- Dry thoroughly: Remove the jars carefully and let them air dry on a clean towel.
This step minimizes the risk of bacteria and extends the shelf life of your jam.
Step 6: Filling and Sealing the Jars
Now comes the fun part—filling your jars!
- Use a funnel: Carefully ladle the hot jam into the jars, leaving about 1/4 inch of headspace.
- Seal the jars: Wipe the rims clean and screw on the lids tightly.
Make sure the jars are sealed properly to prevent air from getting inside.
Step 7: Canning and Storing the Jam
For long-term storage, you can use the water bath canning method:
- Place jars in a large pot: Ensure they are fully submerged in water.
- Boil for 10–15 minutes: This helps create a vacuum seal.
- Remove and cool: Let the jars cool completely on a countertop.
Once cooled, store your jam in a cool, dark place.
Step 8: Cooling and Labeling
Don’t forget to label your jars with the date and contents. This helps you keep track of when the jam was made and ensures you enjoy it before it expires.
Tips for Perfect Blueberry Jam
- Use high-quality, ripe blueberries for the best flavor.
- Adjust sugar levels to your preference, but remember that sugar helps with preservation.
- Add spices like cinnamon or a splash of vanilla for a unique twist.
Common Mistakes to Avoid
- Overcooking the jam can result in a hard, overly thick texture.
- Failing to sterilize jars may lead to spoilage.
- Not testing for readiness can cause runny jam.
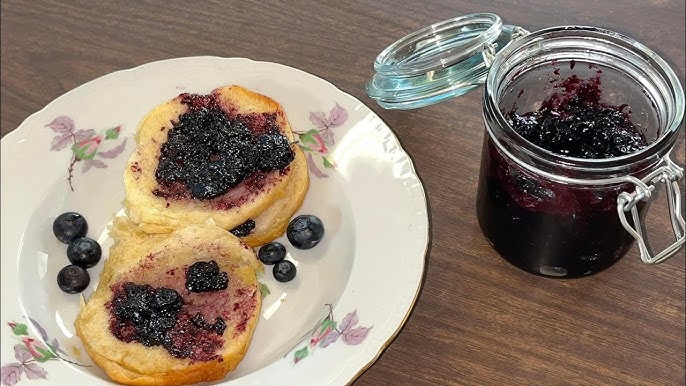
Serving Suggestions
Blueberry jam is incredibly versatile! Try it with:
- Toast or bagels
- Pancakes or waffles
- Yogurt or oatmeal
It’s a delicious addition to both sweet and savory dishes.
FAQs about Blueberry Jam Recipe
1. What ingredients are needed for a basic blueberry jam?
To make blueberry jam, you typically need fresh blueberries, sugar, and lemon juice. Pectin can be added to help the jam set, but it’s optional as blueberries naturally contain some pectin.
2. How long does homemade blueberry jam last?
When properly stored in a cool, dark place, homemade blueberry jam can last up to two years if unopened. Once opened, keep it refrigerated and use within one month for best quality and taste.
3. Can I make blueberry jam without sugar?
Yes, you can make sugar-free blueberry jam by substituting sugar with alternatives like honey, agave syrup, or an artificial sweetener. Keep in mind that the texture and shelf life might vary when you make these substitutions.
4. Do I need to use a water bath when canning blueberry jam?
Yes, processing your jars in a water bath canner is essential for safety. It helps seal the jars properly and prevents bacteria growth, ensuring the jam is safe to store at room temperature until opened.
5. What is the best way to thicken blueberry jam?
The best way to thicken blueberry jam is by cooking it down to evaporate excess moisture. If you prefer a thicker consistency, you can add a small amount of pectin during the cooking process.
6. Can I use frozen blueberries to make jam?
Absolutely! Frozen blueberries work well for jam-making. There’s no need to thaw them first; you can start the cooking process with them straight from the freezer, just remember that the cooking time might be slightly longer.
7. How can I tell when my blueberry jam is ready?
You can use the “wrinkle test” to check if your jam is set. Place a small plate in the freezer. Spoon a little jam onto the cold plate, return it to the freezer for a minute, and then push it with your finger. If the jam wrinkles, it’s ready.
Conclusion
Making blueberry jam at home is a rewarding experience that lets you savor the taste of summer all year long. With just a few simple ingredients and some patience, you can create a jam that’s perfect for breakfasts, snacks, and desserts.


