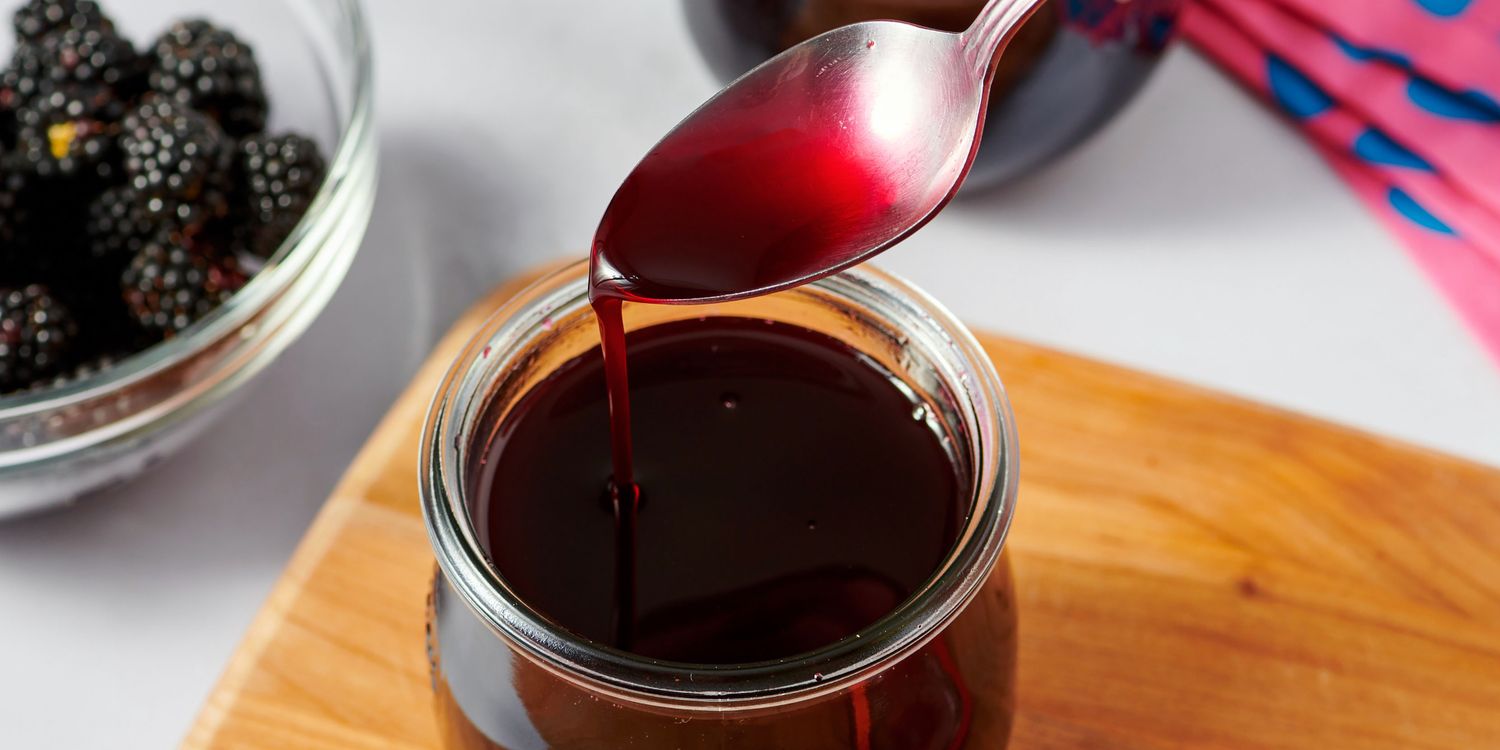
Blackberry Syrup Recipe: There’s nothing quite like the taste of fresh blackberry syrup drizzled over a stack of pancakes, swirled into a cocktail, or spooned over vanilla ice cream. It’s rich, tangy, and sweet with just enough tartness to make your taste buds sing. And the best part? You can make it from scratch in your kitchen with only a few ingredients and about 20 minutes of your time.
Homemade blackberry syrup not only tastes better than store-bought versions (which often come packed with preservatives and artificial flavors), but it’s also incredibly versatile. You can control the sweetness, add unique flavors, and even make it organic or sugar-free. Ready to give it a try? This step-by-step guide walks you through everything—from picking the perfect berries to bottling your delicious creation.
Why Make Homemade Blackberry Syrup?
Let’s be real: store-bought syrups can’t compete. Most are loaded with corn syrup, artificial colors, and a long list of things you can’t pronounce. But when you make your own blackberry syrup, you’re choosing flavor, health, and quality. Not to mention, it’s a fun kitchen project that requires almost no experience. Whether you want to elevate your Sunday brunch or create a signature drink at home, this syrup is a must-have in your kitchen.
Here are a few great reasons to go homemade:
- Flavor: Richer, fresher, and more intense than anything in a bottle.
- Control: Choose how sweet or tart you want it.
- Customizable: Add herbs, spices, or citrus to make it your own.
- No preservatives: 100% natural ingredients.
- Saves money: Especially if you grow your own or buy in bulk.
Once you’ve tasted the difference, you’ll never go back to store-bought again.
The Secret to the Best Blackberry Syrup
The secret? Simplicity and balance. Blackberry syrup needs just a few ingredients to shine, but it’s how you combine them that makes all the difference. The berries themselves are the star, so starting with the best-quality fruit—whether fresh or frozen—is key. Then, it’s all about the ratio: too much sugar and you drown out the berry flavor; too little, and it turns sour. A splash of lemon or lime juice brightens the syrup and cuts through the sweetness.
Want to take it up a notch? A pinch of cinnamon, a hint of vanilla, or even a sprig of thyme while it simmers can add complexity. The best syrup isn’t just sweet—it’s layered, smooth, and perfectly pourable.
Health Benefits of Blackberries
Before we dive into the syrup-making process, it’s worth knowing just how good blackberries are for you. Even when cooked into syrup, these berries offer some impressive health perks.
- Rich in Antioxidants: Blackberries are packed with vitamin C, vitamin A, and polyphenols that help fight free radicals.
- High in Fiber: A single cup has nearly 8 grams of fiber—great for digestion.
- Supports Brain Health: Studies suggest blackberries may improve memory and cognitive function.
- Low in Calories: Naturally sweet but relatively low in sugar compared to other fruits.
- Heart-Healthy: Contain anthocyanins, which are linked to reduced inflammation and improved heart health.
Even though syrup adds sugar, the core benefits of the berries still shine through, especially when made with natural ingredients.
How to Choose the Best Blackberries
If you’re using fresh berries, selection matters. Here’s how to pick the best:
- Color: Look for deep black or purplish berries. Avoid red ones—they’re underripe and sour.
- Texture: Plump and juicy, not mushy or shriveled.
- Smell: A sweet, earthy aroma is a good sign.
- No Mold: Check the bottom of the container—if there’s mold or juice pooling, skip them.
If fresh blackberries aren’t in season, frozen berries work just as well. In fact, they’re often picked at peak ripeness and flash frozen, locking in nutrients and flavor.
Fresh vs. Frozen Blackberries: Which Is Better?
This is the age-old kitchen question, and here’s the truth: both work wonderfully. Fresh berries give you the satisfaction of using seasonal produce, but frozen berries are available year-round, often cheaper, and just as nutritious.
Fresh blackberries:
- Pros: Vibrant taste, no thawing required, great texture.
- Cons: Short shelf life, can be expensive out of season.
Frozen blackberries:
- Pros: Budget-friendly, easy to store, perfect for cooking.
- Cons: Need to thaw first, may release extra water.
So, if you have access to beautiful fresh berries, use them! But if you’re craving syrup in the middle of winter? Frozen will do just fine.
Ingredients You’ll Need
Alright, let’s get into the real stuff. Here’s everything you need to whip up a batch of rich, homemade blackberry syrup.
Main Ingredients
- 2 cups blackberries (fresh or frozen)
- 1 cup water
- 1 cup granulated sugar (adjust to taste)
- 1 tablespoon lemon juice (freshly squeezed)
Optional Add-Ins
- 1 teaspoon vanilla extract – for warmth
- ½ teaspoon cinnamon – for depth
- A sprig of rosemary or thyme – for an herbal twist
- 1 tablespoon cornstarch + 2 tbsp water (if you want a thicker syrup)
You can keep it simple or get creative depending on your taste and what you’re using the syrup for.
Kitchen Tools You’ll Need
Good news: this recipe doesn’t require fancy gadgets. You likely have everything in your kitchen already.
- Saucepan or small pot
- Wooden spoon or silicone spatula
- Fine mesh strainer or cheesecloth
- Measuring cups and spoons
- Glass jar or airtight bottle for storage
- Funnel (optional, but makes bottling easier)
Preparation Tips Before You Start
Before you turn on the stove, take a few minutes to prep your space and ingredients. It’ll save time and help you avoid rookie mistakes. Here’s how to get set up for syrup success:
- Rinse your berries well – even if they’re organic. Fresh blackberries can have dirt, tiny bugs, or pesticides on the surface.
- Thaw frozen berries – if using frozen, let them sit at room temperature or microwave for 30–60 seconds until soft. Drain any excess liquid if it’s too watery.
- Sterilize your jars or bottles – especially if you plan to store the syrup for a while. Just boil them for 10 minutes or run through the dishwasher on a hot cycle.
- Have your tools ready – strainer, spoon, jar, etc. Once the syrup’s hot, you won’t want to scramble looking for equipment.
A little prep upfront makes the whole process smoother—and trust me, it’s worth it when you’re pouring that dark purple gold into a jar.
Step-by-Step Guide to Making Blackberry Syrup
Ready to make magic? Let’s walk through the syrup-making process one step at a time. It’s easier than you think, and the reward is totally worth it.
Step 1: Wash and Prep the Blackberries
Rinse the blackberries thoroughly under cool running water to remove any dirt or debris. Pick out any stems or leaves and transfer the clean berries to a medium-sized saucepan.
Step 2: Simmer with Sugar and Water
Add equal parts sugar and water to the saucepan (for example, 1 cup sugar and 1 cup water for every 2 cups of blackberries). Bring to a gentle simmer over medium heat, stirring occasionally until the sugar dissolves and the berries start to break down.
Step 3: Add Lemon Juice for Balance
Stir in a tablespoon of lemon juice to enhance the flavor and add a subtle tartness that balances the sweetness.
Step 4: Strain the Syrup
Pour the mixture through a fine-mesh sieve or cheesecloth, pressing gently to extract the rich purple syrup.
Step 5: Bottle and Store
Transfer the syrup to a clean glass bottle or jar, seal tightly, and refrigerate. It stays fresh for up to two weeks—perfect for cocktails, pancakes, or drizzling over desserts.
How to Thicken Blackberry Syrup Naturally
If you like a thicker, more luxurious syrup (think maple syrup consistency), there are a few easy ways to get it there:
- Cook it longer – Simmer for an additional 10–15 minutes to reduce the liquid. Stir often to avoid burning.
- Add cornstarch – Mix 1 tablespoon cornstarch with 2 tablespoons cold water. Stir into the syrup during the last few minutes of cooking. It will thicken as it cools.
- Use pectin – This natural fruit thickener can help set the syrup, especially if you plan to use it as a glaze or topping.
Just keep in mind that the syrup will thicken more as it cools. So don’t overdo it on the stove!
Ways to Use Blackberry Syrup
This syrup is more than just a pancake topper. Once you have a jar of this magic in your fridge, you’ll find dozens of ways to use it.
On Pancakes and Waffles
A classic. Swap out maple syrup for this fruity twist. It’s perfect on:
- Buttermilk pancakes
- Belgian waffles
- Crepes
- French toast
Add whipped cream or a sprinkle of powdered sugar to make it extra indulgent.
In Cocktails and Beverages
Add a splash to your favorite drink for a fruity boost. Try it in:
- Lemonades or iced teas
- Sparkling water or soda
- Mojitos, margaritas, or gin & tonic
- Homemade blackberry mojito or whiskey sour
It adds color, flavor, and wow factor with zero effort.
With Yogurt or Ice Cream
Swirl it into plain Greek yogurt for a fruity parfait. Or pour it over:
- Vanilla ice cream
- Cheesecake
- Panna cotta
- Frozen yogurt
Add some granola or chopped nuts for crunch.
As a Glaze for Meat
This one might surprise you—blackberry syrup is incredible as a glaze. Try brushing it on:
- Grilled chicken
- Pork tenderloin
- Duck or turkey
- BBQ ribs
The sweet-tart flavor caramelizes beautifully and adds a gourmet touch.
Storage Tips and Shelf Life
So you’ve made your beautiful batch of blackberry syrup—now what? Proper storage is essential to keeping that flavor fresh and delicious for as long as possible.
Here’s how to store your syrup the right way:
In the Refrigerator
This is the simplest and most common method.
- Shelf Life: Up to 2 to 3 weeks
- Storage Container: Use a sterilized glass jar, mason jar, or swing-top bottle.
- Tip: Make sure the syrup is fully cooled before sealing the container to prevent condensation.
Also, always use a clean spoon when serving from the jar—no double dipping! This helps prevent introducing bacteria that can spoil the syrup.
Freezing Blackberry Syrup
Want to enjoy summer berries all year long? Freeze your syrup!
- Shelf Life: Up to 6 months
- How to Freeze:
- Pour syrup into ice cube trays, freeze, and transfer cubes into a freezer bag.
- Or use freezer-safe jars or silicone molds.
- Thawing Tip: Let it thaw in the fridge overnight, or warm it gently on the stove.
This method is perfect for making single servings for drinks or desserts.
Canning for Long-Term Storage
If you’re into preserving, you can water-bath can your syrup for a shelf-stable version.
- Sterilize jars and lids
- Fill jars with hot syrup, leaving 1/4 inch headspace
- Process in boiling water for 10–15 minutes (time varies by altitude)
- Store in a cool, dark pantry for up to 1 year
Once opened, store canned syrup in the fridge.
Freezing Blackberry Syrup for Long-Term Use
If your garden exploded with berries or you scored a big haul at the farmers’ market, freezing syrup is your best move. This keeps the fresh flavor locked in while giving you an easy way to sweeten up your recipes later.
Here’s how to do it right:
Best Containers for Freezing Syrup
- Ice cube trays (then transfer to zip-top freezer bags)
- Silicone freezer molds
- Freezer-safe glass jars (leave space at the top for expansion)
- BPA-free plastic containers
Label Everything
Always mark the container with:
- The date it was frozen
- The contents (“Blackberry Syrup”)
- Optional: flavor notes if you added herbs or spices
This helps you keep track of freshness and flavor variety.
Thawing Tips
When ready to use, you can:
- Microwave a cube for 15–20 seconds
- Let thaw in the fridge overnight
- Warm gently in a saucepan over low heat
Frozen syrup is perfect for cocktails, baking, or topping oatmeal and yogurt—basically anything you want to add berry flavor to on the fly.
Troubleshooting Common Mistakes
Even the simplest recipes can go sideways. Let’s go over the most common mistakes people make when preparing blackberry syrup—and how to fix them.
1. My Syrup Is Too Runny
This happens when it’s not simmered long enough. To fix it:
- Return it to the stove and simmer for 10–15 more minutes
- Add a cornstarch slurry (1 tbsp cornstarch + 2 tbsp water)
2. It’s Way Too Sweet
Too much sugar? You can balance it by:
- Adding more lemon juice
- Diluting with a bit of water and re-simmering
- Adding a pinch of salt or a splash of vinegar to tone it down
3. It Tastes Bland
Try these flavor boosters:
- Add a cinnamon stick or a vanilla bean during simmering
- Increase the lemon juice slightly
- Try a splash of balsamic vinegar for depth
4. It Spoiled Too Quickly
This is usually due to improper storage. Always:
- Use sterilized jars
- Store in the fridge
- Use clean utensils every time
Also, always smell or taste before using if it’s been in the fridge for a while. If it smells off or has mold, toss it out.
FAQs about Blackberry Syrup Recipe
Q1: Can I make blackberry syrup without sugar?
Yes! You can substitute sugar with honey, maple syrup, agave, or stevia (if you’re keto). Just note that some alternatives may change the flavor or consistency slightly.
Q2: How long does homemade blackberry syrup last?
Stored in the fridge, it lasts 2 to 3 weeks. If you freeze it, it can last up to 6 months, and if canned properly, up to a year unopened.
Q3: Can I use other berries in this recipe?
Absolutely! This same method works great with raspberries, blueberries, strawberries, or even mixed berries. Feel free to experiment with different combos.
Q4: Is it normal for syrup to separate?
Yes. Natural syrups can separate when sitting—just shake or stir before using. Separation doesn’t mean it’s spoiled.
Q5: Can I use this syrup in baking?
You bet! It’s awesome as a filling, drizzle over cakes, or mixed into muffin batters. You can also use it as a natural sweetener in place of honey or maple syrup.
Conclusion
Blackberry syrup is one of those magical kitchen creations that’s insanely easy to make yet totally elevates everything it touches. With just a handful of ingredients and a few simple steps, you can bottle up the bold, tangy sweetness of summer and use it in dozens of delicious ways.
Whether you’re looking to wow your brunch guests, shake up your cocktails, or add something special to your desserts, this syrup is a total game-changer. And the best part? You control what goes in it. No preservatives, no artificial junk—just real berries, real flavor, and real satisfaction.
So next time you have a basket of blackberries (or a frozen bag sitting in your freezer), skip the store-bought stuff and make your own. Your taste buds will thank you.