Blackberry Jelly Recipe: There’s something magical about opening a jar of homemade blackberry jelly—especially when you’re the one who made it. It tastes like summer in a jar: sweet, slightly tart, and bursting with berry flavor. Whether you’re spreading it on toast, swirling it into yogurt, or gifting it to a friend, blackberry jelly never disappoints.
This guide will walk you through every single step—from prepping your berries to sealing your jars—with pro tips and tricks to help you get it right the first time. Ready to turn those juicy blackberries into a glossy, gem-like jelly? Let’s get into it.
What Makes Blackberry Jelly Special?
Blackberry jelly stands out for its deep, rich flavor and smooth texture. Unlike jam, it’s seedless and silky, making it a perfect spread for people who love the taste of berries without the crunch of seeds.
- Pure Fruit Taste: The cooking and straining process extracts just the juice, giving you the concentrated flavor of blackberries.
- Versatile Use: It pairs well with everything—breakfast toast, grilled meats, cheese platters, and even baked goods.
- Preserving at Its Best: Making jelly is a great way to preserve blackberries when they’re in season so you can enjoy them year-round.
List of Ingredients You’ll Need
Here’s everything you’ll need for making classic blackberry jelly:
Main Ingredients:
- Fresh blackberries – 3 to 4 pounds (for about 4 cups juice)
- Granulated sugar – Typically 1:1 with juice (adjust to taste)
- Liquid fruit pectin – 1 pouch (or powdered, follow brand instructions)
- Lemon juice – 1–2 tablespoons (optional, helps with acidity and pectin setting)
Optional Additions:
- A pinch of salt – To balance sweetness
- Vanilla extract – For a flavor twist
- Cinnamon or clove – For a spiced version
Canning and Storage Supplies:
- Large stockpot
- Jelly bag or cheesecloth
- Canning funnel
- Ladle
- Sterilized 8 oz mason jars with lids and rings
- Water bath canner or deep pot with rack
- Jar lifter and magnetic lid lifter
- Clean kitchen towels
Before You Start: Tips for Success
Before you dive into the jelly-making process, a little preparation goes a long way:
Choose Ripe Berries
Look for ripe, plump blackberries—dark purple and almost black. Underripe berries are more tart and can throw off the flavor. Overripe ones may ferment or spoil quickly.
Sterilize Your Jars
You can do this by boiling them for 10 minutes or running them through a dishwasher on high heat. Always keep the jars hot until you’re ready to fill them to avoid cracking.
Use the Right Equipment
If you’re new to canning, investing in a water bath canner is helpful, but any deep pot will work as long as you can fully submerge your jars with at least 1–2 inches of water over the top.
Step-by-Step Guide to Making Blackberry Jelly
Step 1: Wash and Prepare the Blackberries
Rinse fresh blackberries thoroughly under cold running water to remove dirt and debris. Discard any unripe or damaged berries. Drain well and lightly crush them to help release their juice during cooking.
Step 2: Cook the Berries to Extract Juice
Place the blackberries in a large pot and add a small amount of water—just enough to prevent sticking. Bring to a gentle boil, then reduce heat and simmer for 10–15 minutes, stirring occasionally, until the berries soften and release their juices.
Step 3: Strain the Juice (No Seeds!)
Pour the cooked berries into a jelly bag, cheesecloth-lined sieve, or fine strainer set over a bowl. Let the juice drip naturally for several hours or overnight. Avoid pressing the pulp, as this can make the jelly cloudy.
Step 4: Measure Juice and Add Sugar
Measure the strained juice accurately. For most recipes, you’ll use about ¾ to 1 cup of sugar per cup of juice. Pour the juice into a clean pot and add the sugar, stirring until dissolved.
Step 5: Add Pectin and Bring to Boil
Stir in liquid or powdered pectin according to package instructions. Bring the mixture to a rolling boil over high heat, stirring constantly. Boil hard for 1–2 minutes to activate the pectin properly.
Step 6: Test for Doneness
Test the jelly by placing a small spoonful on a chilled plate. If it wrinkles when pushed with your finger, it’s ready. If not, boil for another minute and test again.
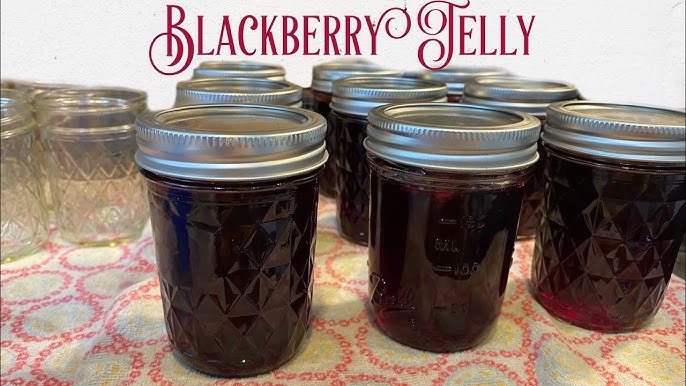
Step 7: Pour into Sterilized Jars
Carefully ladle the hot jelly into sterilized jars, leaving about ¼ inch of headspace. Wipe rims clean and seal with lids and bands.
Step 8: Process in Water Bath (Canning)
Process the jars in a boiling water bath for 10 minutes. Remove and let cool completely. Check seals before storing.
Homemade vs Store-Bought Jelly
You might be wondering, “Is homemade jelly really worth the effort?” The answer is absolutely yes—and here’s why:
Flavor and Quality
- Homemade jelly uses real fruit, sugar, and pectin—no preservatives or artificial coloring.
- Store-bought versions often contain high-fructose corn syrup and flavor enhancers to extend shelf life and reduce cost.
Customization
- Want less sugar? Add less.
- Want a spiced version? Throw in some cinnamon.
- Prefer organic ingredients? You control everything that goes in.
Cost-Effective and Sustainable
- If you have access to fresh or foraged blackberries, the cost is minimal.
- Homemade jelly reduces packaging waste, and you can reuse canning jars each season.
The satisfaction of popping open a jar of jelly you made yourself? Priceless.
Tips for the Best Blackberry Jelly
Even if it’s your first time, you can absolutely make perfect jelly by following these expert tips:
1. Don’t Skip the Straining
Seeds and pulp can ruin the smooth texture of jelly. Be patient and let the juice drip naturally overnight through a jelly bag for crystal-clear results.
2. Use a Candy Thermometer
This tool helps ensure you hit that magic 220°F temperature where jelly sets. It takes the guesswork out and gives you consistent results.
3. Stir Constantly During Boiling
Sugar can burn fast. Stirring while the mixture boils ensures even heat distribution and prevents sticking.
4. Check Your Pectin
Different pectin types (liquid vs. powdered) need different boiling times and sugar ratios. Always read your pectin box instructions before starting.
5. Avoid Double Batches
It might be tempting to double the recipe, but larger batches can lead to uneven cooking and poor setting. Stick to one batch at a time for the best results.
Common Mistakes and How to Avoid Them
Making jelly isn’t hard, but there are a few common pitfalls:
Overcooking
If you boil the jelly too long, it can become thick, rubbery, or overly caramelized. Keep an eye on the temperature and timing.
Undercooking
Jelly that hasn’t reached the right temperature won’t set. It’ll stay runny, like syrup. Again—your thermometer is your best friend here.
Skipping the Water Bath
Skipping the canning step can result in spoilage. Even if your jelly looks fine now, bacteria can develop over time. Always process jars unless you’re planning to refrigerate and use them quickly.
How to Store Blackberry Jelly
Once sealed, your jelly can be safely stored in a cool, dark pantry for up to 12 months. After opening, keep it in the fridge and use within 3–4 weeks.
Storage Tips:
- Label jars with the date you made them.
- Don’t stack jars; keep them upright to protect the seal.
- If you notice mold or fermentation (like fizzing or bubbles), discard the jar.
Creative Ways to Use Blackberry Jelly
Blackberry jelly isn’t just for toast! Here are some delicious, creative ways to enjoy it:
1. Glaze for Meats
Brush it over pork chops, chicken, or ham during the final minutes of roasting. It caramelizes beautifully.
2. Topping for Cheesecake or Ice Cream
A spoonful of blackberry jelly adds fruity elegance to desserts.
3. Fillings for Thumbprint Cookies
Swap your usual jam with blackberry jelly for a gourmet cookie twist.
4. Pair with Cheese
Spread it on a cracker with a slice of brie, goat cheese, or sharp cheddar—perfect for a party platter.
5. Mix into Yogurt or Oatmeal
Adds sweetness and color to your morning routine.
Can You Freeze Blackberry Jelly?
Absolutely! If you don’t want to go through the full canning process, freezer jelly is a great option—especially if you’re short on time or only making a small batch.
How to Freeze Blackberry Jelly:
- Cool the Jelly Completely: After cooking, let it come to room temperature.
- Use Freezer-Safe Containers: Pour the jelly into clean, freezer-safe jars or plastic containers. Leave about ½ inch of space at the top to allow for expansion.
- Label and Freeze: Add a label with the date and freeze for up to 12 months.
- Thawing and Use: When ready to use, thaw in the refrigerator. Once thawed, consume within 3–4 weeks.
Freezing jelly doesn’t affect the flavor much, but the texture may be a bit looser than canned versions. Still, it’s a fantastic way to preserve jelly without the need for canning gear.
How to Fix Jelly That Didn’t Set
It happens to the best of us. You followed every step, but your jelly turned out runny. Don’t worry—it’s totally fixable.
Reboil Method (Most Common)
- Measure the jelly and pour it back into a pot.
- For every 4 cups of jelly, add:
- ¼ cup sugar
- 2 tablespoons lemon juice
- 1 pouch (or half) liquid pectin
- Bring to a full boil for 1–2 minutes, then test for doneness again.
- Re-process the jars using the water bath method.
Liquid Pectin Method (No Sugar Added)
If your jelly is sweet enough but didn’t set, try adding only pectin and lemon juice when reboiling. Sugar isn’t always necessary during the re-cook.
Sometimes, letting the jelly sit for a few extra days can help it set naturally—especially if it’s just slightly loose.
How to Make Blackberry Jelly Without Pectin
Don’t have pectin? You can still make jelly—it just takes longer.
Why It Works:
Blackberries naturally contain pectin, especially when slightly underripe. Boiling them with sugar and lemon juice helps release that pectin.
Steps for Pectin-Free Jelly:
- Extract the juice as usual.
- Add 3/4 cup sugar for every 1 cup of juice and 1 tablespoon lemon juice.
- Bring to a boil and simmer for 25–30 minutes, stirring often.
- Use the spoon or plate test to check for doneness.
- Pour into jars and water bath process as usual.
This method results in a slightly softer set, but the flavor is unbeatable and 100% natural.
Nutrition Facts and Health Benefits
Besides being delicious, blackberry jelly has a few surprising health perks—especially if you make it at home with minimal sugar.
Nutritional Breakdown (Per Tablespoon):
| Nutrient | Approximate Value |
|---|---|
| Calories | 50–60 kcal |
| Sugar | 12–14g |
| Carbs | 13–15g |
| Fat | 0g |
| Protein | 0g |
Health Highlights:
- Rich in Antioxidants: Blackberries are loaded with anthocyanins, which may help fight inflammation and protect cells.
- Vitamin C Boost: Helps with immunity, skin health, and healing.
- Fiber Content: While the jelly itself is low in fiber due to straining, the original berries are high in it.
Want a healthier version? Try using low-sugar pectin or natural sweeteners like honey (just note it may change the texture).
FAQs about Blackberry Jelly Recipe
1. Can I Use Frozen Blackberries?
Yes! Thaw them first and use just like fresh ones. Frozen berries actually break down faster, which can help with juice extraction.
2. How Long Does Blackberry Jelly Last?
If sealed and stored properly, up to 12 months in the pantry. Once opened, keep in the fridge and use within 3–4 weeks.
3. Can I Make This Sugar-Free?
You can use sugar-free pectin and a natural sweetener like Stevia or monk fruit, but note that texture and taste may vary slightly.
4. What If My Jelly Is Too Runny?
Don’t worry—it happens. You can reboil with pectin or lemon juice (see the guide above) to fix the consistency.
5. Is Blackberry Jelly Good for Kids?
Yes! Just make sure it’s not overly sweet, and always supervise younger kids to avoid sticky messes. You can even make mini jars for school lunches!
Conclusion
Blackberry jelly is more than just a sweet spread—it’s a way to capture the flavor of summer in a jar. With just a few simple ingredients and some patience, you can create something better than anything you’ll find in stores.
Whether you go the traditional route with pectin or try a no-pectin version, you’re in for a treat. From breakfast toast to BBQ glazes, there are endless ways to enjoy your homemade creation. And trust me—once you make it yourself, you’ll never go back to store-bought.
So grab those berries, sterilize those jars, and let’s get jellyin’!