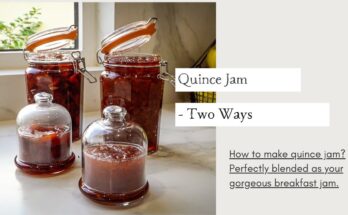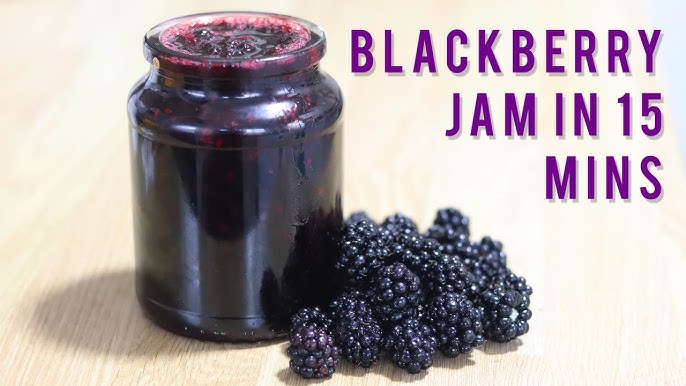
Blackberry Jam Recipe: There’s nothing quite like the sweet, tangy flavor of homemade blackberry jam. Whether you’re spreading it on warm toast, swirling it into yogurt, or using it in baking, this simple yet delicious preserve adds a burst of fruity goodness to any meal. Making your own jam at home not only allows you to control the ingredients but also lets you capture the essence of fresh, juicy blackberries at their peak.
Store-bought jams often contain artificial preservatives and excessive sugar, but with a homemade version, you can adjust the sweetness to your preference and keep things as natural as possible. Plus, it’s a great way to use up an abundance of fresh or frozen blackberries!
In this step-by-step guide, I’ll walk you through the process of making perfect blackberry jam from scratch.
Ingredients Needed
Before you start, gather the essential ingredients:
Main Ingredients:
- Blackberries – 4 cups (fresh or frozen)
- Sugar – 2 cups (adjust based on sweetness preference)
- Lemon Juice – 2 tbsp (for natural pectin and flavor balance)
Optional Additions for Flavor Enhancement:
- Vanilla Extract – 1 tsp (for a hint of warmth)
- Cinnamon – ½ tsp (adds depth to the jam)
- Honey – as a sugar substitute
- Pectin (Optional) – If you prefer a thicker jam, add 1 tbsp of pectin
Using natural ingredients ensures that your jam is both delicious and nutritious. The lemon juice helps balance the sweetness while also aiding in the setting process by activating natural pectin found in the berries.
Essential Equipment
To make a successful batch of blackberry jam, you’ll need the right tools:
- Large pot or saucepan – for cooking the jam
- Wooden spoon – for stirring
- Candy thermometer – to check the jam’s temperature (220°F for perfect consistency)
- Mason jars with lids – for storing the jam
- Ladle or funnel – to transfer jam into jars
- Potato masher or blender – to break down blackberries
Having the right equipment ensures a smooth process and prevents messes while handling hot jam.
Preparing the Blackberries
Washing Fresh Blackberries:
- Rinse the blackberries under cold water to remove any dirt or debris.
- Pat them dry gently with a clean kitchen towel.
- Remove any stems or leaves.
Using Frozen Blackberries:
- If using frozen blackberries, allow them to thaw for about 30 minutes before cooking.
- Drain excess liquid to prevent the jam from becoming too runny.
Once the blackberries are prepped, they’re ready for the cooking process!
Cooking the Jam – Step-by-Step Process
Step 1: Mash the Blackberries
- Place the blackberries in a large pot over medium heat.
- Use a potato masher to break them down and release their juices.
Step 2: Add Sugar and Lemon Juice
- Pour in the sugar and stir well to dissolve.
- Add the lemon juice to enhance flavor and help with thickening.
Step 3: Simmer and Stir
- Bring the mixture to a gentle boil.
- Stir frequently to prevent burning and ensure even cooking.
Step 4: Cook Until Thickened
- Let it simmer for about 15-20 minutes until it reaches the desired consistency.
Now that we’ve started cooking the jam, let’s check for doneness in the next step!
Checking the Jam for Doneness
Knowing when your jam is ready is crucial to achieving the perfect consistency. Here are three foolproof methods to test if your blackberry jam is done:
1. Spoon Test
- Dip a cold spoon into the jam and lift it out.
- If the jam drips off in a runny stream, it needs more cooking.
- If it falls off in thick drops or sheets, it’s ready.
2. Freezer Plate Test
- Place a small plate in the freezer for a few minutes.
- Drop a small spoonful of jam onto the cold plate.
- Wait a few seconds, then push the jam with your finger. If it wrinkles and doesn’t flow back, it’s set!
3. Using a Candy Thermometer
- The ideal temperature for jam setting is 220°F (105°C).
- Insert a candy thermometer into the mixture while boiling.
- Once it reaches this temperature, your jam is ready to be removed from heat.
If your jam isn’t thick enough, simmer it for a few more minutes and test again.
Sterilizing Jars for Storage
Properly sterilizing your jars is essential to keep your jam fresh and prevent bacterial growth. Follow these steps to ensure clean and safe jars:
Step 1: Wash the Jars
- Use hot, soapy water to wash the mason jars and lids.
- Rinse thoroughly to remove any soap residue.
Step 2: Boil the Jars
- Place the jars in a large pot filled with water.
- Bring the water to a rolling boil and let the jars sit for 10 minutes.
- Carefully remove the jars using tongs and place them on a clean towel to dry.
Step 3: Keep the Jars Warm
- To prevent the jars from cracking when filled with hot jam, keep them warm by placing them in an oven at 200°F (93°C) until you’re ready to use them.
Sterilizing jars ensures your jam stays fresh for months without the risk of spoilage.
Canning and Storing the Jam
Filling the Jars:
- While the jam is still hot, carefully ladle it into the sterilized jars.
- Leave about ¼ inch (6 mm) of space at the top to allow for expansion.
- Wipe the rim of the jars clean to remove any sticky residue.
- Secure the lids tightly.
Sealing the Jars (Water Bath Method):
- Place the filled jars into a boiling water bath for 10-15 minutes.
- This process removes air bubbles and ensures a tight seal.
- Remove the jars and let them cool completely. You should hear a “pop” sound, indicating a proper seal.
Storing Your Blackberry Jam:
- Store sealed jars in a cool, dark place for up to 12 months.
- Once opened, refrigerate and consume within 3 weeks.
Tips for Achieving Perfect Texture and Flavor
- Balance Sugar and Acidity – Adjust sugar levels based on the natural sweetness of the blackberries.
- Avoid Overcooking – Cooking too long can lead to a thick, gummy jam.
- Use Fresh Ingredients – Fresh berries result in the best flavor.
- Prevent Crystallization – Stir the sugar well to dissolve it completely before boiling.
These small tips will make a big difference in your jam-making success!
Variations and Additions
Want to add a twist to your blackberry jam? Here are some fun variations:
1. Spiced Blackberry Jam
- Add ½ teaspoon of cinnamon and a pinch of nutmeg for a warm, spiced flavor.
2. Honey-Sweetened Blackberry Jam
- Substitute sugar with 1½ cups of honey for a natural sweetness.
3. Mixed Berry Jam
- Combine blackberries with raspberries, blueberries, or strawberries for a multi-berry flavor.
Experiment with flavors to create a unique jam that suits your taste!
Common Mistakes to Avoid
1. Overcooking the Jam
- Overcooked jam turns too thick and loses its fresh berry flavor. Stick to the recommended cooking time.
2. Not Using Enough Pectin
- If you prefer a thicker jam, add 1 tablespoon of pectin to help it set.
3. Improper Sealing and Storage
- Always sterilize jars and perform the water bath canning method to prevent spoilage.
Avoiding these mistakes will ensure your homemade jam turns out perfectly every time.
Serving Ideas for Blackberry Jam
Blackberry jam isn’t just for toast! Here are some delicious ways to enjoy it:
- Spread it on freshly baked bread or biscuits.
- Swirl it into yogurt or oatmeal for a fruity twist.
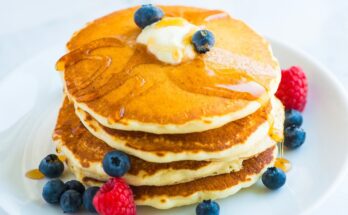
- Use it as a topping for pancakes, waffles, or ice cream.
- Mix it into salad dressings or glazes for meats.
- Fill pastries, cakes, or cookies for a sweet surprise.
Get creative and explore new ways to enjoy your homemade jam!
Health Benefits of Blackberries
Not only is blackberry jam delicious, but it also retains some of the health benefits of fresh blackberries:
- Rich in Antioxidants – Helps fight free radicals and boost immunity.
- High in Vitamin C – Supports healthy skin and immune function.
- Good Source of Fiber – Aids digestion and promotes gut health.
- Low in Calories – Makes a great natural sweet treat.
Enjoying homemade jam allows you to reap these benefits while controlling the ingredients.
FAQs about Blackberry Jam Recipe
1. What ingredients do I need for blackberry jam?
To make blackberry jam, you will need fresh blackberries, granulated sugar, and lemon juice. Some recipes may also call for pectin to help the jam set.
2. How long does it take to make homemade blackberry jam?
Preparing and cooking blackberry jam can take about 30 minutes. Additional time is needed for the jam to cool and set, which can vary depending on the recipe and whether pectin is used.
3. Do I need to use pectin in my blackberry jam?
Pectin is not mandatory, but it helps the jam set more reliably. If you prefer a more natural approach, you can cook the jam longer for natural thickening or include apples, which are high in natural pectin.
4. How can I tell when my jam is ready?
You can use the “wrinkle test” to check if your jam is ready. Place a small plate in the freezer, and when you think your jam is done, drop a small amount onto the cold plate. If it wrinkles when you push it with your finger, it’s ready.
5. How long does homemade blackberry jam last?
Properly sealed and stored in a cool, dark place, homemade blackberry jam can last for up to a year. Once opened, keep it refrigerated and use it within a month.
6. Can I make blackberry jam without sugar?
Yes, you can make sugar-free blackberry jam using sugar substitutes like honey or artificial sweeteners. Keep in mind that sugar helps in preserving, so sugar-free jams may have a shorter shelf life.
7. Is blackberry jam healthy?
Blackberry jam contains antioxidants and vitamins from the berries but also has high sugar content. Enjoy it in moderation for a healthier option.
Final Thoughts
Making homemade blackberry jam is a rewarding experience that brings fresh, fruity flavors to your kitchen. With just a few simple ingredients and steps, you can create a delicious preserve that’s free from artificial additives. Whether you spread it on toast, swirl it into desserts, or gift it to loved ones, this jam will surely be a favorite in your home.
Try this recipe today, and enjoy the natural goodness of homemade blackberry jam!