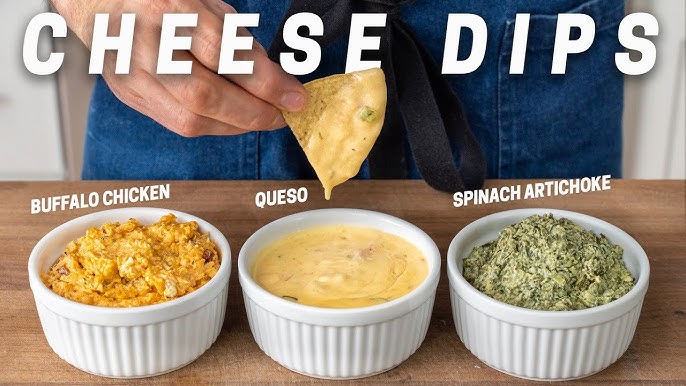
Best Queso Recipe: If there’s one dip that can win over an entire crowd, it’s queso. Rich, creamy, cheesy, and just the right amount of spicy—queso is more than just a dip. It’s the heart of any great Tex-Mex gathering. Whether you’re preparing for game night, a party, or just a solo snack fest, this ultimate guide will show you how to make the best queso ever—step by step, from scratch.
What is Queso?
Queso, short for “queso fundido” or “chile con queso,” is a cheesy, often spicy dip rooted in Mexican cuisine and beloved throughout the United States—especially in Texas. It translates literally to “cheese,” but to food lovers everywhere, it means a warm, gooey, savory dip perfect for tortilla chips and more.
There are different versions of queso depending on the region. Classic Mexican queso might include Oaxacan cheese or asadero cheese melted with peppers and chorizo. Meanwhile, the Tex-Mex version often incorporates processed cheese like Velveeta, mixed with green chilies, tomatoes, and sometimes ground meat. It’s quick to prepare and even quicker to disappear at a party.
What sets queso apart is its smooth texture and spicy kick, making it the go-to party dip. Whether you love it mild or fire-breathing hot, queso is adaptable to your spice preference and can even be made vegetarian or vegan.
Ingredients for the Best Queso
The secret to exceptional queso lies in the balance of cheese, spice, and creaminess. Here’s a list of ingredients to make it unforgettable:
Core Ingredients:
- 2 tbsp butter – For the roux base
- 2 tbsp all-purpose flour – Helps thicken the sauce
- 1 cup whole milk – Brings the creaminess
- 1 cup heavy cream – Adds richness
- 2 cups shredded sharp cheddar cheese – Gives depth of flavor
- 1 cup shredded Monterey Jack cheese – For that melt factor
- 1 can (10 oz) diced tomatoes with green chilies – Adds tang and heat
- 1 small jalapeño (optional) – For extra spice
- Salt and pepper to taste
Optional Add-ins:
- Cooked ground beef or chorizo
- Fresh cilantro, chopped
- Diced onions or bell peppers
- Hot sauce or cayenne pepper for added heat
Freshly grated cheese melts better than pre-shredded varieties, which often contain anti-caking agents that make the dip grainy. Also, using a combination of cheeses improves both taste and texture.
Kitchen Tools You’ll Need
Queso doesn’t demand fancy gadgets, but having the right tools makes it easier:
- Medium saucepan – Ideal for melting and mixing
- Whisk – To prevent clumping when making the roux
- Wooden spoon – Perfect for stirring as the queso thickens
- Cheese grater – Freshly grated cheese is a must
- Cutting board and knife – For prepping veggies
Optional but handy:
- Slow cooker – To keep the queso warm during a party
- Serving bowl with a warming feature – Keeps the texture smooth throughout serving time
With these essentials in your kitchen, you’re fully equipped to tackle this queso recipe like a pro.
Step-by-Step Instructions for Making Queso
Now comes the fun part—making the actual queso. Follow these steps carefully to get that smooth, creamy texture and bold, cheesy flavor every time.
Step 1: Prepping the Ingredients
Start by shredding your cheeses and setting them aside. Dice your jalapeños and other vegetables, if using. Drain the canned tomatoes with green chilies and have your milk and cream ready. Measure out your flour and butter. This mise-en-place approach ensures you’re not scrambling as the sauce thickens.
Step 2: Making the Roux and Base
In your saucepan, melt the butter over medium heat. Add the flour and whisk continuously for about a minute. This step cooks out the raw flour taste and creates a thickening base. Slowly pour in the milk and cream while whisking to avoid lumps. Cook until it slightly thickens—about 2–3 minutes.
Step 3: Adding Cheese and Flavor
Reduce the heat to low. Add in your shredded cheeses one handful at a time, stirring constantly. Once the cheese is fully melted and the sauce is silky, add the drained tomatoes and jalapeños. Stir until everything is evenly combined. Taste and adjust with salt, pepper, or hot sauce as needed.
At this point, your queso should be smooth, creamy, and full of flavor. If it’s too thick, stir in a bit more milk. Too thin? Let it simmer a little longer or add a touch more cheese.
Pro Tips for Creamy, Flavorful Queso
Even though queso seems simple, a few wrong moves can leave you with a gritty, clumpy, or bland dip. Here are some expert tips to ensure your queso turns out just right every single time:
1. Use Freshly Grated Cheese: It’s tempting to grab a bag of pre-shredded cheese, but don’t do it. Those cheeses have added starches and anti-caking agents that can affect the texture of your queso. Grating your cheese fresh from the block will ensure it melts smoothly and creates a velvety sauce.
2. Low and Slow is Key: Queso isn’t something you want to rush. Always melt your cheese on low heat. High heat can cause the proteins to seize and the fats to separate, leaving you with a curdled mess. Keep the heat low and stir often.
3. Stir Constantly:
You don’t have to whisk like a maniac, but consistent stirring helps distribute the heat evenly and prevents scorching at the bottom of the pan.
4. Adjust Thickness with Milk or Cheese: If your queso ends up too thick, don’t panic. Add a splash of milk or cream until you reach your desired consistency. On the flip side, if it’s too runny, a little more cheese (or letting it simmer a bit) can thicken things up nicely.
5. Season Wisely: Remember that cheese and canned ingredients (like Rotel tomatoes) often contain salt. Taste before adding more. Want a smoky flavor? Try smoked paprika or chipotle powder.
6. Keep it Warm: Once queso cools, it thickens quickly. If you’re serving it at a party, keep it warm in a slow cooker or a fondue pot. Give it a stir every now and then to keep the texture even.
Following these pro tips will give you that irresistible, smooth-as-silk queso every time. Perfect for dipping, drizzling, or devouring with a spoon!
Creative Variations on Classic Queso
Queso is one of those recipes that just begs for customization. While the classic version is already amazing, adding your own twist can elevate it to gourmet snack status. Here are some mouthwatering variations to try:
1. Spicy Jalapeño Queso: Craving heat? Add more diced jalapeños, serrano peppers, or even a splash of your favorite hot sauce. For smoky heat, try chipotle peppers in adobo sauce. The depth of flavor is incredible.
2. Chorizo Queso: Brown up some Mexican chorizo and stir it into your finished queso. The spicy, savory sausage adds protein and bold flavor that turns this dip into a full-on meal.
3. Green Chile Queso: Swap out the canned tomatoes for roasted Hatch green chilies. They have a slightly sweet, smoky flavor that pairs beautifully with cheese.
4. Beer Cheese Queso: Replace half the milk with a light beer to create a pub-style queso with extra depth. Just make sure to simmer off the alcohol, so you’re left with rich flavor, not bitterness.
5. Vegan Queso: Yes, it’s possible—and delicious! Use a cashew or potato-carrot base blended with nutritional yeast, garlic, and spices. Add almond milk or oat milk to reach the desired consistency. Even dairy lovers will be impressed.
6. Bacon Queso: Because, why not? Add crispy bacon bits to your queso for a savory, salty crunch. Bonus points if you drizzle some of the bacon grease into the cheese sauce for an extra punch.
7. White Queso Blanco: Use white American cheese and Monterey Jack for a smooth, mild version. Great for those who prefer a less tangy flavor profile.
The possibilities are endless. Think of queso as a blank canvas—flavor it to fit your mood or the crowd you’re serving.
Best Foods to Serve with Queso
Sure, tortilla chips are the classic sidekick, but there’s a whole world of queso pairings waiting to be explored. Whether you want to keep things traditional or think outside the chip bag, here are some killer ideas:
1. Tortilla Chips: The OG. Crunchy, salty, and made for dipping. Warm them in the oven for extra magic.
2. Soft Pretzels: The soft, chewy texture of pretzels with warm queso? Heaven. Great for game nights or party platters.
3. Fresh Veggies: For a lighter option, try dipping baby carrots, celery sticks, bell pepper slices, or cucumber rounds. The crisp freshness balances the richness of the cheese.
4. French Fries or Tater Tots: Cheese fries are always a win. Pour queso over a plate of crispy fries or tater tots for an indulgent treat.
5. Nachos: Layer tortilla chips with beans, jalapeños, olives, and ground beef. Then smother the whole thing with queso and pop it under the broiler for a minute.
6. Tacos & Burritos: Use queso as a topping for tacos, burritos, or enchiladas. It adds gooey richness and pulls the whole dish together.
7. Breadsticks or Garlic Bread: Yep, it works. Dip crusty bread into queso for an unexpected but delicious combo.
8. Grilled Meats: Queso can be a delicious topping for grilled chicken, steak, or even burgers. Think of it as a cheesy gravy with a kick.
Next time you’re hosting, serve up a queso board with a variety of dippables. Your guests will love the mix-and-match potential!
Storage and Reheating Tips
So, you’ve made a big batch of queso, but somehow (miraculously) there are leftovers. The good news? Queso stores and reheats like a dream—if you do it right. Here’s how to preserve the creamy texture and bold flavor for another round.
1. Cool it Down First: Before you think about storing queso, let it cool to room temperature. Don’t just stick a piping hot pan in the fridge—that can lead to condensation and change the texture when reheated.
2. Store in an Airtight Container: Transfer your cooled queso to a glass or BPA-free plastic container with a tight-fitting lid. This will keep it from drying out and absorbing fridge odors.
3. Refrigeration: Homemade queso will keep in the refrigerator for about 3–4 days. Just give it a good stir before reheating to redistribute any separated oils or moisture.
4. Freezing Queso – Yay or Nay? Technically, yes—you can freeze queso. But be warned: dairy can separate when thawed, resulting in a grainy texture. If you do freeze it, use an airtight freezer-safe container and leave some room for expansion. When reheating, warm it slowly on the stove and whisk vigorously. Adding a bit of cream or milk can help restore smoothness.
5. Reheating Like a Pro: Reheat your queso low and slow. The stovetop is your best bet—heat over low heat, stirring constantly. If you’re short on time, you can microwave it in 30-second bursts, stirring in between until warm and smooth. Avoid high heat, as it can cause the cheese to split and become oily.
6. Add a Splash of Milk or Cream: Queso tends to thicken in the fridge. To bring it back to its dippable glory, add a splash of milk or cream during reheating and stir it in well. You can also toss in a little fresh cheese to freshen up the flavor.
Treat your leftovers with care and you’ll be enjoying your queso all over again—on fries, over nachos, or straight from the spoon!
Queso for Special Diets
Queso may be traditionally made with cheese and cream, but that doesn’t mean those with dietary restrictions have to miss out. Here’s how you can tailor your queso recipe for different dietary needs without sacrificing flavor:
1. Vegan Queso: Ditch the dairy and still enjoy creamy, cheesy goodness. Here’s a base that works wonders:
- 1 cup soaked cashews (or cooked potatoes and carrots for nut-free)
- 1/2 cup plant milk (like oat or almond)
- 1/4 cup nutritional yeast (gives that cheesy flavor)
- 1 tsp garlic powder, onion powder, paprika
- 1 tbsp lemon juice or apple cider vinegar
- Salt and jalapeños to taste
Blend everything until smooth and heat gently on the stove. You’ll be amazed at how close this comes to the real deal.
2. Gluten-Free Queso: Most traditional queso is naturally gluten-free, especially if you’re not using a flour-based roux. To thicken without flour, you can use cornstarch or arrowroot powder. Always check labels, especially on pre-packaged cheese or seasonings.
3. Keto-Friendly Queso: Queso is already pretty low in carbs, but for a truly keto version:
- Skip any flour thickeners
- Use heavy cream and full-fat cheese
- Avoid high-carb mix-ins like tomatoes (opt for jalapeños or green chilies)
4. Dairy-Free Queso:
Similar to vegan versions, you can use dairy-free cheeses and plant-based milk. Look for meltable vegan cheese blends made from almond or coconut oil for best results.
No matter your dietary restrictions, there’s a queso out there for you. With a little creativity and a few swaps, everyone gets to dip in.
Nutritional Facts of Homemade Queso
Let’s be honest—queso isn’t exactly “diet food,” but making it at home gives you way more control over what goes into your bowl. Here’s a general breakdown of a standard serving (about 1/4 cup) of classic homemade queso:
| Nutrient | Amount per Serving |
|---|---|
| Calories | 150–180 |
| Total Fat | 13g |
| Saturated Fat | 7g |
| Carbohydrates | 4g |
| Sugar | 2g |
| Protein | 6g |
| Sodium | 400–600mg |
Ways to Make Queso Healthier:
- Use reduced-fat cheese – But beware, some don’t melt as well.
- Substitute milk with low-fat versions – Or unsweetened almond milk.
- Bulk it up with veggies – Add spinach, roasted peppers, or tomatoes.
- Control salt – Taste first before adding more.
- Skip the roux – Thicken with a bit of cornstarch slurry or just more cheese.
Remember, queso is meant to be indulgent—enjoy it in moderation and maybe serve it with some fresh veggie dippers to balance things out.
Queso Mistakes to Avoid
Making queso seems easy—melt some cheese and go, right? But a few small mistakes can turn that dreamy, creamy dip into a gritty, greasy mess. Avoid these common pitfalls and your queso will be restaurant-quality every time:
1. Using Pre-Shredded Cheese: It might be convenient, but pre-shredded cheese has anti-caking agents that prevent smooth melting. These additives can create a gritty or gluey texture. Always shred your cheese fresh from the block for the best results.
2. Overheating the Cheese: High heat is queso’s enemy. If you heat cheese too quickly or at too high a temperature, it can seize up and separate, leaving you with a clumpy mess. Stick to low and slow—let the cheese melt gradually and stir constantly.
3. Skipping the Roux or Thickener: A simple roux of butter and flour, or a cornstarch slurry, helps the sauce stay together and gives it that luscious thickness. Without a proper thickener, your queso may turn watery or separate.
4. Not Stirring Enough: It’s not a hands-off dip. Queso needs constant attention while it’s cooking. Stir often to keep it smooth and prevent scorching.
5. Adding All the Cheese at Once: Dumping in all the cheese at once will cool the sauce too quickly and increase the risk of clumping. Add cheese slowly, one handful at a time, allowing each batch to melt before adding more.
6. Not Draining Wet Ingredients: If you’re using canned tomatoes or green chilies, always drain them first. Extra liquid can mess with the texture of your queso and make it soupy.
7. Forgetting to Taste and Season: Cheese has salt, but that doesn’t mean your dip is perfectly seasoned. Always taste before serving, and feel free to adjust with garlic powder, cumin, paprika, or chili flakes to balance the flavor.
Avoid these common queso mistakes and you’ll be the dip king or queen of every party.
Why Homemade Queso is Better Than Store-Bought
Sure, grabbing a jar of queso off the shelf is easy, but once you taste homemade queso, you’ll never go back. Here’s why making it yourself is totally worth the (minimal) effort:
1. Fresh Ingredients: Homemade queso uses real cheese, milk, cream, and spices—no preservatives, stabilizers, or mystery thickeners. You know exactly what you’re putting into your body, and the flavor speaks for itself.
2. Customizable Flavor:
Store-bought queso comes in set flavors. Homemade queso? You can tweak it endlessly. Want it spicier? Add more jalapeños. Want it smoky? Toss in some chipotle. More garlic? Go for it. You’re the boss of your batch.
3. Better Texture: Jarred queso often has a rubbery, plasticky feel. Homemade queso is silky, smooth, and can be adjusted to your perfect thickness with just a splash of milk or more cheese.
4. Healthier Option: By controlling the ingredients, you can make your queso gluten-free, low-carb, vegetarian, or even vegan. You can cut back on salt, fat, or calories without sacrificing flavor.
5. Impress Your Guests: Bringing out a bubbling bowl of fresh, hot queso with your custom toppings shows love and effort. Your friends will be asking for the recipe—and maybe even for seconds… or thirds.
Homemade queso isn’t just better—it’s on a whole different level. Once you try it, you’ll be making it every time the craving hits.
Fun Ways to Use Leftover Queso
Leftover queso? Sounds like a bonus to us. Don’t let that cheesy goodness go to waste. Here are some fun, delicious ways to use it up:
1. Queso Nachos: Spread tortilla chips on a baking sheet, drizzle with reheated queso, and broil for a minute or two. Top with jalapeños, onions, sour cream, and guac.
2. Queso Mac & Cheese: Mix queso with cooked macaroni for a quick, ultra-creamy mac and cheese. You can even bake it with breadcrumbs on top for an elevated twist.
3. Queso-Stuffed Burgers: Create a pocket in your burger patty and fill it with a spoonful of queso. Grill it to gooey perfection and enjoy the melty surprise.
4. Loaded Queso Fries: Pour leftover queso over French fries and top with chopped bacon, scallions, and hot sauce. Perfect game-day snack.
5. Queso Breakfast Burritos: Scramble eggs, add potatoes, sausage or bacon, and drizzle with queso. Wrap it all up in a tortilla for a hearty breakfast.
6. Queso-Topped Baked Potatoes: Split a baked potato and load it up with queso, black beans, and salsa. A delicious, comforting vegetarian meal.
7. Dip for Veggie Trays: Reheat and serve your queso as a dip alongside carrots, celery, broccoli, and bell peppers. Even veggie skeptics will dive in.
With queso, the possibilities are as endless as your imagination (and appetite). It’s the gift that keeps on giving.
FAQs about Best Queso Recipe
1. Can I make queso in advance?
Yes! Queso can be made a day or two in advance. Just store it in the fridge and reheat gently on the stove or in the microwave, adding a splash of milk if needed.
2. What cheese is best for queso?
A mix of cheddar and Monterey Jack is ideal. For smoother melting, you can also use American cheese or Velveeta, though they’re more processed.
3. Can queso be frozen?
Yes, but the texture may change slightly when thawed. Reheat slowly and whisk thoroughly to bring it back to a smooth consistency.
4. How can I fix thick queso?
Add a splash of milk or cream and stir until it reaches your desired consistency. You can also reheat it slowly and whisk to blend.
5. Is queso only for chips?
Not at all! Queso is great on nachos, fries, burgers, tacos, baked potatoes, and more. It’s an all-purpose cheesy topping that upgrades any dish.
Conclusion
There you have it—the ultimate step-by-step guide to making the best queso you’ll ever taste. From choosing the right cheese and mastering the creamy texture, to adding your own spicy or meaty twist, homemade queso isn’t just better—it’s a game-changer.
The next time you’re planning a party, game day snack, or just craving something rich and cheesy, skip the store-bought jar. Use this guide, melt up some magic, and watch it disappear faster than you can say “pass the chips.”