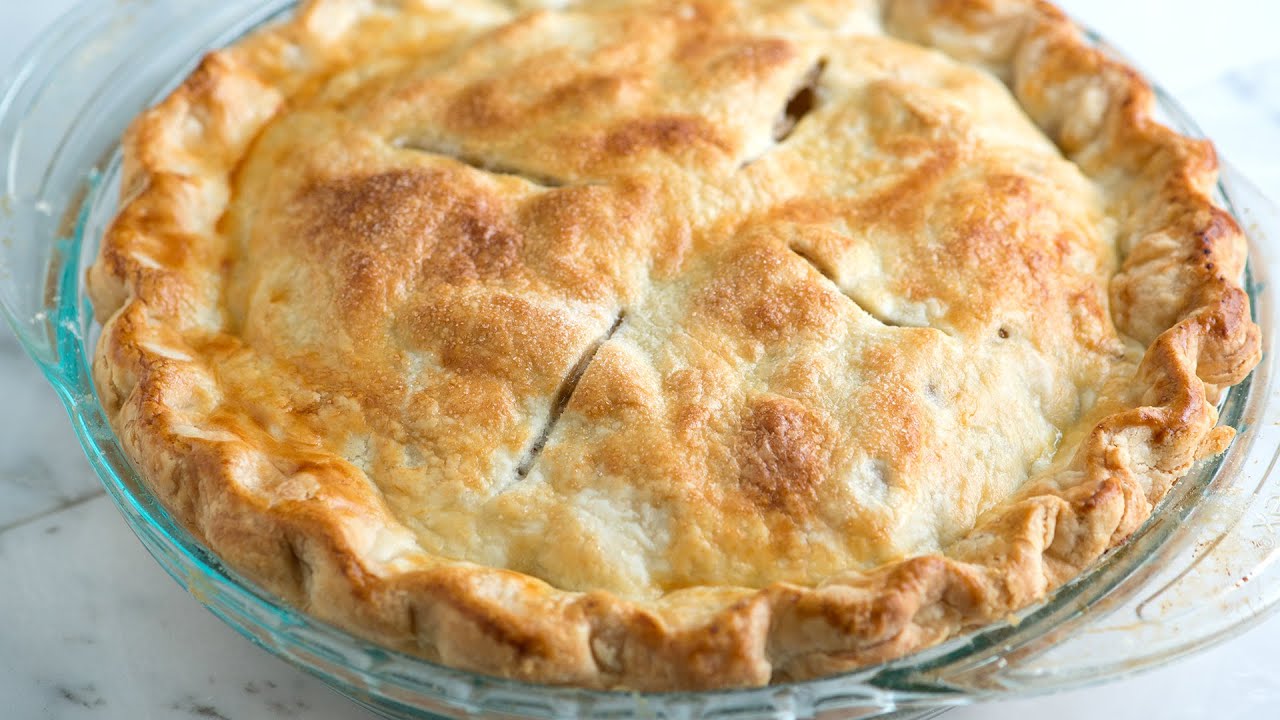
Best Pie Crust Recipe: Creating the perfect pie crust isn’t just a skill—it’s an art. This guide isn’t your run-of-the-mill list of ingredients with vague instructions. Nope.
We’re diving deep into every flakey layer. Whether you’re a seasoned baker or a total beginner, by the end of this guide, you’ll be able to make a golden, buttery, and tender pie crust that melts in your mouth.
Let’s get rolling!
Why a Great Pie Crust Matters
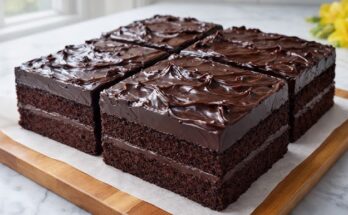
Ever taken a bite of a beautiful pie only to find the crust disappointingly soggy or bland? Yeah, we’ve all been there. A great crust is the backbone of a pie. It sets the stage for the filling, offering a crisp, flaky contrast that elevates the whole dessert. Think of it like a movie soundtrack—it may not be the star, but without it, everything falls flat. A properly made crust enhances flavor, texture, and presentation. Whether it’s a juicy apple filling or creamy pumpkin, a perfect crust is what holds it all together—literally and figuratively.
What Makes This Pie Crust the Best?
There are thousands of pie crust recipes floating around, so why this one? Because it delivers every single time. This crust is:
- Flaky, thanks to the cold butter and proper technique.
- Flavorful, with just the right touch of salt and fat.
- Versatile, suitable for both sweet and savory pies.
- Fail-proof, if you follow the step-by-step method.
What’s more, you don’t need fancy equipment. Just a few ingredients, a bit of patience, and a rolling pin.
Types of Pie Crusts
Let’s talk fats. The type of fat you use has a major impact on the flavor and texture of your crust.
Butter
- Rich, delicious flavor
- Flaky texture
- Slightly harder to work with (melts quickly)
Shortening
- Very flaky
- Easier to handle
- Lacks the rich flavor of butter
Lard
- Ultra-flaky
- Traditional in many recipes
- Stronger taste
Pro tip: Many bakers use a mix of butter and shortening for the best of both worlds—flavor and flake.
Essential Ingredients You’ll Need
To get started, gather the following ingredients:
| Ingredient | Amount | Notes |
|---|---|---|
| All-purpose flour | 2 ½ cups | Spooned and leveled |
| Unsalted butter | 1 cup (2 sticks) | Cold and cut into cubes |
| Salt | 1 tsp | Balances the flavor |
| Ice water | 6–8 tbsp | Add slowly until dough holds together |
| Sugar (optional) | 1 tbsp | For sweet pies |
| Vinegar or vodka (optional) | 1 tsp | Prevents gluten development for tender crust |
That’s it. Keep it simple and stick to high-quality ingredients for the best results.
Kitchen Tools You’ll Need
While you don’t need anything fancy, the right tools make life easier:
- Mixing bowls
- Pastry blender or food processor
- Measuring cups and spoons
- Rolling pin
- Plastic wrap
- Pie dish
- Fork (for docking)
- Pastry brush (for egg wash if needed)
Pie Crust Troubleshooting Tips
- Crumbly Dough? Add more ice water—one tablespoon at a time.
- Sticky Dough? You added too much water; dust with flour and handle gently.
- Shrunken Crust? You likely didn’t chill it enough or stretched it while placing it in the pie pan.
- Tough Crust? You may have overmixed or used warm ingredients.
Don’t stress. Each mistake is a step toward mastering your crust game.
Step-by-Step Guide to the Perfect Pie Crust
Here’s the part you’ve been waiting for—let’s roll up our sleeves and dive in.
Step 1: Measure Ingredients Properly
Accuracy is everything. Spoon flour into your measuring cup and level it with a knife. Don’t scoop directly from the bag—it compresses the flour and leads to a dense crust.
Step 2: Keep Everything Cold
Warm butter is your worst enemy. Cold butter = flaky layers. Cube your butter and place it in the fridge or even freezer for a few minutes before mixing. You can also chill your flour bowl to keep everything cool.
Step 3: Cut the Butter Into the Flour
Use a pastry cutter, fork, or food processor. You’re looking for pea-sized pieces. Don’t overmix—the little butter pockets are what create that tender, flaky texture when they melt in the oven.
Step 4: Add Ice Water Gradually
Add one tablespoon at a time while mixing. The dough should hold together when you press it, but it shouldn’t be sticky or wet. Stop when it holds form—you might not need all 8 tablespoons.
Step 5: Form Into a Disc
Dump the dough onto a clean surface. Gather it into a ball, divide it in half if making a double crust, and gently flatten into a disc shape. Wrap tightly in plastic wrap.
Step 6: Chill the Dough
Place your disc in the fridge for at least 1 hour, or up to 2 days. This helps hydrate the flour and solidify the butter. Don’t skip this step—it’s key to flakiness!
Step 7: Roll Out the Dough
Lightly flour your surface and rolling pin. Roll from the center out, rotating the dough a quarter-turn every few rolls. Keep it about ⅛ inch thick and a few inches larger than your pie dish.
Step 8: Transfer to Pie Plate
Gently fold the rolled-out dough in half or roll it around your pin to transfer it to the pie plate. Ease it into the corners—don’t stretch it! Press lightly to fit.
Step 9: Trim and Crimp Edges
Trim the excess dough, leaving about a ½ inch overhang. Fold the edge under itself and crimp using your fingers or a fork for a decorative finish.
Step 10: Blind Bake (If Needed)
For cream pies or quiches, you’ll want to blind bake. Line the crust with parchment paper, fill with pie weights or beans, and bake at 375°F for 15–20 minutes. Remove weights and bake 10 more minutes until golden.
Tips for Rolling the Perfect Dough
Rolling dough might seem intimidating, but it’s all about rhythm and patience. Here’s how to master it:
- Start from the center and roll outward in all directions—north, south, east, west—to keep the shape circular.
- Rotate the dough a quarter-turn every few rolls to prevent sticking and ensure an even thickness.
- Light pressure is key. Don’t press too hard or you’ll risk tearing or overworking the dough.
- Keep it cold. If the dough becomes too soft or sticky while rolling, pop it back in the fridge for 10 minutes.
- Use light flour dusting on your surface and rolling pin, but don’t go overboard—too much flour can make the crust dry and tough.
- Patch tears easily by pressing a small piece of extra dough over the tear and smoothing it out with your fingers or a bit of cold water.
Practice makes perfect. The more you roll, the more intuitive it becomes. Soon enough, you’ll be rolling dough like a pro—quick, even, and ready to impress.
Common Mistakes and How to Avoid Them
Even seasoned bakers slip up sometimes. Here are the most common pie crust pitfalls and how to steer clear of them:
1. Overworking the Dough
Mix just until the dough comes together. Overworking it will activate the gluten and lead to a chewy, tough crust instead of a flaky, tender one.
2. Warm Ingredients
If your butter melts before baking, you’ll lose all those delicious flaky layers. Use cold butter, cold water, and even chill your flour if needed.
3. Not Letting It Rest
Skipping the chilling phase can make the dough shrink when baked. Letting it rest allows the gluten to relax and helps the butter stay solid.
4. Stretching the Dough
When placing the dough in the pie plate, ease it in. Don’t pull or stretch—this causes the crust to shrink back in the oven.
5. Skipping Blind Baking
If your filling is wet or doesn’t require baking (like a cream pie), blind baking is a must. Otherwise, you’ll end up with a soggy bottom crust.
Avoid these traps, and you’ll be on your way to pie crust perfection every single time.
How to Store Pie Dough
Once your dough is made, you’ve got options:
- Refrigerate for up to 2–3 days. Just make sure it’s tightly wrapped in plastic wrap to prevent drying out or absorbing fridge odors.
- Freeze for later. Wrap in plastic and then foil, or use a zip-top freezer bag. It’ll stay good for up to 3 months.
When you’re ready to use frozen dough, thaw it in the refrigerator overnight—not at room temperature. This keeps the butter solid and the crust flaky.
How to Freeze Pie Crust
Yes, you can freeze your crust fully formed. Here’s how:
- Roll out your dough and press it into a pie pan.
- Crimp or trim the edges as desired.
- Cover the entire pie plate tightly with plastic wrap and foil.
- Label it with the date and type.
- Freeze for up to 3 months.
When you need it, there’s no need to thaw—just bake from frozen! Add an extra 5–10 minutes to the bake time if you’re blind baking or filling with a hot mixture.
Perfect Fillings to Pair with This Crust
This crust works beautifully for both sweet and savory pies. Here are a few delicious ideas:
Sweet Fillings
- Apple cinnamon
- Classic cherry
- Blueberry lemon zest
- Pumpkin spice
- Pecan or chocolate pecan
Savory Fillings
- Chicken pot pie
- Quiche Lorraine
- Spinach and feta
- Ham and cheddar
- Mushroom and leek
Whether you’re baking for the holidays, a Sunday brunch, or just because—you can’t go wrong pairing this crust with your favorite filling.
Gluten-Free or Vegan Alternatives
Have dietary restrictions? No worries. Here are a few easy tweaks:
Gluten-Free Pie Crust
- Use a 1:1 gluten-free all-purpose flour blend.
- Add ½ tsp xanthan gum if your flour blend doesn’t include it.
- Keep everything else the same—but be gentle, as GF doughs are more fragile.
Vegan Pie Crust
- Replace butter with plant-based butter or chilled coconut oil.
- Shortening also works as a butter substitute.
- Make sure your sugar (if used) is certified vegan.
Both versions are surprisingly delicious and still offer a flaky, golden crust—no compromise on taste or texture.
FAQs about Pie Crust Recipe
1. Can I use salted butter instead of unsalted?
Yes, but reduce the added salt in the recipe by about half. Salted butter already contains salt, so adjust accordingly to avoid an overly salty crust.
2. What’s the best way to crimp a pie crust?
Use your thumb and index finger on one hand and the index finger of your other hand to pinch the dough into a wavy pattern. You can also press the edges with a fork for a simple finish.
3. My pie crust keeps cracking. What can I do?
Your dough might be too dry. Add an extra tablespoon of ice water and knead gently. Also, let it rest before rolling to relax the gluten.
4. Should I egg wash the crust?
If you want a golden, shiny finish, yes! A simple egg beaten with 1 tbsp of water makes a great wash. Brush it on the top crust or edges before baking.
5. Can I make this dough in a food processor?
Absolutely. Just pulse the dry ingredients and butter until crumbly, then add water gradually. Be cautious not to overprocess—it comes together fast!
Conclusion
And there you have it—your complete, no-fail guide to the Best Pie Crust Recipe. It’s buttery, flaky, flavorful, and, best of all, totally doable, even for beginners. By understanding the role of each ingredient and following the step-by-step instructions, you’ll avoid the usual pie crust pitfalls and end up with a crust that’s worthy of any bakery window.
So next time you’re whipping up a pie, skip the store-bought dough. With just a few ingredients and a bit of technique, you’ll be rolling out your own homemade masterpiece that’ll leave everyone asking for seconds.