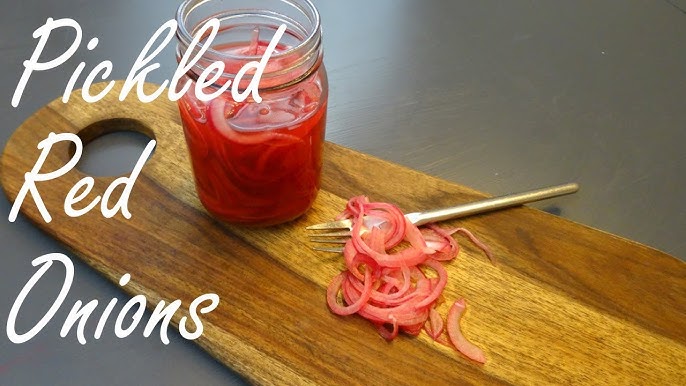
Best Pickled Onions Recipe: Pickled onions—those tangy, crunchy, slightly sweet slices of brilliance—are an underrated powerhouse in any kitchen. These tiny flavor bombs transform basic meals into something unforgettable. Toss them on tacos, layer them in sandwiches, stir them into salads, or just eat them straight from the jar (we won’t judge). The best part? They’re incredibly easy to make at home, and once you try this recipe, you’ll never go back to store-bought.
Pickling is an age-old preservation technique, and onions are one of the easiest vegetables to pickle. Whether you’re into spicy, sweet, or a classic tart profile, you can customize the flavor to suit your palate. Once you master the basic method, the variations are endless. And let’s be honest—when your fridge is stocked with a jar of homemade pickled onions, you’re just one spoonful away from jazzing up any meal.
Why Pickled Onions Are a Pantry Essential
There’s something special about pickled onions. They cut through richness, brighten up heavy dishes, and add an irresistible crunch. Think about how a rich pulled pork sandwich comes to life with a handful of vibrant pink onions. It’s not just about taste—it’s about texture, contrast, and balance.
They’re also incredibly versatile. You can serve them with eggs at breakfast, use them as a topping for burgers at lunch, or even mix them into grain bowls for dinner. Their vibrant hue (thanks to the magic of vinegar reacting with red onions) makes dishes pop visually too.
Health-wise, pickled onions are low-calorie and fat-free. Plus, when made with raw vinegar, they even bring some probiotic benefits to the table. For such a small condiment, they sure pack a punch.
Ingredients You’ll Need
Let’s break down what you need to get started with your perfect pickled onions.
Main Ingredients:
- Red onions (2 medium-sized): These are preferred for their color and mild flavor.
- Vinegar (1 cup): Apple cider vinegar or white vinegar both work great.
- Water (1 cup): Helps dilute the brine to mellow the vinegar bite.
- Sugar (2 tablespoons): Balances out the acidity.
- Salt (1.5 teaspoons): Enhances flavor and preserves the onions.
That’s it! With just these five basic ingredients, you’re well on your way to something magical.
Optional Add-ins for Flavor Customization:
- Garlic cloves (1-2): For a punch of savory aroma.
- Black peppercorns (1 teaspoon): Adds a mild heat and earthiness.
- Bay leaves (1-2): Brings depth and complexity.
- Red chili flakes (½ teaspoon): For those who like it spicy.
- Fresh herbs (like thyme or dill): For a fragrant twist.
These extras are like the cherry on top. Mix and match based on what you’re craving.
Tools and Equipment Required
Before you dive into chopping and boiling, make sure your kitchen is ready to go.
Essential Kitchen Tools:
- Sharp knife: For even, precise onion slices.
- Cutting board: Preferably non-porous to avoid onion smell sticking.
- Saucepan: For heating your brine.
- Measuring cups/spoons: Accuracy matters in pickling.
- Mixing spoon: A wooden or stainless steel one is ideal.
These are all standard tools in most kitchens, so no need to buy anything fancy.
Best Containers for Pickling:
- Glass jars (like Mason jars): Non-reactive and airtight, perfect for pickling.
- Lid (tight-fitting): Keeps the brine sealed in and air out.
- Optional: Funnel and ladle: Makes transferring the brine easier and cleaner.
Make sure your jars are sterilized before use. You can do this by boiling them or running them through a hot dishwasher cycle.
Preparing the Onions
This is where it all begins—the foundation of your pickled perfection.
Choosing the Right Type of Onion:
Red onions are the top pick for this recipe. Why? Their natural sweetness balances the vinegar’s sharpness, and they turn a gorgeous pinkish hue when pickled. However, if you’re in a pinch, white or yellow onions will still work—they’ll just lack that pretty color and may be a bit sharper in flavor.
Try to choose onions that are firm, smooth, and free from bruises. Organic is ideal if available, since you’ll be soaking the whole thing in a brine.
Proper Slicing Techniques:
- Peel off the papery outer layer.
- Cut the onion in half from root to tip.
- Slice into thin, even half-moons (about 1/8 inch thick).
Thinner slices mean quicker pickling and a better crunch. You want consistency so that all your slices pickle at the same rate. If you’re a kitchen gadget lover, a mandoline slicer can help you achieve those perfect, uniform slices effortlessly.
Making the Pickling Brine
Here’s where the transformation begins. That tangy, slightly sweet liquid is the heart of any good pickle.
The Ideal Vinegar Mix:
A 1:1 ratio of vinegar to water works best. This creates a bold but not overpowering brine. Apple cider vinegar adds a hint of fruitiness, while white vinegar gives a sharper bite. You can even experiment with rice vinegar or red wine vinegar for a twist.
- Tip: Always bring your vinegar mixture to a boil. This helps dissolve the sugar and salt, and gives the brine a smoother taste.
Sugar and Salt Ratios:
- 2 tablespoons of sugar: Balances acidity without being too sweet.
- 1.5 teaspoons of salt: Not too salty, but enough to enhance flavor.
Adjust the sugar and salt to your liking, but don’t skip either—they’re both essential for proper pickling.
Pouring and Storing the Pickled Onions
Once your brine is ready and your onions are sliced, it’s time to bring everything together. This part is incredibly satisfying because it’s where all your prep work finally turns into something beautiful and delicious.
Packing the Jars:
Start by placing your sliced onions into your sterilized jars. You want to pack them in fairly tightly, but don’t press them down too hard—you want enough room for the brine to work its way into every nook and cranny.
If you’re using any optional add-ins (garlic, herbs, peppercorns, etc.), add them in between layers of onion slices. This helps infuse the onions evenly and adds visual appeal to your jars.
Pouring the Brine:
Carefully pour the hot brine over the onions until they’re fully submerged. A ladle and a funnel can be helpful here to avoid spills. Use a spoon or chopstick to press down on the onions gently and release any trapped air bubbles. Top off with more brine if needed.
Make sure the brine covers all the onion slices to ensure even pickling. If some onions float to the top, don’t worry—they’ll settle as the mixture cools.
Letting Them Cool and Seal:
Leave the jars at room temperature for about 30 minutes to an hour. Once they’ve cooled slightly, screw the lids on tightly. Place the jars in the refrigerator for at least one hour, though waiting 24 hours gives the best flavor development.
These pickled onions will last in the fridge for up to 2–3 weeks. Over time, they become more flavorful as the onions continue to absorb the brine.
Tips and Tricks for Perfect Pickled Onions
Making pickled onions is easy, but a few insider tips can elevate your results from good to phenomenal.
Balance is Everything:
Taste your brine before you pour it over the onions. It should be slightly sweeter than you think, as the onions will absorb and mellow the flavors. If it tastes too sharp, add a touch more sugar or water.
Customize with Confidence:
Don’t be afraid to experiment. Add citrus zest for brightness, cinnamon sticks for warmth, or even a splash of soy sauce for an umami punch. This is where you can truly make the recipe your own.
Keep it Crunchy:
Want that perfect crunch? Slice your onions thin but not paper-thin. Too thick and they won’t pickle evenly; too thin and they’ll lose their crispness.
Also, never boil your onions—just pour hot brine over them. This method keeps them crunchy and fresh-tasting.
Make Ahead for Convenience:
Pickled onions are a great meal-prep item. Make a big batch and you’ve got a fast, flavorful addition to meals all week. They’ll keep their zing and crunch for up to three weeks if stored properly.
Serving Suggestions and Recipe Pairings
You’ve made your pickled onions—now it’s time to enjoy them. These little flavor bombs are insanely versatile.
Top Uses for Pickled Onions:
- Tacos: The acidity balances out the richness of meats like carnitas or al pastor.
- Burgers and Sandwiches: Adds tang and crunch—especially great with pulled pork or brisket.
- Salads: Toss into green or grain salads for a zesty kick.
- Charcuterie Boards: Perfect next to cheeses and cured meats.
- Avocado Toast: A few rings elevate a basic toast into a brunch-worthy plate.
- Rice Bowls and Buddha Bowls: Adds a fresh contrast to earthy grains and roasted veggies.
- Egg Dishes: Fantastic with scrambled eggs, frittatas, or shakshuka.
You can even chop them finely and mix them into salsas, dips, or relishes. Their punchy flavor enhances just about everything.
Troubleshooting Common Pickling Problems
Things don’t always go according to plan in the kitchen, so let’s look at a few common issues and how to fix them.
Why Are My Onions Mushy?
This could be due to overcooking. Remember: never boil your onions, just pour the hot brine over them. Also, make sure you’re using fresh, firm onions to start with.
My Onions Are Too Sour or Too Sweet—What Went Wrong?
It’s all about ratios. Next time, adjust your sugar and vinegar balance. You can even dilute overly sour onions with a splash of water and let them sit overnight.
They Don’t Look Pink—Is That Normal?
Yes! Red onions gradually turn pink as they soak in vinegar. If yours are still pale after a few hours, give them more time. The color transformation is part of the magic.
I See Bubbles or Foam—Are They Safe to Eat?
Some bubbles are normal, especially right after pouring the brine. However, if you see mold or smell anything funky, toss the batch. Always store your jars in the fridge, not on the counter, unless you’re doing a traditional fermentation process (which this isn’t).
Health Benefits of Pickled Onions
You might not expect it, but these tangy little rings offer more than just flavor. Pickled onions actually come with a surprising number of health perks. They may not be a superfood, but when added to a balanced diet, they provide both taste and wellness benefits.
Low in Calories and Fat-Free
A serving of pickled onions is very low in calories—usually under 20 calories per tablespoon—and contains virtually no fat. This makes them a great flavor enhancer without adding to your waistline.
Rich in Antioxidants
Red onions are naturally high in antioxidants, especially quercetin, which has anti-inflammatory and antihistamine properties. Even though the pickling process changes some of the chemical makeup, many of these beneficial compounds remain.
Digestive Boost
The vinegar in pickled onions isn’t just for taste—it also supports digestion. Apple cider vinegar, in particular, can promote healthy gut bacteria, improve nutrient absorption, and even help regulate blood sugar levels after meals.
Hydration and Electrolytes
Onions contain a decent amount of potassium, and the brine can help replenish electrolytes. After a workout or on a hot day, adding some pickled onions to your meal can help rehydrate and balance your body’s mineral levels.
Natural Detox Properties
Thanks to sulfur compounds, onions support liver function and help the body detoxify. Combined with vinegar’s alkalizing effects, pickled onions can be a gentle way to help your system reset.
Just remember: while pickled onions are good for you in moderation, they are high in sodium. If you’re watching your salt intake, be mindful of how much you eat or consider making a low-sodium version.
How to Store Pickled Onions Properly
Storing your homemade pickled onions the right way is essential to keep them crisp, flavorful, and safe to eat. The good news? It’s super simple.
Refrigeration Is Key
This recipe is for quick-pickled onions—not canned or fermented—so refrigeration is non-negotiable. Always store your jars in the fridge immediately after they’ve cooled down to room temperature.
Make sure your refrigerator is set to 40°F (4°C) or below. A cooler temperature helps maintain the crispness of the onions and prevents any bacterial growth.
Use Airtight Containers
Always use glass jars with tight-fitting lids. Glass doesn’t react with acidic ingredients like vinegar, unlike metal or plastic which can leave a weird taste or even degrade over time.
After each use, make sure to seal the jar tightly again. The less air exposure, the longer your onions will stay fresh.
Label Your Jars
Always mark your jars with the date you made them. This takes the guesswork out of knowing when they’re still good. While they’re safe to eat for up to 2–3 weeks, they’re usually at their best flavor-wise within the first 10 days.
Watch for Spoilage
Even though pickling extends shelf life, things can still go wrong. If your onions smell funky, look cloudy, or develop mold, discard them immediately. It’s not worth the risk.
Variations to Try Next Time
Once you’ve nailed the classic version, it’s time to get creative. Pickled onions are incredibly versatile and take well to all sorts of variations.
Mexican-Inspired Pickled Onions
Add cumin seeds, oregano, and a few jalapeño slices to the jar. Use lime juice instead of water for a citrusy zing. These are perfect for tacos, nachos, or fajitas.
Asian-Inspired Pickled Onions
Try rice vinegar, a bit of soy sauce, and fresh ginger slices. A splash of sesame oil adds depth. These pair beautifully with stir-fries, dumplings, or sushi bowls.
Spicy Pickled Onions
Add more chili flakes, black pepper, or even sliced habaneros for a serious kick. A little goes a long way—these are ideal for those who like it hot.
Sweet and Mild Pickled Onions
Use more sugar and less vinegar for a gentler taste. Add star anise or cinnamon for a warm, aromatic flavor. Great for cheese boards or roasted meats.
Feel free to play around with the vinegar type, spices, or add-ins until you find your signature blend.
FAQs about Pickled Onions Recipe
1. How long do homemade pickled onions last?
They typically last 2–3 weeks in the fridge. For best flavor and texture, consume within the first 10 days.
2. Can I reuse the pickling brine?
Yes, you can reuse it once, especially if you’re pickling another batch within a week. But after that, it’s best to make a fresh batch for optimal flavor and safety.
3. Do I have to use red onions?
Nope! White, yellow, or even sweet onions work. Red onions are just preferred for their mild flavor and bright color.
4. Can I can this recipe for long-term storage?
This is a quick-pickle (refrigerator) method. For shelf-stable storage, you’d need to follow proper canning procedures and sterilize jars accordingly.
5. Are pickled onions healthy?
Yes, in moderation. They’re low-calorie, fat-free, and offer digestive and antioxidant benefits. Just keep an eye on the sodium.
Conclusion
Pickled onions are more than just a garnish—they’re a game-changer. With just a handful of ingredients and a few minutes of prep, you can transform an ordinary dish into something that tastes gourmet. Whether you’re a meal-prepper, a flavor chaser, or someone looking to eat healthier without giving up taste, this simple recipe will quickly become a staple in your kitchen.
So next time you’re whipping up tacos, a sandwich, or even a salad, don’t forget to reach for that jar of vibrant, tangy goodness. Your taste buds (and your dinner guests) will thank you.


