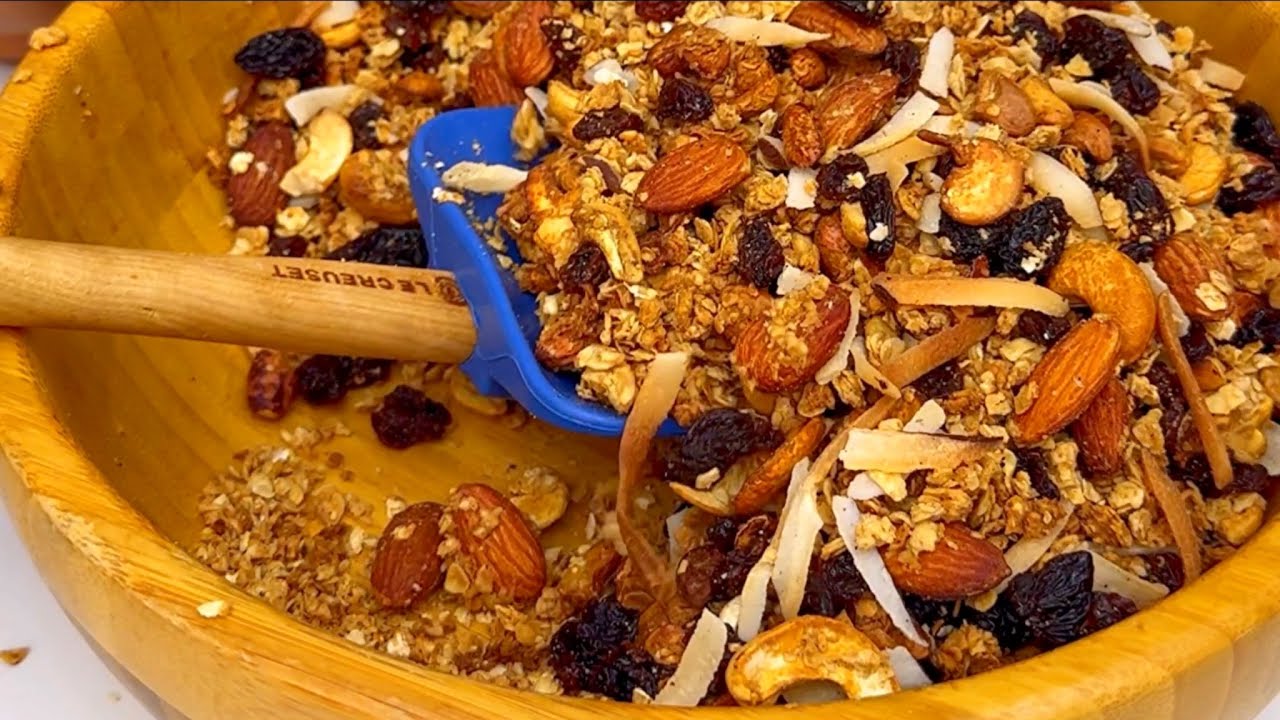
Best Granola Recipe: Making granola at home might just be one of the most satisfying kitchen projects you’ll ever try. Imagine your kitchen filling up with the warm, nutty scent of toasted oats, hints of cinnamon, and a golden crunch that’s better than anything you’ll find in a store. That’s the magic of homemade granola.
Why Make Granola at Home?
Store-bought granola is convenient, but often comes with hidden sugars, preservatives, and sometimes even a hefty price tag. When you make your own, you’re in control. You pick the ingredients. You decide how sweet or crunchy it is. Plus, there’s something deeply satisfying about creating your own snack from scratch.
Homemade granola is customizable down to every last oat. Whether you’re into chewy clusters or crisp bites, like it nutty or fruity, prefer honey over maple syrup, or want it vegan or gluten-free—you can tailor everything.
Health Benefits of Granola
Let’s talk about why granola is more than just tasty. It’s actually packed with nutrients, especially when you make it at home. Oats are rich in fiber and help with digestion. Nuts and seeds add healthy fats and proteins. Dried fruits offer a natural sweetness and antioxidants.
Even better? You’re skipping the overly processed junk and keeping things simple and wholesome. A batch of granola can easily become your go-to breakfast, snack, or even dessert topping.
Essential Ingredients for the Perfect Granola
Creating the best granola starts with choosing the right ingredients. You don’t need a fancy shopping list—just a handful of basics that you can mix and match.
Base Ingredients
Here’s the foundation of any great granola:
- Rolled oats (old-fashioned oats): These are the heart of granola. Go for whole, hearty oats—not quick oats or steel-cut ones.
- Nuts and seeds: Almonds, walnuts, pecans, sunflower seeds, chia seeds—anything you like.
- Sweetener: Maple syrup, honey, or agave work great. You want something that coats the oats and adds that sticky-crunchy effect when baked.
- Oil: Coconut oil or olive oil helps bind everything and gives it that toasted flavor.
- Spices: Cinnamon, nutmeg, vanilla extract—these flavor your granola in a delicious way.
Flavor Enhancers and Mix-ins
Once your base is ready, you can jazz things up with:
- Dried fruits: Raisins, cranberries, apricots, cherries, or chopped dates.
- Chocolate chips: For a dessert-style granola, add them after baking.
- Coconut flakes: Toasted coconut gives a tropical twist.
- Peanut butter or almond butter: Adds creaminess and protein.
Mix and match based on what you’ve got in the pantry or your flavor preferences.
Step-by-Step Guide to Making Granola
Now, let’s walk through the actual process. It’s simple, fast, and you’ll have a jar full of crunchy, golden granola in no time.
Step 1: Gather Your Ingredients
For a basic granola recipe, here’s what you’ll need:
- 3 cups rolled oats
- 1 cup nuts (any combo)
- ½ cup seeds (optional)
- ⅓ cup honey or maple syrup
- ¼ cup oil (coconut or olive oil)
- 1 tsp cinnamon
- 1 tsp vanilla extract
- ½ tsp salt
- ¾ cup dried fruit (add after baking)
Optional:
- ½ cup shredded coconut
- ¼ cup nut butter
Step 2: Mix the Dry Ingredients
In a large mixing bowl, combine the oats, nuts, seeds, cinnamon, and salt. Stir it well so that everything is evenly distributed. This is your dry mix—the foundation of your granola.
If you’re using coconut flakes and want them toasted, add them now. If you like them soft, add them after baking with the dried fruits.
Step 3: Add Wet Ingredients
In a small saucepan, warm up the honey (or maple syrup) and oil over low heat. Stir until they blend together, then add the vanilla extract.
Pour this warm liquid over the dry mix. Use a spatula to stir and coat everything well. This is where the magic starts—the mix begins to clump up and smell incredible.
For extra richness or flavor, you can stir in a spoonful of peanut or almond butter at this stage.
Step 4: Bake to Perfection
Preheat your oven to 325°F (165°C). Line a baking sheet with parchment paper. Spread the granola mixture in an even layer, pressing down slightly with a spatula to form some clumps (if you like chunkier granola).
Bake for 25–30 minutes, stirring halfway through. Watch closely during the last 5 minutes to prevent burning. It should be golden brown, not too dark.
Important: It will still feel soft when it comes out of the oven. Don’t worry—it crisps up as it cools.
Step 5: Cool and Store
Let the granola cool completely on the pan. This is when it hardens and gets that signature crunch.
Once cooled, stir in your dried fruit and any chocolate chips (if using). Store in an airtight container for up to 2 weeks, or freeze for longer storage.
Tips for Customizing Your Granola
One of the best things about homemade granola is how easy it is to tweak and personalize. Whether you’re following a specific diet, watching your sugar intake, or just prefer certain flavors, granola can be adapted effortlessly.
Adjusting for Texture
Some people like loose, flaky granola while others crave big, crunchy clusters. Here’s how to achieve either:
- For chunky granola: Use less stirring while baking. Press the mixture down firmly on the baking sheet before putting it in the oven. Also, a little nut butter can act like a glue to help form clusters.
- For looser granola: Stir the mixture frequently while baking. Don’t press it down too much.
- Add egg whites: Whipping an egg white until frothy and mixing it in before baking can help bind the oats and create those coveted crunchy clumps.
Also, to make your granola crispier, bake it longer at a lower temperature. Keep an eye on it to avoid over-browning. For chewier granola, take it out of the oven a few minutes earlier.
Flavor Variations to Try
Bored of the usual oat-nut-fruit combo? Here are some flavor ideas that’ll spice up your granola routine:
- Tropical: Add coconut flakes, dried pineapple, macadamia nuts, and a splash of lime zest.
- Chocolate: Mix cocoa powder into the base, add dark chocolate chips after baking, and include hazelnuts for a Nutella-inspired taste.
- Pumpkin Spice: Add pumpkin puree, cinnamon, nutmeg, cloves, and a dash of allspice. Use maple syrup for that autumn vibe.
- Apple Pie: Use dried apples, cinnamon, nutmeg, and pecans. Add a touch of molasses for extra richness.
- Peanut Butter Banana: Stir mashed banana and peanut butter into your wet ingredients for a protein-packed twist.
The options are endless. Use your favorite cookie or dessert flavors as inspiration and turn them into granola magic.
How to Serve and Enjoy Granola
So, you’ve made the perfect batch of granola. Now what? Sure, it’s delicious straight out of the jar, but there are plenty of creative ways to enjoy it all day long.
Breakfast Options
Granola shines brightest at breakfast—and here’s how to make it the star of your morning routine:
- Classic bowl: Serve with cold milk or your favorite plant-based milk. Add fresh fruit like bananas, strawberries, or blueberries on top.
- Yogurt parfaits: Layer granola with Greek yogurt and fruit in a glass for a pretty and nutritious breakfast or snack.
- Smoothie bowls: Sprinkle granola over smoothie bowls for extra texture and crunch.
- Warm it up: Pour warm milk over granola for a cozy breakfast. Top with cinnamon or nut butter for added comfort.
You can also use granola as a base for breakfast bars or homemade cereal mixes. It’s a brilliant way to add fiber and healthy fats to your start of the day.
Snacks and Desserts
Granola isn’t just for breakfast—it’s perfect for snacking and dessert, too.
- Energy bites: Mix granola with honey and nut butter, shape into balls, and chill for homemade snack bites.
- Granola bars: Press the mixture into a pan, refrigerate, and slice into bars.
- Trail mix: Combine granola with chocolate chips, pretzels, and dried fruit for a fun mix.
- Topping for ice cream or pudding: Sprinkle over your favorite desserts for a crunchy twist.
- Baked into muffins or cookies: Fold granola into muffin or cookie batter for texture and flavor.
Even just grabbing a handful straight from the jar is enough to keep hunger at bay between meals.
FAQs about Granola Recipe
Can I make granola without oil?
Yes, you can! While oil helps with crispiness and binding, you can substitute it with applesauce, mashed bananas, or nut butter for a lower-fat version. Just note that it may turn out softer.
How long does homemade granola last?
Stored in an airtight container, granola lasts about 2–3 weeks at room temperature. For longer shelf life, refrigerate it for up to a month or freeze it for 3 months.
What’s the best way to store granola?
Cool it completely before storing. Use an airtight glass jar, container, or resealable bag. Keep it in a cool, dry place away from direct sunlight or moisture to maintain its crunch.
Is granola gluten-free?
Only if you use certified gluten-free oats. Regular oats can be cross-contaminated during processing, so look for gluten-free labeling if you have celiac disease or sensitivity.
Can I make granola without an oven?
Absolutely. You can make stovetop granola by toasting the mixture in a skillet over medium heat for 10–15 minutes, stirring frequently until golden and fragrant.
Conclusion
There you have it—a full guide to crafting the best granola you’ve ever had. From picking the right ingredients to baking it just right, and finding fun ways to enjoy it, homemade granola truly deserves a spot in your kitchen routine. It’s healthy, versatile, budget-friendly, and seriously satisfying.
With so many ways to tweak the recipe to your liking, you’ll never get bored. Whether you’re team crunchy clusters or soft and chewy bites, your perfect granola batch is just a few steps away.
Give it a try, get creative, and don’t be afraid to experiment. You might just discover your new favorite food!