Best Cinnamon Rolls Recipe: There’s something universally comforting about a warm, gooey cinnamon roll. Whether it’s the swirls of buttery cinnamon sugar or the rich, creamy icing melting into every crevice, cinnamon rolls are a beloved treat across the globe. From cozy kitchens in the Midwest to upscale cafes in Europe, these sticky delights have a way of bringing people together. They’re indulgent, aromatic, and deeply nostalgic—just the smell of them baking can transport you back to a childhood weekend morning. What makes cinnamon rolls truly special is that balance between soft, fluffy dough and that sweet-spicy filling. And when it’s homemade, it hits differently. Store-bought versions rarely do justice to the real deal. With just a few ingredients and a bit of patience, you can bake rolls that rival any bakery’s offering right from your own oven.
Why Make Cinnamon Rolls at Home?
So, why go through the trouble of making cinnamon rolls at home when you can just buy them frozen or from a store? First, flavor. Homemade cinnamon rolls are on another level—fresher, softer, and filled with love (and lots of butter). Second, customization. When you’re in charge, you get to tweak the sweetness, add nuts, raisins, or even a splash of orange zest in the icing. Want extra filling? Go for it. Want them giant-sized like a bakery special? You can do that too. Third, the process is therapeutic. Kneading the dough, watching it rise, rolling it out, and smelling it bake—each step connects you with the food in a way that’s incredibly satisfying. Finally, sharing homemade cinnamon rolls earns you serious points. Whether it’s brunch with friends, a holiday breakfast, or just spoiling your family, homemade cinnamon rolls show effort and care. And let’s be real—nothing beats the first warm bite of a cinnamon roll fresh from your oven.
Ingredients You’ll Need
For the Dough
To get that perfect soft and fluffy texture, your dough needs a solid base of ingredients that work harmoniously together:
- 1 cup warm milk (110°F or 43°C)
- 2 ¼ teaspoons active dry yeast (1 packet)
- ½ cup granulated sugar
- ⅓ cup unsalted butter, melted
- 1 teaspoon salt
- 2 large eggs
- 4 cups all-purpose flour (plus extra for dusting)
The combination of milk and eggs gives the dough its rich flavor and tender crumb, while yeast provides the lift that makes these rolls so light and airy. Make sure your milk isn’t too hot, or it could kill the yeast.
For the Filling
This is the soul of your cinnamon rolls—the sweet, sticky goodness that makes every bite irresistible:
- 1 cup brown sugar (packed)
- 2 ½ tablespoons ground cinnamon
- ⅓ cup unsalted butter, softened
You can add optional extras like a pinch of nutmeg, crushed pecans, or raisins if you’re feeling adventurous. The butter helps the cinnamon-sugar mixture melt into the dough, creating those ooey-gooey pockets of flavor.
For the Cream Cheese Frosting
This tangy-sweet topping is the crowning glory of any cinnamon roll:
- 4 ounces cream cheese, softened
- ¼ cup unsalted butter, softened
- 1 to 1 ½ cups powdered sugar (adjust to taste)
- ½ teaspoon vanilla extract
- 1–2 tablespoons milk or heavy cream (for consistency)
Some people like a light drizzle, others want a thick layer that covers every swirl—adjust as your sweet tooth demands.
Equipment Checklist
Tools to Ensure Perfect Rolls
Before diving in, make sure your kitchen is prepped with the tools that’ll make your cinnamon roll journey smoother:
- Stand mixer with dough hook (optional but helpful)
- Large mixing bowl
- Measuring cups and spoons
- Rolling pin
- Sharp knife or dental floss (for cutting rolls)
- 9×13 inch baking dish or two 9-inch round pans
- Clean kitchen towel or plastic wrap (for covering the dough)
- Oven thermometer (optional, but useful for accurate baking)
Having the right equipment is half the battle. A stand mixer can speed up dough kneading, but don’t worry if you don’t have one—you can knead by hand too. A good rolling pin and a sharp knife will help you get even, beautiful rolls.
Step-by-Step Instructions
Step 1 – Preparing the Dough
Start by activating your yeast. In a large bowl, combine the warm milk and yeast. Let it sit for about 5–10 minutes until it’s foamy. This means your yeast is alive and ready to go. Next, mix in the sugar, melted butter, salt, and eggs. Stir until everything is well combined.
Now gradually add the flour—about a cup at a time. Mix until the dough pulls away from the sides of the bowl. If using a stand mixer, knead with the dough hook for 5–7 minutes. If kneading by hand, turn the dough out onto a floured surface and knead for 8–10 minutes, until it’s smooth and elastic.
Once the dough is ready, shape it into a ball and place it in a greased bowl. Cover with a towel or plastic wrap and let it rise in a warm place for 1 to 1.5 hours, or until doubled in size. The dough should spring back slightly when poked.
Step 2 – Letting the Dough Rise
After you’ve kneaded your dough to perfection, the next crucial step is letting it rise—this is where the magic happens. Place your smooth ball of dough into a lightly greased bowl and cover it with a clean kitchen towel or plastic wrap. This stage is all about patience. Set it somewhere warm—like near a sunny window, on top of a preheating oven, or in your microwave with the light on.
The dough should double in size, which usually takes about 1 to 1.5 hours. This fermentation process is when the yeast goes to work, creating air bubbles that give your rolls their airy texture. If you’re short on time, you can speed up the rise by placing the bowl in a slightly warmed (but turned off) oven. Just be careful—it shouldn’t be too hot or it might kill the yeast.
To test if your dough is ready, gently press your finger into it. If the indentation slowly springs back, it’s good to go. If it doesn’t spring back, give it a little more time. This step is non-negotiable. Under-risen dough leads to dense, disappointing rolls.
Step 3 – Rolling and Filling the Dough
Now for the fun part. Once the dough has risen, punch it down gently to release the air. Turn it out onto a lightly floured surface and use your rolling pin to shape it into a large rectangle—roughly 16 x 12 inches and about ¼ inch thick. Try to keep the thickness even so your rolls bake uniformly.
Spread the softened butter evenly over the entire surface of the dough—don’t skimp, this helps the cinnamon sugar stick. Next, mix the brown sugar and cinnamon together in a small bowl and sprinkle the mixture generously over the buttered dough. Use your hands to gently press it in so it sticks.
Starting from the long edge, tightly roll the dough into a log. This helps ensure those beautiful, spiral swirls. Once rolled, use a very sharp knife or unflavored dental floss (yes, really!) to cut the log into 12 equal pieces. Dental floss slides through without squishing the rolls—just place the floss under the dough, cross the ends over the top, and pull tight.
Step 4 – Cutting and Proofing the Rolls
Place the cut rolls into a greased 9×13 inch baking dish or two 9-inch round pans, leaving a bit of space between them for expansion. Cover again with a towel or plastic wrap and let them rise a second time, for about 30–45 minutes. This step is called proofing, and it’s what gives the rolls their final puff before baking.
As the rolls proof, preheat your oven to 350°F (175°C). The second rise ensures they bake up tall, fluffy, and tender. During this time, the dough relaxes, and those little spirals plump up into the bakery-style rolls you crave.
Don’t skip or rush this step—under-proofed rolls can come out tough and overly dense. If you’re making them ahead of time, you can pause here. Just cover and refrigerate overnight. The next morning, bring them to room temperature before baking.
Step 5 – Baking to Golden Perfection
Once your rolls have puffed up beautifully, they’re ready to bake. Place them in the preheated oven and bake for 25–30 minutes. You’re aiming for a golden-brown top and fully set centers. If the tops are browning too quickly, you can loosely cover the pan with foil for the last 10 minutes.
Keep an eye on the centers—undercooked rolls are doughy and unpleasant, while overbaked ones dry out. You’ll know they’re done when they’re golden all over and a toothpick inserted into the center comes out clean.
Once baked, remove them from the oven and let them cool for about 10 minutes. This allows the structure to set without turning the frosting into a complete puddle. Speaking of which…
Step 6 – Making and Spreading the Frosting
While your rolls are cooling slightly, whip up that dreamy cream cheese frosting. In a bowl, beat together the softened cream cheese and butter until smooth and fluffy. Gradually mix in the powdered sugar, followed by the vanilla extract and just enough milk or cream to get your desired consistency.
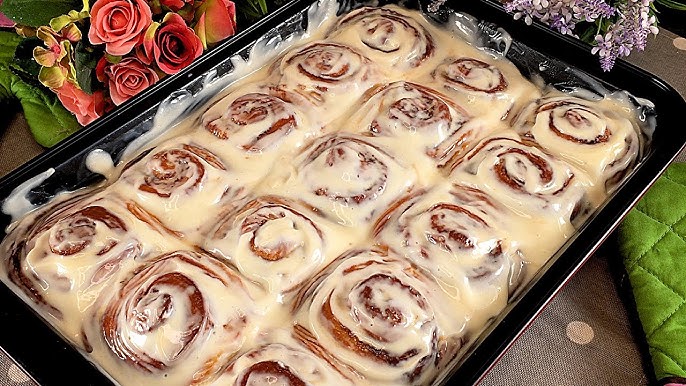
This frosting should be thick, but spreadable. Slather it generously over your warm rolls so it melts into all those nooks and crannies. If you prefer a thinner glaze, just add a bit more milk until it reaches your desired drizzling thickness.
Once frosted, your cinnamon rolls are ready to serve. Warm, gooey, and smothered in rich frosting, they’re practically irresistible. Whether you’re enjoying one with a hot cup of coffee or sharing a tray with loved ones, this is comfort food at its absolute finest.
Tips for the Best Cinnamon Rolls Ever
Crafting the ultimate cinnamon roll isn’t just about following a recipe—it’s about mastering a few insider tricks that elevate your rolls from good to unforgettable. First up, always use room temperature ingredients unless otherwise noted. Cold eggs or milk can slow down your yeast, while room-temp components blend better and yield a more consistent dough.
When it comes to butter in the filling, make sure it’s softened—not melted. Melted butter can cause the filling to leak out during baking, robbing you of that sweet swirl. And speaking of the filling, don’t be shy. Generously layer the cinnamon-sugar mix for that classic gooey center.
Don’t rush the rise time. If your kitchen is chilly, create a warm spot by heating your oven to the lowest setting for a couple of minutes, then turning it off and placing your dough inside to rise. It’s like a cozy spa for your dough.
Cutting the rolls evenly also makes a big difference. Uneven rolls bake at different rates, which can leave you with some overcooked and others underdone. And while it might sound old-school, using unflavored dental floss instead of a knife really does yield cleaner, neater rolls.
Finally, frost while warm but not hot. You want the frosting to melt just enough to seep into the crevices, not slide right off. And if you’re feeling fancy, add a touch of orange zest, maple syrup, or even a splash of bourbon to the icing for a gourmet twist.
Common Mistakes to Avoid
Even experienced bakers can trip up when making cinnamon rolls. Here are some frequent pitfalls—and how to dodge them:
1. Killing the yeast: This is the most common issue. Yeast is a living organism and water or milk that’s too hot can destroy it. Stick to liquids that are just warm to the touch—around 110°F (43°C).
2. Not kneading enough: Proper kneading develops gluten, which gives the dough structure. Under-kneaded dough won’t rise properly and will feel dense and chewy rather than soft and pillowy.
3. Skipping the second rise: It’s tempting to throw the rolls in the oven after cutting, but this second proof ensures they bake up tall and fluffy. Don’t skip it, even if you’re in a hurry.
4. Overbaking: This turns your dream rolls into dry spirals of sadness. Keep an eye on them and pull them out when they’re golden brown and just cooked through.
5. Not sealing the roll seam: After rolling up your dough, pinch the seam closed so it doesn’t unravel during baking. It’s a small step that makes a big difference in how the rolls hold their shape.
By avoiding these common errors, you’ll ensure your cinnamon rolls are bakery-quality every single time.
Storing and Reheating
Cinnamon rolls are best fresh, but they store beautifully for later indulgence. If you’ve got leftovers (lucky you!), here’s how to keep them tasting amazing:
Room Temperature: Place cooled rolls in an airtight container and keep them at room temp for up to 2 days. They’ll stay soft and tender.
Refrigerator: For longer storage (up to a week), refrigerate them. Just note that the fridge can dry them out a bit, so always warm before serving.
Freezer: You can freeze unfrosted or frosted rolls. Wrap them tightly in plastic wrap, then foil, and freeze for up to 2 months. When ready to eat, thaw overnight in the fridge and warm in the oven or microwave.
Reheating: Microwave individual rolls for 20–30 seconds or warm a whole pan in the oven at 325°F (163°C) for about 10–15 minutes. Add a damp paper towel when microwaving to help retain moisture. A quick zap revives the gooey center and makes the frosting luscious again.
Pro tip: If reheating from frozen, let the rolls come to room temperature first to avoid uneven heating.
FAQs about Best Cinnamon Rolls Recipe
1. Can I make cinnamon rolls ahead of time?
Yes! You can prep the dough and shape the rolls the night before. Just cover tightly and refrigerate. In the morning, let them come to room temperature and rise before baking. Perfect for early risers and brunch lovers!
2. What’s the secret to soft and fluffy cinnamon rolls?
It’s all about the dough. Use warm (not hot) milk, fresh yeast, and don’t over-flour. Kneading until just smooth and letting it rise fully gives that pillowy softness we all crave.
3. Can I freeze cinnamon rolls?
Absolutely. You can freeze them either baked or unbaked. For best results, freeze unbaked rolls after shaping—then thaw, rise, and bake fresh for that bakery-style aroma at home.
4. What type of cinnamon is best?
Ground Ceylon cinnamon offers a milder, more delicate flavor, while Cassia cinnamon is stronger and more commonly used. For a bolder, spicier taste—go with Cassia.
5. How do I store leftover cinnamon rolls?
Store them in an airtight container at room temperature for up to 2 days, or refrigerate for up to a week. Warm them slightly in the microwave before serving to revive their gooey glory.
6. Can I make these without eggs or dairy?
Yes! Use plant-based milk and a flax egg or commercial egg replacer. Swap butter for vegan alternatives. The result? Still indulgent, still irresistible.
Conclusion
Homemade cinnamon rolls are more than just a sweet treat—they’re a labor of love that delivers a cozy, delicious reward. Whether you’re making them for a lazy weekend brunch, a special holiday morning, or just because, these rolls have a way of turning any day into something special. With this step-by-step guide, you now have all the tools, tips, and tricks to create bakery-quality cinnamon rolls in your own kitchen. From the soft, fluffy dough to the gooey cinnamon filling and the rich cream cheese frosting, every bite is a testament to your baking skills—and a true comfort to everyone lucky enough to get a taste. So roll up your sleeves, dust off that rolling pin, and get ready to make cinnamon roll magic.