Best Chocolate Cookie Recipe: Who doesn’t love a warm, gooey chocolate cookie fresh out of the oven? That delightful mix of soft center, slightly crisp edges, and rich chocolate flavor is simply irresistible.
Whether you’re baking for the holidays, a birthday party, or just a midweek pick-me-up, a great chocolate cookie never disappoints.
In this detailed, step-by-step guide, we’ll take you through every part of the process—from choosing the best ingredients to baking like a pro. Ready to become the cookie champion of your kitchen? Let’s get into it!
Why Everyone Loves Chocolate Cookies
Chocolate cookies hold a special place in everyone’s heart—and taste buds. They’re comforting, nostalgic, and incredibly satisfying. The combination of cocoa and butter creates a rich, melt-in-your-mouth experience that hits all the right notes. Whether it’s the classic chocolate chip or a double chocolate chunk variation, there’s a flavor combo for every craving.
But it’s more than just flavor—it’s also about texture. That perfect balance between chewy and crunchy is what elevates a chocolate cookie from good to unforgettable. Some prefer a thick, doughy bite while others enjoy a thin, crispy finish. The beauty of chocolate cookies is how easily you can tailor the recipe to suit your taste.
And let’s not forget their universal appeal. Chocolate cookies are a hit with kids, a treat for adults, and a staple at every celebration. From bake sales to break-ups, they’ve seen us through it all.
The Secret to a Perfect Batch Every Time
Here’s the not-so-secret formula for amazing cookies every single time: high-quality ingredients, precision in measuring, and a little bit of patience. Yes, patience—especially when it comes to chilling your dough (we’ll explain more about that soon). The right chocolate, butter, and even the type of flour you use can dramatically affect your final result.
The magic really starts when you combine technique with the right tools. Mixing too much? Flat cookies. Too little? Doughy centers. It’s a delicate dance, but one that’s easy to master with the right guide—like this one!
Essential Ingredients You’ll Need
The Core Baking Ingredients
Let’s break down what goes into making the best chocolate cookies:
- Butter – Always go for unsalted and high-quality. It adds flavor and affects the texture significantly.
- Sugar – A mix of white and brown sugar gives that classic chewy-crispy balance.
- Eggs – They bind the dough and add richness.
- Flour – All-purpose flour is standard, but don’t skimp on measuring accurately.
- Baking soda – Helps the cookies rise and puff up beautifully.
- Salt – Just a pinch enhances the chocolate flavor.
- Vanilla extract – Adds depth and warmth.
- Chocolate – Use chocolate chips, chunks, or even chopped-up chocolate bars. Dark, milk, or semi-sweet? That’s up to you.
Optional Add-ins for Custom Flavors
Want to jazz up your batch? Try these tasty additions:
- Nuts – Walnuts, pecans, or almonds add crunch and richness.
- Sea salt flakes – A sprinkle on top creates a gourmet touch.
- Peanut butter chips – Adds a creamy, nutty twist.
- Espresso powder – Enhances the chocolate flavor without tasting like coffee.
- Dried fruit – Think cherries or cranberries for a tart contrast.
The beauty of chocolate cookies lies in how versatile they are. You can follow the classic route or get creative and experiment with textures and flavors that suit your mood.
Kitchen Tools and Equipment
Must-Have Baking Tools
Before you begin, make sure your kitchen is stocked with the right gear:
- Mixing bowls – You’ll need at least two (one for wet, one for dry).
- Electric mixer – A handheld or stand mixer makes the creaming process faster and more effective.
- Measuring cups and spoons – Accuracy is key, especially with baking.
- Spatula – Ideal for scraping the bowl and folding in your chocolate.
- Baking sheet – Choose a sturdy, non-stick one for even baking.
- Parchment paper – Prevents sticking and makes cleanup easier.
Nice-to-Have Extras
These aren’t essential, but they can level up your cookie game:
- Cookie scoop – Ensures uniform size and shape.
- Cooling rack – Helps cookies cool evenly without getting soggy bottoms.
- Digital kitchen scale – Precision pays off with bakery-level results.
- Silicone baking mat – A reusable alternative to parchment paper.
Investing in quality tools not only improves your cookies but also makes the baking process smoother and more enjoyable.
Step-by-Step Instructions for Making Chocolate Cookies
Step 1: Prepare Your Ingredients
Start by gathering and measuring all your ingredients. This is what the pros call “mise en place”—everything in its place. Bring your butter and eggs to room temperature for easy mixing. Preheat your oven to 350°F (175°C) and line your baking sheet with parchment paper or a silicone mat.
Having everything ready before you start mixing ensures you won’t miss a step or scramble for ingredients midway through.
Step 2: Mix Wet and Dry Ingredients
Now it’s time to get down to business. Start by creaming your softened butter with the sugars using an electric mixer on medium speed. This process usually takes about 3–5 minutes and is crucial for achieving that light, airy texture. The goal here is to incorporate air into the butter, which leads to cookies that rise properly in the oven.
Once the mixture is pale and fluffy, add in your eggs—one at a time—beating well after each addition. Stir in the vanilla extract. You’ll notice the dough beginning to take shape, and the aroma? Pure magic.
In a separate bowl, whisk together your dry ingredients: flour, baking soda, and salt. Slowly incorporate the dry mixture into the wet, a little at a time. Go slow—overmixing can lead to tough cookies. Just stir until combined, and don’t worry if the dough feels a little stiff.
Finally, fold in your chocolate chips or chunks with a spatula. Make sure they’re evenly distributed throughout the dough. Every bite should have that chocolatey surprise waiting.
Step 3: Form the Cookie Dough
Scoop out balls of dough using a cookie scoop or spoon. If you want bakery-style cookies, make the dough balls a little larger—think golf ball size. Place them on your prepared baking sheet, spacing them at least two inches apart. These cookies will spread as they bake, and you don’t want them merging into one giant blob.
If you like your cookies with a little flair, press a few extra chocolate chips or a pinch of sea salt on top of each dough ball. It not only adds flavor but also makes them look professionally made.
This stage is also where you can freeze some of the dough for future cravings. Just scoop the dough onto a tray, freeze until solid, and then store in a zip-top bag. You’ll thank yourself later.
Step 4: Chill for Maximum Flavor
This step is optional but highly recommended. Chilling the cookie dough for at least 30 minutes—or up to 24 hours—helps the flavors meld and develop. It also firms up the fat in the dough, which leads to thicker, chewier cookies that don’t spread too much in the oven.
If you’re short on time, even a brief chill in the fridge will make a noticeable difference. Trust me, the payoff in flavor and texture is totally worth the wait.
You can either chill the whole bowl of dough or form the cookies first and chill the individual balls. Just cover them with plastic wrap or place them in an airtight container so they don’t dry out.
Step 5: Bake to Perfection
Now for the best part—baking! Place your cookies in the preheated oven and bake for 10–12 minutes. You’re looking for golden edges and slightly underbaked centers. Why underbaked? Because cookies continue to cook on the baking sheet even after you take them out of the oven. This ensures they stay soft and gooey inside.
For chewier cookies, aim for the lower end of the baking time. Prefer a crispier texture? Leave them in for a couple more minutes.
Once done, let them cool on the baking sheet for about 5 minutes before transferring to a cooling rack. This step helps set their shape and makes them easier to handle.
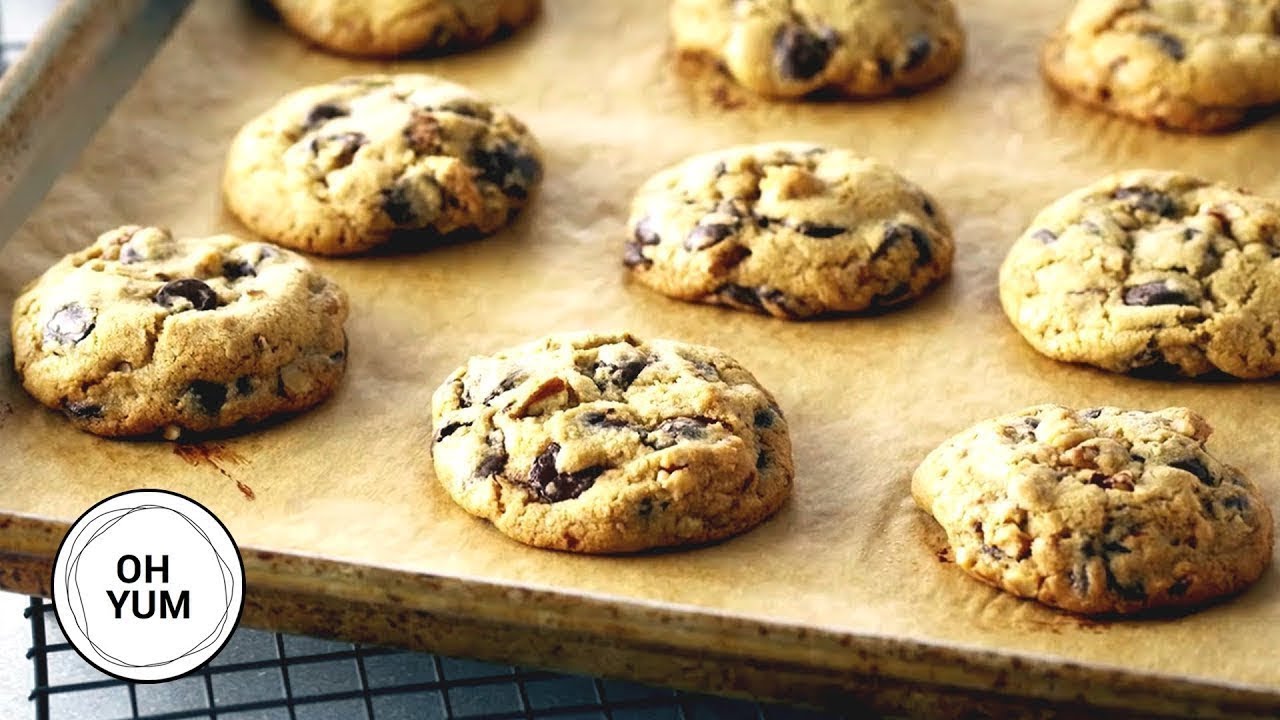
Take one bite and you’ll see—it’s the cookie of your dreams. Crispy on the outside, gooey in the middle, and packed with rich chocolate flavor.
Expert Tips for the Best Results
Common Mistakes and How to Avoid Them
Even seasoned bakers make mistakes. Here’s how to dodge the most common cookie pitfalls:
- Using melted butter – This leads to flat, greasy cookies. Always use softened, room-temp butter.
- Overmixing the dough – Tough cookies are usually the result of too much mixing. Stir until just combined.
- Skipping the chill – Yes, it’s tempting to go straight from mixing to baking, but chilling really enhances texture and flavor.
- Incorrect measurements – Always spoon flour into your measuring cup and level it off. Scooping packs the flour and throws off the ratio.
- Overbaking – Cookies firm up as they cool. Take them out when they look slightly underdone.
Tricks for a Chewy vs. Crispy Texture
Prefer your cookies chewy or crispy? It’s all in the technique:
For Chewy Cookies:
- Use more brown sugar than white.
- Add an extra egg yolk.
- Chill the dough longer.
- Bake at a slightly lower temperature (around 325°F).
For Crispy Cookies:
- Use more white sugar.
- Bake longer at 350°F or slightly higher.
- Flatten the dough balls a bit before baking.
Adjusting these small details allows you to tailor every batch to your personal cookie craving.
How to Store and Freeze Your Cookies
Storing for Freshness
Once your cookies have cooled completely, it’s important to store them the right way to maintain that fresh-from-the-oven taste. The best method? Keep them in an airtight container at room temperature. They’ll stay soft and chewy for up to 5 days. If you like a crispier bite, you can leave the container slightly ajar.
To maintain softness, consider placing a slice of bread in the container with your cookies. The bread will absorb any excess moisture and keep the cookies from drying out. Just make sure it’s a neutral-flavored bread like white or sandwich bread.
Also, avoid refrigerating baked cookies. The cold air can dry them out and make them taste stale much faster than if they were stored at room temp.
Freezing for Later
Want to enjoy fresh cookies anytime? Freeze your cookie dough! After scooping the dough into balls, lay them out on a tray and freeze until solid. Then transfer them to a freezer-safe zip-top bag or airtight container. They’ll last for up to 3 months.
When you’re ready to bake, there’s no need to thaw. Just add an extra minute or two to your baking time. You can also freeze already-baked cookies—just be sure to cool them completely first, then store in layers separated by parchment paper.
Freezing is perfect for portion control and last-minute dessert emergencies!
Creative Variations to Try
Chocolate Overload
Turn the chocolate factor up a notch by mixing in cocoa powder with the flour. This creates double or even triple chocolate cookies when paired with chocolate chunks and chips. It’s rich, indulgent, and every chocoholic’s dream.
Stuffed Cookies
Want to wow your friends and family? Try stuffing your cookies! Drop a spoonful of Nutella, peanut butter, or caramel into the center of your cookie dough before rolling it into a ball. When baked, the filling melts and oozes out with every bite—pure bliss.
Spiced Chocolate Cookies
Add a warm twist by incorporating spices like cinnamon, nutmeg, or even a pinch of cayenne pepper. This gives your cookies a unique depth and a subtle heat that pairs beautifully with dark chocolate.
Serving Suggestions and Pairings
Cookies are great on their own, but pairing them smartly elevates the experience. Here are some suggestions:
- With milk – A classic combo. Whole milk is best for rich flavor, but almond or oat milk work well too.
- With coffee or espresso – The bitterness of coffee balances the sweetness of the cookie.
- As an ice cream sandwich – Scoop your favorite ice cream between two cookies. Freeze until firm for the ultimate summer treat.
- With wine – Believe it or not, red wine like Merlot or Cabernet pairs wonderfully with chocolate cookies.
Serving cookies warm is always a win—just pop them in the microwave for 10 seconds, and they’ll taste freshly baked again.
Nutritional Information and Health Tips
Let’s be honest—cookies aren’t exactly health food, but there are ways to enjoy them without guilt:
| Ingredient | Standard Version | Healthier Swap |
|---|---|---|
| Butter | Full-fat unsalted | Coconut oil or margarine |
| Sugar | White/brown sugar | Coconut sugar or honey |
| Flour | All-purpose flour | Almond or oat flour |
| Eggs | Whole eggs | Flax eggs (vegan) |
| Chocolate Chips | Regular semi-sweet | Dark chocolate or cacao nibs |
Using whole wheat flour, reducing the sugar slightly, or opting for dark chocolate with 70% cocoa or more can give you a healthier cookie that still tastes amazing.
FAQs about Best Chocolate Cookie Recipe
1. What makes a chocolate cookie recipe the best?
The best chocolate cookie recipe balances crispy edges with a soft, chewy center. It uses high-quality cocoa or melted chocolate, the right sugar mix (usually brown and white), and just the right chill time to enhance flavor and texture.
2. Can I use dark chocolate instead of milk chocolate?
Absolutely! Dark chocolate gives a richer, more intense cocoa flavor. If you’re a chocoholic looking for depth, go dark. Just make sure it’s baking-quality and chopped or chunked for melt-in-your-mouth moments.
3. Why do my cookies spread too much while baking?
Too much butter or not chilling your dough can cause excess spreading. Quick fix? Chill your dough for at least 30 minutes before baking. Also, double-check your oven temperature — an overheated oven can melt your dough too fast.
4. Can I freeze chocolate cookie dough?
Yes, and you should! Roll the dough into balls, flash-freeze them, then store in a zip-top bag. Bake straight from frozen—just add 2–3 minutes to the baking time. Perfect for late-night cravings!
5. How do I keep my cookies soft after baking?
Store them in an airtight container with a slice of bread or apple. The cookies will draw moisture from it and stay soft. Pro tip: don’t overbake — they continue to set on the pan after coming out of the oven.
6. Can I add nuts or other mix-ins?
Totally. Walnuts, pecans, white chocolate chips, or even a swirl of peanut butter work great. Just don’t go overboard—stick to about 1 to 1½ cups of mix-ins for a standard batch.
Conclusion
There you have it—a complete, foolproof, and flavor-packed chocolate cookie recipe that anyone can master. Whether you’re baking for the first time or the hundredth, this guide gives you all the tools you need to make mouthwatering cookies every time. From selecting the best ingredients to mastering the baking process and even storing or customizing your treats, you’ve now got the complete cookie playbook.
So what are you waiting for? Preheat that oven, grab your mixing bowls, and treat yourself to some of the best cookies you’ve ever made. And don’t forget—cookies taste best when shared, so bake a double batch and spread the joy!