Best Butternut Squash Soup Recipe: There’s something undeniably comforting about a bowl of warm, creamy butternut squash soup. As the leaves turn golden and the chill of fall sets in, this vibrant soup becomes a seasonal staple for a reason. It’s hearty, flavorful, and feels like a hug in a bowl. Whether you’re new to cooking or a seasoned chef looking to master this autumn classic, this guide will walk you through every single step to make the best butternut squash soup you’ve ever tasted.
Butternut squash isn’t just tasty—it’s a nutritional powerhouse. Packed with fiber, vitamin A, vitamin C, magnesium, and potassium, it’s a great base for a healthy meal. And when it’s slow-cooked with onions, garlic, broth, and warm spices, the result is pure, velvety magic.
In this recipe guide, we’ll break everything down into simple steps. You don’t need fancy skills or expensive gadgets. Just a little patience, some fresh ingredients, and a blender (we’ll talk about options if you don’t have one). Let’s get into the warm, golden goodness of this butternut squash soup—because your taste buds deserve this!
Ingredients Needed
Before we dive into the cooking process, let’s talk about what you’ll need. The best part? You probably already have most of these ingredients in your kitchen.
Essential Ingredients:
- 1 medium butternut squash (about 2 to 3 pounds), peeled, seeded, and cubed
- 2 tablespoons olive oil or unsalted butter
- 1 large yellow onion, diced
- 3 cloves garlic, minced
- 1 teaspoon salt (adjust to taste)
- ½ teaspoon black pepper
- 1 teaspoon ground cumin or cinnamon (optional for warmth)
- 4 cups vegetable broth (or chicken broth if not vegan)
- ½ cup coconut milk or heavy cream (for creaminess)
Optional Flavor Add-Ons:
- 1 apple (peeled and chopped) for natural sweetness
- A pinch of nutmeg for a cozy fall twist
- Red pepper flakes for a little heat
- Fresh herbs like thyme, rosemary, or sage
Kitchen Tools You’ll Need:
- Sharp chef’s knife and cutting board
- Large soup pot or Dutch oven
- Wooden spoon
- Blender (immersion or traditional)
- Ladle
- Measuring spoons and cups
These basic items are all it takes to create a deeply flavorful, creamy butternut squash soup that tastes like it came from a high-end restaurant. Ready to get cooking?
Step-by-Step Instructions
Now comes the fun part: turning those raw ingredients into a smooth, soul-warming soup. Follow these five steps carefully and you’ll end up with a bowl full of golden, silky comfort.
Step 1 – Prepare the Butternut Squash
Prepping a butternut squash might feel intimidating, but don’t worry—it’s not as hard as it looks. First, use a sturdy cutting board and a sharp knife. Slice off both ends of the squash to give yourself flat, stable surfaces. Next, peel the squash using a vegetable peeler or a sharp paring knife. The skin is tough but manageable with a little pressure.
Once peeled, slice the squash lengthwise. You’ll find seeds in the lower bulb—scoop those out with a spoon and discard or save them for roasting later. Then chop the squash into roughly 1-inch cubes. Try to keep the cubes similar in size so they cook evenly.
If this step feels like too much, here’s a tip: many grocery stores sell pre-cubed butternut squash. It’s a little more expensive, but it can save you 10-15 minutes of prep time. Just make sure it looks fresh and hasn’t started to dry out.
Preparing the squash is the most hands-on part of this recipe. Once it’s chopped and ready to go, the rest is all about building flavor.
Step 2 – Sauté Aromatics
This is where the magic starts. Heat olive oil or butter in a large soup pot over medium heat. Once hot, add the diced onions and a pinch of salt. Cook them slowly, stirring occasionally, until they’re soft and translucent—about 5 to 7 minutes. You want them golden, not browned.
Next, toss in the minced garlic and sauté for another minute. Don’t walk away here—garlic burns fast, and you only want it lightly golden to bring out its sweet, nutty flavor.
This step lays the foundation of your soup. The combination of onion and garlic, cooked just right, adds depth and umami that enhances the natural sweetness of the squash. If you’re using any spices like cumin or cinnamon, stir them in here to bloom in the hot oil and release their aromas.
Your kitchen will start to smell amazing at this point—and we’re just getting started.
Step 3 – Add and Simmer Ingredients
Now that your aromatics are nicely sautéed and fragrant, it’s time to bring the dish together. Add your chopped butternut squash cubes to the pot, stirring to coat them in the onion, garlic, and spice mixture. This quick stir-fry infuses the squash with flavor even before the broth hits the pot.
Next, pour in the vegetable broth, making sure the squash is fully submerged. If you like a thinner soup, you can add an extra half-cup of broth or water. If you’re going for thick and creamy, stick to the 4 cups.
At this stage, you can also add any optional ingredients—like a peeled, chopped apple for extra sweetness, or a sprig of rosemary or thyme for an herbal punch. Give everything a good stir, increase the heat, and bring the mixture to a boil.
Once it starts boiling, reduce the heat to a simmer and cover the pot. Let it cook for about 20–25 minutes, or until the squash is fork-tender. Don’t rush this step—letting the ingredients simmer slowly allows the flavors to deepen and blend together beautifully. Stir occasionally to prevent sticking.
By the end of this simmering phase, your kitchen will be filled with a savory aroma and the squash should be soft enough to mash with a fork—perfect for blending in the next step.
Step 4 – Blend Until Smooth
Now it’s time to transform your chunky, rustic soup into a luxurious, silky blend. Turn off the heat and let the soup cool slightly before blending—it’s safer and easier to handle when it’s not piping hot.
You have two main options here:
- Immersion Blender (Stick Blender): Simply insert it into the pot and blend until smooth. This method is convenient, with less cleanup.
- Traditional Blender: Work in batches. Carefully ladle soup into the blender (no more than halfway full), cover with a towel or lid with a vent, and blend until smooth. Transfer to a new pot or large bowl.
Whichever method you choose, your goal is a smooth, creamy consistency. If you like a chunkier texture, blend only part of the soup and stir it back into the pot. Too thick? Add more broth or a splash of water. Too thin? Let it simmer uncovered a bit longer.
Once blended, return the soup to the pot if needed and place it over low heat. Stir in your coconut milk or cream for that rich, velvety finish. Taste and adjust the seasoning—add more salt, pepper, or spices if needed. A splash of lemon juice or vinegar can also brighten up the flavor if it tastes too sweet.
Step 5 – Final Touches and Seasoning
At this point, your soup is nearly ready to serve—but the final touches are what elevate it from good to unforgettable.
Start by doing a final taste test. This is your moment to fine-tune the flavor profile. Is it a bit bland? Add a pinch of salt. Too flat? A squeeze of lemon juice or apple cider vinegar can add brightness. Want more warmth? A dash of cinnamon, nutmeg, or cayenne can give it a little edge.
Now’s the time to stir in your creamy element. Coconut milk gives a slightly sweet, nutty finish, while heavy cream adds richness. Stir it in slowly over low heat and let it warm through for about 2–3 minutes.
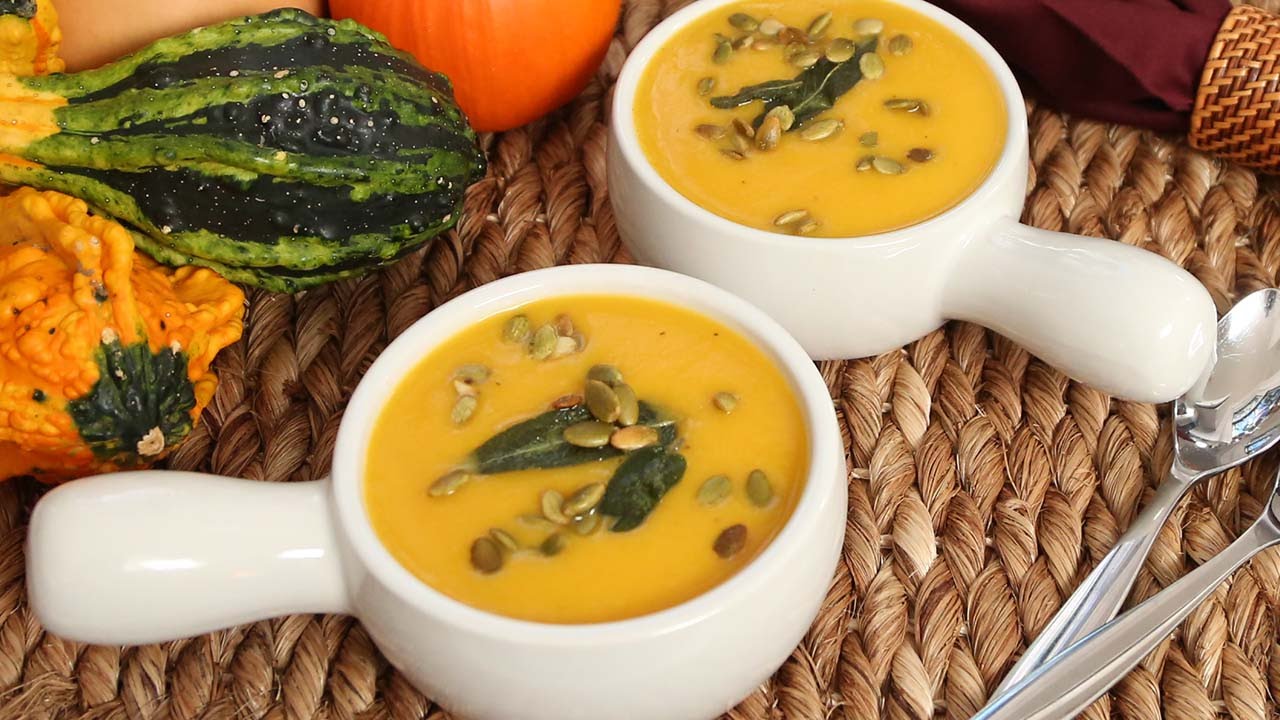
Don’t forget texture. A swirl of cream or coconut milk on top makes it look beautiful and restaurant-worthy. Sprinkle on freshly cracked black pepper, fresh herbs like parsley or thyme, or even a drizzle of good olive oil for an extra layer of flavor.
If you’re prepping this soup for a dinner party or want to get fancy, top it with toasted pumpkin seeds (pepitas), croutons, crispy bacon bits, or a dollop of Greek yogurt. It’s these final touches that transform a simple soup into something truly special.
Pro Tips for the Perfect Soup
Making soup seems simple, but there are little tricks that separate a good soup from a great one. Here are some of the top tips you’ll want to keep in mind while cooking your butternut squash soup:
- Roast your squash first: If you have time, roast the cubed squash at 400°F for 30 minutes before adding it to your soup pot. Roasting caramelizes the squash and intensifies its natural sweetness.
- Use a high-powered blender: If silky smooth texture is your goal, a high-speed blender like a Vitamix or Blendtec will give you a five-star finish.
- Add apple or carrot for balance: Butternut squash can be heavy on sweetness. A Granny Smith apple or a chopped carrot balances this out and adds natural depth.
- Watch the salt levels: If you’re using store-bought broth, taste before seasoning. Some broths are already heavily salted.
- Don’t skip the fat: Olive oil, butter, or coconut milk not only add creaminess but also help absorb fat-soluble nutrients in the squash.
- Make it spicy: For a kick, stir in cayenne pepper, chipotle powder, or a spoonful of harissa.
These small adjustments don’t take much extra effort but can dramatically change the outcome. Soup is comfort food—but it can also be gourmet.
Delicious Toppings and Variations
While butternut squash soup is a delight on its own, adding the right toppings or making creative variations can elevate the experience to new heights. Here’s where you get to have fun and customize your soup based on mood, dietary needs, or even what’s sitting in your fridge.
Topping Ideas That Add Texture and Flavor:
- Toasted Pumpkin Seeds (Pepitas): These give your soup a satisfying crunch and nutty flavor.
- Crispy Bacon Bits: For a savory punch, crumble some cooked bacon on top.
- Croutons: Make homemade croutons from sourdough or baguette slices sautéed in olive oil and garlic.
- Greek Yogurt or Sour Cream Swirl: Adds a creamy tang that balances sweetness.
- Fresh Herbs: Chopped parsley, thyme, or sage add a refreshing contrast.
- Red Pepper Flakes or Chili Oil: For a little kick and warmth.
Creative Flavor Variations:
- Curried Butternut Squash Soup: Add curry powder, turmeric, and a dash of coconut milk for a rich, exotic twist.
- Thai-Inspired: Blend in ginger, lemongrass, and red curry paste. Finish with lime juice and cilantro.
- Apple and Sage: Add a tart apple (like Granny Smith) and fresh sage for a fragrant, fall-inspired version.
- Mexican-Inspired: Stir in cumin, smoked paprika, and top with avocado slices and tortilla strips.
Dietary Tweaks:
- Vegan: Stick to coconut milk and vegetable broth, and use oil instead of butter.
- Paleo: Avoid dairy and use bone broth for an added nutrient boost.
- Gluten-Free: Naturally gluten-free, but be careful with toppings like croutons or processed broths.
Toppings aren’t just for aesthetics—they enhance texture, add layers of flavor, and allow your soup to feel fresh and different every time you make it.
Storage and Reheating Tips
Soup is one of those meals that tastes even better the next day, as the flavors meld together. That makes butternut squash soup perfect for meal prep, lazy weeknights, or a make-ahead dinner party option.
Storing the Soup:
- In the Fridge: Allow the soup to cool completely before transferring it to an airtight container. It will last 4–5 days in the refrigerator.
- In the Freezer: Butternut squash soup freezes beautifully. Store in portioned containers or freezer bags. Leave about an inch of space at the top for expansion. Label with the date and it’ll be good for up to 3 months.
Reheating Tips:
- Stovetop: Gently reheat the soup in a saucepan over medium-low heat. Stir occasionally to ensure even heating.
- Microwave: Heat in short bursts (1-2 minutes), stirring between rounds to avoid uneven warming.
- Avoid Boiling: Once the soup has cream or coconut milk, avoid boiling as it can cause separation or a grainy texture.
Make-Ahead Tip:
If you plan to freeze the soup, hold off on adding cream or milk until reheating. This helps prevent any unwanted texture changes or separation.
Serving Suggestions
A bowl of butternut squash soup can shine on its own, but pairing it with the right sides turns it into a hearty, satisfying meal.
Bread-Based Sides:
- Crusty Sourdough or French Baguette: Perfect for dipping and soaking up the soup.
- Garlic Bread: Adds a savory crunch that pairs well with the sweetness of the squash.
- Cheesy Toast: A slice of bread with melted cheese complements the soup beautifully.
Protein Options:
- Grilled Chicken or Turkey: Adds substance for a protein-packed dinner.
- Chickpea Salad: Keeps it vegetarian while providing extra fiber and protein.
- Egg on Toast: A poached or fried egg on toast makes for a surprisingly tasty companion.
Fresh and Light Sides:
- Mixed Green Salad with Vinaigrette: Offers a crisp contrast to the smooth soup.
- Roasted Veggies: Carrots, Brussels sprouts, or even sweet potatoes roasted with olive oil and herbs go wonderfully on the side.
Pair your soup with one or two of these sides for a cozy, satisfying, and complete meal.
Nutritional Benefits
Butternut squash soup isn’t just tasty—it’s packed with nutrients that support your health, especially during the cooler months when your immune system needs a boost.
Key Nutrients in Butternut Squash:
- Vitamin A: Butternut squash is high in beta-carotene, which your body converts into vitamin A. Great for vision, skin, and immune health.
- Vitamin C: Helps your immune system fight off colds and flu.
- Fiber: Aids digestion and keeps you feeling full longer.
- Potassium: Supports heart health and helps regulate blood pressure.
- Magnesium: Important for muscle function and bone health.
Calorie Count and Macronutrients (Per 1-Cup Serving):
- Calories: ~120 (without cream)
- Carbs: 22g
- Protein: 2g
- Fat: 4g (depends on oil/cream used)
- Fiber: 3–4g
This soup is naturally low in fat and calories, especially if you skip the cream and keep toppings light. It’s a fantastic option for those looking to eat healthy without sacrificing flavor.
FAQs about Butternut Squash Soup Recipe
1. Can I freeze butternut squash soup?
Yes! It freezes very well. Store in airtight containers or freezer bags for up to 3 months. Leave out the cream if freezing, and add it in after reheating.
2. What if I don’t have a blender?
Use a potato masher for a rustic texture, or transfer small batches into a food processor. You can also use a fork, but it will be chunkier.
3. How do I make it spicier?
Add a pinch of cayenne pepper, red pepper flakes, or even a swirl of hot sauce to your soup. You can also sauté a chopped chili with the onions.
4. Can I use frozen butternut squash?
Absolutely. It saves time and works great. Just make sure to thaw and drain it before adding it to the soup.
5. What other vegetables go well with this soup?
Carrots, apples, sweet potatoes, and even red bell peppers pair wonderfully with butternut squash in soups. They enhance the flavor and add natural sweetness.
Conclusion
There’s a reason butternut squash soup is a seasonal favorite—it’s warm, comforting, and full of depth. Whether you’re preparing it for a weeknight dinner or as a starter for a holiday feast, this step-by-step guide ensures you’ll get it right every single time.
From its vibrant color to its velvety texture and rich, savory-sweet taste, this soup is a must-have in your fall and winter rotation. It’s simple to make, easy to customize, and loved by kids and adults alike. Plus, it stores well, freezes beautifully, and can be dressed up with all kinds of delicious toppings.
So grab a squash, fire up the stove, and bring a little warmth to your table with this incredible butternut squash soup recipe. You deserve it.