Best Brisket Recipe: Who doesn’t love a juicy, tender, smoky brisket that practically melts in your mouth? Whether you’re throwing a backyard BBQ, cooking up a feast for the holidays, or just craving some classic comfort food, brisket is the go-to. But let’s be real—getting brisket right isn’t always a walk in the park. That’s why I’ve put together this ultimate step-by-step guide to help you master the art of brisket from start to finish.
So what makes this brisket recipe the best? It’s simple, foolproof, and delivers that perfect bark, smoke ring, and juicy interior every single time. We’re talking about low and slow cooking, deep seasoning, and some top-tier tricks from real pitmasters. Whether you’re a beginner or a BBQ veteran, this guide is for you.
Choosing the Right Cut of Brisket
Before we even touch the grill or oven, let’s talk meat. Brisket comes in two main cuts: the flat cut and the point cut. Here’s what you need to know:
- Flat Cut (First Cut): Leaner, more uniform, and great for slicing. Ideal for oven roasting and presentation.
- Point Cut (Second Cut): Juicier and more marbled with fat. It’s a bit harder to slice cleanly, but it packs in more flavor. Perfect for shredding or BBQ sandwiches.
Pro Tip: If you’re cooking for a crowd, go for a full-packer brisket, which includes both the flat and the point. That way, everyone gets their favorite.
How much brisket per person? Plan on about 1/2 pound of raw brisket per person, which cooks down to around 1/3 pound. For big eaters or if you want leftovers, bump it up to 3/4 pound.
Preparing the Brisket
Alright, let’s roll up our sleeves and prep this bad boy.
1. Trimming the Fat: Most briskets come with a thick fat cap. You want to trim it down to about 1/4 inch. This allows the smoke or heat to penetrate the meat better while still keeping it moist. Don’t go too aggressive—fat is flavor!
2. The Dry Rub: This is where the magic happens. Skip the store-bought stuff and mix your own for a custom flavor punch.
Here’s a simple and killer dry rub mix:
- 1/4 cup kosher salt
- 1/4 cup black pepper
- 2 tbsp smoked paprika
- 2 tbsp garlic powder
- 1 tbsp onion powder
- 1 tbsp brown sugar
- 1 tsp cayenne (optional, for heat)
Rub it generously all over the brisket. Every nook and cranny. This is your flavor armor.
Marinating for Maximum Flavor
Once that dry rub is on, you want to give it time to really soak in. You’ve got two choices:
Option 1: Fridge Overnight – Wrap the brisket in plastic or place it in a covered pan. Let it sit in the fridge for 12–24 hours. This allows the salt and spices to penetrate deep into the meat fibers.
Option 2: Room Temp Rest – If you’re short on time, let it sit at room temperature for 1–2 hours before cooking. Not ideal, but still better than nothing.
Why it matters: Marinating or resting with the rub allows the seasoning to act almost like a brine, locking in juices and adding intense flavor with every bite.
Smoking vs. Oven Roasting
This is the big decision: Are you going to smoke it or roast it in the oven?
Smoking:
- Pros: That unbeatable smoky flavor, beautiful bark, and a real BBQ experience.
- Cons: Takes longer, requires equipment (smoker, wood), and more attention.
Oven Roasting:
- Pros: Easier, more accessible, and still delicious when done right.
- Cons: No smoky flavor unless you use liquid smoke or smoked salt.
Recommended Tools:
- For smoking: Pellet smoker or offset smoker, wood chips (oak, hickory, or mesquite), meat thermometer.
- For roasting: Roasting pan with rack, foil or butcher paper, oven thermometer.
No matter what method you choose, patience is key. Brisket is a labor of love—but trust me, it’s worth every minute.
Cooking the Brisket – Step-by-Step
Now we’re getting into the real heart of it—cooking the brisket! Whether you’re using the oven or smoker, this is where you transform a tough cut of meat into a juicy, flavorful masterpiece.
Oven Method Instructions
If you’re going the oven route, here’s what you’ll need to do:
- Preheat your oven to 300°F (150°C).
- Place your brisket fat-side up in a large roasting pan or baking dish with a rack. This helps air circulate and prevents the brisket from sitting in its own juices.
- Add about a cup of beef broth or water to the bottom of the pan to keep it moist.
- Cover tightly with foil or lid. You want to trap in all that steam.
- Roast for about 1 hour per pound of brisket. So, if you’ve got a 6 lb brisket, you’re looking at roughly 6 hours of slow roasting.
- Remove the foil for the last hour of cooking to help develop a bark or crust on the outside.
- Use a meat thermometer to check the internal temperature (more on this below!).
Smoker Method Instructions
For that unbeatable BBQ flavor, smoking your brisket is the way to go:
- Preheat your smoker to 225°F (107°C). This is the sweet spot for low and slow.
- Place your brisket fat-side up directly on the grate or a wire rack.
- Use wood chunks or chips like oak, hickory, or mesquite for a deep smoky flavor.
- Smoke for 1 to 1.25 hours per pound. A 10 lb brisket? Plan for 10-12 hours.
- Wrap in butcher paper or foil once the brisket hits around 165°F (known as the stall) to speed up the process and retain moisture.
- Continue smoking until the internal temperature hits about 200–205°F.
- Let it rest before slicing. Patience pays off!
The Perfect Internal Temperature
Getting your brisket to the right internal temp is everything. Undercooked and it’s tough. Overcooked and it’s dry. So what’s the magic number?
- Ideal Internal Temperature: 200–205°F (93–96°C)
- Use a Meat Thermometer: Always check the thickest part of the meat without touching fat or bone.
- The “Jiggle Test”: A perfectly cooked brisket should jiggle when you shake it lightly. It should feel like soft butter when you probe it.
Also, don’t stress about hitting an exact number. As long as you’re in the 200–205°F zone and it feels tender, you’re golden.
Letting It Rest
This might be the hardest part—waiting. But it’s a must. Cutting into a hot brisket too soon will release all those delicious juices you worked so hard to keep in.
- Rest Time: Let your brisket rest for at least 1 hour, wrapped in foil and a towel, placed in a cooler. This keeps it hot and lets the juices redistribute.
- Resting Tips: Don’t unwrap it until you’re ready to slice and serve. Trust the process.
- Storage: If you’re serving later, you can hold it in a warm oven (around 170°F) or a turned-off oven with the light on.
Slicing the Brisket Properly
Now it’s time to show off your masterpiece. But one wrong slice, and things can go sideways fast. Brisket must be sliced against the grain—and here’s how to nail it.
Against the Grain Explained
Look at the brisket’s muscle fibers—they run in one direction. Slicing against that direction shortens the fibers, making each bite tender instead of chewy.
- Separate the point from the flat (they have different grain directions).
- Slice the flat into pencil-thin slices, straight across the grain.
- Turn the point 90° and slice accordingly.
- Use a sharp carving knife or slicing knife to get clean, smooth cuts.
Knife Tips
- Go with a long, serrated or Granton-edge knife.
- Always let the knife do the work—don’t saw or press down too hard.
- Wipe the blade every few slices to keep it clean and sharp.
Serving Suggestions
Your brisket’s the star, but the supporting cast is important too. Here’s how to serve it up right:
Classic Side Dishes
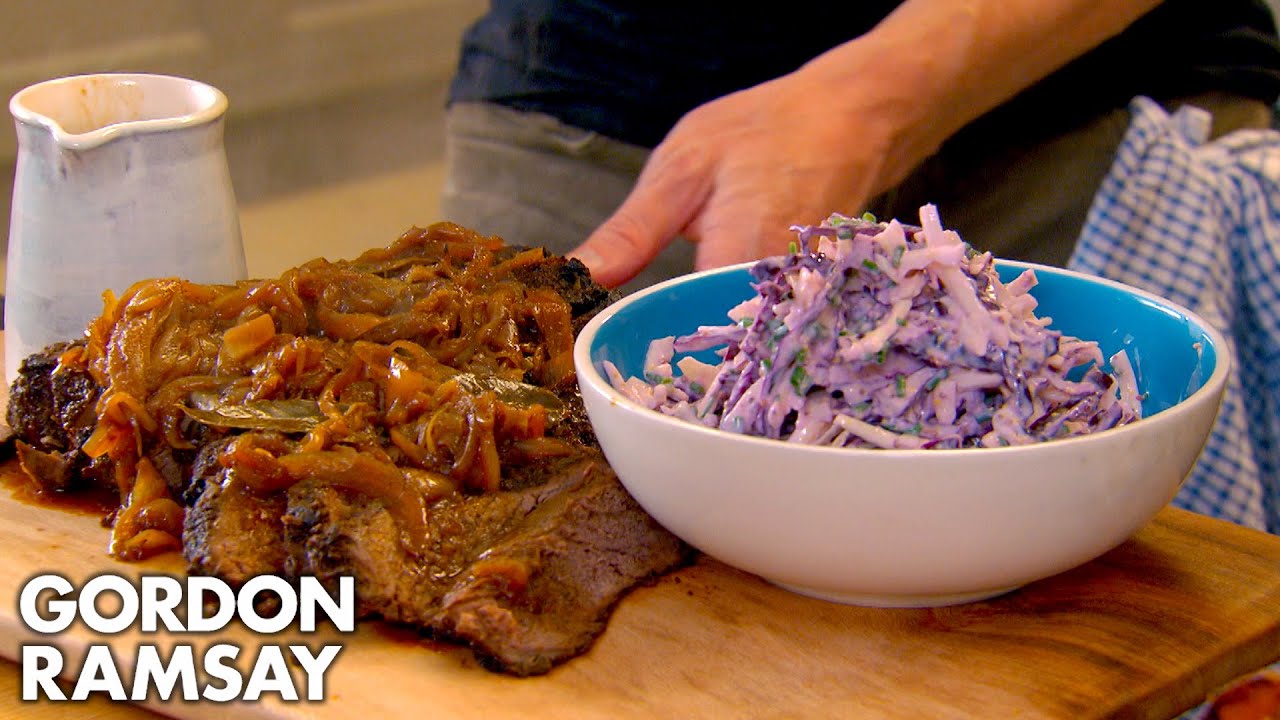
- Coleslaw: Creamy, crunchy, and balances the rich brisket.
- Mac and Cheese: Comfort food that pairs perfectly.
- Cornbread or Texas Toast: A must-have for soaking up juices.
- Pickles and Onions: Sharp and acidic to cut through the fat.
- Baked Beans: Smoky, sweet, and satisfying.
Sauce or No Sauce?
This one’s up for debate. A perfectly cooked brisket doesn’t need sauce, but a good homemade BBQ sauce can take it to the next level.
Try this quick BBQ sauce:
- 1 cup ketchup
- 1/4 cup apple cider vinegar
- 2 tbsp brown sugar
- 1 tbsp Worcestershire sauce
- 1 tsp smoked paprika
- Dash of hot sauce
Mix and simmer for 10 minutes—done!
Storage and Reheating Tips
Leftover brisket? Lucky you. The good news is, brisket stores and reheats like a champ—as long as you do it right.
How Long Does Brisket Last?
- In the Fridge: Store brisket in an airtight container or wrapped tightly in foil/plastic wrap. It’ll stay good for 3–4 days.
- In the Freezer: For longer storage, wrap it tightly in foil, then place it in a freezer bag or vacuum-seal it. It’ll keep for up to 3 months. Pro tip: Slice it before freezing for easier portions later.
Best Reheating Methods
Dry brisket is a tragedy we’re not going to let happen. Reheat it gently to keep it juicy.
- Oven Method (Best): Place slices in a baking dish with a bit of broth or leftover juices. Cover tightly with foil and heat at 325°F until warmed through.
- Sous Vide Method (Fancy): Place vacuum-sealed brisket in a water bath at 165°F for about an hour. It keeps the meat moist and evenly reheated.
- Microwave (Quick Fix): Not ideal, but it works. Add a splash of broth, cover, and heat on low in short bursts to avoid drying it out.
Common Brisket Mistakes to Avoid
Even seasoned pros mess up brisket now and then. Avoid these common pitfalls:
1. Rushing the Process
Brisket is a marathon, not a sprint. Low and slow wins the race. Cutting corners—like cranking the oven or smoker temp—just leads to dry, tough meat.
2. Skipping the Rest
We get it—you’re hungry. But cutting into your brisket too soon will make it lose all its juices. Resting is not optional.
3. Under or Over Seasoning
Brisket is a thick cut of meat, so don’t be shy with that dry rub. At the same time, balance is key. You want layers of flavor, not just salt or smoke.
4. Not Monitoring Internal Temp
Always use a meat thermometer. Guesswork is the fastest way to ruin your hard work. Also, remember to probe the thickest part of the flat for an accurate reading.
5. Slicing the Wrong Way
It’s all about cutting against the grain. Otherwise, even the most tender brisket will chew like rubber.
Tips from Pitmasters
Want to cook like the BBQ legends? These expert tips will level up your brisket game.
1. Use a Water Pan (for Smokers)
Place a water pan in your smoker to help maintain moisture and stabilize the temperature. It makes a big difference, especially during those long cooks.
2. Don’t Keep Peeking
Every time you lift the lid or open the oven, you lose heat. Trust the process and check only when necessary—typically when it’s time to wrap or when it’s nearing the final temp.
3. Wrap Tightly but Not Too Early
Wrapping helps push through the stall and keeps things moist. But wrap too early, and you won’t get that crispy bark. Wait until the brisket hits 165°F, then wrap in butcher paper or foil.
4. Add a Touch of Coffee or Cocoa to Your Rub
It sounds weird, but a little ground coffee or unsweetened cocoa powder adds depth and richness to your dry rub. You won’t taste it outright—but it makes the bark unforgettable.
5. Keep Notes
Every brisket you cook teaches you something new. Write down what worked (and what didn’t)—like weight, time, temp, wood used, and how it tasted. Your future self will thank you.
FAQs about Best Brisket Recipe
Q1: What is the best cut of meat for brisket?
The best cut is the whole packer brisket, which includes both the flat and the point. This ensures a juicy, flavorful result.
Q2: Should I cook brisket fat side up or down?
For most methods, especially smoking or slow roasting, fat side up helps baste the meat and retain moisture.
Q3: How long does it take to cook a brisket?
Brisket should be cooked low and slow—typically at 225°F for about 1 to 1.5 hours per pound.
Q4: Do I need to marinate or dry rub brisket?
Yes. A dry rub with spices or an overnight marinade enhances the flavor and helps tenderize the meat.
Q5: How do I keep brisket from drying out?
Wrap it in foil or butcher paper during cooking (the Texas Crutch method), and let it rest for at least 30–60 minutes after cooking.
Q6: Can brisket be made in the oven?
Absolutely! A slow-roasted oven brisket can be just as delicious. Use a covered roasting pan and keep the temperature low.
Q7: What are the best sides to serve with brisket?
Popular options include coleslaw, mac and cheese, baked beans, cornbread, and roasted vegetables.
Conclusion
Whether you’re smoking for hours on a summer day or roasting a hearty meal in the oven for the family, brisket is one of those dishes that brings people together. It’s soulful, satisfying, and just plain delicious when done right.
So grab your spices, fire up the oven or smoker, and get ready to impress everyone at your table. Because now you know the secrets of making the best brisket. And once you do it once? You’ll never look back.