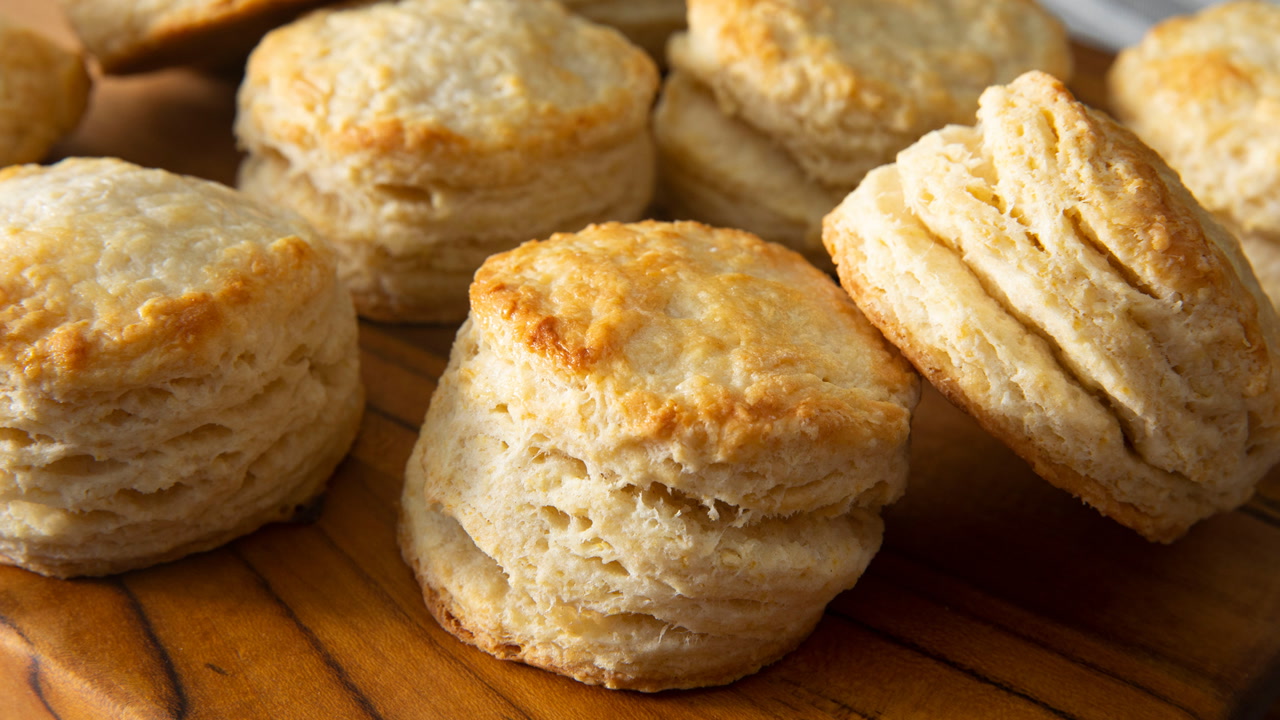
Best Biscuit Recipe: Let’s talk about biscuits—the golden, flaky kind that steal the spotlight at any table. Whether you’re pairing them with gravy for breakfast or butter and jam for a comforting snack, nothing quite beats a homemade biscuit. And honestly? Once you’ve tried this recipe, those store-bought versions just won’t cut it anymore.
Homemade biscuits are incredibly rewarding to make. They’re quick, easy, and don’t require any fancy techniques. The result? Pillowy-soft insides, golden brown edges, and a buttery flavor that melts in your mouth. This guide will walk you through everything—yes, everything—you need to know. From the ingredients to tips for nailing that perfect rise, I’ve got you covered.
So if you’re ready to turn your kitchen into a biscuit-baking haven, grab an apron and let’s roll (pun totally intended). Get ready for a step-by-step biscuit recipe that’s so easy and delicious, it’ll become your new go-to!
Ingredients You’ll Need
Here’s the best part: You don’t need a grocery store haul to make great biscuits. In fact, you probably have most of these ingredients in your kitchen right now. The key is in the quality and the ratios, not the complexity.
Basic Ingredients:
- 2 cups all-purpose flour – This is your biscuit’s backbone. Stick with plain flour for a light, fluffy texture.
- 1 tablespoon baking powder – Gives your biscuits that signature rise.
- ½ teaspoon baking soda – Adds lightness and reacts with the buttermilk for extra lift.
- 1 teaspoon salt – Brings out the flavors.
- 6 tablespoons unsalted butter (cold, cubed) – Cold butter = flaky layers. Don’t skip this trick.
- ¾ cup buttermilk (cold) – Adds tanginess and moisture.
Yep, that’s it. Six simple ingredients!
Optional Add-Ins:
- Shredded cheese – A sharp cheddar or smoked gouda adds depth.
- Chopped herbs – Rosemary, thyme, or chives elevate the flavor.
- Sugar or honey – For a slightly sweet twist (especially good with jam).
Always keep your ingredients cold, especially the butter and buttermilk. This helps create those tender, flaky layers that make a biscuit truly unforgettable.
Tools Required
You don’t need a chef’s kitchen to make biscuits, but a few tools can make the job easier—and cleaner.
Kitchen Tools:
- Mixing bowls – Medium to large is best for mixing ingredients without a mess.
- Pastry cutter or fork – To cut the butter into the flour. If you don’t have one, your hands will do the trick.
- Biscuit cutter – A round cutter helps create uniform biscuits. You can also use a drinking glass in a pinch.
- Baking sheet – Preferably with parchment paper for easy cleanup.
- Rolling pin (optional) – Great for gently pressing the dough out evenly.
- Pastry brush – For brushing the tops with butter before or after baking.
Pro Tips for Prep:
- Chill your tools: Even your mixing bowl can be chilled in the fridge for 10 minutes before use.
- Use your fingers lightly if you don’t have a pastry cutter—but work quickly to avoid warming up the butter too much.
With these simple tools, you’re more than ready to get started!
How to Make Best Biscuit – Step-by-Step Instructions
Here’s where the biscuit magic happens. Follow these steps exactly, and you’ll be biting into warm, fluffy perfection in no time.
Step 1: Preheat and Prepare
Preheat your oven to 425°F (220°C). This high temperature helps the biscuits rise quickly and develop that beautiful golden crust.
Line a baking sheet with parchment paper or lightly grease it with butter or non-stick spray. Set it aside.
Step 2: Mix Dry Ingredients
In a large bowl, whisk together:
- 2 cups all-purpose flour
- 1 tbsp baking powder
- ½ tsp baking soda
- 1 tsp salt
Whisking ensures even distribution and helps create light, airy biscuits.
Step 3: Cut in the Butter
Add your cold, cubed butter to the dry mixture. Using a pastry cutter or fork, cut the butter into the flour until it resembles coarse crumbs—think pea-sized pieces.
This step is crucial. Those little pockets of butter steam up in the oven, creating flaky layers. Work quickly to keep the butter from melting.
Step 4: Add Milk and Mix
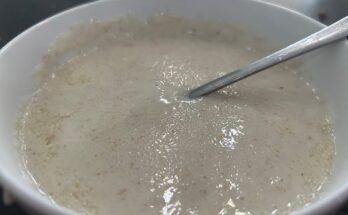
Pour in ¾ cup cold buttermilk, and stir gently with a fork or spatula until just combined. The dough should be slightly sticky, but don’t overmix—overworking the dough can lead to tough biscuits.
Step 5: Knead and Fold
Turn the dough out onto a lightly floured surface. Gently pat it into a rectangle about ½-inch thick.
Now for the biscuit secret: fold the dough in half over itself and gently press it out again. Repeat this folding process 4 to 5 times. This technique helps build those flaky layers everyone loves.
Final step: pat it out to about ¾-inch thickness.
Step 6: Cut the Biscuits
Using a floured biscuit cutter (or the rim of a glass), press straight down into the dough—no twisting! Twisting seals the edges and can prevent a good rise.
Place the biscuits on the prepared baking sheet. For taller biscuits, place them close together; for crispier edges, space them out.
Step 7: Bake to Perfection
Pop the tray into your preheated oven and bake for 12 to 15 minutes, or until the tops are golden brown.
Optional: Brush the tops with melted butter for a glossy, flavorful finish.
Tips for Perfect Biscuits
Even though biscuits are simple to make, a few insider tips can mean the difference between “meh” and mouthwatering. Want bakery-level biscuits every time? Let’s break it down:
Keep Everything Cold
This can’t be stressed enough. Cold butter and cold buttermilk are essential. Why? Because when the butter hits the hot oven, it melts and creates steam, which puffs up the dough and gives you that signature flakiness.
- Pop your butter in the freezer for 10 minutes before using.
- Chill your bowl and flour if your kitchen is warm.
Don’t Overwork the Dough
Biscuit dough doesn’t like being handled too much. The more you knead and fold, the more gluten develops, making your biscuits dense instead of tender.
- Mix until just combined.
- Use gentle hands when folding and patting out the dough.
Use a Sharp Cutter
Whether you’re using a biscuit cutter or a glass, make sure the edges are sharp. Press straight down and lift. Twisting the cutter seals the edges and prevents rising.
Check Oven Accuracy
An oven that runs hot or cool can sabotage your biscuits. Use an oven thermometer to ensure it’s at 425°F before you pop in the tray.
Brush with Butter (Or Buttermilk)
Before baking, brush the tops with buttermilk for a golden hue. After baking, a quick swipe of melted butter adds flavor and that irresistible glossy finish.
These tips might seem small, but together they’ll level up your biscuit game big time.
Biscuit Variations to Try
One of the best things about a solid biscuit recipe? It’s incredibly versatile. Once you’ve mastered the basic version, you can start customizing like a pro. Let’s explore a few popular (and delicious) variations.
Cheddar Cheese Biscuits
Add 1 cup of shredded sharp cheddar to your flour mixture before adding the butter. You can even throw in some chopped chives or jalapeños for a savory kick.
- Perfect for: breakfast sandwiches, soup sides, or snacking
- Tip: Use a little extra buttermilk if the dough feels too dry after adding cheese
Buttermilk Biscuits
Already using buttermilk? You’re halfway there! Just keep everything extra chilled, and use a touch more buttermilk for added richness.
- Slightly tangier taste
- Works great with sausage gravy or fried chicken
Sweet Cinnamon Biscuits
Want to satisfy your sweet tooth? Add 2 tablespoons of sugar to the dry mix and a sprinkle of cinnamon. After baking, drizzle with a simple icing made of powdered sugar and milk.
- Like a cross between a biscuit and a cinnamon roll
- Amazing for brunch or dessert
Herb & Garlic Biscuits
Toss in some dried Italian herbs and a bit of garlic powder to the flour. After baking, brush the tops with garlic butter.
- Tastes just like Red Lobster’s cheddar bay biscuits (especially if you add cheese!)
Experimenting with biscuit variations is like creating your own mini bakery at home. Once you start, it’s hard to stop!
How to Store and Reheat Biscuits
So you’ve made a batch of biscuits (or maybe two), and now you’re wondering how to keep them fresh and tasty. Good news: biscuits store well and can be just as delicious the next day—if you do it right.
Storing Biscuits
Room Temperature:
- Cool completely before storing.
- Wrap in foil or place in an airtight container.
- Keeps for 1–2 days.
Refrigerator:
- Wrap tightly or seal in a zip-top bag.
- Lasts up to 5 days.
Freezer:
- Wrap each biscuit individually in plastic wrap or foil.
- Store in a freezer-safe bag.
- Best used within 2–3 months.
Pro Tip: You can also freeze raw biscuit dough. Just cut your biscuits, freeze them on a tray, then store in a zip-lock bag. Bake straight from the freezer—add 2–3 extra minutes.
Reheating Biscuits
No one wants a dry biscuit. Here’s how to reheat while keeping them soft and flavorful:
Oven:
- Wrap in foil and bake at 350°F for 10 minutes.
Microwave:
- Wrap in a damp paper towel and heat for 15–20 seconds.
Toaster Oven:
- Pop them in uncovered for 5–7 minutes at 350°F for a slightly crispier outside.
Want that fresh-baked flavor? Brush a little butter on top before reheating.
What to Serve with Biscuits
Biscuits are the ultimate sidekick. But let’s be real—they’re just as good as the main event. Whether you’re going savory or sweet, here are some all-star pairings to make your biscuits shine.
Savory Pairings:
- Sausage Gravy – A Southern classic. Thick, creamy, and packed with flavor.
- Fried Chicken – Biscuit sandwiches anyone? Enough said.
- Bacon and Eggs – Breakfast just got a serious upgrade.
- Soup or Chili – Dunk your biscuit in tomato soup or hearty beef chili.
Sweet Pairings:
- Honey and Butter – Simple but unbeatable.
- Jam or Preserves – Strawberry, raspberry, or fig. Go wild.
- Whipped Cream and Berries – Hello, biscuit shortcake!
- Peanut Butter and Banana Slices – A delicious and filling combo.
Biscuits are basically the Swiss Army knife of baked goods—use them for breakfast, lunch, dinner, or dessert. They never disappoint.
FAQs about Best Biscuit Recipe
Q1. What is the secret to fluffy biscuits?
The key to fluffy biscuits is using cold butter and not overworking the dough. Cold butter creates steam during baking, resulting in light, flaky layers.
Q2. Can I use all-purpose flour instead of self-rising flour?
Yes, but you’ll need to add baking powder and salt. For every cup of all-purpose flour, add 1½ teaspoons of baking powder and ¼ teaspoon of salt.
Q3. Why did my biscuits turn out hard?
Hard biscuits usually happen when the dough is overmixed or overkneaded. Handle the dough gently to keep it soft and tender.
Q4. Can I make biscuit dough ahead of time?
Yes! You can prepare the dough, cut out the biscuits, and refrigerate them for up to 24 hours before baking.
Q5. How do I store leftover biscuits?
Store cooled biscuits in an airtight container at room temperature for up to 2 days. For longer storage, freeze them and reheat when needed.
Q6. Can I freeze biscuit dough?
Absolutely. Place cut biscuits on a tray, freeze until solid, then transfer to a zip-top bag. Bake directly from frozen, adding a few extra minutes to the bake time.
Q7. What’s the best fat to use—butter, shortening, or lard?
Butter gives the best flavor, but shortening or lard can produce a slightly flakier texture. A mix of butter and shortening works well too.
Q8. Do I need a biscuit cutter?
Not necessarily. You can use a glass or even shape the dough into squares with a knife for easy cutting and less waste.
Q9. Can I make biscuits without buttermilk?
Yes! You can substitute with regular milk and a tablespoon of lemon juice or vinegar. Let it sit for 5–10 minutes before using.
Q10. What oven temperature is best for baking biscuits?
A hot oven—typically 425°F (220°C)—helps biscuits rise quickly and develop a golden, crisp top.
Conclusion
We started with basic ingredients and tools you probably already have. From mixing and cutting in that cold butter to folding and baking, each step plays a big role in achieving that bakery-style perfection. Remember the golden rules: keep everything cold, don’t overmix, and bake in a hot oven. Add a brush of melted butter on top, and your biscuits will have that golden, glossy finish you see on food magazine covers.
Plus, with all the variations—from cheesy to sweet to herb-infused—you can mix things up depending on your mood or the meal. Whether you’re serving them with gravy for breakfast, alongside a hearty dinner, or slathering on jam for a midnight snack, these biscuits are guaranteed to please.
So go ahead—grab your flour and butter, preheat that oven, and start baking your way to biscuit bliss. Once you master this recipe, you’ll wonder how you ever lived without it.