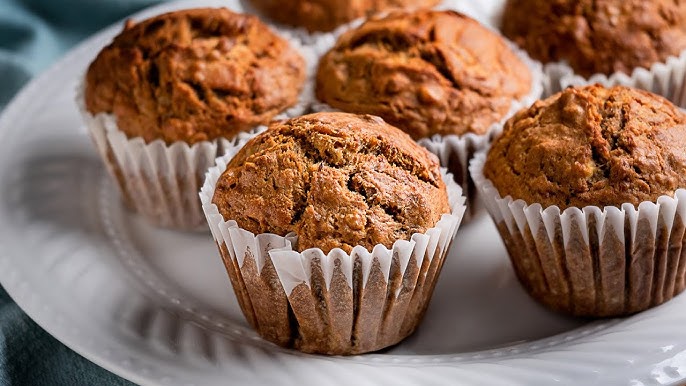
Best Banana Muffin Recipe: Banana muffins are the ultimate comfort food. They’re soft, moist, and filled with rich banana flavor that hits just the right sweet spot without being overly sugary. Whether you’re baking to use up those overripe bananas sitting on your counter or simply craving a warm muffin with your morning coffee, banana muffins always deliver. The best part? They’re ridiculously easy to make—even for beginner bakers. No fancy techniques, no complicated ingredients—just a few simple steps and you’ll have your kitchen smelling like a cozy bakery in no time.
There’s something inherently satisfying about taking basic ingredients and turning them into a golden, fluffy delight. Plus, banana muffins are incredibly versatile. You can keep them plain and classic or add a personal twist with nuts, chocolate chips, or even a sprinkle of cinnamon on top. Their soft texture, subtle sweetness, and natural moisture make them a top-tier choice for families, busy mornings, and last-minute bake sales.
Perfect for Breakfast, Snacks, or Dessert
These muffins aren’t just delicious—they’re practical. Need a grab-and-go breakfast? Check. A wholesome after-school snack for the kids? Done. A light dessert to pair with a scoop of vanilla ice cream? Banana muffins have got you covered. They’re portable, mess-free, and satisfying enough to curb hunger between meals. And because they’re made with bananas, there’s a subtle health appeal that makes you feel a little better about indulging (wink).
You can bake them in bulk and enjoy them throughout the week, or freeze a batch for future cravings. The real magic? These muffins taste even better the next day as the flavors settle and deepen. So, if you’re looking for a recipe that’s as easy as it is delicious, you’re in for a treat.
Ingredients You’ll Need
Basic Pantry Staples
Let’s keep it simple. Here’s what you need to make a basic batch of 12 delicious banana muffins:
- 3 ripe bananas – the riper, the better (think brown spots!)
- 1/3 cup melted butter – unsalted is best
- 3/4 cup sugar – white or brown sugar works; brown adds more flavor
- 1 large egg – room temperature
- 1 teaspoon vanilla extract
- 1 teaspoon baking soda
- 1/4 teaspoon salt
- 1 1/2 cups all-purpose flour
That’s it! These are ingredients most people already have in their kitchen, which is why banana muffins are a go-to recipe for spontaneous baking.
Optional Add-ins for Extra Flavor
Now here’s where the fun begins. Want to level up your banana muffins? Try mixing in:
- 1/2 cup chopped walnuts or pecans
- 1/2 cup chocolate chips or chunks
- 1 teaspoon cinnamon for a warm, cozy flavor
- A pinch of nutmeg
- A sprinkle of brown sugar on top for a crunchy finish
These small additions can totally transform the flavor profile and texture of your muffins. Whether you’re in the mood for indulgent or healthy, there’s a combo for you.
Tools and Equipment Required
Must-Have Kitchen Tools
To make this process smooth, make sure you have these basic kitchen tools on hand:
- Mixing bowls (at least two – one for wet, one for dry)
- Whisk or fork (for mashing and mixing)
- Measuring cups and spoons
- Muffin tin (standard 12-cup)
- Muffin liners or nonstick spray
- Ice cream scoop or spoon (for portioning batter)
You don’t need a mixer for this recipe, which makes cleanup a breeze.
Tips for Preparing Your Equipment
Before diving into mixing, line your muffin tin with paper liners or grease each cup with butter or nonstick spray. Preheat your oven to 350°F (175°C) and position your oven rack in the center for even baking. Having your ingredients and tools ready before starting is key to a stress-free baking experience.
Step-by-Step Banana Muffin Recipe
Step 1 – Preheat and Prep
Before you even think about mixing ingredients, turn on your oven. Preheat it to 350°F (175°C). This step is critical—starting with a properly heated oven ensures your muffins rise correctly and bake evenly.
Next, prep your muffin tin. Line each cup with paper muffin liners or grease them lightly with butter or nonstick spray. This prevents sticking and makes removing the muffins later a breeze. While you’re at it, set out your ingredients. Let your egg come to room temperature and melt your butter (but let it cool slightly before adding it to the mix).
Why does preheating matter? Because if your oven is too cold when you place the muffins in, they won’t get that lovely dome shape. Instead, you’ll end up with flat tops, and no one wants that.
Step 2 – Mash the Bananas
Grab those ripe bananas. The darker and spottier, the better—they’re naturally sweeter and easier to mash. Peel all three and toss them into a large mixing bowl. Use a fork or potato masher to mash them up until they’re mostly smooth, with just a few small lumps.
Don’t overdo it. You want a creamy texture, but a little bit of chunkiness gives the muffins a lovely texture and bursts of banana flavor. If your bananas are still a little firm, microwave them for about 20 seconds to soften them up.
This step is where all the flavor magic begins. Overripe bananas act as both a natural sweetener and a moisture booster, helping your muffins stay soft and rich.
Step 3 – Mix the Wet Ingredients
Now that your bananas are mashed, add in the wet ingredients:
- 1/3 cup melted butter
- 3/4 cup sugar
- 1 large egg
- 1 teaspoon vanilla extract
Stir everything together until well combined. The mixture should be smooth, thick, and slightly glossy.
This is the moment where the banana meets butter, egg, and sugar—creating a deliciously rich and fragrant base. Make sure your butter isn’t too hot when you add it, or it could scramble the egg. Mix until everything is just incorporated; no need to overwork it.
Once this step is done, set the bowl aside while you mix your dry ingredients in a separate bowl.
Step 4 – Add the Dry Ingredients
In another bowl, whisk together:
- 1 1/2 cups all-purpose flour
- 1 teaspoon baking soda
- 1/4 teaspoon salt
This mix is what gives your muffins their structure. The baking soda helps them rise, while the salt balances out the sweetness.
Now, gently fold the dry ingredients into the wet mixture. Don’t just dump it all in at once—add it in batches to avoid clumps and ensure even mixing. Use a spatula or wooden spoon to fold until just combined. The batter will be thick, but that’s exactly what you want.
Overmixing at this stage is the number one muffin sin. Stir only until you don’t see any streaks of flour. The more you mix, the tougher your muffins become because of gluten development—so keep it light and gentle.
Step 5 – Fold in Optional Add-ins
Here’s your chance to get creative. Want chocolate chips? Toss in half a cup. Prefer a nutty crunch? Add some chopped walnuts or pecans. You can even combine both for a bakery-style banana nut chocolate chip muffin.
Stir these extras in gently, just enough to distribute them evenly. If you’re adding cinnamon or nutmeg, you can mix them in with your dry ingredients in the previous step. For a fun twist, sprinkle a few chocolate chips or nuts on top of each muffin before baking—they’ll toast up nicely and make your muffins look professionally made.
Optional toppings also include a streusel crumble, shredded coconut, or a pinch of sea salt.
Step 6 – Pour Batter and Bake
Use an ice cream scoop or large spoon to divide the batter evenly among the 12 muffin cups. Fill each cup about 3/4 full to allow room for rising.
Place the tray in the preheated oven and bake for 18–22 minutes, or until a toothpick inserted into the center comes out clean. Every oven is slightly different, so start checking around the 18-minute mark.
Once they’re done, let them cool in the pan for 5 minutes before transferring them to a wire rack. If you try to remove them too early, they may fall apart. Patience here pays off!
When they’re cool enough to handle, it’s time for the best part: digging in. Warm, fluffy banana muffins fresh out of the oven? Pure joy.
Pro Tips for the Perfect Muffin Texture
Avoid Overmixing
This can’t be stressed enough. When you mix too much, the gluten in the flour activates, making the muffins dense and chewy instead of soft and fluffy. To avoid this, stir until the dry ingredients are just incorporated—no more, no less. Your batter might look a bit lumpy, and that’s okay! Lumpy batter is your friend in muffin-making.
Use Overripe Bananas
Those mushy, brown, ugly bananas you might be tempted to toss? They’re your secret weapon. Overripe bananas are sweeter, softer, and easier to mix into batter. They also bring intense banana flavor and keep your muffins moist for days. If your bananas aren’t ripe enough, try roasting them in the oven for 15 minutes at 300°F to bring out their natural sweetness.
Storing and Freezing Banana Muffins
How to Store for Freshness
You’ve baked the perfect batch—now how do you keep them fresh? The key is to store them in an airtight container. Once your banana muffins have cooled completely, place them in a container lined with a paper towel. Then, place another paper towel on top before sealing it with the lid. This trick absorbs any excess moisture and prevents sogginess.
At room temperature, your banana muffins will stay fresh for about 3 to 4 days. Keep them away from direct sunlight and heat, and never store them while still warm. Warmth causes condensation, which leads to soggy tops and quick spoilage.
If you prefer your muffins warm or freshly baked every time, simply pop one in the microwave for about 10–15 seconds to reheat. The flavor and texture will come back to life just like that!
Freezing and Reheating Instructions
Want to keep your muffins longer? No problem. Banana muffins freeze beautifully and can last up to 3 months in the freezer without losing flavor or texture.
Here’s how to freeze them the right way:
- Let them cool completely.
- Wrap each muffin individually in plastic wrap or foil.
- Place the wrapped muffins in a ziplock freezer bag or airtight container.
- Label with the date and type for easy identification later.
To reheat, simply take one muffin out and microwave for 30–45 seconds, or let it thaw at room temperature for about an hour. You can also warm them up in the oven at 300°F (150°C) for 10 minutes. They’ll taste just like freshly baked!
If you’re freezing for grab-and-go breakfasts, try freezing them in smaller bags of two or three muffins per pack.
FAQs about Best Banana Muffin Recipe
Q1: Can I use frozen bananas in this recipe?
Yes! Just thaw them first and drain any excess liquid. They work just as well and still deliver great flavor.
Q2: What can I substitute for butter?
You can use an equal amount of vegetable oil, coconut oil, or even applesauce for a lighter, healthier version.
Q3: How do I make these muffins gluten-free?
Use a 1:1 gluten-free all-purpose flour substitute. Just be sure to mix gently and check the consistency of the batter.
Q4: Can I turn this recipe into banana bread?
Absolutely! Just pour the batter into a greased loaf pan and bake at 350°F for 50–60 minutes.
Q5: Why are my banana muffins dry?
They were likely overbaked or didn’t have enough banana. Always use overripe bananas and check doneness with a toothpick to avoid overbaking.
Conclusion
There you have it—the absolute best banana muffin recipe, laid out step-by-step. Whether you’re baking to use up leftover bananas, prepping snacks for the week, or looking to impress guests with homemade goodness, these muffins are always a winning choice. They’re easy to make, super versatile, and loaded with flavor in every bite.
Remember to start with ripe bananas, don’t overmix, and don’t be afraid to add your favorite extras. With this recipe in your back pocket, you’ll never let a ripe banana go to waste again.