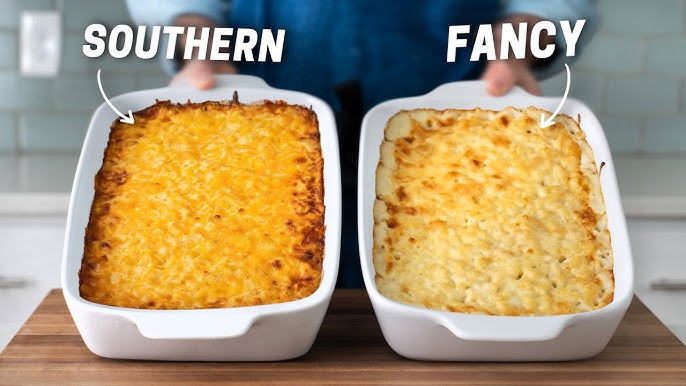
Best Baked Mac and Cheese Recipe: Few dishes scream “comfort food” quite like a hearty serving of baked mac and cheese. It’s creamy, it’s cheesy, it’s crispy on top, and best of all, it’s deeply satisfying.
Whether you’re preparing it for a family dinner, potluck, or just because you crave a nostalgic bite, this recipe delivers in every way. Baked mac and cheese isn’t just a side dish—it’s often the main event.
This step-by-step guide will walk you through making the ultimate baked mac and cheese that’s gooey inside with a perfectly crispy golden crust. Get ready to take your taste buds on a delicious ride.
Ingredients You’ll Need
To make this masterpiece, you’ll need some kitchen staples and a few special touches to make it unforgettable. Here’s what to gather:
Basic Ingredients:
- Elbow macaroni: The classic choice, though shells or cavatappi also work great.
- Butter: Unsalted is preferred to control the saltiness of the dish.
- Flour: Used to create a roux, which thickens the sauce.
- Milk: Whole milk or a combination of milk and heavy cream for richness.
- Cheddar cheese: Sharp cheddar melts beautifully and gives robust flavor.
- Mozzarella cheese: For that gooey, stretchy texture.
- Parmesan cheese: Adds a salty, nutty punch.
- Salt & pepper: Essential seasonings.
- Breadcrumbs: For the golden, crispy topping.
Optional Add-Ins:
- Paprika or cayenne pepper: For a hint of heat.
- Garlic powder or onion powder: To add depth.
- Mustard powder: Enhances the cheese flavor.
- Bacon bits or cooked sausage: For a meaty twist.
- Broccoli or spinach: To sneak in some greens.
This combination of cheeses and optional ingredients creates a flavor profile that’s both traditional and customizable.
Tools and Equipment
Before diving into cooking, make sure your kitchen is armed with the right tools. Proper equipment makes the job smoother and ensures consistent results.
Kitchen Essentials:
- Large pot: To boil the pasta.
- Medium saucepan: For preparing the cheese sauce.
- Whisk: Crucial for avoiding lumps in the roux.
- Wooden spoon or spatula: Ideal for mixing the pasta with the sauce.
- Colander: For draining pasta.
- Baking dish: A 9×13-inch casserole dish works well.
Bakeware Tips:
Opt for ceramic or glass baking dishes. These materials distribute heat evenly and give you that signature crispy top without overcooking the bottom. Avoid metal pans, which can cause hot spots and uneven browning.
Having everything prepped and ready means you can focus on what matters—making magic happen in your kitchen.
Preparing the Cheese Sauce
The cheese sauce is the soul of your baked mac and cheese. Get this right, and the rest follows like a charm.
Step-by-Step Cheese Sauce Instructions:
- Melt butter in your saucepan over medium heat.
- Add the flour, whisking constantly to form a roux. Cook this for 1-2 minutes until it turns slightly golden.
- Slowly pour in the milk, whisking continuously to avoid lumps. Cook until the sauce thickens—this usually takes about 5–7 minutes.
- Add a pinch of salt, pepper, and any optional spices like paprika or mustard powder.
- Turn the heat to low and stir in your shredded cheeses. Start with cheddar, then add mozzarella and parmesan. Stir until completely melted and silky smooth.
Pro Tips for Creaminess:
- Use room-temperature milk to prevent the sauce from seizing.
- Don’t overheat the cheese or it might become grainy.
- For extra creaminess, add a splash of heavy cream or a tablespoon of cream cheese.
When done correctly, the sauce should be thick enough to coat a spoon and rich enough to make you want to dive in with a straw.
Boiling the Pasta Perfectly
Pasta might seem simple, but perfecting its texture is crucial. Overcooked noodles turn mushy after baking, while undercooked ones don’t absorb the cheese sauce well.
Choosing the Right Pasta:
- Elbow macaroni is a classic, but cavatappi, penne, or shells can also work beautifully. Look for shapes with ridges or pockets that hold onto the sauce.
Boiling Tips:
- Use plenty of salted water—about 4 quarts per pound of pasta.
- Cook until just shy of al dente (usually 1–2 minutes less than package directions).
- Drain and rinse under cold water to halt cooking and remove excess starch, which could thicken the sauce too much.
Once boiled, set the pasta aside while you finish your cheese sauce. You’re now halfway to mac and cheese greatness!
Combining Pasta and Cheese Sauce
Now comes the moment where everything starts to come together—combining the perfectly cooked pasta with your rich and creamy cheese sauce. This step ensures every bite is evenly coated with cheesy goodness, setting the stage for the perfect bake.
How to Combine Like a Pro:
- Return the drained pasta to your large pot.
- Pour the warm cheese sauce over the pasta.
- Gently fold everything together with a spatula or wooden spoon to avoid breaking the pasta.
Make sure the pasta is completely coated. You don’t want dry patches—every nook and cranny should be drenched in cheesy deliciousness. If the mixture seems too thick, add a splash of warm milk to loosen it up a bit.
Layering for Extra Flavor:
Want to elevate your mac and cheese even more? Try layering:
- Add a layer of pasta and cheese sauce mixture.
- Sprinkle extra shredded cheese on top.
- Repeat until your baking dish is full.
This layering technique creates melty pockets of cheese throughout and a truly luxurious texture. It’s like lasagna but cheesier and more comforting.
Baking to Golden Perfection
This step is where the magic truly happens—where your mac and cheese transforms from a creamy mixture into a bubbly, golden-topped casserole that’s impossible to resist.
Oven Preparation:
- Preheat your oven to 375°F (190°C).
- Butter or spray your baking dish to prevent sticking.
Topping Tips:
For a perfectly crisp top:
- Mix 1 cup of breadcrumbs with 2 tablespoons melted butter.
- Stir in a bit of parmesan cheese for added flavor.
- Sprinkle the mixture evenly over the top of the mac and cheese.
Bake uncovered for 25–30 minutes, or until the top is golden brown and bubbling. If you want an extra-crispy crust, broil for the last 2–3 minutes—but keep a close eye on it!
Pro Baking Tip:
Let the mac and cheese sit for about 10 minutes after baking. This allows it to firm up slightly, making it easier to serve without falling apart.
Serving Suggestions
Baked mac and cheese is versatile. It can shine on its own or complement a variety of main dishes. Presentation matters too—make it look as good as it tastes!
Best Ways to Serve:
- As a main course with a fresh salad and crusty bread.
- As a side dish alongside roasted chicken, BBQ ribs, or grilled veggies.
- In individual ramekins for a fancy dinner party vibe.
Flavor Pairing Ideas:
- A dash of hot sauce or sriracha adds zing.
- A sprinkle of chopped chives or green onions brings freshness.
- Pair with a crisp white wine or a rich porter beer for adult-friendly enjoyment.
Want to impress guests? Serve your mac and cheese in mini cast iron skillets—it keeps the dish warm and adds a rustic touch.
Storing and Reheating Tips
Made too much (or purposely made extra)? Baked mac and cheese stores well, and with the right reheating method, it’ll taste just as good the next day.
Storage Tips:
- Refrigerate leftovers in an airtight container for up to 5 days.
- For longer storage, freeze in a freezer-safe dish for up to 2 months.
Reheating Like a Pro:
- Oven method (best for crispiness):
- Preheat oven to 350°F (175°C).
- Cover with foil and bake for 20–25 minutes.
- Uncover for the last 5 minutes to restore the crust.
- Microwave method (faster):
- Place a portion in a microwave-safe dish.
- Add a splash of milk and cover loosely.
- Heat on medium power, stirring halfway through.
To avoid dryness, always add a little milk or cream when reheating, and stir halfway through the process.
Variations to Try
The beauty of mac and cheese is how easily you can customize it to suit any dietary need or personal preference. Once you master the classic, try putting your own twist on it.
Spicy Mac and Cheese:
- Add diced jalapeños or a dash of cayenne pepper.
- Use spicy pepper jack cheese or chipotle cheddar.
Meat Lovers’ Mac:
- Stir in crispy bacon, ground beef, or shredded chicken.
- Try smoked sausage for a Southern-inspired flavor.
Vegan and Gluten-Free Options:
- Use gluten-free pasta and breadcrumbs.
- Replace dairy with plant-based milk and cheese (cashew cream and nutritional yeast work wonders).
- Add roasted veggies like cauliflower, mushrooms, or kale for added texture and nutrients.
Gourmet Touches:
- Drizzle with truffle oil.
- Mix in caramelized onions or roasted garlic.
- Top with panko breadcrumbs and fresh thyme.
There’s truly no end to how you can experiment with baked mac and cheese. Make it your own and let your taste buds lead the way.
Mac and Cheese for Special Occasions
Believe it or not, baked mac and cheese can be just as at home at a holiday table or elegant dinner party as it is on a casual weeknight. The key is in how you present and flavor it.
For the Holidays:
- Add ingredients like caramelized onions, pancetta, or sautéed mushrooms.
- Use upscale cheeses like Gruyère, Fontina, or Brie for a rich and indulgent flavor.
- Top with a blend of panko breadcrumbs and fresh herbs like rosemary or thyme.
Dinner Parties or Potlucks:
- Bake it in a pretty dish and garnish with fresh parsley or scallions.
- Make mini mac and cheese muffins using a muffin tin for perfect individual portions.
- Pair with sparkling wine or craft beer to elevate the experience.
Kid-Friendly Versions:
- Skip the spicy seasonings and add in finely chopped veggies like carrots or peas.
- Cut into fun shapes using cookie cutters if serving in a cooled slab.
- Serve with a side of ketchup or ranch (yes, really—some kids love it!).
From casual to classy, baked mac and cheese is surprisingly adaptable. Just tweak the flavors and the format to suit your event.
Mac and Cheese Mistakes to Avoid
Even though it’s a simple dish, baked mac and cheese comes with its own set of pitfalls. Avoid these common mistakes to ensure you nail it every time.
Top Mistakes and Fixes:
- Overcooked pasta: Remember, the pasta continues to cook in the oven. Pull it off the stove while still slightly firm.
- Lumpy cheese sauce: Whisk continuously and add milk slowly to your roux. Also, shred your own cheese—pre-shredded varieties often contain anti-caking agents that affect melting.
- Too dry or too runny: Balance is key. If it’s too dry, you might’ve baked too long or used too much pasta. Too runny? The sauce may not have been thick enough before baking.
- Not enough seasoning: Cheese is salty, yes, but mac and cheese needs more. Add mustard powder, garlic powder, or a touch of paprika for depth.
- Skipping the resting period: Letting your dish rest before serving allows it to firm up and makes slicing easier.
Learning from these common missteps will make your baked mac and cheese practically foolproof.
Nutritional Information (Optional)
If you’re watching your intake or serving guests with dietary needs, it helps to have a general idea of what’s going into your baked mac and cheese.
| Nutrient | Approximate Per Serving (1 cup) |
|---|---|
| Calories | 350–450 kcal |
| Protein | 15–20g |
| Carbohydrates | 30–40g |
| Fat | 20–25g |
| Saturated Fat | 10–12g |
| Calcium | 25% RDA |
| Sodium | 600–800mg |
Keep in mind, nutritional content can vary based on ingredients and portion size. Opting for low-fat cheese or whole-grain pasta can lighten it up a bit.
Why This Recipe Works Every Time
Consistency is everything when it comes to comfort food. This recipe is built on the principles of balanced flavor, perfect texture, and customizable components.
What Makes It Foolproof:
- The roux creates a sturdy base that prevents separation.
- The cheese mix offers both flavor and stretchiness.
- Pre-boiling pasta correctly ensures it stays firm, not mushy.
- Baking uncovered gives you that coveted crispy topping.
Whether you’re a seasoned cook or a kitchen newbie, following this method step-by-step will deliver a dish that’s comforting, flavorful, and downright addictive every time.
FAQs about Best Baked Mac and Cheese Recipe
1. Can I use pre-shredded cheese for baked mac and cheese?
While pre-shredded cheese is convenient, it often contains anti-caking agents that prevent it from melting smoothly. For a creamy, gooey texture, it’s best to shred your cheese fresh from the block.
2. What type of cheese is best for baked mac and cheese?
A mix of sharp cheddar, mozzarella, and Gruyère gives the perfect balance of flavor and meltiness. Sharp cheddar brings the bold taste, while mozzarella and Gruyère add creaminess and a gourmet twist.
3. How do I keep baked mac and cheese from drying out?
Add enough milk and cheese sauce before baking, and don’t overbake. Covering the dish with foil for the first half of baking helps lock in moisture.
4. Can I make baked mac and cheese ahead of time?
Absolutely! You can assemble it a day ahead, cover, and refrigerate. When you’re ready to bake, let it sit at room temperature for 20–30 minutes, then pop it in the oven.
5. What can I add to make it even more flavorful?
Try mixing in crispy bacon bits, sautéed onions, garlic, or a sprinkle of smoked paprika. For a crunchy topping, add buttery breadcrumbs before baking.
6. Is baked mac and cheese freezer-friendly?
Yes! Prepare and assemble it, then freeze before baking. Wrap tightly and store for up to 2 months. When ready to enjoy, bake from frozen at 350°F until heated through.
Conclusion
There’s a reason baked mac and cheese has stood the test of time. It’s a dish that warms the heart, pleases the palate, and brings people together. This step-by-step guide was crafted to help you master the art of baked mac and cheese—from selecting the best ingredients to achieving that irresistible golden crust.
Now that you’ve got the inside scoop, it’s your turn to create a cheesy masterpiece. Experiment with add-ins, switch up the cheeses, and make it your own. Once you try homemade baked mac and cheese, there’s no going back to the boxed stuff.
So go ahead—tie on that apron and treat yourself (and everyone you love) to the best baked mac and cheese ever. You’ve earned it.


