Besan Chilla Recipe: Looking for a quick, healthy, and super satisfying Indian snack? Besan Chilla, also known as gram flour pancake, is your perfect fix! Whether you’re rushing out the door in the morning or want something light in the evening, this savory pancake is an absolute winner. It’s loaded with nutrients, customizable with your favorite veggies, and comes together in less than 15 minutes. What’s not to love?
Let’s dive deep into how to make the perfect besan chilla with a detailed, step-by-step guide that’ll have you flipping like a pro in no time!
Ingredients You’ll Need
To whip up the perfect besan chilla, you need just a handful of ingredients—most of which you likely already have in your kitchen. Here’s a detailed breakdown:
Basic Ingredients:
- Besan (Gram Flour): 1 cup (finely sifted for a smooth batter)
- Water: Approximately ¾ cup (adjust as needed for batter consistency)
- Salt: ½ tsp (to taste)
- Turmeric Powder (Haldi): ¼ tsp
- Red Chili Powder: ½ tsp (optional, for spice)
- Carom Seeds (Ajwain): ½ tsp (helps with digestion)
Optional Vegetables & Add-ons:
- Onions (finely chopped): 1 small
- Tomatoes (finely chopped): 1 medium
- Green Chilies: 1-2 (finely chopped)
- Grated Carrot or Beetroot
- Coriander Leaves: A handful (finely chopped)
- Spinach, Cabbage, or Bell Peppers: Finely shredded
Optional Flavor Enhancers:
- Ginger-Garlic Paste: ½ tsp
- Cumin Powder or Garam Masala: ¼ tsp (for flavor twist)
- Amchur Powder (Dry Mango Powder): For tanginess
Substitutes & Variations:
- Instead of Water: Try buttermilk for a softer chilla
- Skip Chili Powder: Use black pepper if you want mild spice
- Use Kasuri Methi: Dried fenugreek leaves for a restaurant-like flavor
That’s the beauty of besan chilla—you can keep it simple or go wild with flavors. Totally your call!
Tools & Equipment Required
Before we begin, let’s talk tools. You don’t need a fancy kitchen setup to make besan chilla, but having the right utensils makes things easier.
What You’ll Need:
- Mixing Bowl: Deep enough to stir without spilling
- Whisk or Spoon: For mixing the batter smoothly
- Tawa or Non-stick Pan: Preferably flat and medium-sized
- Ladle or Large Spoon: To pour and spread the batter
- Spatula: For flipping (a silicone spatula works great)
- Measuring Cups/Spoons: To maintain the correct proportions
Pro Tip:
Using a cast iron tawa gives a beautiful crisp to the chilla, while a non-stick pan is beginner-friendly and requires less oil.
Health Benefits of Besan Chilla
Don’t be fooled by its simple ingredients—besan chilla packs a nutritional punch!
- High in Protein: Great plant-based protein source for vegetarians.
- Gluten-Free: Ideal for those avoiding wheat.
- Rich in Fiber: Helps with digestion and keeps you full longer.
- Low in Calories: When cooked with minimal oil, it’s a diet-friendly option.
- Diabetic-Friendly: Low glycemic index keeps blood sugar stable.
Plus, when you add veggies, you increase its vitamin and mineral content naturally. It’s a well-balanced meal or snack in every way.
Types of Besan Chilla
Once you master the basic version, there’s a whole world of chilla variations to explore.
Popular Types:
- Plain Besan Chilla: Just seasoned batter, no veggies.
- Veggie Chilla: Onions, tomatoes, green chilies, and more.
- Paneer Chilla: Add grated paneer or use it as stuffing.
- Moong Dal + Besan Mix: A protein powerhouse.
- Cheese Chilla: A kids’ favorite with a cheesy center.
- Spinach Chilla: Great way to sneak greens into your meal.
Each one offers a different texture, taste, and nutritional profile. Play around and find your favorite!
Step-by-Step Guide to Making Besan Chilla
Now let’s break it down step by step so you never mess it up, even on your first try.
Step 1: Preparing the Batter
Choose fresh, fine-quality besan (gram flour) for the best taste and texture. In a bowl, add besan, salt, turmeric, and red chili powder. Gradually whisk in water using a spoon or whisk to avoid lumps. The batter should be smooth and pourable—similar to pancake batter. Let it rest for 5 minutes to hydrate fully.
Step 2: Adding Vegetables and Spices
Add finely chopped vegetables like onions, tomatoes, green chilies, spinach, grated carrot, or cabbage. Finely chopping helps even cooking. Enhance flavor with ginger, cumin seeds, ajwain (carom seeds), and fresh coriander. Mix well so the vegetables are evenly distributed.
Step 3: Heating the Pan
Heat a non-stick or cast-iron pan on medium heat. Lightly grease with oil and wipe excess with a tissue. The pan should be hot but not smoking to prevent sticking.
Step 4: Pouring and Spreading the Batter
Pour a ladle of batter into the center of the pan. Gently spread it outward in a circular motion using the back of the ladle. Keep it medium-thin for even cooking and crisp edges.
Step 5: Cooking and Flipping the Chilla
Cook for 2–3 minutes until bubbles appear and edges lift slightly. Drizzle a little oil around the edges, flip carefully, and cook the other side for 1–2 minutes until golden and cooked through.
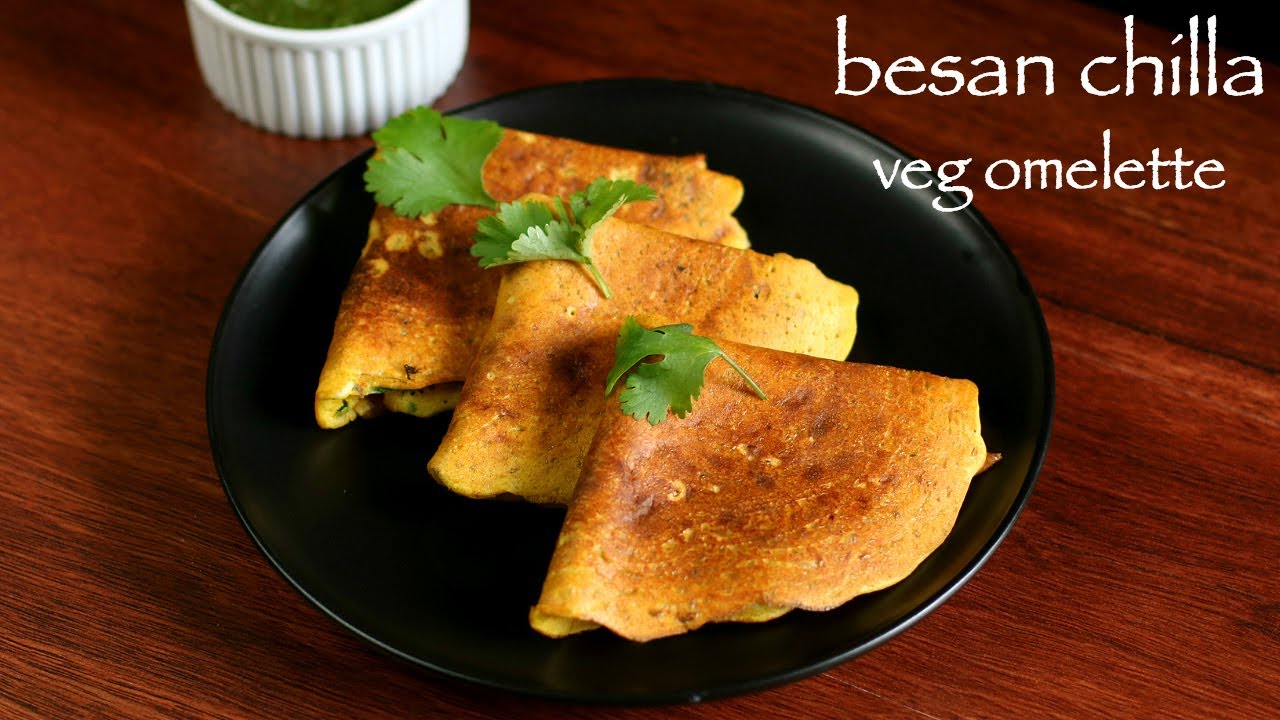
Step 6: Serving Suggestions
Serve hot with green chutney, tamarind chutney, or yogurt. Pair with salad for a complete meal, or wrap and pack for a healthy lunchbox option.
Pro Tips for Perfect Besan Chilla
Want to level up your chilla game? These expert tips can make all the difference:
- Don’t skip resting the batter for at least 10 minutes—it makes it smoother and easier to cook.
- If using a cast iron pan, make sure it’s properly seasoned to avoid sticking.
- Add water gradually—too much at once can make the batter too thin.
- Use ajwain for flavor and better digestion.
- Keep the flame at medium to low—high heat will burn the chilla from outside while leaving it raw inside.
- Stir batter before each pour, especially if it’s been sitting for a while.
- Want it extra crispy? Cook on low flame for an extra minute on each side.
- Add a bit of rice flour or semolina (sooji) to the batter for crunch.
Storage and Reheating Tips
Got leftovers or planning to meal prep? Here’s how to keep your chillas fresh:
Storing Tips:
- Let chillas cool completely before storing.
- Place in an airtight container with a layer of parchment between them to avoid sticking.
- Store in the fridge for up to 2 days.
Reheating Tips:
- On Tawa: Reheat on a medium-hot pan for 1–2 minutes on each side.
- Microwave: Wrap in damp paper towel and microwave for 30–40 seconds.
- Avoid overheating, as besan tends to get dry.
Note: Chillas taste best fresh, but reheated ones are still pretty good if stored properly.
Variations to Try
Once you master the basic chilla, it’s time to get creative!
1. Spicy Masala Chilla
- Add green chili paste, garam masala, and black pepper.
- Serve with a garlic chutney for an extra kick.
2. Stuffed Paneer Chilla
- Grate paneer, mix with chopped onions, coriander, and spices.
- Add it as a filling and fold chilla like a quesadilla.
3. Cheese Chilla
- Sprinkle grated cheese on half-cooked chilla, fold, and cook till melty.
4. Moong Dal-Besan Chilla
- Mix soaked & ground moong dal with besan.
- Rich in protein and super filling!
5. Oats Chilla
- Add powdered oats into the batter for more fiber.
Each of these variations adds a new layer of flavor and nutrition—perfect for switching things up during the week.
Nutritional Breakdown
Besan chilla isn’t just tasty—it’s also quite nutritionally balanced. Whether you’re tracking macros or just trying to eat cleaner, this dish fits perfectly into most diets.
Here’s an approximate nutritional value for one medium-sized besan chilla (without stuffing):
| Nutrient | Amount (approx.) |
|---|---|
| Calories | 120–150 kcal |
| Protein | 6–8 g |
| Carbohydrates | 12–15 g |
| Fiber | 2–3 g |
| Fat | 4–5 g (with 1 tsp oil) |
| Iron | 8–10% RDA |
| Vitamin A & C | Varies (depends on veggies added) |
Why It’s a Smart Choice:
- High in plant protein: Great option for vegetarians and vegans.
- Low in saturated fat: Heart-friendly when cooked with minimal oil.
- Rich in complex carbs and fiber: Keeps you full and energized longer.
- Customizable macros: Add paneer for more protein, or veggies for fiber.
This makes besan chilla a brilliant option for weight loss diets, diabetic meal plans, and even bodybuilding diets when paired with a protein-rich side like yogurt or tofu.
Why Besan Chilla is Ideal for Diet Plans
Wondering whether besan chilla fits your current health goals? Here’s why it likely does!
1. Great for Weight Loss
- Low in calories and high in fiber, besan chilla keeps you full without overeating.
- It helps in curbing cravings when paired with a green chutney or veggie salad.
2. Diabetes-Friendly
- The low glycemic index of besan keeps blood sugar levels stable.
- Add some fenugreek (methi) leaves or cinnamon to enhance its diabetic-friendly benefits.
3. Vegan & Gluten-Free
- No dairy, no eggs, and no wheat—besan chilla is naturally vegan and gluten-free.
- Perfect for people with allergies or food sensitivities.
4. Perfect for Meal Prepping
- You can make the batter in advance and store it in the fridge for up to 2 days.
- Quick to cook and pairs with multiple sides—great for planning healthy meals.
5. Post-Workout Meal
- Rich in protein, especially when you add paneer or tofu.
- Combine it with peanut chutney or a glass of protein-rich smoothie for a post-workout boost.
Besan chilla is proof that healthy food doesn’t need to be boring or bland. With the right ingredients, it can be flavorful, quick, and deeply satisfying.
FAQs about Besan Chilla Recipe
1. Can I use other flours instead of besan?
Yes, you can substitute besan with moong dal flour, whole wheat flour, or a mix of millet flours. However, the flavor and texture will change slightly. You can also mix besan with oats flour for a fiber boost.
2. How can I make besan chilla without oil?
Use a good-quality non-stick pan or a well-seasoned iron tawa. Pour the batter and cook on low to medium flame without oil. You can also use an oil spray or just brush a few drops for minimal fat.
3. Is besan chilla suitable for kids?
Absolutely! It’s protein-rich, soft, and customizable. Reduce the spice levels and add grated cheese or paneer to make it more appealing for children. Serve with ketchup or a mild yogurt dip.
4. Can I store the batter overnight?
Yes, you can store besan chilla batter in the refrigerator for up to 2 days. Stir it well before using, as besan tends to settle at the bottom. Avoid adding salt and veggies until you’re ready to cook for maximum freshness.
5. What’s the best dip to serve with besan chilla?
Green chutney (coriander and mint) is the most classic option. You can also try garlic chutney, peanut chutney, curd-based dips, or even hummus for a twist. For kids, serve with ketchup or mayonnaise.
Conclusion
Besan chilla is more than just a dish—it’s a versatile, nutritious, and utterly comforting meal you can enjoy any time of the day. Whether you’re rushing through a busy morning or relaxing with a light dinner, this savory pancake has got your back.
From its protein-rich goodness to its endless variations, besan chilla is a must-have in every kitchen. It’s budget-friendly, easy to make, and loved by both adults and kids.
So, the next time you’re staring into your fridge wondering what to make—go with besan chilla. Just mix, pour, flip, and enjoy!