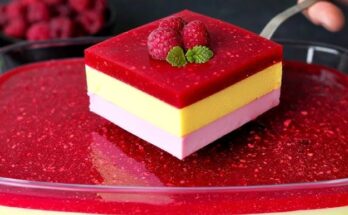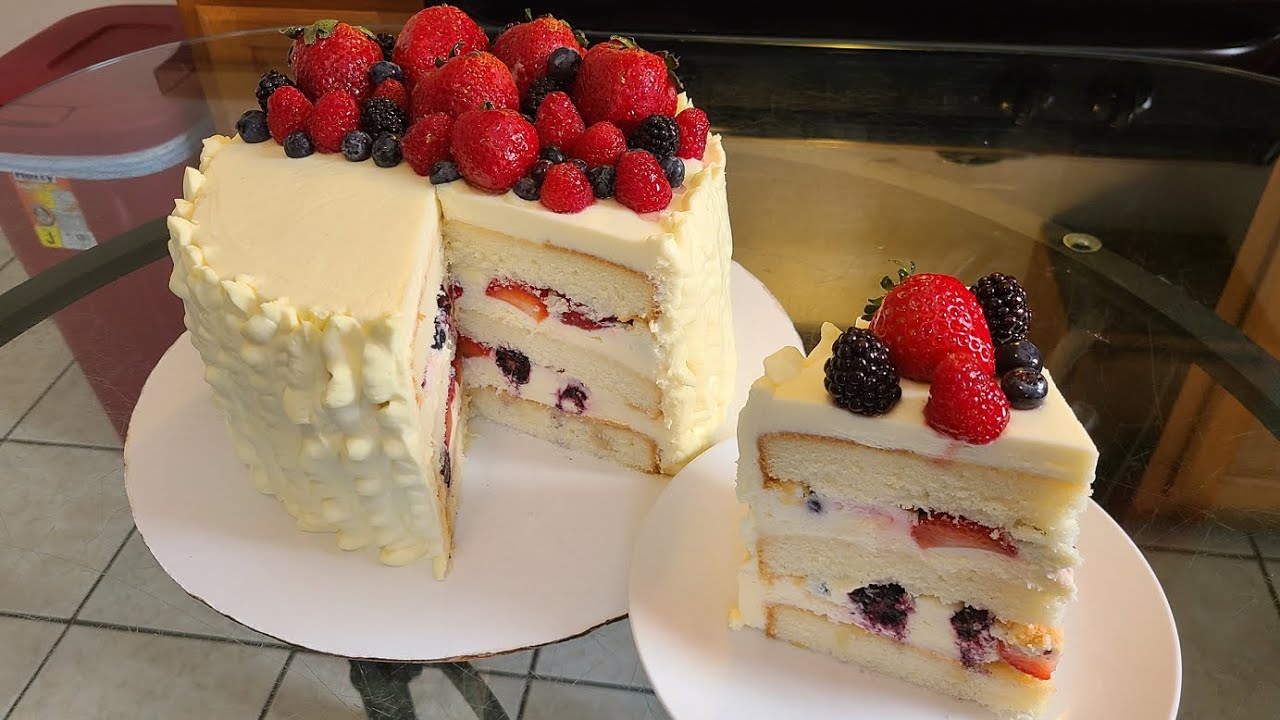
Berry Chantilly Cake Recipe: There are cakes, and then there’s the Berry Chantilly Cake—a dessert that feels like it belongs at the center of every celebration. Imagine layers of soft, fluffy vanilla cake wrapped in rich, velvety Chantilly cream and decorated with a rainbow of fresh berries. It’s not just a dessert; it’s a showstopper that brings smiles the moment it’s placed on the table.
Whether you’re hosting a summer garden party, surprising someone for their birthday, or simply want to treat yourself, this cake is a wonderful choice. In the guide below, I’ll take you through the ingredients, tools, and each step so you can make this masterpiece right in your kitchen.
Ingredients You’ll Need
Before diving into the process, let’s gather everything you’ll need. The right ingredients are crucial for making your Berry Chantilly Cake both delicious and picture-perfect.
Dry Ingredients
- 2 ½ cups cake flour (or all-purpose flour with cornstarch substitute)
- 2 ½ tsp baking powder
- ½ tsp baking soda
- ½ tsp salt
- 1 ½ cups granulated sugar
The dry base of the cake ensures structure and sweetness. Cake flour is ideal because it gives a softer, more tender crumb.
Wet Ingredients
- 1 cup unsalted butter (room temperature)
- 1 cup whole milk (room temperature)
- 4 large eggs (room temperature)
- 1 tbsp vanilla extract
- ½ cup sour cream or Greek yogurt (for moisture)
Room-temperature ingredients mix better, preventing lumps and creating a smooth batter. The sour cream is a secret ingredient that guarantees your cake will stay moist.
Fresh Berries
- 1 cup strawberries (sliced)
- 1 cup blueberries
- 1 cup raspberries
- 1 cup blackberries
Always choose ripe, firm berries. You can mix and match, but the combination of four types creates a vibrant and balanced flavor.
Chantilly Cream Frosting
- 2 cups heavy whipping cream (chilled)
- 8 oz cream cheese (softened)
- ½ cup mascarpone cheese (optional but adds richness)
- 1 cup powdered sugar (sifted)
- 1 tsp vanilla extract
- Zest of 1 lemon (for brightness)
The frosting is what makes Chantilly Cake unique. Unlike buttercream, it’s light, fluffy, and slightly tangy from the cream cheese and mascarpone. It complements the berries beautifully without overpowering them.
Essential Tools and Equipment
Baking success often comes down to having the right tools. While you don’t need professional bakery equipment, a few essentials will make your job easier.
Baking Tools
- Three 8-inch round cake pans
- Parchment paper
- Mixing bowls (various sizes)
- Hand or stand mixer
- Whisk
- Measuring cups and spoons
Parchment paper ensures your cake layers release without sticking, and a stand mixer will save you a lot of effort when whipping cream or beating butter.
Decorating Tools
- Offset spatula
- Serrated knife or cake leveler
- Cake turntable (optional but very helpful)
- Piping bag with star or round tip
- Cooling rack
An offset spatula helps spread frosting evenly, while a turntable makes smooth frosting work almost effortless. Even if you’re not aiming for a professional bakery finish, these tools help you get close.
Step-by-Step Guide to Making Berry Chantilly Cake
Now comes the fun part—actually baking and assembling your cake. Follow these steps carefully, and you’ll have a dessert that looks and tastes like it came from a high-end bakery.
Step 1 – Preparing the Cake Layers
Start by preheating your oven to 350°F (175°C). Grease and line your cake pans with parchment paper to prevent sticking. In one bowl, whisk together the dry ingredients: flour, baking powder, baking soda, and salt. In another bowl, cream the butter and sugar until light and fluffy. This step is key—it incorporates air and gives your cake its tender structure.
Next, add the eggs one at a time, mixing well after each. Stir in vanilla. Alternate adding the dry ingredients with milk and sour cream, starting and ending with the flour mixture. Mix just until combined—overmixing can lead to dense cake.
Divide the batter evenly among the prepared pans. Bake for 25–30 minutes, or until a toothpick inserted in the center comes out clean. Let the cakes cool in the pans for 10 minutes, then transfer them to a cooling rack. Cooling completely is essential before frosting, otherwise, your cream will melt.
This step sets the stage. Soft, moist, golden cake layers are the canvas on which you’ll build your berry masterpiece.
Step 2 – Making the Chantilly Cream
The Chantilly cream is the star of this cake—it’s what sets it apart from any ordinary layered dessert. Start by beating the softened cream cheese and mascarpone cheese together until smooth. This step removes any lumps and creates a creamy base. Add in powdered sugar and vanilla extract, whipping until everything is well combined and slightly fluffy.
In a separate chilled bowl, whip the heavy cream until soft peaks form. This means the cream should hold its shape but still curl at the top when you lift the whisk. Over-whipping will turn it grainy and eventually into butter, so keep a close eye on it.
Now comes the magic—gently fold the whipped cream into the cream cheese mixture. Use a spatula and fold in an upward motion to keep the frosting airy. The result should be light, silky, and stable enough to spread and pipe. A touch of lemon zest can also be added at this stage to brighten the flavor.
This Chantilly cream isn’t just frosting—it’s an indulgence on its own. Its tangy sweetness balances the fruitiness of the berries and the richness of the cake, making every bite feel refreshing rather than heavy.
Step 3 – Layering the Cake with Berries and Cream
Now that both the cake and frosting are ready, it’s time to assemble. First, level your cakes using a serrated knife or cake leveler so each layer is flat. This prevents a wobbly cake and makes stacking easier.
Place one cake layer on your serving plate or cake board. Spread a generous layer of Chantilly cream evenly across the surface. Next, scatter a mix of berries over the cream. Make sure to press the berries gently into the frosting so they don’t roll around when stacking the next layer.
Repeat the process with the second layer: cake, Chantilly cream, then fresh berries. Once you add the third layer of cake on top, give the cake a gentle press to set it in place. Don’t worry if a little cream squeezes out—that will be covered during frosting.
At this stage, your cake should already look vibrant and mouthwatering. The layers of berries peeking through the cream add texture and juiciness to every slice. It’s like biting into cake and fresh fruit salad at once—truly irresistible.
Step 4 – Frosting and Decorating
Now comes the fun part—turning your stacked cake into a stunning centerpiece. Start by applying a crumb coat. This is a thin layer of frosting that seals in crumbs and creates a smooth base for the final coat. Spread the cream thinly across the top and sides, then refrigerate the cake for about 20 minutes.
Once chilled, apply the final layer of Chantilly cream, smoothing it out with an offset spatula. Don’t stress if it’s not perfectly even—this cake has a rustic elegance, and a few swirls make it look homemade and inviting.
For decoration, pile fresh berries on top in a mound, letting some cascade down the sides for a natural look. You can also use a piping bag to add small rosettes or decorative swirls around the edges. If you want an extra pop of color, sprinkle on a little powdered sugar or add edible flowers.
This step transforms your cake from simple layers into a dessert worthy of special occasions. It’s a feast for the eyes and the taste buds.
Step 5 – Chilling and Serving
Patience is key here. After decorating, refrigerate the cake for at least one hour before serving. This allows the cream to firm up and the flavors to meld together. If you cut too early, the layers may slide, and the cream could be too soft.
When ready to serve, use a sharp knife dipped in hot water (wiped dry) for clean slices. Each piece should reveal golden cake layers, fluffy Chantilly cream, and jewel-toned berries. Pair it with a cup of coffee, tea, or even champagne for a truly luxurious experience.
The first bite will tell you everything—sweet, tangy, creamy, and fruity all at once. It’s not just dessert; it’s happiness on a plate.
Tips and Tricks for the Perfect Chantilly Cake
Even though this recipe is straightforward, a few expert tips will make your cake truly bakery-worthy.
Choosing the Right Berries
Always go for fresh, firm, and ripe berries. Overripe ones release too much juice and may make your cake soggy. If berries aren’t in season, you can use frozen ones—just thaw and pat them dry before layering.
Making the Cake Moist and Fluffy
Room-temperature ingredients are non-negotiable. They blend better and trap air, making your cake rise beautifully. Adding sour cream or Greek yogurt ensures your cake doesn’t dry out.
How to Keep Frosting Smooth
Make sure your cream cheese is softened to room temperature before whipping; otherwise, it may create lumps. Also, chill your mixing bowl and whisk before whipping the heavy cream—this helps it whip faster and hold its shape longer.
These small tweaks can make the difference between a good cake and a perfect one.
Variations of Berry Chantilly Cake
One of the best things about Berry Chantilly Cake is its versatility. Once you’ve mastered the base recipe, you can easily experiment with different flavors and twists to match your personal taste or the theme of your event.
Chocolate Chantilly Cake
If you’re a chocoholic, this variation will win your heart. Simply replace one-third of the flour in your cake batter with high-quality cocoa powder. You can also drizzle melted chocolate between the layers along with the berries for an indulgent surprise. The contrast of rich chocolate with light Chantilly cream and tangy berries creates a heavenly combination.
Lemon Chantilly Cake
For something zesty and refreshing, add fresh lemon juice and zest to both the cake batter and the frosting. Lemon enhances the brightness of the berries and gives the cake a more summery, citrusy profile. This version is perfect for spring celebrations, afternoon teas, or bridal showers.
Vegan Chantilly Cake Option
Yes, you can still enjoy this beauty without dairy or eggs. Swap butter with vegan butter, eggs with flaxseed or chia seed mixture, and heavy cream with coconut cream. For the frosting, use vegan cream cheese and coconut whipped cream. The flavor is slightly different, but still delicious and just as beautiful.
These variations prove that Berry Chantilly Cake isn’t a one-size-fits-all dessert—it’s a canvas for creativity.
Common Mistakes to Avoid
Even seasoned bakers can face hiccups when making a Chantilly Cake. Knowing the pitfalls ahead of time will save you frustration and ensure your cake turns out perfect every time.
Overbaking the Cake Layers
Nothing ruins a cake faster than dryness. Always check your cake a few minutes before the suggested baking time. Insert a toothpick—if it comes out clean or with a few moist crumbs, it’s ready.
Runny Chantilly Cream
If your cream turns out too soft, it’s usually because it wasn’t whipped long enough, or the ingredients weren’t cold. Always chill your bowl, whisk, and heavy cream before starting. If it still feels unstable, you can add a tablespoon of instant pudding mix to help it hold shape.
Uneven Cake Stacking
Crooked cakes happen when layers aren’t level or the cream filling isn’t spread evenly. Always trim the tops of your cake layers with a serrated knife, and spread frosting all the way to the edges. A turntable can also help keep things even.
Avoiding these mistakes ensures your cake looks as good as it tastes.
Storage and Make-Ahead Instructions
Berry Chantilly Cake is best enjoyed fresh, but sometimes you need to prep ahead—especially for big gatherings.
How to Store Berry Chantilly Cake
Once assembled, the cake should be stored in the refrigerator because of the fresh cream and berries. Cover it loosely with plastic wrap or place it in a cake carrier to keep it from drying out. It will stay fresh for up to 3 days.
Freezing Tips
If you want to make it ahead, you can bake the cake layers in advance. Wrap each cooled layer tightly in plastic wrap and freeze for up to 2 months. Thaw them at room temperature before assembling. The Chantilly cream, however, is best made fresh—it doesn’t freeze well.
You can also assemble the cake a day before serving and keep it chilled. In fact, letting it rest overnight often improves the flavor as the layers meld together.
Nutritional Value of Berry Chantilly Cake
While Berry Chantilly Cake is a treat, it’s helpful to know what’s in each slice, especially if you’re watching your diet.
Calories and Macros per Slice
On average, a slice (1/12 of the cake) contains:
- Calories: 450–500
- Carbohydrates: 55g
- Fat: 22g
- Protein: 6g
These numbers may vary depending on portion size, frosting quantity, and berry types used.
Healthier Alternatives
- Use whole wheat pastry flour instead of white flour for added fiber.
- Replace sugar with coconut sugar or a natural sweetener like stevia.
- Swap out some cream with Greek yogurt to cut fat.
- Use lighter frostings such as whipped Greek yogurt cream.
With these swaps, you can enjoy a slightly lighter version without compromising too much on flavor.
Serving Ideas and Pairings
Presentation matters almost as much as taste, and pairing your Berry Chantilly Cake with the right sides elevates the whole experience.
Drinks That Pair Well with Chantilly Cake
- A chilled glass of champagne or prosecco for celebrations
- Freshly brewed coffee or cappuccino for brunch gatherings
- Herbal teas like chamomile or mint for a calming afternoon treat
- Sweet dessert wines such as Moscato
Creative Plating Ideas
- Serve each slice with a drizzle of berry coulis or chocolate sauce.
- Add a dollop of whipped cream on the side.
- Garnish plates with mint leaves for extra freshness.
- For special occasions, dust the cake with edible glitter for a magical touch.
These little additions turn an already elegant dessert into a restaurant-worthy experience.
FAQs about Berry Chantilly Cake Recipe
Q1: Can I make this cake a day in advance?
Yes, in fact, the flavors improve after resting overnight in the fridge. Just keep it covered to prevent drying out.
Q2: Can I use frozen berries instead of fresh?
Yes, but thaw them first and pat dry to remove excess liquid, otherwise they may make the cake soggy.
Q3: How long can Chantilly cream hold its shape?
If whipped properly, it can stay stable for up to 2–3 days in the refrigerator.
Q4: Can I make Chantilly cream without mascarpone?
Absolutely. Cream cheese alone works fine, though mascarpone adds extra richness and smoothness.
Q5: What’s the difference between Chantilly cream and whipped cream?
Chantilly cream is sweetened whipped cream, often enhanced with cream cheese or mascarpone for added texture and flavor.
Conclusion
By following this step-by-step guide, you can recreate the bakery-style charm of this cake in your own kitchen. Whether you stick with the classic version or try fun variations like chocolate or lemon, one thing is guaranteed—your guests will be asking for seconds.
So, grab your mixing bowls, whip up that cream, and let the beauty of berries shine through. The Berry Chantilly Cake isn’t just baked; it’s crafted with love.