Belgian Waffle Recipe: Is there anything more comforting than the smell of fresh waffles wafting through your kitchen on a slow weekend morning? If you’re looking to recreate the fluffy, golden goodness of a classic Belgian waffle at home, you’re in for a treat. Belgian waffles are not just your regular waffles—they’re crispier on the outside, fluffier on the inside, and oh-so-satisfying with every bite.
Unlike American-style waffles, Belgian waffles are made with a lighter batter and typically have deeper pockets, which are perfect for holding your favorite toppings like maple syrup, whipped cream, fresh fruits, or even a scoop of ice cream. They’re a brunch favorite, a breakfast delight, and can easily become the star of your dessert menu too.
In this step-by-step guide, we’re going to walk you through everything you need to make the perfect Belgian waffles from scratch. Whether you’re a seasoned home chef or a total beginner, this recipe is easy to follow and guarantees delicious results every time. So grab your mixing bowls, plug in your waffle maker, and let’s whip up some magic together.
List of Ingredients You’ll Need
Before we dive into the steps, let’s make sure you have everything on hand. Here’s a breakdown of what you’ll need to make authentic Belgian waffles.
Dry Ingredients
- 2 cups all-purpose flour – This forms the base of your batter. You can also experiment with whole wheat or oat flour, but all-purpose flour gives the best texture.
- 2 tablespoons granulated sugar – Adds a hint of sweetness. You can increase this slightly if you like sweeter waffles.
- 1 tablespoon baking powder – Helps the waffles rise and become airy.
- 1/2 teaspoon salt – Enhances flavor and balances the sweetness.
Wet Ingredients
- 2 large eggs, separated – Egg yolks go in the batter while the whites are whipped to create fluffy waffles.
- 1 3/4 cups whole milk – Provides moisture and richness. You can substitute with buttermilk or almond milk.
- 1/2 cup unsalted butter, melted and cooled – Adds richness and gives that classic waffle flavor.
- 1 teaspoon vanilla extract – Gives a warm, sweet aroma and flavor.
Optional Add-ins and Toppings
Make your waffles your own with these optional extras:
- Add-ins: Mini chocolate chips, blueberries, chopped nuts, cinnamon
- Toppings: Fresh strawberries, banana slices, syrup, whipped cream, Nutella, powdered sugar, yogurt, or even fried chicken for a savory twist!
Kitchen Equipment You’ll Need
To get started, you’ll need some basic kitchen tools. Here’s what to gather:
- Belgian waffle maker – The deeper pockets make all the difference!
- 2 large mixing bowls – One for dry and one for wet ingredients.
- Electric mixer or hand whisk – Especially useful for beating egg whites.
- Measuring cups and spoons – Precision matters.
- Rubber spatula – Perfect for folding and mixing gently.
- Ladle or batter scoop – Makes it easy to pour just the right amount into the waffle iron.
Step-by-Step Guide
Let’s get cooking! Follow these steps carefully, and you’ll have golden, fluffy waffles in no time.
Step 1. Preheat Your Waffle Iron
The first step? Get your waffle maker nice and hot. Preheating ensures that your waffles start cooking immediately when the batter hits the surface, leading to a crispy exterior and fluffy interior. If your waffle maker has an indicator light, wait for it to turn on. Don’t rush this step—cold plates will ruin your texture.
Pro Tip: Lightly grease the plates with non-stick spray or a brush of melted butter to keep things clean and prevent sticking.
Step 2. Separate the Eggs
Crack your eggs and separate the yolks from the whites. Place the yolks in one bowl and the whites in another. Why? Beating the whites separately and folding them in later gives the batter its signature fluff and lift—exactly what Belgian waffles are all about.
Not sure how to separate eggs? Use the eggshell method or an egg separator tool. Just make sure there’s no yolk in your whites, or they won’t whip up properly.
Step 3. Beat the Egg Whites Until Stiff Peaks Form
Take your hand mixer or stand mixer and beat the egg whites until they form stiff peaks. This means when you lift the beaters, the peaks should stand up straight without collapsing.
This step is crucial. Think of whipped egg whites as the secret ingredient that gives your waffles a pillowy-soft inside without being dense. You’ll fold them into the batter later for that magic touch.
Step 4. Mix the Dry Ingredients
Now, let’s move on to the dry mix. In a large mixing bowl, combine the all-purpose flour, sugar, baking powder, and salt. Use a whisk to mix everything thoroughly. You want to make sure the baking powder is evenly distributed, so you don’t end up with uneven waffles that rise in some spots and fall flat in others.
Don’t rush this step. A consistent dry mix sets the stage for a smooth batter. If you’re sifting your flour (recommended), this is the perfect time to do it. Sifting helps eliminate lumps and gives the waffles a lighter texture. If you’re in a rush, just make sure you whisk well enough to combine everything evenly.
Step 5. Combine the Wet Ingredients (Excluding Whites)
In a separate bowl, take your egg yolks, milk, melted butter, and vanilla extract. Mix them well using a whisk until the mixture becomes creamy and smooth. The melted butter adds a richness to the batter, while the vanilla gives that warm, sweet scent we all associate with waffles.
Be sure your melted butter has cooled slightly before adding it to the mixture—if it’s too hot, it could cook the egg yolks, and we definitely don’t want scrambled eggs in our waffles. Once combined, your wet ingredients should look like a pale yellow, silky batter.
Step 6. Fold the Wet into the Dry
Slowly pour your wet mixture into the bowl of dry ingredients. Using a rubber spatula or wooden spoon, fold them together gently. The goal is to combine the two without overmixing. A few lumps are okay—resist the urge to keep stirring!
Why? Overmixing activates the gluten in the flour, making the waffles tough and chewy instead of light and fluffy. Think of it like folding laundry—you want to bring the two parts together gently and evenly.
Once combined, the batter should be thick but pourable. You’re almost there!
Step 7. Gently Fold in the Egg Whites
Now it’s time for the magic step—folding in those stiff egg whites. This is what gives Belgian waffles their signature airy structure. Add the whipped whites in thirds, gently folding them into the batter using a spatula. Don’t stir or whisk; you want to maintain as much of the air as possible.
Here’s a trick: use an under-over motion with your spatula. Cut through the middle, scrape along the bottom, and bring the batter over the top. Rotate the bowl as you go. It’ll take a minute, but the result is a light and fluffy batter that’ll make your waffles rise beautifully in the iron.
When you’re done, the batter should be smooth, airy, and slightly foamy—ready for the waffle maker!
Step 8. Prepping the Waffle Iron
Before pouring the batter in, make sure your waffle iron is hot and greased. If it’s not non-stick, you can brush it lightly with oil or melted butter. Even if it is non-stick, a light greasing helps give the waffles that perfect golden crust.
Set the temperature to medium-high if your waffle maker allows for temperature control. Belgian waffles need enough heat to crisp up the outside while fully cooking the inside.
Tip: Pour a small spoon of batter into the center to test the heat—it should start cooking immediately.
Step 9. Cook the Waffles
Ladle or scoop your batter into the center of the preheated waffle iron. Don’t overfill it—Belgian waffles rise a lot due to the whipped egg whites and baking powder. Pouring too much will cause a messy overflow (we’ve all been there!).
Close the lid and let the waffle cook undisturbed. Most waffle irons take 4–6 minutes to cook a Belgian waffle. Don’t lift the lid too early, or you risk tearing your waffle. Wait for the indicator light (if your maker has one), or watch for steam to stop escaping—this usually means it’s done.
You’re looking for a golden brown color and a firm, crispy texture on the outside. When you lift the lid, the waffle should release easily.
Step 10. Remove and Serve
Carefully remove the waffle using a fork, spatula, or tongs. Place it on a wire rack for a minute or two to avoid sogginess caused by steam on a plate. If you’re serving a crowd, keep cooked waffles warm in a 200°F (95°C) oven directly on the rack—this keeps them crisp.
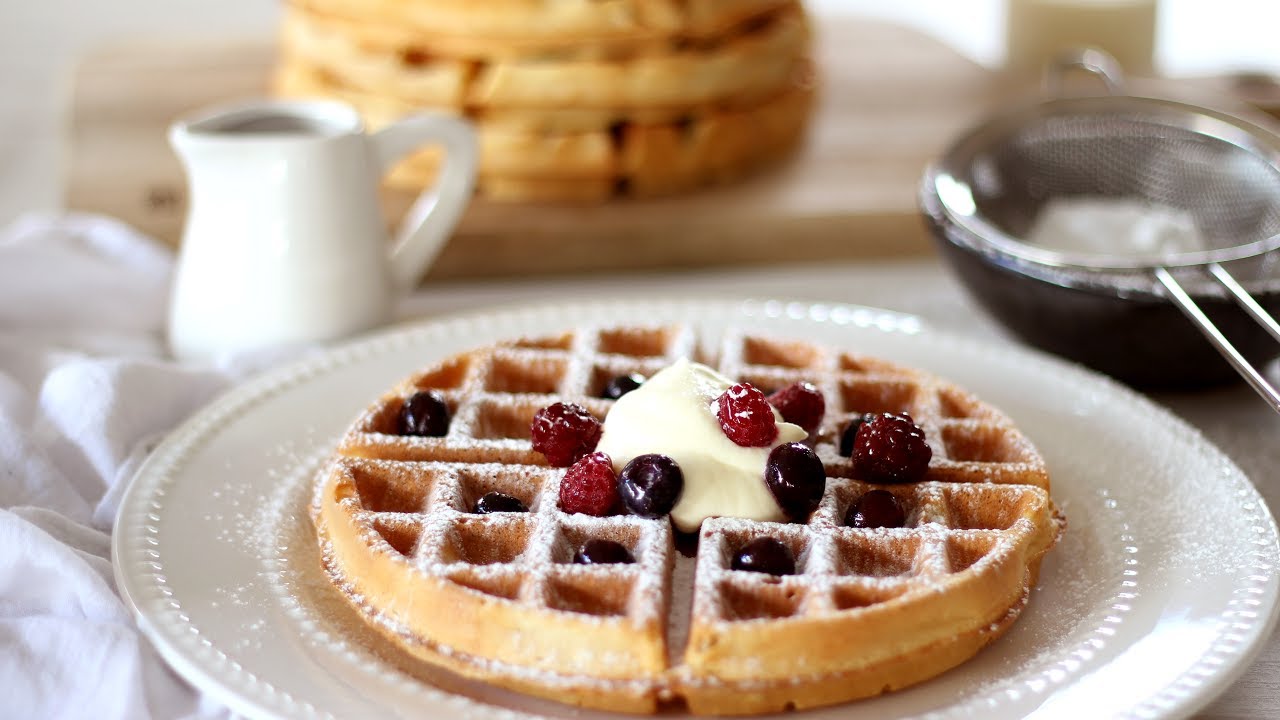
Now’s the time to get creative with toppings. Whether you’re a syrup traditionalist or love going wild with berries and cream, Belgian waffles are a blank canvas for flavor.
Tips for the Perfect Belgian Waffle
Getting it right is all about the little things. Here are some pro tips to ensure perfection every time:
- Don’t overmix the batter. A lumpy batter is better than a tough one.
- Use room temperature ingredients. Cold milk or eggs can affect how the batter comes together.
- Preheat properly. Cold irons create soggy, uneven waffles.
- Fold egg whites last. This preserves their fluffiness and helps with rise.
- Don’t stack hot waffles. This traps steam and makes them soft.
Waffles are a science—but a delicious one!
Best Toppings and Serving Ideas
The fun part? Dressing them up. Belgian waffles are super versatile. Here’s how to serve them like a pro:
Sweet Toppings
- Maple syrup (classic!)
- Fresh berries (strawberries, blueberries, raspberries)
- Whipped cream
- Powdered sugar
- Chocolate sauce or Nutella
- Caramelized bananas
- Peanut butter and honey
Savory Combinations
- Fried chicken and hot sauce
- Bacon and cheddar
- Avocado, poached egg, and chives
- Smoked salmon and cream cheese
Seasonal Twists
- Fall: Pumpkin spice waffles with cinnamon apple compote
- Winter: Gingerbread waffles with spiced whipped cream
- Summer: Lemon zest waffles with fresh peach slices
There’s no wrong way to top a waffle. Go wild!
Storing and Reheating Waffles
Made more than you can eat? Don’t worry—Belgian waffles store beautifully.
- Refrigerate: Store in an airtight container for up to 3 days.
- Freeze: Place cooled waffles on a baking sheet and freeze until solid, then transfer to a zip-top bag for up to 3 months.
- Reheat: Toast in a toaster or toaster oven to bring back the crisp. Avoid microwaving—it makes them soggy.
Batch cooking and freezing waffles is perfect for quick weekday breakfasts.
Common Mistakes to Avoid
Even though Belgian waffles are relatively simple to make, a few missteps can lead to disappointing results. Let’s look at the most common mistakes and how to avoid them:
1. Overmixing the Batter
This is the number one culprit of dense, chewy waffles. When you stir too vigorously or too long, you develop the gluten in the flour, which takes away the fluffy texture you’re aiming for. Instead, stir gently and stop as soon as the dry and wet ingredients are just combined. It’s totally okay if the batter looks a little lumpy.
2. Not Preheating the Waffle Iron
Waffles need that immediate heat to form a crisp crust. Pouring batter into a lukewarm waffle maker results in pale, limp waffles that stick to the plates. Always let your waffle iron fully preheat before adding the batter—it makes a big difference.
3. Opening the Iron Too Soon
We know the temptation is real—you want to peek! But lifting the lid too early interrupts the cooking process and could tear the waffle apart. A good rule of thumb is to wait until the steam stops escaping or until your waffle iron’s indicator light turns on.
4. Not Whipping the Egg Whites Properly
If you don’t whip the egg whites enough (or overwhip them), you’ll lose that signature airy texture. Aim for stiff peaks that hold their shape but aren’t dry or grainy. Use a clean, grease-free bowl and beaters for best results.
5. Using Cold Ingredients
Cold milk or eggs can cause your melted butter to solidify and create an uneven batter. It’s best to let your ingredients come to room temperature before mixing.
Avoiding these mistakes will take your waffles from just okay to absolutely amazing!
Gluten-Free or Vegan Variations
Love waffles but need a dietary-friendly version? Good news—you don’t have to miss out. Here’s how to tweak the classic Belgian waffle recipe for gluten-free and vegan needs:
Gluten-Free Belgian Waffles
Replace the all-purpose flour with a gluten-free flour blend that includes xanthan gum (or add 1/2 tsp if your blend doesn’t). The texture may be slightly different, but the taste will still be delicious.
- Pro Tip: Add an extra egg white or a tablespoon of cornstarch for improved structure.
Vegan Belgian Waffles
Skip the eggs and dairy with these swaps:
- Egg replacement: Use 1 tablespoon of ground flaxseed mixed with 3 tablespoons of water (per egg) or a commercial egg replacer.
- Milk: Almond milk, soy milk, or oat milk work great.
- Butter: Use coconut oil or vegan butter.
Keep in mind that the vegan version may not be quite as fluffy, but it will still be rich, golden, and completely satisfying.
Other Ideas
- Add mashed banana or applesauce for extra moisture and sweetness.
- Use plant-based whipped cream or vegan chocolate chips for toppings.
Even with dietary restrictions, Belgian waffles can be a joy to make and eat!
FAQs about Belgian Waffle Recipe
1. Can I make Belgian waffles without a waffle maker?
Technically, you can use a grill pan or stovetop waffle iron, but the texture won’t be quite the same. A proper Belgian waffle maker creates those deep, crispy pockets and fluffy insides. It’s worth investing in one if you love waffles.
2. What’s the difference between Belgian waffles and regular waffles?
Belgian waffles are thicker, fluffier, and have deeper pockets than traditional American waffles. They’re typically made with a lighter batter (often with whipped egg whites) and are cooked in a specialized waffle maker with deeper grids.
3. Can I freeze leftover waffles?
Yes! Freeze cooled waffles on a baking sheet, then transfer to a freezer bag. To reheat, pop them in the toaster or oven for a crispy, warm result. Avoid the microwave—it softens them too much.
4. How do I keep waffles crispy after cooking?
Place cooked waffles on a wire rack to prevent steam buildup. If you’re making a batch, keep them warm in the oven at 200°F (95°C) on a rack or baking sheet—just don’t stack them!
5. Can I make the batter ahead of time?
It’s best to cook the batter right after making it, especially because of the whipped egg whites. However, you can mix the dry and wet ingredients separately ahead of time and combine them just before cooking for maximum freshness.
Conclusion
There’s a reason Belgian waffles have become a beloved breakfast (and dessert!) staple around the world—they’re ridiculously delicious, versatile, and surprisingly easy to make at home. With their crispy exterior, fluffy inside, and those perfect little pockets ready to be filled with your favorite toppings, they deliver on both flavor and texture every single time.
Whether you stick to the classic recipe or go all out with custom flavors and creative toppings, this step-by-step guide gives you everything you need to create waffle magic in your own kitchen. And hey, once you master the basics, the sky’s the limit. Think savory waffle sandwiches, dessert waffles with ice cream, or seasonal variations for every holiday.
So go ahead—fire up that waffle iron, grab your favorite toppings, and treat yourself to homemade Belgian waffles that taste like they came straight from a cozy café in Brussels.