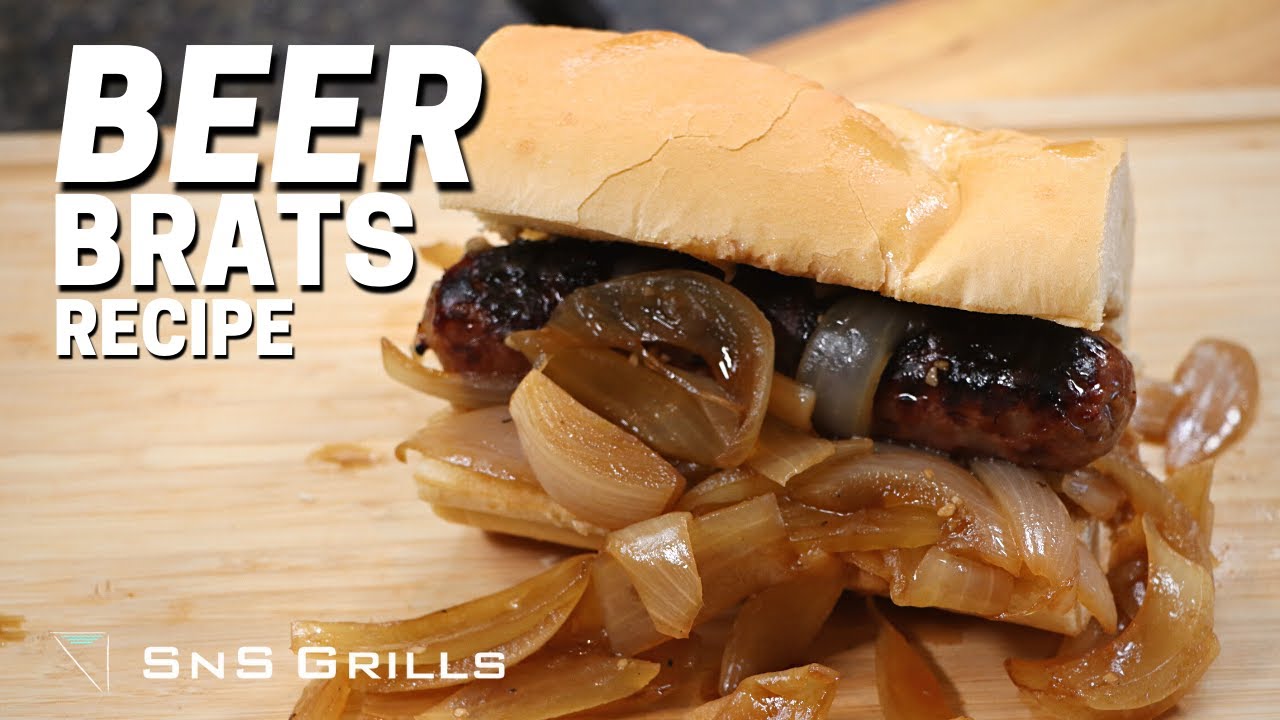
Beer Brats Recipe: If you’ve ever been to a summer cookout or tailgate party in the Midwest, chances are high you’ve come across beer brats. They’re not just a dish; they’re a tradition. The juicy, flavorful bratwurst soaked in a bath of beer and onions before getting that crispy finish on the grill—it’s a match made in heaven.
So, what exactly are beer brats? Simply put, beer brats are bratwursts that have been simmered in beer (and often onions) before being grilled. This process infuses them with a deep, rich flavor that plain grilling can’t match. The beer doesn’t just add flavor—it helps tenderize the brats, locking in moisture and adding complexity.
Why are they a favorite? Well, they’re incredibly easy to prepare, they’re packed with flavor, and they pair fantastically with a cold brew and simple sides like sauerkraut or potato salad. Plus, they’re a crowd-pleaser. Everyone from hardcore grillmasters to kitchen rookies can master this dish with ease.
In this guide, we’ll take you through the entire process—from picking the perfect bratwurst to grilling techniques and what sides to serve. By the end, you’ll have a foolproof method for creating beer brats that’ll be the star of your next BBQ.
Essential Ingredients for Beer Brats
Bratwurst: Picking the Right Kind
When it comes to beer brats, the star of the show is obviously the bratwurst. You don’t want to cut corners here. Go for high-quality, uncooked pork bratwursts—ideally from your local butcher or a trusted brand known for flavor and consistency. Avoid pre-cooked or heavily processed options, as these don’t soak up the beer the same way fresh brats do.
Fresh bratwursts have a firm texture and a pink hue, and when cooked, they burst with juicy goodness. Look for ones with visible seasoning and little to no added fillers.
The Importance of Choosing the Right Beer
The type of beer you use will significantly affect the final flavor of your brats. That’s right—not all beers are created equal when it comes to cooking. A good rule of thumb is to avoid beers that are too hoppy, like IPAs, as their bitterness can overpower the sausage.
Instead, go for lagers, amber ales, or even a good German-style pilsner. These offer a nice balance of malt and mild hops, complementing the bratwurst without overwhelming it. Darker beers like stouts and porters can also add a richer, slightly sweet flavor if you’re aiming for a more robust taste.
Additional Ingredients to Enhance Flavor
While beer and brats are the main act, adding a few extras can elevate your dish:
- Onions: Slice them thick—they’ll cook down beautifully in the beer and add a sweet, caramelized touch.
- Garlic: A few cloves smashed and added to the beer bath will enhance the savory notes.
- Butter: Just a tablespoon or two in the beer bath adds richness and helps meld the flavors together.
- Spices: Optional, but a bay leaf, some peppercorns, or a pinch of red pepper flakes can give an extra layer of complexity.
By now, you’ve got a good sense of what you need. Next up—let’s get cooking.
Tools You’ll Need
Grilling Essentials
You can’t make beer brats without some basic tools, especially if you’re grilling them to get that perfect char. Here’s what you’ll need:
- Grill: Charcoal or gas, either works. Charcoal adds a smoky flavor, while gas offers easier control.
- Tongs: Skip the fork—use tongs to turn your brats without piercing the casing and losing juices.
- Grill Brush: Keep your grates clean for even cooking and better flavor.
Cooking Utensils and Prep Tools
Even if you don’t have a full backyard setup, you can still prepare these on the stove. Here’s your prep list:
- Large Skillet or Saucepan: For simmering the brats in beer.
- Cutting Board & Knife: To slice onions and prep toppings.
- Meat Thermometer: Optional but helpful to ensure doneness (160°F for pork brats).
Step-by-Step Cooking Instructions
Step 1: Preparing the Bratwurst
Take your fresh bratwursts out of the fridge about 15-20 minutes before cooking. Letting them come to room temperature ensures even cooking. While they rest, start prepping your beer bath.
Slice 1-2 onions into thick rings. These will go into the beer with the brats and add both flavor and texture. If you like garlic, smash a couple of cloves to throw in as well.
Place a large pan or pot over medium heat. Add a tablespoon of butter and let it melt before tossing in the onions and garlic. Sauté them for about 5 minutes until they’re fragrant and just starting to soften.
Now, gently lay in the bratwursts. Pour in enough beer to cover them—usually two to three bottles is perfect depending on your pan size. Don’t boil; simmer. Bring the mixture up to a gentle simmer and let it cook for about 15-20 minutes.
Step 2: Simmering in Beer
This is where the magic happens. As the brats simmer, they soak up the beer and seasonings, turning juicy and flavorful. Keep the heat at a low simmer—bubbling too vigorously could cause the casings to split.
If you’re using spices like a bay leaf or peppercorns, toss them in now. Stir gently and cover loosely with a lid. Check every few minutes to ensure they’re not boiling over.
At the 20-minute mark, your brats should be fully cooked inside. You can test with a thermometer to be sure—they should hit 160°F. But we’re not done yet. Now it’s time to add that crispy grilled finish.
Step 3: Grilling the Brats to Perfection
Now that your bratwursts are infused with beer and oniony goodness, it’s time to give them that smoky, charred exterior that makes beer brats truly irresistible. Preheat your grill to medium heat—around 350°F to 375°F is ideal.
Once hot, carefully transfer the simmered brats from the beer bath to the grill. Use tongs to avoid piercing them, which could release all those tasty juices you worked so hard to lock in.
Grill the brats for about 2 to 4 minutes per side. You’re not trying to cook them through here—they’re already cooked from the simmering step. The goal is to get a nice, even char on the outside and a little crispiness to contrast with the juicy interior.
As you grill, you can also toss a few of those onions from the beer bath onto the grill for a smoky touch. These caramelized bits make great toppings later on.
If you’re using a charcoal grill, try searing them over direct heat first, then move them to indirect heat to avoid flare-ups. For gas grills, keep the lid closed to circulate the heat evenly.
Pro Tip: Don’t overcrowd the grill. Give each brat some space to ensure they cook evenly and get that beautiful golden-brown crust.
Step 4: Toasting the Buns
You’ve come this far—don’t let store-bought buns ruin the party. While your brats are finishing on the grill, split your brat buns and toast them cut-side down for about 1-2 minutes.
Why toast the buns? It’s a game-changer. Toasted buns add a crispy texture, prevent sogginess from toppings, and hold up better when stuffed with juicy bratwursts and condiments.
You can brush the insides with a little butter or garlic-infused oil before toasting for an extra layer of flavor. Keep an eye on them though—they go from golden to burnt fast.
Pick buns that are slightly larger and sturdier than standard hot dog buns. Bakery-fresh or pretzel buns are especially delicious and can handle more toppings without falling apart.
Step 5: Assembling Your Beer Brats
Now comes the best part—assembly. Lay your grilled brat in the toasted bun. Start with a base of grilled onions, then pile on your toppings.
Popular choices include:
- Mustard – spicy brown or Dijon for a tangy kick
- Sauerkraut – for that German-style crunch
- Pickled Jalapeños – for heat lovers
- Grilled Peppers – add sweetness and texture
- Beer Cheese – creamy and indulgent
Avoid ketchup if you’re aiming for a traditional experience—it’s considered a bit of a bratwurst faux pas, especially in brat-loving regions like Wisconsin.
Want to take it up a notch? Drizzle a spoonful of the reduced beer-onion mixture over your brat before serving. It’s like gravy for your bratwurst—deep, rich, and totally satisfying.
Serve immediately with a cold beer in hand and some great side dishes (which we’ll cover shortly).
Tips for the Best Beer Brats
Avoiding Common Mistakes
Even though this recipe is simple, there are a few common pitfalls that can mess with your brat game:
- Boiling instead of simmering: Boiling causes the casing to split and lets all the juices leak out.
- Using the wrong beer: Hoppy or overly bitter beers can make your brats taste off. Stick to malty, smooth lagers.
- Skipping the grill: Simmering adds flavor, but grilling seals the deal. Don’t skip it!
- Poking holes in the brat: This old trick does more harm than good—juices escape and the brat dries out.
Flavor Boosting Hacks
Want to kick it up a notch? Try these:
- Caramelize onions in beer first before adding brats to the pot.
- Add a splash of Worcestershire sauce to the beer bath for umami depth.
- Smoke the brats using a handful of soaked wood chips on a charcoal grill for rich, BBQ-style flavor.
- Use flavored mustard or brat-specific sauces like German curry ketchup or beer mustard.
These little upgrades can take your beer brats from basic to legendary status.
Perfect Sides and Pairings
What’s a perfectly grilled beer brat without something tasty on the side? While the brat itself is the star of the show, the right sides and pairings can turn a casual cookout into a feast. Here’s how to round out your plate and elevate the whole experience.
Classic Side Dishes
Let’s start with the classics—those reliable, mouthwatering dishes that always complement a juicy beer brat.
- Potato Salad: Whether you like it creamy and Southern-style or German with vinegar and bacon, potato salad is always a hit. Its hearty texture and mild flavor balance the spice and zest of a brat.
- Coleslaw: Cool and crunchy, slaw cuts through the richness of the bratwurst. Try a tangy vinegar-based version if you want something lighter.
- Baked Beans: Sweet, smoky, and sometimes spiked with bacon, baked beans add a comforting, savory touch.
- Grilled Corn on the Cob: Slather it in butter and sprinkle with some chili lime seasoning—simple, but pure summer magic.
- Pretzels or Soft Pretzel Bites: Perfect for dipping into beer cheese and great for that authentic German flair.
All of these are easy to prepare ahead of time, meaning less stress when it’s grilling time.
Best Beers to Pair with Beer Brats
You cooked them in beer, so naturally, you should enjoy them with a cold brew on the side. But not just any beer—there are a few that really bring out the best in your bratwurst.
- Lagers: Crisp, clean, and light—great for complementing without overwhelming.
- Hefeweizens: These wheat beers are slightly sweet with hints of banana and clove. They’re especially nice with grilled onions and spicy mustard.
- Amber Ales: Malty and rich, amber ales work beautifully if you used darker beer in your simmer.
- Pilsners: For a truly authentic taste, try a German pilsner. Its sharp, dry finish balances the brat’s fatty richness.
Don’t drink alcohol? No problem! Go for a root beer, craft ginger ale, or a lemon-lime soda for a fizzy, fun alternative.
FAQs about Beer Brats Recipe
1. What kind of beer is best for beer brats?
A medium-bodied lager or ale works best. Think amber ales, German lagers, or even a pilsner. Avoid overly hoppy beers—they can add bitterness.
2. Do I need to boil the brats in beer before grilling?
Yes! Boiling them in beer infuses flavor and ensures they’re fully cooked before hitting the grill for that final char.
3. How long should I simmer the brats in beer?
Simmer for 15–20 minutes. Don’t boil too hard—just let them bathe in that beer bath gently.
4. Can I make beer brats without a grill?
Absolutely. You can brown them in a skillet or roast them in the oven after the beer simmer. Still delicious.
5. Can I make beer brats ahead of time?
Yes! Simmer them in beer, refrigerate, then grill or pan-sear when ready to serve. Great for parties and tailgates.
6. What are the best toppings for beer brats?
Classic choices: sautéed onions, sauerkraut, mustard, and pickles. Want to get wild? Try spicy jalapeños or beer cheese.
7. Are beer brats alcoholic?
Nope. Most of the alcohol cooks off during simmering and grilling—what’s left is all flavor, not buzz.
8. Can I use non-alcoholic beer?
Yes, you can! You’ll still get that malty flavor without the alcohol content. Perfect for all ages.
9. What sides go well with beer brats?
Potato salad, pretzels, coleslaw, grilled corn, or baked beans all hit the mark.
10. How do I store leftovers?
Wrap them tightly and store in the fridge for up to 3 days. Reheat gently on the stove or in the oven.
Conclusion
The simmer-and-grill method gives you the best of both worlds: deep, infused flavor from the beer and a satisfying snap and char from the grill. Add a toasted bun, your favorite toppings, and a cold drink, and you’ve got yourself a bite of backyard bliss.
Whether you’re hosting a big barbecue or just looking for a weekend dinner that screams summer, this beer brat recipe has you covered. So fire up that grill, crack open a cold one, and enjoy the savory, juicy joy of beer brats done right.