Beanless Chili Recipe: For many chili lovers, beans are a staple. But for purists and fans of a more Texan-style chili, going beanless isn’t just a preference—it’s a bold statement. Beanless chili focuses entirely on rich meat, spicy heat, and a deep, savory base without the filler. Skipping the beans not only makes the dish low-carb and keto-friendly, but it also intensifies the flavors of the meat and spices. Think of it as the chili equivalent of going all-in: every bite is packed with bold flavor, meaty texture, and just the right kick.
Not everyone digests beans easily, either. For those with sensitive stomachs, this chili skips the discomfort while doubling down on satisfaction. It’s also perfect for those who want a quicker cooking time—beans often need soaking or extended cooking, while this version can come together faster without sacrificing depth.
Whether you’re avoiding beans due to dietary needs or you’re just craving a more protein-packed bowl of comfort, beanless chili offers a robust and hearty meal that’s simple to make and impossible to resist.
History and Origins of Beanless Chili
Chili con carne, often shortened to “chili,” originated in Texas and was first made by cowboys and frontier cooks in the 1800s. Back then, the focus was on meat, chili peppers, and spices—beans were rarely, if ever, included. In fact, traditionalists argue that real chili never had beans to begin with.
As chili spread across the U.S., different regions added their own twist—like Cincinnati chili with pasta or Midwestern chili with a hefty serving of beans. But in its most original form, chili was all about bold spice, stewed meat, and slow-cooked perfection.
Texans, in particular, are known for guarding the sanctity of beanless chili. So if you want to stay true to the roots of this beloved dish, this recipe has your back. No beans. No fuss. Just flavor-packed chili the way it was meant to be.
Ingredients Needed for Beanless Chili
Core Ingredients
To make a rich and satisfying beanless chili, you need to start with high-quality, flavor-packed ingredients. Here’s what you’ll need:
- Ground beef (80/20 blend is best): 2 lbs
- Yellow onion (diced): 1 large
- Garlic cloves (minced): 4
- Tomato paste: 2 tablespoons
- Crushed tomatoes: 1 (28-ounce) can
- Beef broth: 1 cup
- Chili powder: 3 tablespoons
- Ground cumin: 2 teaspoons
- Smoked paprika: 1 teaspoon
- Oregano (dried): 1 teaspoon
- Salt and pepper: To taste
- Olive oil or avocado oil: 2 tablespoons
Each ingredient plays a critical role. Ground beef brings the bulk and heartiness, onions and garlic add depth, and a medley of spices brings that familiar chili warmth. Crushed tomatoes and tomato paste build the base of the sauce, while beef broth enhances the umami and balances the consistency.
Optional Add-ins for Extra Flavor
Want to jazz things up? These add-ins will take your beanless chili to the next level:
- Chopped green chiles or jalapeños for more heat
- Cocoa powder or dark chocolate (a small amount) to deepen flavor
- A splash of beer or coffee for richness
- Apple cider vinegar for a tangy kick
- Worcestershire sauce to boost umami
- Red pepper flakes for spice lovers
Add these optional ingredients based on your personal preference or what you have on hand. They won’t change the foundation of the chili but will certainly elevate the flavor profile.
Kitchen Tools You’ll Need
Must-Have Utensils
Before diving into the cooking, make sure your kitchen is stocked with the essential tools. Here’s your checklist:
- Large Dutch oven or heavy-bottomed pot: Crucial for even cooking and great heat retention.
- Wooden spoon or spatula: Ideal for browning meat and stirring.
- Sharp chef’s knife and cutting board: For prepping vegetables and aromatics.
- Measuring spoons and cups: Accurate measurements make a big difference with spices.
- Ladle or serving spoon: Makes serving neat and easy.
- Storage containers (if making ahead): Beanless chili tastes even better the next day.
Having the right equipment ensures a smooth and enjoyable cooking experience. It also helps with prep time and makes cleaning up afterward much less of a chore.
Prep Tips Before Cooking
Prepping in advance can seriously streamline your chili-making process. Here’s how to get ahead:
- Chop all your veggies before you start heating anything—this keeps things moving.
- Measure out your spices and place them in a small bowl so they’re ready to toss in.
- Warm your beef broth slightly before adding to the pot—it helps maintain the simmer.
- If using garlic and onions, sauté them before adding meat to mellow their sharpness.
- Want an ultra-rich texture? Let your meat come to room temperature before browning.
Taking a few extra minutes to prep makes the cooking process more efficient and ensures that every layer of your chili gets the attention it deserves.
Step-by-Step Instructions to Make Beanless Chili
Step 1: Browning the Meat
This is where flavor begins. Heat your Dutch oven over medium-high heat and add oil. Once hot, toss in the ground beef. Use your spatula to break it apart and let it cook without moving it too much. This lets it brown and caramelize, locking in that meaty goodness.
Once it’s mostly browned, drain any excess fat if needed, but leave a little for flavor. This step should take about 8-10 minutes. Don’t rush it. You want those crispy brown bits at the bottom—that’s flavor gold.
Step 2: Adding Aromatics
Now it’s time to build some serious flavor. After the meat is browned, toss in your chopped onions and minced garlic. Stir well so the fat from the beef coats the aromatics. Cook for about 5–7 minutes until the onions are translucent and fragrant. The combination of beef, onions, and garlic is the aromatic foundation that makes your chili irresistible.
Want to level it up? Add a pinch of salt during this step—it helps draw moisture out of the onions and makes them caramelize faster. If you’re using jalapeños or green chiles, this is also a good time to add them. They’ll soften and release their oils into the dish, adding a spicy kick.
Keep stirring frequently to avoid burning the garlic. Once everything is softened and the kitchen smells amazing, you’re ready to move to the next crucial stage—building the spice base.
Step 3: Building the Flavor with Spices
Here’s where the magic happens. You’re going to add your chili powder, cumin, smoked paprika, oregano, salt, and pepper right into the pot. Stir it into the meat and aromatics, letting the spices toast in the hot pan for about 2 minutes.
Why toast the spices? Because heat activates the essential oils in your seasonings, enhancing their aroma and deepening their flavor. Don’t skip this step—it’s what separates bland chili from unforgettable chili.
If you’re using optional flavor boosters like cocoa powder or a splash of beer, now’s the time to add those, too. They blend beautifully with the spices and start forming that rich, earthy base that defines good chili.
You should see everything in the pot take on a deep, reddish-brown hue—and the aroma? It’ll be mouthwatering. Let it simmer gently for another minute before moving on to liquids.
Step 4: Simmering to Perfection
Now it’s time to add the liquids: the crushed tomatoes, tomato paste, and beef broth. Stir everything thoroughly to combine. Turn the heat to medium-low and let the chili come to a gentle simmer. At this point, the mixture should be thick, rich, and saucy.
Cover the pot halfway with a lid and simmer for at least 30–45 minutes, stirring occasionally. The longer it simmers, the better the flavors meld together. You can even simmer it for up to two hours if you want maximum depth.
If your chili starts getting too thick, just add a bit more beef broth or water to loosen it up. If it’s too thin, take the lid off and simmer uncovered to let some of the liquid evaporate.
Taste it halfway through and adjust the seasoning. Need more salt? A bit of vinegar to balance acidity? Now’s the time to tweak it. By the time it’s done, the meat should be tender, the flavors balanced, and the chili irresistibly rich.
Tips to Enhance Your Chili Flavor
Spice it Right
There’s a fine art to getting your chili just spicy enough without burning your tongue off. Start with mild amounts of chili powder, and increase as needed. Want more complexity? Use a mix of spices like ancho chili powder, cayenne, or even chipotle powder for a smoky twist.
Don’t just rely on heat—balance is key. Adding a small amount of sugar or maple syrup can soften the acidity of the tomatoes and spice. A splash of vinegar or lime juice at the end brightens everything up.
Consider this pro tip: make your chili a day ahead. Overnight rest in the fridge allows flavors to marry and deepen—your leftovers might taste even better than the first serving.
Texture and Thickness Tricks
Getting the perfect chili texture is all about patience and the right balance of ingredients. If it’s too watery, add a small spoon of cornmeal or masa harina to thicken. Prefer a chunkier bite? Add extra tomato paste or reduce the broth.
Letting your chili sit for 10–15 minutes off the heat before serving also allows it to thicken naturally. For creamier texture, stir in a tablespoon of sour cream or Greek yogurt just before serving—this can mellow the spice and add a silky finish.
Serving it over rice, cornbread, or mashed potatoes? Let the chili stay slightly looser so it spreads easily. Prefer eating it solo? Thicken it up and load it with toppings for a satisfying bowl.
Serving Suggestions for Beanless Chili
Toppings That Take It to the Next Level
Beanless chili is bold on its own—but let’s be real, toppings can totally transform it into something epic. Here’s a roundup of must-try add-ons that add flavor, crunch, and creaminess:
- Shredded cheddar or pepper jack cheese: Melts beautifully and adds a creamy contrast to the heat.
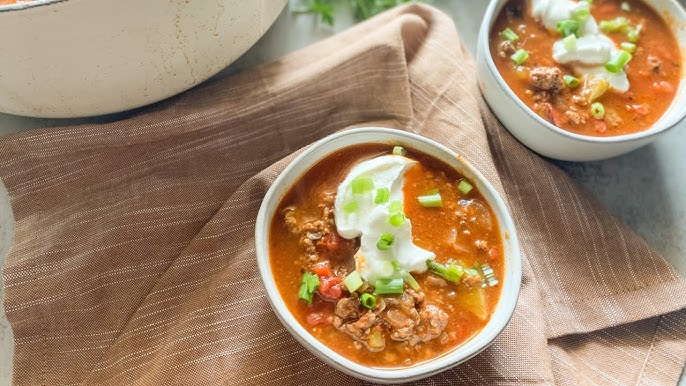
- Sour cream or Greek yogurt: Cool things down with a dollop right in the center of your bowl.
- Sliced jalapeños or pickled red onions: Add tang and an extra punch of spice.
- Crushed tortilla chips or cornbread crumbles: For some texture and that irresistible crunch.
- Fresh cilantro or green onions: Brings a burst of freshness and color.
Get creative and set up a chili bar for game night or family dinners—everyone can build their perfect bowl. Think of it like a taco night, but for chili lovers!
What to Serve With It
Beanless chili pairs beautifully with a variety of sides. Here are some winning combos:
- Cornbread or cornbread muffins: Their sweet crumb balances the savory chili.
- Rice or cauliflower rice: A base that makes your bowl even heartier.
- Baked potatoes: Pour chili over a fluffy potato for the ultimate comfort meal.
- Tortilla chips: Dip and scoop for a fun twist.
- Simple green salad: Helps lighten up the meal and adds a crisp contrast.
Serve it your way, but don’t be afraid to experiment. Whether it’s for a weeknight dinner or a big game-day bash, beanless chili brings big energy to the table.
Storing and Reheating Your Chili
Best Practices for Leftovers
One of the best things about chili? It actually gets better the next day. The spices have more time to meld, and the texture thickens perfectly. If you’ve made a big batch, here’s how to store it right:
- Cool it completely before refrigerating.
- Store in airtight containers to keep it fresh.
- It keeps well in the fridge for up to 4–5 days.
- For longer storage, freeze in individual portions—it’ll stay good for up to 3 months.
When freezing, use freezer-safe bags or containers. Label them with the date so you know when it’s time to enjoy again.
Reheating Without Losing Flavor
To reheat, simply:
- Microwave: Heat in 30-second bursts, stirring in between to distribute heat evenly.
- Stovetop: Reheat gently over medium-low heat, adding a splash of broth or water if it thickens too much.
Avoid boiling when reheating—it can break down the texture and make it too mushy. Stir often, taste again, and maybe add a fresh sprinkle of cheese or squeeze of lime to brighten it up.
Health Benefits of Beanless Chili
Low-Carb and Keto-Friendly
If you’re watching your carbs, this chili is a dream come true. Without beans, you’re cutting down on starches and focusing on protein and fat. That makes it ideal for:
- Keto diets
- Paleo meal plans
- Low-carb lifestyles
Use grass-fed beef, skip added sugars, and add healthy fats like avocado oil to make it even more nutrient-packed.
Packed With Protein and Nutrients
Beyond being low-carb, beanless chili is a nutritional powerhouse:
- Protein-rich from ground beef or turkey
- Lycopene and antioxidants from tomatoes
- Spices like garlic, chili powder, and cumin that boost immunity and metabolism
It’s a comfort food that doesn’t have to weigh you down. Just another reason to make a big batch and enjoy it guilt-free.
Customizing for Dietary Needs
Make It Vegetarian (Yes, Really!)
Want a plant-based version without beans? Try these swaps:
- Use lentils or mushrooms as your protein base
- Add sweet potatoes, zucchini, or cauliflower for bulk and texture
- Boost umami with soy sauce, miso paste, or nutritional yeast
It won’t be traditional, but it will still be delicious and full of flavor.
Make It Spicier or Milder
Customize your chili heat level by adjusting the chili powder or adding more fresh chilies. Want it milder? Use sweet paprika instead of hot varieties and skip the jalapeños.
It’s your chili. Make it suit your taste buds and dietary goals.
FAQs about Beanless Chili Recipe
1. Can I use ground turkey instead of beef?
Absolutely. Ground turkey is leaner but still tasty. Add a bit more oil and maybe some Worcestershire sauce to deepen the flavor.
2. Is beanless chili keto-friendly?
Yes, without beans or added sugar, this chili is naturally low-carb and perfect for keto diets.
3. How spicy is this recipe?
It’s medium heat by default. Adjust the chili powder or add fresh chilies to control the spice level.
4. Can I freeze beanless chili?
Definitely. Let it cool completely, then freeze in airtight containers. It’ll last up to 3 months.
5. What’s the best way to thicken my chili?
Simmer it uncovered, or stir in a little cornmeal or masa harina for natural thickening.
Conclusion
Beanless chili is more than just a meal—it’s a meaty, rich, spicy experience that honors tradition while being easy to tweak to your taste. Whether you’re going low-carb, want a protein-packed dish, or just need some hearty comfort food, this recipe has you covered. From the sizzle of browning beef to that first spicy bite, each step brings you closer to a bowl of something truly unforgettable. So grab your pot, gather your ingredients, and make this bold, no-beans chili part of your kitchen rotation.


