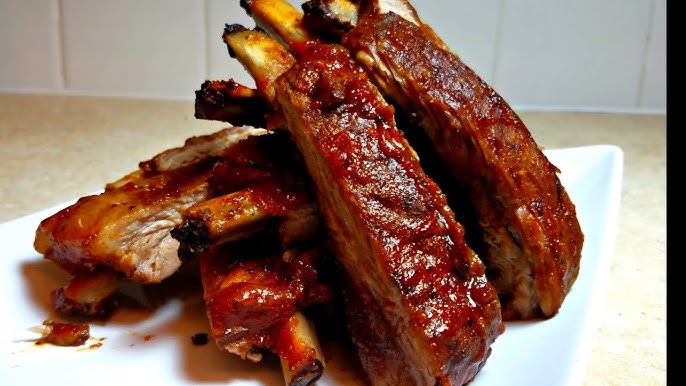
Barbecue Ribs Recipe: Barbecue ribs are more than just a food—they’re a tradition, a symbol of summer, and a guaranteed crowd-pleaser. Nothing screams weekend like the smoky, sticky, fall-off-the-bone goodness of ribs slow-cooked to perfection. They bring people together, filling backyards with laughter, the smell of charcoal, and the sound of sizzling meat. The magic of ribs lies not just in the taste but in the process—slow, deliberate, and oh-so-rewarding.
There’s something primal yet comforting about picking up a bone, getting your fingers messy, and savoring every bite. Whether you’re a backyard barbecue pro or a first-time rib-roaster, this guide will take you step-by-step through the process of creating ribs that rival any restaurant. Ready to fire up that grill or oven? Let’s get started.
Types of Ribs: Baby Back vs. Spare Ribs
Not all ribs are created equal. Knowing your cuts is crucial to nailing your barbecue.
- Baby Back Ribs come from the top of the rib cage between the spine and the spare ribs. They’re leaner, smaller, and cook faster. If you’re new to ribs or looking for a quicker cook, baby backs are your best bet.
- Spare Ribs come from the belly side and are larger, meatier, and more flavorful due to their higher fat content. They take longer to cook but reward you with juicy, tender results if done right.
Each type brings its own charm, and your choice might come down to how much time you’ve got or what flavor profile you prefer. For a classic BBQ experience, either one will hit the spot.
Ingredients You’ll Need
For the Ribs
- 2 racks of baby back or spare ribs (about 3-4 lbs total)
- Olive oil (optional for rubbing)
For the Dry Rub
- 2 tbsp brown sugar
- 1 tbsp paprika (smoked or sweet)
- 1 tsp garlic powder
- 1 tsp onion powder
- 1 tsp black pepper
- 1 tsp salt
- ½ tsp cayenne pepper (adjust to heat preference)
- ½ tsp mustard powder
Dry rubs are the backbone of flavor. They build the foundation for that savory crust and inject the ribs with deep seasoning before you even fire up the heat.
For the Barbecue Sauce
- 1 cup ketchup
- ½ cup apple cider vinegar
- ¼ cup brown sugar
- 2 tbsp Worcestershire sauce
- 1 tbsp Dijon mustard
- 1 tsp garlic powder
- A pinch of chili flakes (optional)
You can absolutely use store-bought BBQ sauce, but trust us—homemade sauce elevates your ribs to new heights. This sweet-tangy blend complements the smoky ribs perfectly and gives you control over the flavor.
Preparing the Ribs
Removing the Membrane
First things first—flip your ribs bone-side up. There’s a thin, shiny layer called the membrane or silver skin. Leaving it on can make your ribs tough and chewy.
- Use a butter knife to slide under the membrane at one end of the rack.
- Gently lift and loosen it, then grab it with a paper towel (for grip) and pull it off in one go.
Removing the membrane allows the rub and smoke to penetrate better, giving you tender, flavorful ribs every time.
Applying the Dry Rub
Now the fun begins. With your ribs cleaned and prepped:
- Pat them dry with paper towels.
- Rub a thin layer of olive oil over them (optional, helps the rub stick).
- Sprinkle your dry rub generously on both sides.
- Massage it in with your hands, making sure every inch is covered.
Wrap them in plastic wrap and refrigerate for at least 2 hours—or better yet, overnight. This gives the spices time to soak in and deepen the flavor.
Cooking Methods
Oven-Baked Method
No grill? No problem. Oven-baked ribs can be just as delicious if done right.
- Preheat oven to 300°F (150°C).
- Place the ribs on a foil-lined baking sheet, bone-side down.
- Cover with foil and bake for 2.5 to 3 hours.
Low and slow is the mantra. This allows the meat to break down and become tender without drying out.
Grilling to Perfection
Grilling gives you that classic char and smoky flavor.
- Preheat grill to medium heat (about 350°F).
- Grill ribs over indirect heat for 1.5 to 2 hours, flipping halfway through.
- Brush with sauce in the final 15 minutes for a sticky glaze.
Keep the lid closed and avoid direct flames—too much heat will dry them out.
Smoking for Flavor
If you’ve got a smoker, now’s the time to shine.
- Set smoker to 225°F using applewood or hickory chips.
- Smoke ribs for 5-6 hours, spritzing with apple juice every hour.
- Wrap in foil for the final hour to lock in moisture.
Smoked ribs have unmatched depth. The slow cook plus wood flavor makes every bite memorable.
Step-by-Step Cooking Process
Step 1 – Prepping the Ribs
Prepping your ribs is the key to mouthwatering flavor. After removing the membrane and applying the dry rub as mentioned earlier, let your ribs rest. Resting allows the spices to soak into the meat and start breaking it down, setting the stage for that “fall-off-the-bone” tenderness we all crave.
Take them out of the fridge 30 minutes before cooking so they can come to room temperature—this ensures even cooking. Preheat your oven, smoker, or grill depending on the method you’re using. Place your ribs on a wire rack over a baking sheet or directly on the grill grates. If using the oven, wrap them tightly in foil to keep the moisture in.
This step might seem small, but it’s crucial. Prepping properly saves you from dry, flavorless ribs and sets the tone for the entire cooking process.
Step 2 – Slow Cooking or Baking
Whether you’re using the oven, a smoker, or a grill, the principle remains the same—low and slow. The magic happens when the collagen in the ribs slowly breaks down, transforming the meat into tender goodness.
- In the Oven: Bake at 300°F for about 2.5 to 3 hours. Keep them wrapped in foil to trap in steam and flavor.
- On the Grill: Use indirect heat and keep the grill closed. Flip every 30 minutes to prevent scorching.
- In the Smoker: Maintain a temperature of 225°F and plan for about 5-6 hours total. Use a water pan to retain moisture.
Throughout this process, resist the temptation to keep checking or poking the ribs. Let the heat work its magic. You can spritz them every hour with a mix of apple juice and water to keep them juicy.
Step 3 – Adding the BBQ Sauce
About 30 minutes before your ribs are done, it’s time to glaze them with that sweet, tangy barbecue sauce. This step gives your ribs that shiny, caramelized finish we all love.
- Remove the ribs from the foil if baked or smoked.
- Brush on a generous layer of sauce.
- Return them to the heat, uncovered, for another 20-30 minutes.
For extra sticky ribs, repeat this process twice—just keep an eye out for burning. Sugar in the sauce can char quickly if the heat is too high.
This glazing step is what transforms good ribs into great ribs. It adds flavor, texture, and that finger-lickin’ stickiness that defines classic barbecue.
Step 4 – Final Sear on the Grill
If you’ve cooked your ribs in the oven or smoker, finish them on a hot grill for that smoky charred edge. Just 5–10 minutes on high heat is enough to give them that irresistible bark.
Place the ribs bone-side down, brush with a bit more sauce, and watch them sizzle. The sugars in the sauce will caramelize, and you’ll get that crispy, slightly burnt finish that barbecue dreams are made of.
Not using a grill? Pop them under your oven’s broiler for a few minutes. Keep a close eye—they can go from perfect to burnt in seconds!
Serving Suggestions
Perfect Sides to Pair with Ribs
Ribs are the star of the show, but what you serve alongside them can elevate the whole meal. Here are some crowd-favorites:
- Coleslaw: Its cool, creamy crunch is the perfect contrast to warm, sticky ribs.
- Cornbread: A little sweet, a little crumbly—ideal for mopping up sauce.
- Grilled Corn on the Cob: Brushed with butter and herbs, it’s a summer staple.
- Mac and Cheese: Gooey, cheesy comfort food heaven.
- Baked Beans: Smoky and hearty, they complement ribs beautifully.
Mix and match depending on your vibe. Hosting a backyard party? Throw in some chips and dip. Going for a family dinner? Add roasted veggies for balance.
Beverage Pairings
What you sip can enhance the whole barbecue experience. Here’s what works well:
- Beer: A hoppy IPA or a smooth lager balances the richness of ribs.
- Red Wine: A bold Zinfandel or Shiraz complements smoky flavors.
- Iced Tea or Lemonade: Sweet, tart, and refreshing—especially for a summer feast.
- Whiskey or Bourbon: Sipped neat or mixed into a cocktail, it pairs wonderfully with BBQ.
Whatever you choose, make sure it complements—not overpowers—the rich, smoky flavor of the ribs.
Tips and Tricks for Perfect Ribs
Tenderness Test
The holy grail of ribs is achieving that melt-in-your-mouth tenderness. But how do you know when they’re done without tearing them apart?
Here are a few foolproof ways to test rib tenderness:
- Bend Test: Using tongs, lift the rack from one end—if the ribs bend easily and start to crack on the surface, they’re perfectly tender.
- Toothpick Test: Slide a toothpick or skewer into the meat between the bones. If it slides in without resistance, the ribs are ready.
- Bone Wiggle: Try wiggling one of the bones. If it moves easily and almost pulls out, you’ve nailed it.
Avoid the “falling-off-the-bone” myth unless that’s your personal preference. True BBQ connoisseurs look for a gentle pull-off-the-bone texture—tender but still holding together.
Common Mistakes to Avoid
Even seasoned grillers can mess up ribs. Avoid these common pitfalls:
- Too Much Heat: High temps will dry out your ribs and burn the sauce. Stick to low and slow cooking.
- Skipping the Membrane Removal: Leaving it on results in chewy, tough ribs.
- Not Resting the Ribs: Let your ribs rest for at least 10 minutes before slicing to keep the juices locked in.
- Drowning in Sauce: BBQ sauce is the final act, not the main event. Balance is key—don’t smother the flavor developed during cooking.
- Undercooking: Always give your ribs enough time to break down collagen. Rushing the process leads to chewy, unpleasant meat.
Mastering ribs is a journey, but avoiding these mistakes will put you on the fast track to rib perfection.
FAQs About Barbecue Ribs Recipe
1. What’s the best cut of ribs for BBQ?
Pork baby back ribs are the fan favorite—tender, lean, and quick to cook. If you want something meatier and more flavorful, go for St. Louis-style ribs or spare ribs.
2. Should I boil ribs before grilling?
Boiling ribs can make them tender faster, but it also washes out a lot of flavor. Instead, try slow baking or smoking them low and slow for juicy, fall-off-the-bone goodness.
3. How long should I cook ribs on the grill?
For the perfect barbecue ribs, grill them over indirect heat for 2.5 to 3 hours. Patience = flavor!
4. What temperature should ribs be cooked to?
Ribs are safe to eat at 145°F (63°C), but for that melt-in-your-mouth texture, aim for an internal temp of 190–203°F (88–95°C).
5. Can I make BBQ ribs in the oven?
Absolutely. Season, wrap in foil, and bake at 300°F (150°C) for 2.5–3 hours. Finish them under the broiler with sauce for that caramelized crust.
6. Do I need to remove the membrane?
Yes! That silver skin on the back of the ribs can get chewy. Peel it off before seasoning for better texture and flavor absorption.
7. What’s the secret to tender ribs?
Low and slow cooking, a good dry rub, and resting time. Bonus points if you wrap them in foil to lock in moisture during cooking.
8. Should I use a dry rub or marinade?
Dry rubs give ribs a rich, crusty bark, while marinades add moisture and zing. You can do both—but don’t skip the rub.
9. When should I add BBQ sauce?
Slather it on during the last 20–30 minutes of cooking to avoid burning. Earlier, and you’ll get bitter, blackened sugar.
10. How do I store leftover ribs?
Wrap tightly in foil or place in an airtight container. Refrigerate for up to 4 days, or freeze for up to 3 months. Reheat low and slow for best results.
Conclusion
Making barbecue ribs at home may seem intimidating at first, but once you understand the process, it becomes more than just cooking—it’s an experience. From the smoky aroma that fills the backyard to the first juicy bite that leaves sauce on your fingers, ribs have a magical way of turning a meal into a memory.
Whether you’re cooking for family, friends, or just treating yourself, following this step-by-step guide ensures you end up with ribs that are tender, flavorful, and absolutely irresistible. So go ahead—fire up the grill, get your hands dirty, and embrace the joy of real, homemade barbecue.