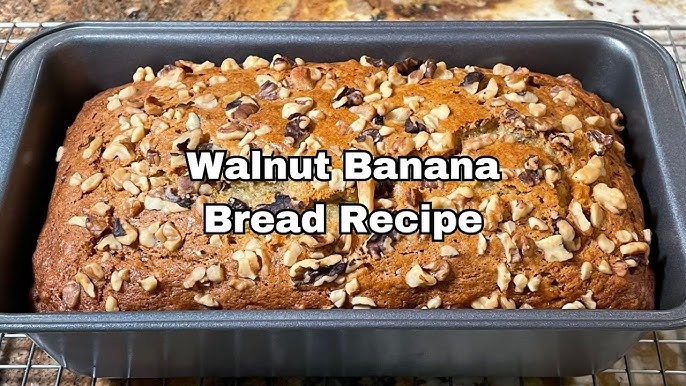
Banana Walnut Bread Recipe: There’s something deeply comforting about the smell of freshly baked banana walnut bread wafting through your kitchen. It’s warm, nutty, slightly sweet, and utterly nostalgic. Whether you’re a seasoned baker or a total newbie in the kitchen, this detailed step-by-step guide will take you through everything you need to make a moist, flavorful, and irresistible banana walnut bread that you’ll want to bake over and over again.
Why Banana Walnut Bread is a Classic
Banana walnut bread is that delightful in-between of a dessert and a breakfast treat. It’s not overly sweet like cake, but it has just enough richness to make you feel like you’re indulging in something special. It originated in the United States during the Great Depression when frugality was key, and throwing out overripe bananas wasn’t an option. The solution? Mash them up and add them to bread. Genius, right?
Since then, banana bread has evolved in dozens of ways, but the classic banana walnut combination has stood the test of time. The walnuts add a crunchy contrast to the soft, moist bread, bringing both texture and a subtle nutty flavor that pairs perfectly with ripe bananas. Whether it’s for breakfast, a mid-afternoon snack, or a light dessert, banana walnut bread hits the sweet spot every time.
Health Benefits of Bananas and Walnuts
While this bread is definitely a treat, it’s also packed with some pretty great health perks. Bananas are rich in potassium, vitamin C, and vitamin B6. They’re great for heart health, digestion, and even boosting your mood thanks to their tryptophan content, which the body uses to produce serotonin.
Walnuts, on the other hand, are a powerhouse of omega-3 fatty acids, antioxidants, and plant-based protein. They support brain health, reduce inflammation, and are even linked to improved heart function. So yeah, you’re technically doing your body a favor with each delicious bite!
Ingredients You’ll Need
Basic Ingredients
Let’s start with the essentials. These are the ingredients you’ll need to whip up the perfect banana walnut bread:
- 3 ripe bananas (the browner the better – those spots mean flavor!)
- 2 cups all-purpose flour
- 1 teaspoon baking soda
- 1/2 teaspoon salt
- 1/2 cup unsalted butter (softened)
- 3/4 cup brown sugar (you can use white sugar, but brown adds a caramel depth)
- 2 large eggs
- 1 teaspoon vanilla extract
- 1/2 cup milk (whole milk preferred)
- 1 cup chopped walnuts
Each ingredient plays a critical role. The bananas add moisture and sweetness. The butter and eggs bring richness. The flour and baking soda give structure. And the walnuts? Crunchy bites of magic.
Optional Add-ins for Flavor Variation
Want to switch it up a little? Here are a few optional ingredients you can add:
- 1/2 teaspoon cinnamon or nutmeg for a spiced version.
- 1/2 cup chocolate chips if you’re feeling indulgent.
- 1 tablespoon Greek yogurt or sour cream for extra moistness.
- A pinch of espresso powder to deepen the banana flavor.
These tweaks won’t mess with the base recipe too much but can totally elevate the flavor to match your vibe or the season.
Equipment Required
Must-Have Kitchen Tools
You don’t need fancy gadgets to make banana walnut bread, but a few reliable kitchen tools will make the process smoother:
- Mixing bowls (at least two – one for dry, one for wet)
- Measuring cups and spoons
- Whisk and spatula
- Hand mixer or stand mixer (optional but helps with creaming butter)
- 9×5 inch loaf pan
- Parchment paper or non-stick spray
Tips for Prepping Your Equipment
Before you even touch a banana, take a few minutes to prep. Preheat your oven to 350°F (175°C) and make sure your loaf pan is greased or lined with parchment paper. This will prevent sticking and help the bread release smoothly after baking.
Also, set your butter out early so it softens to room temperature. This is crucial for creaming it properly with the sugar, which adds air and makes your bread fluffy instead of dense.
Preparing Your Ingredients
How to Properly Mash Bananas
You might think mashing bananas is no big deal—and you’re not wrong—but doing it the right way can improve your bread’s texture. Use a fork or potato masher and go for a smooth consistency with a few tiny lumps. You don’t want big chunks that might create wet pockets in the bread.
If you’ve got bananas that aren’t quite ripe yet, here’s a trick: throw them (with peels on) in the oven at 300°F for 15-20 minutes. They’ll turn black on the outside but be perfectly sweet and soft on the inside—ideal for baking.
Chopping and Toasting Walnuts for Maximum Flavor
This is a step many skip, but toasting your walnuts before adding them to the batter takes their flavor to the next level. Simply spread them on a baking sheet and toast at 350°F for 5–7 minutes. Let them cool, then give them a rough chop. Don’t overdo it—you still want bite-sized pieces to add that lovely crunch in each slice.
How to Make Banana Walnut Bread – Step-by-Step Instructions
Step 1: Preheat and Prep
First things first—preheat your oven to 350°F (175°C). Getting your oven hot and ready before you even start mixing ensures the batter goes straight into an evenly heated environment. This is key for a consistent rise and a golden crust.
While your oven is heating up, prep your loaf pan. You can either grease it generously with butter or use parchment paper for easy cleanup. Personally, I love parchment—it creates clean edges and helps lift the bread right out after baking.
Now, lay out all your ingredients and tools. It might sound like a small step, but having everything ready and within reach turns your baking session from stressful to seamless. This is your mise en place—pro bakers swear by it for a reason.
Also, make sure your bananas are mashed, your walnuts are toasted and chopped, and your butter is soft. Trust me, doing this now makes the mixing process a breeze.
Step 2: Mix Dry and Wet Ingredients
Here comes the magic. Start with the dry ingredients:
- In a large bowl, whisk together:
- 2 cups of all-purpose flour
- 1 teaspoon of baking soda
- 1/2 teaspoon of salt
Whisking evenly distributes the baking soda and salt into the flour, so you don’t end up with salty or flat-tasting bites.
Now, for the wet ingredients:
- In a separate bowl, use a hand mixer or a sturdy whisk to beat together:
- 1/2 cup softened butter
- 3/4 cup brown sugar
Mix them until creamy and light—it should look fluffy. This step is important because it aerates the mixture, which helps your bread rise nicely.
Next, beat in:
- 2 eggs (one at a time)
- 1 teaspoon of vanilla extract
Stir until fully incorporated. Then, add:
- The mashed bananas (3 medium-sized ripe ones)
- 1/2 cup of milk
Mix gently until it becomes a cohesive, slightly lumpy batter. At this point, it should smell heavenly already—banana, butter, and vanilla working their aromatic magic.
Step 3: Combine Everything and Add Walnuts
Now it’s time to bring it all together. Slowly add the dry ingredients into the wet mixture. Do this in batches—about 1/3 of the dry at a time—gently folding with a spatula after each addition.
Don’t overmix! Stir just until there are no streaks of flour. Overworking the batter can make your bread tough and chewy instead of tender and moist.
Once your batter is combined, fold in:
- 1 cup of chopped, toasted walnuts
At this point, you can also throw in any optional add-ins like chocolate chips or cinnamon. Mix just enough to distribute them evenly.
The final batter should be thick but pourable. Pour it into your prepared loaf pan and give it a gentle shake or tap it on the counter to eliminate any air pockets.
Step 4: Bake to Perfection
Place your pan on the center rack of your preheated oven. Set your timer for 55–65 minutes. Every oven is different, so start checking around the 50-minute mark.
Here’s how to know it’s done:
- A toothpick inserted in the center comes out clean or with a few moist crumbs.
- The top is golden brown with a slight dome.
- It smells so good you’ll want to eat it straight from the oven (but don’t!).
If the top is browning too quickly, tent it loosely with foil around the 40-minute mark. This helps the center cook without burning the crust.
Step 5: Cool and Slice
This is probably the hardest part—waiting. Once out of the oven, let your banana walnut bread rest in the pan for about 10–15 minutes. This lets it firm up a bit and makes it easier to remove.
Then, carefully lift it out using the parchment paper or turn it out onto a wire rack. Let it cool completely—we’re talking at least another 45 minutes—before slicing. Cutting it too soon can make it crumble or become gummy inside.
Once cool, slice it into thick, generous pieces. The edges should be slightly crisp, the inside soft and moist, with chunks of crunchy walnut throughout. It’s perfect on its own, with a pat of butter, or even a dollop of cream cheese.
Storing and Serving Tips
Best Ways to Store Banana Walnut Bread
Once your bread is cool and sliced, the last thing you want is for it to dry out or go stale too quickly. Here’s how to keep it moist and fresh for days:
- Room Temperature: Wrap it tightly in plastic wrap or foil and store it in an airtight container. It will stay fresh for about 3–4 days.
- Refrigeration: If you live in a hot or humid climate, storing it in the fridge is a good option. Again, wrap it well to prevent it from absorbing fridge odors. It can last up to a week this way.
- Freezing: Banana bread freezes beautifully. Wrap each slice (or the whole loaf) in plastic wrap, then in foil or a freezer-safe bag. It’ll keep for 2–3 months. Just thaw at room temp or microwave for 30 seconds.
You can even pre-slice it before freezing for easy grab-and-go breakfasts or snacks!
Serving Suggestions for Extra Flavor
Banana walnut bread is delightful on its own, but if you’re feeling fancy, here are some fun ways to serve it:
- Warm with butter – Classic and simple.
- Toasted with cream cheese or Nutella – Rich and indulgent.
- With a scoop of vanilla ice cream – Dessert heaven.
- As French toast – Dip in egg and fry for a luxurious breakfast.
- Drizzled with honey or maple syrup – A sweet upgrade.
Whether you’re enjoying it for breakfast, dessert, or a midnight snack, there’s no wrong way to eat banana walnut bread.
Common Mistakes to Avoid
Overmixing the Batter
It’s tempting to stir everything until it looks perfectly smooth, but resist the urge. Overmixing activates the gluten in the flour, leading to dense and rubbery bread. Mix just until the flour disappears—lumps are totally fine!
Using Unripe Bananas
This might be the biggest banana bread sin. Unripe bananas don’t have the sweetness or softness you need for a moist, flavorful loaf. If your bananas aren’t quite there yet, use the oven trick mentioned earlier to ripen them in a pinch.
Underbaking or Overbaking
Nobody wants dry banana bread, but undercooked batter in the middle is worse. Use a toothpick to test the center after 50 minutes. If it comes out with batter, keep baking in 5-minute increments and check again.
Forgetting to Toast the Walnuts
It’s a small step, but toasted walnuts bring a warm, nutty depth that raw walnuts just can’t match. Take the time—it’s worth it.
Nutritional Information
What’s Inside One Slice of Banana Walnut Bread?
Here’s a rough estimate per slice (based on a 10-slice loaf):
| Nutrient | Amount |
|---|---|
| Calories | 250–280 |
| Total Fat | 12g |
| Saturated Fat | 4g |
| Carbohydrates | 35g |
| Sugars | 18g |
| Protein | 4g |
| Fiber | 2g |
Of course, values will vary based on the ingredients you use—like full-fat vs. low-fat milk, or if you add extras like chocolate chips. While it’s definitely a treat, you’re still getting the benefits of bananas and walnuts with every bite.
Making It Vegan or Gluten-Free
Vegan Banana Walnut Bread
Swapping just a few ingredients makes this recipe completely plant-based:
- Butter → Coconut oil or vegan butter
- Eggs → Flax eggs (1 tbsp flaxseed meal + 2.5 tbsp water per egg)
- Milk → Almond or oat milk
The result is still moist, tender, and full of flavor—no compromise needed!
Gluten-Free Version
To make a gluten-free loaf:
- Use a 1:1 gluten-free flour blend (like Bob’s Red Mill or King Arthur)
- Add 1/2 teaspoon of xanthan gum if your blend doesn’t already include it
- Double-check that your baking soda is gluten-free (most are, but it’s good to be sure)
These substitutions make it accessible for those with dietary restrictions without sacrificing that amazing texture and taste.
FAQs about Banana Walnut Bread Recipe
Q1: Can I use frozen bananas for banana walnut bread?
Absolutely! Just thaw them first and drain excess liquid. They add even more moisture and sweetness to your bread.
Q2: Can I skip the walnuts?
Yes, you can leave out the walnuts or swap them with pecans, chocolate chips, or dried fruit. Your bread, your rules.
Q3: How do I store banana walnut bread?
Wrap it tightly in plastic or foil and keep it at room temperature for up to 3 days. For longer storage, refrigerate for up to a week or freeze it for 2-3 months.
Q4: Can I make this recipe gluten-free?
Totally! Just use your favorite gluten-free flour blend—look for one that substitutes 1:1 for all-purpose flour.
Q5: Why did my banana bread sink in the middle?
Oof—classic baking drama. It’s usually from underbaking or too much liquid. Always test with a toothpick and let it cool slowly.
Q6: Can I make muffins with this batter?
Yes! Just pour the batter into a muffin tin and bake at 350°F (175°C) for 18–22 minutes. Instant mini banana joy!
Q7: Should I toast the walnuts first?
Toasting is optional, but it levels up the flavor with a rich, nutty crunch. Just a quick 5–7 minutes in the oven at 350°F will do.
Q8: Can I reduce the sugar in the recipe?
Definitely. You can cut the sugar by up to ⅓ if you like it less sweet—especially if your bananas are super ripe.
Conclusion
Banana walnut bread is more than just a delicious baked good—it’s a cozy, soul-satisfying experience in loaf form. From the simple ingredients to the heavenly aroma filling your kitchen, every step of the process is pure joy. Whether you’re baking it for yourself, your family, or to impress guests, this step-by-step guide ensures you get it right every single time.
It’s a beautiful blend of nutrition and indulgence, tradition and flexibility. Don’t be afraid to make it your own—play with flavors, switch up ingredients, and most importantly, have fun with it.
Happy baking!