Banana Pudding Cheesecake Recipe: Who can resist the silky richness of cheesecake combined with the nostalgic charm of banana pudding? If you’ve ever been torn between the two desserts, let’s end that dilemma today with one epic combo: Banana Pudding Cheesecake. This dessert is everything—creamy, sweet, a little tangy, layered with fresh bananas and classic vanilla wafers, all wrapped up in one luscious, decadent bite.
Whether you’re planning a weekend treat, a birthday surprise, or a holiday dessert table showstopper, this recipe checks all the boxes. It’s smooth. It’s flavorful. And most importantly, it’s ridiculously easy to follow. So, grab your apron, let’s get to baking!
Why You’ll Love This Banana Pudding Cheesecake
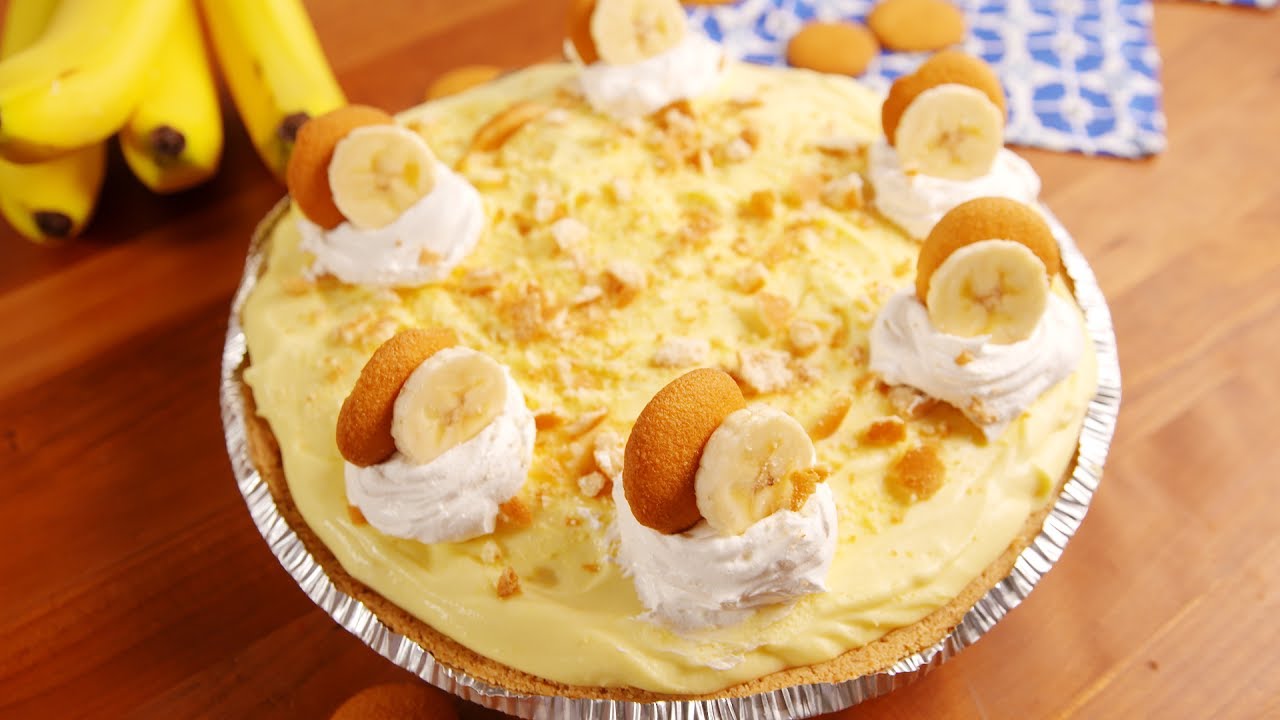
Imagine this: a crunchy vanilla wafer crust, velvety banana-flavored cheesecake, real banana pudding layered inside, and a cloud of whipped cream on top—every bite tastes like sunshine and Southern comfort rolled into one dessert.
Here’s why this dessert should be at the top of your “must-make” list:
- Flavor Explosion: The creamy tang of cheesecake balances the sweetness of bananas perfectly.
- Textures Galore: Crunchy crust, silky filling, fluffy topping—it’s a party in your mouth.
- Crowd Pleaser: Watch it disappear in seconds at family gatherings or potlucks.
- No Banana Mash Needed: We use fresh banana slices and pudding—zero mush.
- Make-Ahead Friendly: It tastes better the next day!
If you love classic banana pudding and swoon for cheesecake, get ready to meet your new obsession.
Ingredients You’ll Need
To keep things simple, we’ve broken down the ingredients by layers.
For the Crust
- 2 cups vanilla wafer crumbs (about 60 wafers)
- 1/4 cup granulated sugar
- 1/2 cup (1 stick) unsalted butter, melted
For the Cheesecake Filling
- 3 (8 oz) blocks cream cheese, softened
- 1 cup granulated sugar
- 1/2 cup sour cream
- 3 large eggs, room temperature
- 1 tablespoon cornstarch
- 1 teaspoon vanilla extract
- 1/2 teaspoon banana extract (optional, but recommended)
For the Banana Pudding Layer
- 1 box (3.4 oz) instant banana pudding mix
- 1 1/2 cups cold milk
- 2–3 ripe bananas, sliced thin
For the Whipped Topping
- 1 cup heavy whipping cream
- 2 tablespoons powdered sugar
- 1/2 teaspoon vanilla extract
Equipment You’ll Need
Before starting, make sure you have the following tools:
- 9-inch springform pan
- Electric mixer (hand or stand)
- Mixing bowls
- Rubber spatula
- Measuring cups and spoons
- Aluminum foil (for water bath)
- Large roasting pan (for water bath baking)
- Offset spatula (optional, for smoothing layers)
Choosing the Right Bananas: Ripe vs Overripe
Here’s the deal with bananas: if they’re too green, they lack flavor. If they’re too mushy and brown, they might ruin the texture. The sweet spot? Just-ripe bananas—yellow with a few brown spots. They’re flavorful, hold their shape, and won’t overpower the cheesecake with mush.
Need a quick ripening trick? Pop your bananas in a paper bag with an apple for 24 hours!
Step-by-Step Guide to Making Banana Pudding Cheesecake
Let’s walk through every layer, every stir, and every slice together. Follow these steps and your dessert will come out bakery-worthy!
Step 1: Preparing the Crust
Crush vanilla wafers into fine crumbs, mix with melted butter and a bit of sugar, then press firmly into the bottom of a springform pan. Chill the crust while you prepare the filling.
Step 2: Making the Cheesecake Filling
Beat cream cheese, sugar, and vanilla extract until smooth. Add mashed ripe bananas and a couple of eggs, one at a time, mixing gently until the batter is creamy and lump-free.
Step 3: Assembling the Banana Pudding Layer
Pour the cheesecake batter over the crust, then spoon in dollops of banana pudding (homemade or instant). Lightly swirl it with a knife for a marbled effect.
Step 4: Baking the Cheesecake
Bake at 325°F (160°C) for about 60 minutes or until the edges are set and the center slightly jiggles.
Step 5: Cooling and Chilling
Let it cool at room temperature, then refrigerate for at least 4 hours or overnight to firm up beautifully.
Step 6: Adding the Whipped Topping
Spread whipped cream or Cool Whip generously on top for a dreamy, cloud-like finish.
Step 7: Garnishing with Wafers & Sliced Bananas
Top with crushed vanilla wafers and freshly sliced bananas before serving. A creamy, nostalgic masterpiece in every bite!
Tips to Make It Perfect Every Time
- Room Temp Ingredients Are Key: Cold cream cheese creates lumps. Let all dairy come to room temp.
- Don’t Overmix After Eggs: Overmixing incorporates too much air—hello, cracks.
- Use a Water Bath: The moist heat prevents the top from drying out and cracking.
- Chill Long Enough: The cheesecake sets properly only after hours in the fridge.
- Slice with a Hot Knife: For clean slices, dip your knife in hot water and wipe clean between cuts.
Want to go pro? Use acetate strips around the sides before chilling to get that clean bakery-style edge when unmolded.
Can You Make It Ahead of Time?
Absolutely, and honestly—it’s even better that way. The cheesecake develops deeper flavor and a creamier texture as it sits.
Make-Ahead Tips:
- Up to 2 Days in Advance: You can assemble, bake, and chill the cheesecake without toppings.
- Add Toppings Day Of: Fresh bananas and whipped cream are best added right before serving to keep them pretty and fresh.
Hosting a party? Make this the night before, and just dress it up before the guests arrive.
How to Store Banana Pudding Cheesecake
Proper storage keeps your cheesecake dreamy and safe to eat.
- In the Fridge: Store in an airtight container or tightly wrapped in plastic wrap. It stays fresh for up to 5 days.
- Prevent Banana Browning: If already topped with bananas, squeeze a little lemon juice over them and cover tightly.
- Avoid Storing with Strong Odors: Cheesecake can absorb fridge smells like garlic or onions. Yuck.
Pro tip: Use a cake carrier with a locking lid for easier storage and transport.
Can You Freeze It?
Yes! This dessert freezes surprisingly well—just be smart about how you do it.
Freezing Instructions:
- Without Toppings: Best results come from freezing the cheesecake before adding whipped cream or bananas.
- Wrap Well: Double-wrap in plastic wrap, then foil. Or store in an airtight container.
- Label & Freeze: Freeze for up to 2 months.
- To Thaw: Move to the fridge the night before serving. Add toppings after thawing.
Avoid freezing fresh banana slices—they’ll turn mushy and brown. Stick to adding them fresh.
Banana Pudding Cheesecake Variations
Feeling creative? This recipe is a great base to riff on.
- Chocolate Banana Cheesecake: Add melted chocolate or cocoa powder to the cheesecake layer.
- Nutty Version: Add crushed pecans or walnuts to the crust or topping.
- Caramel Swirl: Swirl caramel sauce through the cheesecake batter before baking.
- Bourbon Banana Cheesecake: A splash of bourbon in the pudding or batter adds a grown-up twist.
- No-Bake Version: Skip the baking altogether and use gelatin to set the filling—ideal for summer.
Play with flavors and textures to make it your own signature dessert.
Common Mistakes to Avoid
Even seasoned bakers can slip up with cheesecake. Here’s what to steer clear of:
- Using Cold Ingredients: Lumpy filling and uneven texture are the results.
- Skipping the Water Bath: Without it, expect cracks and dry edges.
- Overbaking: Look for the jiggle! Don’t bake until it’s fully firm—it sets as it cools.
- Opening Oven Door Too Early: Let the heat and steam do their job uninterrupted.
- Rushing the Chill: Warm cheesecake is tempting, but patience is the secret ingredient here.
Bake it low, slow, and chill it long. That’s the cheesecake mantra.
Pairing Ideas: What Goes Well With It
While this cheesecake shines solo, here are a few tasty pairings to elevate your dessert experience:
- Coffee or Espresso: The bitter notes balance the sweetness.
- Sweet White Wine: Moscato or Riesling complement the banana and vanilla flavors.
- Salted Nuts: Serve a small side of roasted nuts for texture contrast.
- Vanilla Ice Cream: Double down on creamy goodness.
- Mint Garnish: For a fresh pop and visual contrast.
Add a little jazz to your dessert plate and impress every guest.
Nutritional Breakdown (Approximate Per Slice – Serves 12)
| Nutrient | Amount |
|---|---|
| Calories | 480–520 kcal |
| Total Fat | 32g |
| Saturated Fat | 18g |
| Carbohydrates | 45g |
| Sugar | 30g |
| Protein | 6g |
| Fiber | 1g |
| Sodium | 260mg |
Note: Values vary depending on specific ingredients and serving size.
FAQs about Banana Pudding Cheesecake Recipe
1. Can I use a graham cracker crust instead of vanilla wafers?
Absolutely! While vanilla wafers offer that banana pudding authenticity, a graham cracker crust works beautifully as a substitute.
2. Can I use homemade banana pudding instead of instant?
Yes, but make sure it’s completely cooled and thickened before layering into the cheesecake. Otherwise, it may cause sogginess.
3. What if I don’t have a springform pan?
You can use a deep pie dish or cake pan lined with parchment, but be aware that removing it cleanly will be trickier.
4. Can I add a layer of caramel or chocolate?
Of course! A swirl of caramel or melted chocolate in the cheesecake filling adds an indulgent twist.
5. How do I keep bananas from turning brown on top?
Brush sliced bananas with lemon juice or place them just before serving to keep them fresh and pretty.
Conclusion
And there you have it—the ultimate Banana Pudding Cheesecake that’s sure to blow minds and satisfy every sweet craving. With its rich, layered flavors and luscious texture, this dessert feels like a warm hug in cheesecake form. Whether you’re celebrating something big or just want to treat yourself (because you deserve it!), this step-by-step guide makes it easy to create a dessert that feels as fancy as it tastes.
So, go ahead—preheat that oven and treat yourself to a slice of happiness. You earned it.


