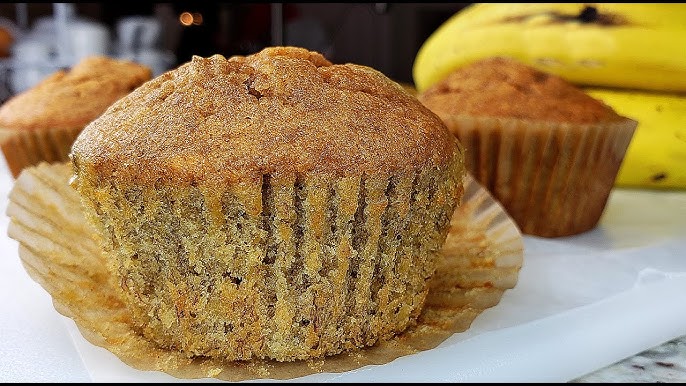
Banana Bread Muffins Recipe: Who doesn’t love the comforting aroma of banana bread wafting through the kitchen? Now imagine that classic, moist, banana-packed goodness, but in a portable, perfectly portioned muffin form. That’s the magic of banana bread muffins! These delightful little snacks combine the rich, dense flavor of banana bread with the convenience and versatility of muffins.
Banana bread muffins are ideal for breakfast, snack time, or even dessert. They’re easy to make, easy to customize, and—best of all—a great way to use up those overripe bananas sitting on your kitchen counter. No waste, all taste.
One of the best things about banana bread muffins is their universal appeal. Kids love them, adults crave them, and they’re an easy addition to lunchboxes or afternoon tea. They’re not just tasty—they’re comforting, nostalgic, and made with everyday pantry staples.
The Origins and Popularity of Banana Bread Muffins
Banana bread itself dates back to the Great Depression when resourceful home bakers wanted to avoid throwing out overripe bananas. The result? A moist, rich loaf that quickly became a household staple. Over time, banana bread evolved, giving rise to banana bread muffins—essentially the same ingredients, but baked in a muffin tin for ease and speed.
Banana bread muffins gained popularity for their simplicity and adaptability. From cafés to home kitchens, they’ve become a baking essential. Whether you’re a beginner or an experienced baker, the process is so straightforward that success is practically guaranteed.
Plus, you can dress them up or down—throw in chocolate chips for a sweeter treat, add chopped walnuts for texture, or swirl in some cinnamon for extra warmth. However you like them, banana bread muffins are a dependable go-to.
Ingredients You’ll Need
Essential Ingredients
To whip up a batch of delicious banana bread muffins, you’ll need some staple baking items. Here’s a basic list of must-haves:
- 3 ripe bananas – the riper, the better; they provide natural sweetness and moistness.
- 1/2 cup (1 stick) unsalted butter, melted – adds richness.
- 1/2 to 3/4 cup sugar – depending on how sweet you want it.
- 1 large egg – acts as a binder.
- 1 teaspoon vanilla extract – for added depth of flavor.
- 1 teaspoon baking soda – the leavening agent.
- 1/4 teaspoon salt – enhances the overall taste.
- 1 1/2 cups all-purpose flour – the base structure of the muffins.
These ingredients form the base of classic banana bread muffins. They’re simple, accessible, and most likely already sitting in your kitchen.
Optional Add-ins to Elevate Flavor
Now, if you want to add a little extra flair, there’s a whole world of mix-ins you can experiment with:
- Chocolate chips – for a touch of indulgence.
- Chopped walnuts or pecans – add crunch and nutty flavor.
- Cinnamon or nutmeg – for a warm, cozy spice profile.
- Dried fruits like raisins or cranberries – for added chew and sweetness.
- A swirl of peanut butter or Nutella – because, why not?
These are totally optional, but they do allow you to personalize your banana bread muffins to your taste. Try different combinations to see what you and your family love most.
Tools and Equipment Required
Basic Baking Tools
You don’t need any fancy equipment to make banana bread muffins. Here are the basics:
- Mixing bowls – one for wet and one for dry ingredients.
- Fork or potato masher – for mashing the bananas.
- Whisk or electric mixer – to blend ingredients.
- Measuring cups and spoons – for accuracy.
- Rubber spatula or wooden spoon – to gently mix the batter.
These tools are likely already in your kitchen, making banana bread muffins a great last-minute baking project.
Useful Extras for Perfect Muffins
While the basics will get the job done, a few extras can make the process even smoother:
- Muffin tin – standard 12-cup muffin pan.
- Paper liners or cooking spray – to prevent sticking.
- Ice cream scoop or spoon – for even batter distribution.
- Cooling rack – helps muffins cool evenly without becoming soggy.
Having these extras on hand helps make baking easier, cleaner, and more efficient. Plus, they’ll give your muffins a professional-looking finish.
Preparation Before Baking
Preheating and Setting Up
Before diving into the mixing process, it’s crucial to set yourself up for success. First things first—preheat your oven to 350°F (175°C). Preheating ensures that your muffins bake evenly and rise properly.
While the oven’s heating up, take the time to:
- Line your muffin tin with paper liners or grease each cup thoroughly.
- Melt the butter and let it cool slightly.
- Measure out all your ingredients for a smoother baking process.
Setting up before you begin prevents any last-minute scrambling and helps keep the kitchen organized. Trust me, your future self will thank you.
Prepping Ingredients the Right Way
Start by mashing your bananas in a bowl until they’re smooth but still have a bit of texture. Overripe bananas are best—they’re sweeter and mash effortlessly.
If you’re using any add-ins like nuts or chocolate chips, now’s the time to chop or measure them out. Having everything prepped makes the assembly process a breeze.
Also, make sure your butter isn’t piping hot when adding it to your eggs—you don’t want to accidentally cook them! Let it cool for a minute or two after melting.
Step-by-Step Instructions for Making Banana Bread Muffins
Mixing the Wet and Dry Ingredients Separately
One of the golden rules in baking muffins is to keep your wet and dry ingredients separate—at least at first. It might seem like an unnecessary extra step, but trust me, it makes all the difference when it comes to texture.
Start with the wet ingredients:
In a large mixing bowl, combine the mashed bananas, melted butter, sugar, egg, and vanilla extract. Use a whisk or hand mixer to blend everything until smooth and well-incorporated. Don’t overmix—just ensure it’s unified and creamy.
In another bowl, whisk together the dry ingredients: flour, baking soda, and salt. Stir gently to ensure even distribution of the leavening agents.
Why keep them separate? This prevents over-activation of the baking soda before it hits the oven, and also ensures your muffins don’t turn into chewy little bricks. We want light, moist, and tender muffins—not dense and rubbery ones.
This technique gives you better control over the final product, and ensures that every bite is just right.
Combining and Mixing Gently
Now comes the moment of truth: combining wet and dry.
Pour the dry ingredients into the bowl with the wet ones. Here’s where things can go south if you’re not careful—mix gently and only until just combined. Overmixing activates the gluten in the flour too much, which leads to tough muffins.
Use a rubber spatula or wooden spoon, and fold the mixture together slowly. You want the batter to be slightly lumpy. Those lumps? They’re your friends—they guarantee a soft texture inside.
At this point, if you’re adding in chocolate chips, nuts, or any other extras, fold them in with a light hand. A good rule of thumb is to mix until you see no more streaks of flour, then stop. That’s it.
A thick, scoopable batter is what you’re aiming for—not too runny, not too stiff. The perfect consistency should hold its shape when dropped into the muffin tin but not be overly dry or doughy.
Filling the Muffin Tin and Baking
With your batter ready, it’s time to fill the muffin tin. If you’re using paper liners, you’re all set. If not, make sure to grease each muffin cup thoroughly with butter, oil, or non-stick spray.
Use an ice cream scoop or a spoon to distribute the batter evenly into the muffin cups. Aim to fill each one about 3/4 full—this allows room for the muffins to rise without spilling over.
Place the tray into your preheated oven (350°F / 175°C) and bake for 18 to 22 minutes. Ovens vary, so start checking around the 18-minute mark. A toothpick inserted into the center should come out clean or with just a few moist crumbs.
Resist the urge to open the oven door constantly—this can cause the muffins to collapse. Let them rise and bake in peace for at least 15 minutes before peeking.
Once done, remove the muffins from the oven and let them sit in the pan for about 5 minutes before transferring to a wire rack. This gives them time to firm up and cool slightly without turning soggy.
Cooling and Storage Tips
Now that your kitchen smells incredible and the muffins look golden and perfect, it’s time to cool and store them properly.
Letting your muffins cool on a wire rack prevents the bottoms from becoming wet and mushy. Give them at least 15–20 minutes before diving in—though we won’t judge if you sneak one early!
Once fully cooled, store the muffins in an airtight container. At room temperature, they’ll stay fresh for up to 3 days. If you want them to last longer, pop them in the fridge for up to a week—just bring them to room temperature before eating, or give them a quick zap in the microwave for that “just baked” warmth.
You can also freeze banana bread muffins for up to 3 months. Just wrap each muffin individually in plastic wrap, then place them in a zip-top freezer bag. To enjoy later, thaw at room temperature or warm in the oven.
These muffins are just as delicious the next day, making them perfect for meal prepping snacks or breakfasts in advance.
Common Mistakes to Avoid
Overmixing the Batter
One of the most common baking blunders with muffins—especially banana bread muffins—is overmixing. We’ve mentioned it before, but it’s worth repeating: overmixing develops too much gluten in the flour, which leads to a dense, chewy texture rather than the soft and fluffy bite you’re aiming for.
When combining the wet and dry ingredients, stir only until the flour disappears. It’s okay to leave some lumps. In fact, lumpy batter is a good sign you’re not overdoing it. Think of it like pancake batter—it shouldn’t be smooth like cake batter.
Using Bananas That Aren’t Ripe Enough
Unripe bananas just won’t cut it here. They lack both the sweetness and the soft texture that makes banana bread muffins so moist and flavorful. Ideally, you want bananas that are heavily speckled or almost entirely brown. The riper, the better.
If you’re short on time, you can ripen bananas quickly by baking them in the oven (at 300°F for 15–20 minutes) or microwaving them with the peel on for about 30 seconds. It’s a handy trick in a muffin emergency!
Not Measuring Ingredients Accurately
Baking is a science, and getting your measurements right matters. Too much flour and your muffins will be dry. Too little sugar and they’ll lack sweetness. Always level your measuring cups with a flat edge, and if possible, use a kitchen scale for accuracy.
Don’t eyeball it. That one little extra scoop can throw everything off.
Variations of Banana Bread Muffins
Banana Chocolate Chip Muffins
If you want to satisfy your sweet tooth, add 1/2 to 3/4 cup of chocolate chips to the batter. Semi-sweet chips are a classic, but dark or milk chocolate work just as well. For a double chocolate version, toss in a tablespoon of cocoa powder too.
These are especially popular with kids—and honestly, who can resist a warm muffin with gooey chocolate bits inside?
Banana Nut Muffins
For something more classic and hearty, fold in 1/2 cup of chopped walnuts or pecans. They add texture, crunch, and a nutty contrast to the soft banana base. Toast the nuts beforehand for even more flavor.
You can also mix in a dash of cinnamon and a pinch of nutmeg to round out the cozy, comforting profile.
Vegan or Gluten-Free Versions
Going plant-based? Swap the egg with a flaxseed egg (1 tbsp ground flaxseed + 3 tbsp water), use plant-based butter or coconut oil, and opt for non-dairy milk if needed.
For a gluten-free version, use a 1:1 gluten-free flour blend. Almond flour can also work, though you might need to adjust the moisture levels slightly.
These muffins are incredibly versatile, making them perfect for nearly any dietary need.
Nutritional Breakdown
Let’s break down the approximate nutrition for a standard banana bread muffin (without any add-ins like chocolate or nuts):
| Nutrient | Amount (per muffin) |
|---|---|
| Calories | 180–220 kcal |
| Carbohydrates | 30–35g |
| Sugar | 12–18g |
| Protein | 2–4g |
| Fat | 7–10g |
| Fiber | 1–2g |
These values can vary based on portion size and the ingredients you choose. Add-ins like chocolate and nuts will naturally increase calories and fat content, but also offer additional nutrients like antioxidants and healthy fats.
If you’re watching your intake, you can reduce the sugar, use whole wheat flour, or swap in a sugar substitute. Small changes can make a big difference in making these muffins even healthier.
Serving Suggestions
Best Ways to Serve Banana Bread Muffins
While these muffins are incredible all on their own, here are a few ideas to take your serving game to the next level:
- Warm with butter – Slice a muffin in half, toast it lightly, and spread on some salted butter. Heaven.
- With a drizzle of honey or peanut butter – Adds richness and a little twist to your morning bite.
- Alongside yogurt and fruit – For a balanced breakfast or snack.
- As a dessert with ice cream – Serve warm banana muffins with a scoop of vanilla ice cream and a caramel drizzle for a quick, delicious dessert.
Pairing Ideas
Pair your banana bread muffins with:
- A hot cup of coffee or tea for a cozy, café-like feel.
- A smoothie if you’re looking to create a fuller breakfast experience.
- Milk (dairy or non-dairy) for a classic, kid-friendly pairing.
No matter how you serve them, these muffins bring comfort, flavor, and satisfaction every time.
FAQs about Banana Bread Muffins Recipe
1. Can I freeze banana bread muffins?
Absolutely! Once cooled, wrap each muffin individually in plastic wrap and store them in a freezer-safe bag or container. They’ll keep for up to 3 months. To eat, just thaw at room temperature or reheat in the microwave or oven.
2. How do I make my banana muffins more moist?
Use very ripe bananas and don’t overmix the batter. You can also add a tablespoon of sour cream or Greek yogurt to boost moisture. Avoid overbaking—check muffins with a toothpick around the 18-minute mark.
3. Can I make banana muffins without eggs?
Yes! Replace the egg with a flax egg (1 tablespoon ground flaxseed + 3 tablespoons water), applesauce, mashed avocado, or a commercial egg replacer. They’ll still be moist and flavorful.
4. Why did my muffins come out dense?
This usually happens from overmixing or using too much flour. Make sure to mix just until combined, and measure your flour accurately. Also, don’t forget to check your baking soda—it might be expired.
5. Can I turn this recipe into a loaf instead of muffins?
Definitely. Pour the batter into a greased 9×5-inch loaf pan and bake at 350°F (175°C) for about 50–60 minutes. Check with a toothpick to ensure it’s fully baked.
Conclusion
The beauty lies in their simplicity. You don’t need fancy tools or exotic ingredients. A few ripe bananas, some basic pantry staples, and a little time are all you need to whip up a batch of goodness that feels like it came straight from grandma’s kitchen.
What’s even better? You can put your own spin on them. Throw in chocolate chips, add a swirl of peanut butter, or make them gluten-free—banana bread muffins are endlessly customizable. They’re forgiving, flexible, and always deliver comfort and flavor in every bite.
So, next time you’ve got overripe bananas begging for attention, you know exactly what to do. Roll up your sleeves, preheat that oven, and let the magic happen. Your kitchen will smell amazing, your tastebuds will thank you, and you’ll have a go-to recipe for life.