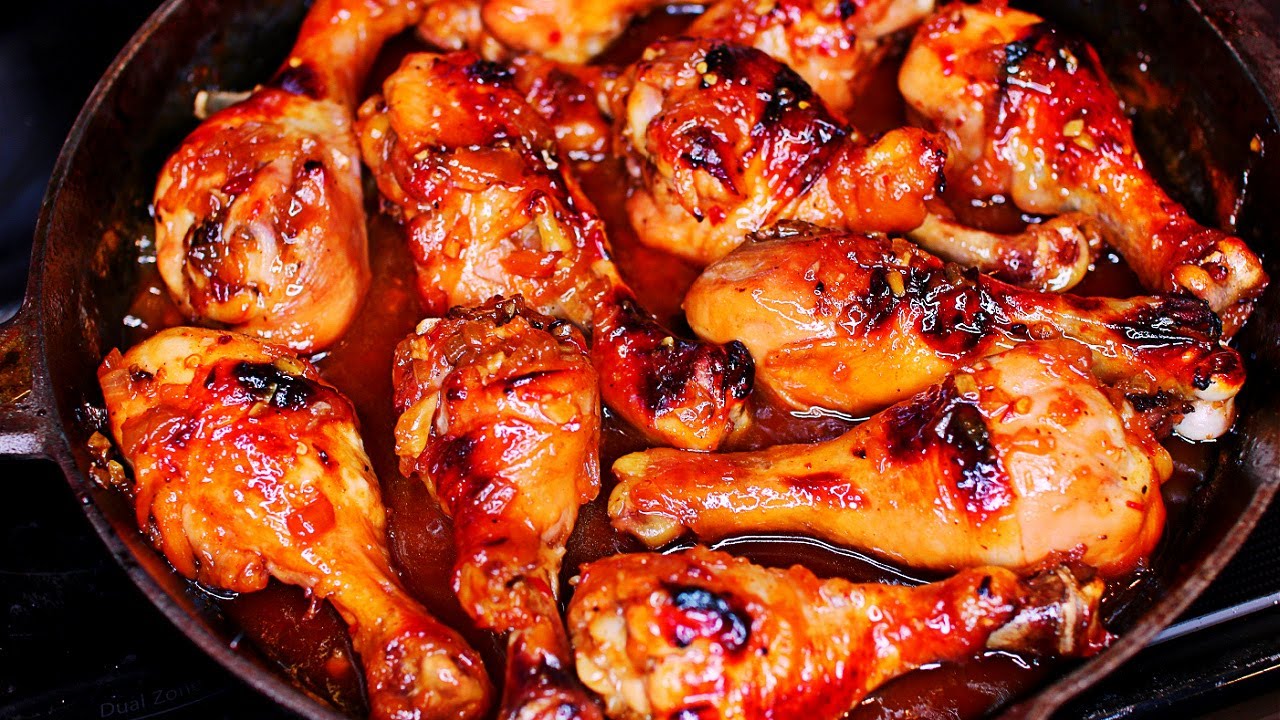
Baked Drumsticks Recipe: There’s just something comforting about biting into a juicy, flavorful baked chicken drumstick.
Whether you’re making a weeknight dinner, prepping a meal for guests, or planning for a potluck, baked drumsticks are a go-to option. They’re easy, affordable, and full of flavor when cooked right.
This step-by-step guide will walk you through the entire process, from selecting the best drumsticks to seasoning and baking them to crispy perfection. Ready to cook? Let’s dive in.
Introduction to Baked Drumsticks
Baked drumsticks are the ultimate crowd-pleaser. They’re meaty, flavorful, and can be seasoned in endless ways. Plus, baking them in the oven is healthier than frying—and way less messy. No splattering oil, no deep fryer needed, just your oven and some patience. What’s not to love?
They’re also a great protein-packed option for families, especially kids who seem to love picking them up and eating them by hand. With the right seasoning and cooking technique, the meat turns out tender on the inside, while the skin gets deliciously crispy on the outside.
Baking drumsticks is also one of those recipes you can easily customize. Like it spicy? Add chili flakes. Prefer it herby? Mix in rosemary and thyme. Want something tangy? Lemon juice or vinegar will do the trick. You can switch up the flavor profile without changing the core recipe, making this dish both flexible and foolproof.
Why Baked Drumsticks Are a Must-Try
Let’s be real—baked drumsticks deserve a permanent spot in your meal rotation. Why?
- Easy to cook: You don’t need to be a chef. If you can season and use an oven, you’re good to go.
- Budget-friendly: Chicken drumsticks are one of the most affordable cuts of meat.
- Versatile: Season them however you like—from BBQ to garlic parmesan to spicy Cajun.
- Healthier option: Compared to fried chicken, baked drumsticks have less fat and fewer calories.
- Perfect for meal prep: They store and reheat beautifully, meaning you can cook in bulk and eat throughout the week.
Whether you’re baking for one or a whole group, this recipe gives you crispy, juicy results every time.
List of Ingredients You’ll Need
Before you start, gather your ingredients. These pantry staples work beautifully together, but feel free to tweak the seasonings based on your preferences.
Main Ingredients
- 8 chicken drumsticks (skin-on for crispiness)
- 2 tablespoons olive oil
- 1 teaspoon salt
- 1/2 teaspoon black pepper
- 1 teaspoon garlic powder
- 1 teaspoon onion powder
- 1 teaspoon paprika
- 1/2 teaspoon dried thyme
- 1/2 teaspoon dried oregano
Optional Ingredients for Extra Flavor
- 1 teaspoon chili powder (for a spicy kick)
- 1 tablespoon soy sauce (adds umami)
- 1 tablespoon honey or brown sugar (for a sweet-glazed finish)
- 1 tablespoon lemon juice (for brightness)
- Fresh chopped parsley (for garnish)
These ingredients create a balanced, flavorful mix that enhances the natural taste of the chicken. Don’t worry if you’re missing one or two—there’s plenty of flexibility.
Kitchen Tools You’ll Need
Cooking great drumsticks isn’t just about ingredients—it’s also about having the right tools. Here’s what you’ll need:
- Baking sheet or tray
- Wire rack (optional but recommended for crispier skin)
- Mixing bowl
- Measuring spoons
- Tongs
- Meat thermometer (essential for perfect doneness)
- Aluminum foil or parchment paper (for easier cleanup)
Having these tools on hand ensures your cooking process is smooth and mess-free.
How to Choose the Best Chicken Drumsticks
Not all drumsticks are created equal. Here’s what to look for when picking the best ones:
- Freshness: Choose drumsticks that have a pinkish color, no strong odor, and firm texture.
- Size consistency: Pick drumsticks that are about the same size so they cook evenly.
- Skin-on: Skin helps lock in moisture and crisp up in the oven.
- Bone-in: Bone-in drumsticks stay juicier than boneless versions.
When buying in bulk, you can also portion and freeze extras for later. Just make sure to thaw properly before cooking.
Prepping the Chicken Drumsticks
Proper preparation sets the foundation for flavor and texture.
Cleaning and Patting Dry
Start by rinsing the drumsticks under cold water, then pat them dry thoroughly using paper towels. Removing excess moisture helps the skin get crispy during baking.
Scoring or Not?
Scoring means lightly slicing the thickest parts of the meat. This helps the marinade penetrate deeper and ensures even cooking. If your drumsticks are particularly large, a couple of shallow cuts on each one can really help with flavor.
Creating the Perfect Marinade
Marinades are like the magic potion for drumsticks—they bring flavor, tenderness, and personality to your chicken. You don’t need anything fancy, just a mix of oil, acids, spices, and herbs. Here’s how to get it just right.
Basic Marinade
If you’re looking for a classic, all-purpose marinade that enhances the chicken’s natural flavor, start with this simple mix:
- 2 tablespoons olive oil
- 1 tablespoon lemon juice or vinegar
- 1 teaspoon garlic powder
- 1 teaspoon paprika
- Salt and pepper to taste
Mix these ingredients in a bowl and toss your drumsticks until fully coated. Let them marinate for at least 30 minutes (but overnight is even better).
Spicy Marinade Variation
Love some heat? Turn up the flavor with this spicy combo:
- 2 tablespoons olive oil
- 1 tablespoon hot sauce (like Sriracha or Tabasco)
- 1 teaspoon cayenne pepper
- 1 teaspoon chili powder
- 1/2 teaspoon cumin
- Salt to taste
This one brings the fire! Great for game days or when you want to serve with something cooling like ranch or yogurt dip.
Herb-Infused Marinade Variation
Want something herby and fresh? Try this Mediterranean-inspired version:
- 2 tablespoons olive oil
- 1 tablespoon lemon juice
- 1 teaspoon dried oregano
- 1 teaspoon dried thyme
- 2 cloves garlic, minced
- A pinch of salt and pepper
Perfect for serving with rice, roasted potatoes, or a light salad.
Marinating Tips for Maximum Flavor
Want to really level up your drumsticks? Let the marinade work its magic. Here are a few quick tips:
- Time it right: Marinate for a minimum of 30 minutes, but 2–8 hours is best.
- Use a zip-lock bag: It ensures even coating and makes cleanup easier.
- Don’t reuse marinade: Once raw chicken touches it, toss it. If you want to use some for basting, set a little aside before adding the chicken.
- Refrigerate while marinating: Always keep marinating chicken in the fridge to prevent bacterial growth.
- Massage the meat: Gently rub the marinade into the drumsticks to help it seep into the meat.
Proper marination is the difference between “meh” chicken and drumsticks that people rave about.
How to Bake Chicken Drumsticks: Step-by-Step Guide
Baking chicken drumsticks is as easy as it gets—once you follow a simple process. Let’s break it down.
Step 1: Preheat the Oven
Set your oven to 400°F (204°C). This is the sweet spot for crispy outside and juicy inside. If you want extra crispy skin, go for 425°F (218°C), but be sure to keep an eye on them.
Step 2: Arrange Drumsticks on the Baking Tray
Line a baking tray with aluminum foil or parchment paper for easy cleanup. Place a wire rack on top if you have one. This allows hot air to circulate all around the chicken, giving you an evenly crispy texture.
Space the drumsticks out so they’re not touching—this helps them cook evenly and brown properly.
Step 3: Bake and Flip
Place the tray in the middle rack of your preheated oven.
- Bake for 20 minutes.
- Remove and flip each drumstick using tongs.
- Bake for another 20–25 minutes, or until fully cooked and golden-brown.
If you want to crisp up the skin even more, turn on the broiler for the last 3–5 minutes. But watch closely—they can go from crispy to burnt fast!
Step 4: Check Internal Temperature
Use a meat thermometer to ensure your drumsticks are safe to eat. The internal temp should be at least 165°F (74°C) at the thickest part.
Don’t have a thermometer? Pierce the thickest drumstick—juices should run clear, not pink.
Tips for Crispy Skin Every Time
Nobody wants soggy skin on their chicken. Here’s how to get that satisfying crunch:
- Pat dry before marinating: Moisture is your enemy if you want crispy skin.
- Use a wire rack: It elevates the drumsticks, allowing heat to circulate.
- Don’t overcrowd the tray: Leave space between each piece.
- Brush with oil before baking: This helps with browning and crispiness.
- Broil at the end: Just a few minutes under high heat gives the perfect golden finish.
- Skip the cover: Never cover your drumsticks while baking—it traps moisture.
Following these tips ensures your drumsticks aren’t just juicy, but also deliver that satisfying crunch.
How Long to Bake Chicken Drumsticks
Cooking time can vary based on oven temp and drumstick size, but here’s a general guide:
| Oven Temperature | Bake Time | Texture Result |
|---|---|---|
| 375°F (190°C) | 45–50 minutes | Juicy, softer skin |
| 400°F (204°C) | 40–45 minutes | Crispy and tender |
| 425°F (218°C) | 35–40 minutes | Super crispy, quick cook |
Always confirm doneness with a thermometer. These times are averages, so your oven may vary slightly.
How to Tell When Your Drumsticks Are Done
Getting your baked drumsticks just right means knowing when they’re perfectly cooked. Overcooked drumsticks can be dry and tough, while undercooked ones are unsafe to eat. So how do you tell they’re done?
Use a Meat Thermometer
This is the gold standard. Insert it into the thickest part of the drumstick, making sure you’re not touching the bone. Your chicken is fully cooked when it reaches 165°F (74°C).
If you don’t have a thermometer, don’t worry—there are still other ways to tell.
Check the Juices
Take one drumstick and gently pierce the thickest part with a knife or fork. If the juices run clear, it’s done. If they’re pink or bloody, it needs more time.
Look at the Color and Texture
- The skin should be golden-brown and crispy.
- The meat should not look pink near the bone.
- It should pull away from the bone easily when tugged with a fork.
The “Wiggle Test”
This is an old-school trick, but it works. Gently grab the end of the drumstick and give it a wiggle. If the bone moves easily, the chicken is done. If it feels stiff, bake a bit longer.
Remember: it’s better to be safe than sorry. If in doubt, give it a few extra minutes.
Best Side Dishes to Serve with Baked Drumsticks
What’s a good meal without great sides? While baked drumsticks are the star of the show, the supporting cast matters too. Here are some fantastic pairings:
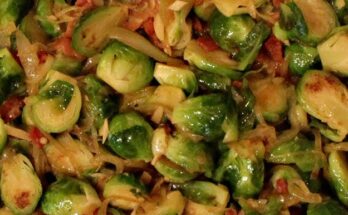
1. Roasted Vegetables
Toss carrots, potatoes, bell peppers, or zucchini with olive oil, salt, and pepper. Roast them on a tray while your chicken bakes. Easy and healthy.
2. Mashed Potatoes
Creamy mashed potatoes are a classic pairing. Add garlic, butter, or sour cream to make them extra comforting.
3. Coleslaw
A crunchy, tangy slaw adds freshness and cuts through the richness of the drumsticks. Make it with cabbage, carrots, and a vinegar or mayo-based dressing.
4. Rice or Pilaf
Fluffy white rice or seasoned rice pilaf complements the flavor of the chicken perfectly. Add some herbs or lemon zest to level it up.
5. Salad
For a lighter touch, go with a crisp green salad. Spinach, arugula, or romaine with a lemon vinaigrette adds brightness to your plate.
6. Corn on the Cob
Grilled or boiled, buttered corn is always a family favorite and makes the meal feel summery and fun.
Choose a mix of sides to match your mood—whether you want cozy, indulgent, or fresh and healthy.
Common Mistakes to Avoid
Even a simple recipe like baked drumsticks can go sideways if you’re not careful. Let’s go over some common pitfalls and how to dodge them:
1. Not Drying the Drumsticks
Too much moisture = soggy skin. Always pat them dry before seasoning or marinating.
2. Skipping the Marinade
Even a quick 30-minute soak in seasoning makes a big difference. It’s worth the extra time.
3. Overcrowding the Tray
If your drumsticks are crammed together, they’ll steam instead of bake. Give each one room to breathe.
4. Not Using a Thermometer
Guesswork can lead to undercooked chicken. Invest in a meat thermometer—it’s a game-changer.
5. Forgetting to Flip
Flipping the drumsticks halfway through baking ensures even cooking and browning on both sides.
6. Not Letting Them Rest
After baking, let the drumsticks rest for 5 minutes before serving. This allows juices to redistribute, keeping the meat moist.
Avoiding these mistakes means you’ll get delicious results every time.
Storing and Reheating Leftovers
Made a big batch? No problem—baked drumsticks reheat beautifully.
Storing Leftovers
- Fridge: Store in an airtight container for up to 4 days.
- Freezer: Wrap tightly in foil or plastic wrap, then place in a freezer bag. They’ll keep for up to 3 months.
Reheating Tips
- Oven (best method): Preheat to 375°F and reheat on a baking sheet for 15–20 minutes, or until heated through.
- Microwave: Quick but may soften the skin. Cover with a damp paper towel and heat in 30-second bursts.
- Air fryer: 350°F for 5–8 minutes gives great crispy results.
Add a splash of water or brush with sauce before reheating to keep them juicy.
FAQs about Baked Drumsticks Recipe
1. Can I bake frozen drumsticks?
Yes, but it’s best to thaw them first for even cooking. If baking from frozen, add an extra 15–20 minutes and always check the internal temp (165°F minimum).
2. Should I cover drumsticks while baking?
Nope! Covering traps moisture and makes the skin soggy. Bake them uncovered for the best crisp.
3. How do I make them spicier?
Add extra chili powder, cayenne pepper, or your favorite hot sauce to the marinade. You can also drizzle with spicy BBQ or buffalo sauce before serving.
4. What sauces go best with baked drumsticks?
Try classic BBQ, garlic butter, honey mustard, or ranch. If you’re going global, think teriyaki, peri-peri, or tzatziki.
5. Can I use this recipe for other chicken parts?
Absolutely! Use the same seasoning and baking method for thighs, wings, or even bone-in breasts—just adjust cooking time based on size.
Final Thoughts
Baked drumsticks are more than just an easy dinner—they’re a recipe for success every single time. Crispy on the outside, juicy on the inside, and bursting with flavor, this dish is the perfect example of how simple ingredients and a little technique can make something extraordinary.
Whether you’re feeding your family on a weeknight, meal-prepping for the week, or cooking for friends, this baked drumsticks recipe delivers. With endless seasoning options and sides to choose from, it never gets boring.
So go ahead—preheat that oven, grab your spices, and get ready to make some mouthwatering drumsticks that everyone will ask for again.