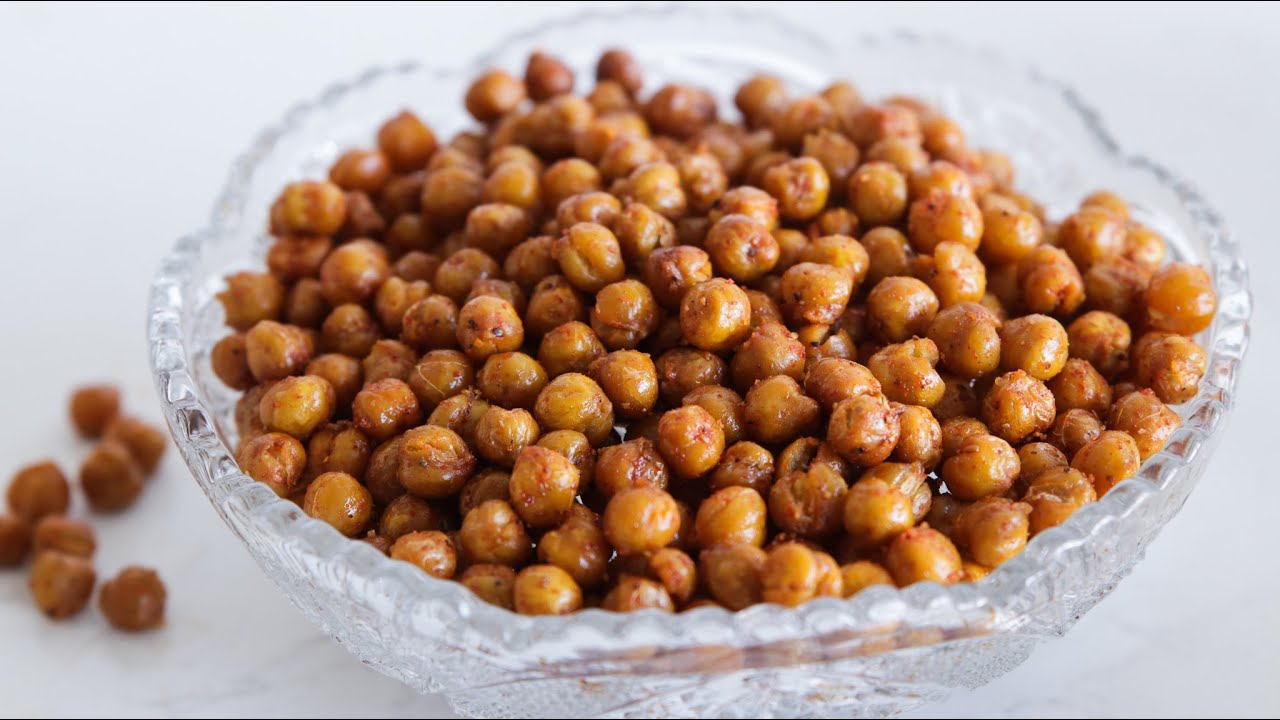
Baked Chickpeas Recipe: Looking for a crunchy, flavorful snack that doesn’t wreck your diet? Baked chickpeas might just be your new favorite go-to. These little golden nuggets are not only packed with protein and fiber but are also easy to make, budget-friendly, and endlessly customizable. Whether you’re trying to swap out greasy chips for something healthier or want a guilt-free snack while binge-watching your favorite series, baked chickpeas deliver on taste and crunch.
What makes them special? Well, for starters, they’re super versatile. Want something spicy? Add chili and paprika. Craving something sweet? A little cinnamon and honey can turn these legumes into dessert-like bites. Plus, they’re completely plant-based, making them suitable for vegans, vegetarians, and gluten-free eaters alike. And the best part? They’re made in your oven in under an hour.
Let’s dive into how you can whip up a batch of these addictive little snacks in your own kitchen.
Health Benefits of Chickpeas
Chickpeas, also known as garbanzo beans, have been a dietary staple in many cultures for centuries. And it’s not hard to see why—they’re nutritional powerhouses. Just one cup of cooked chickpeas contains about 15 grams of protein and 13 grams of dietary fiber. That means they keep you full longer, reduce cravings, and help maintain a healthy digestive system.
Rich in vitamins like folate, iron, magnesium, and B6, chickpeas support everything from heart health to energy production. They’re also a low-glycemic food, which means they won’t cause a spike in your blood sugar levels—a great choice for diabetics and anyone trying to manage their weight.
Another underrated benefit? Chickpeas are good for your bones. With calcium, phosphate, and other minerals, they help maintain strong, healthy bones. For those following a plant-based diet, chickpeas are an excellent alternative to animal protein sources. So not only are they a satisfying snack, but they’re also a smart one.
Ingredients Needed
Let’s start with what you need. The best part about baked chickpeas? The ingredient list is short and sweet. Here’s what you’ll need:
Core Ingredients:
- 1 can (15 oz) of chickpeas (or 1.5 cups of cooked chickpeas)
- 1–2 tablespoons of olive oil
- Salt (to taste)
Optional Spices & Seasonings:
- Smoked paprika
- Garlic powder
- Onion powder
- Cayenne pepper (for heat)
- Black pepper
- Cumin
- Nutritional yeast (for a cheesy flavor)
- Cinnamon and maple syrup (for a sweet version)
Want to get creative? You can also experiment with blends like taco seasoning, curry powder, or even ranch seasoning. The beauty of this recipe is how easy it is to personalize.
Preparation Tips Before Baking
Before you pop your chickpeas into the oven, there’s some prep work that makes a big difference in how crunchy and delicious the final result turns out.
Canned vs. Dried Chickpeas: You can use either, but if you’re short on time, canned chickpeas are the way to go. Just remember to drain and rinse them thoroughly. If you have the time to soak and cook dried chickpeas, you’ll get a slightly firmer texture, which can enhance the crunchiness after baking.
Drying is Critical: This is the most important step—don’t skip it! After rinsing, spread the chickpeas on a clean kitchen towel or paper towels. Pat them dry thoroughly. Even better, let them air-dry for 30 minutes if you have time. The drier they are, the crispier they’ll get. Some people even remove the skins for an extra crunch, but it’s optional.
Once they’re dry, toss them in olive oil and your chosen seasonings. Make sure every chickpea is well-coated.
Step-by-Step Guide to Making Baked Chickpeas
Now we’re ready to get cooking! Follow these steps for perfect baked chickpeas every time:
Step 1: Preheat the Oven
Set your oven to 400°F (200°C). This temperature is hot enough to give you that crispy texture without burning the chickpeas.
Step 2: Rinse and Dry Chickpeas
Drain and rinse your chickpeas thoroughly. Dry them completely using paper towels or a clean kitchen towel. Remember, moisture is the enemy of crunch.
Step 3: Season Your Chickpeas
In a large bowl, toss your chickpeas with olive oil and seasonings of your choice. Start with a base of salt, paprika, and garlic powder, then build from there depending on your flavor mood.
Step 4: Spread on Baking Sheet
Line a baking tray with parchment paper. Spread the chickpeas out in a single layer. Don’t overcrowd the tray—this can cause them to steam rather than bake.
Step 5: Bake and Shake
Bake for 30 to 40 minutes, shaking the tray every 10 minutes so they roast evenly. Keep an eye on them in the last 10 minutes—they can go from golden brown to burnt quickly.
Step 6: Cool for Crunch
Let them cool on the baking tray for at least 15 minutes. They continue to crisp up as they cool, so don’t skip this final step.
Flavor Variations
Bored of the same old snack? One of the best things about baked chickpeas is how incredibly versatile they are when it comes to flavor. You can go spicy, savory, sweet—or even a combo of all three. Here are some exciting ways to switch things up:
Spicy Kick:
- Buffalo Chickpeas: Toss chickpeas with olive oil, cayenne pepper, smoked paprika, and a splash of hot sauce.
- Sriracha Lime: Mix in sriracha, lime juice, garlic powder, and a bit of sea salt for a zesty punch.
Savory & Bold:
- Garlic Parmesan: After baking, sprinkle with garlic powder, oregano, and a touch of grated parmesan.
- BBQ Chickpeas: Coat with olive oil, smoked paprika, onion powder, garlic powder, and brown sugar before baking for a Southern twist.
Sweet & Addictive:
- Cinnamon Sugar: Toss in cinnamon and a touch of sugar (or maple syrup) and bake until caramelized.
- Chocolate Crunch: Once baked and cooled, drizzle with melted dark chocolate for a dessert-like snack.
Global Twists:
- Indian Curry: Use curry powder, turmeric, and cumin.
- Mediterranean Herb: Mix in rosemary, thyme, oregano, and sea salt for a European vibe.
With a little imagination, your oven-roasted chickpeas can travel the world in a bowl.
Storage Tips
You’ve just made a big batch of crispy chickpeas—now how do you keep them fresh and crunchy? The key is moisture control.
Best Storage Practices:
- Let your chickpeas cool completely before storing them. Warm chickpeas stored too early will steam and lose their crunch.
- Store them in an airtight container at room temperature.
- Avoid plastic bags or containers that trap moisture. A paper towel inside the jar or container can help absorb residual humidity.
How Long Do They Last?
If stored properly, baked chickpeas stay crunchy for up to 5 days. However, they’re best within the first 48 hours for peak texture.
Want to revive lost crunch? Just pop them back into the oven at 350°F (175°C) for 5–10 minutes.
Serving Suggestions
Baked chickpeas aren’t just for snacking straight out of the bowl. There are loads of creative ways to incorporate them into meals and elevate your dishes:
Snacking on the Go:
- Pack them in zip-top bags or small containers for a protein-rich office or school snack.
- Mix them into a homemade trail mix with nuts, seeds, and dried fruit.
Toppings and Mix-Ins:
- Salads: Replace croutons with chickpeas for crunch and protein.
- Soups: Sprinkle on top of creamy soups like tomato basil or pumpkin for added texture.
- Buddha Bowls: Add a handful to grain bowls with quinoa, roasted veggies, and tahini dressing.
Entertaining Idea: Serve a trio of flavor variations in small bowls for a party platter. They pair beautifully with hummus, veggie sticks, or even cheese boards for a modern, plant-based twist.
Common Mistakes to Avoid
Even though this recipe is pretty straightforward, a few small missteps can make a big difference in the final outcome. Here’s what to watch out for:
1. Not Drying the Chickpeas Properly: Moisture is the enemy of crispiness. Make sure your chickpeas are completely dry before seasoning and baking.
2. Overcrowding the Baking Sheet: Give them room to breathe! If chickpeas are too close together, they’ll steam instead of bake. Use a large tray or bake in batches.
3. Underbaking or Overbaking: Don’t rush it. Bake until they’re golden and feel hard to the touch. But keep a close eye to avoid burning—especially in the last 10 minutes.
4. Adding Sweet Coatings Too Early: If you’re making a sweet version, wait until the chickpeas are halfway through baking before adding sugary coatings like honey or syrup to prevent burning.
5. Storing Too Soon: Let them cool completely before storing. Otherwise, residual heat causes steam inside the container—bye-bye crunch.
Avoiding these common mistakes ensures you get that addictive, snack-worthy crunch every single time.
Vegan and Gluten-Free Snack Option
If you’re looking for a plant-based snack that checks all the boxes—gluten-free, dairy-free, nut-free, and high-protein—then baked chickpeas are the answer. They cater to nearly every dietary preference without sacrificing flavor or satisfaction.
Perfect for:
- Vegans looking for cruelty-free, high-protein snack options.
- Gluten-intolerant folks who want an alternative to wheat-based snacks.
- Low-carb or paleo eaters (with moderation, due to chickpeas being legumes).
Since you control what goes into your recipe, you can ensure there are no hidden preservatives, artificial flavors, or allergens—making it a guilt-free and safe snack for everyone in the family.
Kid-Friendly Snack Ideas
Getting kids to eat healthy snacks can sometimes feel like a never-ending battle. But baked chickpeas? They’re crunchy, tasty, and can be made to suit even the pickiest little eaters. Plus, they’re a fun, finger-friendly snack—perfect for lunchboxes, after-school munchies, or movie night.
Tips to Make Them Kid-Approved:
- Mild Seasonings: Skip the chili and cayenne. Instead, opt for familiar flavors like cheese powder (vegan or regular), cinnamon sugar, or ranch.
- Mini Bites: Smaller, slightly under-baked chickpeas may be easier for younger children to chew.
- Dipping Fun: Pair them with fun dips like hummus, yogurt ranch, or guacamole for a snack platter.
- Sneaky Nutrition: You can sneak them into wraps or pasta dishes as a crunchy topping to boost their protein intake without a fuss.
Get Kids Involved: Let them choose their own seasoning mix! Lay out different spices and let them experiment with their own custom blends. It’s a fun, sensory cooking activity that doubles as nutrition education.
With the right flavor and presentation, you might just find your kids asking for more chickpeas instead of chips.
Why Homemade is Better Than Store-Bought
Sure, you can grab a bag of roasted chickpeas at the store—but homemade ones have several advantages that make them worth the effort.
Control Over Ingredients: No mystery additives, preservatives, or excessive sodium. You choose everything that goes into your snack.
Customizable Flavors: Commercial brands often stick to a few popular flavors. At home, the possibilities are endless—from zesty lemon pepper to maple cayenne.
Better Crunch: Store-bought versions sometimes lack that fresh, just-out-of-the-oven crispness. Homemade chickpeas, when done right, are on another level in terms of texture.
Cost-Effective: A single can of chickpeas costs less than a dollar. Compare that to $4 or $5 for a small bag of branded roasted chickpeas and you’ll see why DIY makes sense.
Eco-Friendly: You reduce packaging waste and can even source organic or local chickpeas to support sustainable farming.
So while it might take a bit more time, homemade chickpeas beat store-bought every time on flavor, price, and quality.
Chickpeas as a Protein Source
When it comes to plant-based eating, chickpeas are a rock star. They provide a solid amount of protein—about 15 grams per cooked cup—which is essential for building and repairing tissues, making enzymes, and supporting overall growth.
Why This Matters: If you’re vegetarian, vegan, or just looking to cut down on meat, chickpeas offer a high-quality, complete source of protein when paired with other whole foods like grains or seeds.
Bonus Benefits:
- Rich in lysine, an amino acid often lacking in plant-based diets.
- Packed with fiber, aiding digestion and promoting a healthy gut microbiome.
- Loaded with iron and magnesium, supporting energy levels and muscle function.
In fact, chickpeas are often used in protein-rich dishes like hummus, falafel, stews, and salads for good reason. When roasted, they become a crunchy snack that keeps you full and fuels your body—no protein bars needed.
FAQs about Baked Chickpeas Recipe
1. Why are my baked chickpeas not crunchy?
Usually, it’s because they weren’t dried well before baking or were overcrowded on the tray. Make sure they’re spread in a single layer and completely dry before they hit the oven.
2. Can I use an air fryer instead of the oven?
Yes! Air fryers work great. Cook at 390°F (200°C) for 15–20 minutes, shaking the basket every 5 minutes.
3. Are baked chickpeas good for weight loss?
Absolutely. They’re low in calories, high in protein and fiber, and help curb cravings—ideal for snacking without guilt.
4. Can I use dried chickpeas instead of canned?
Yes, but you’ll need to soak and cook them first. This gives you a firmer texture and a more budget-friendly option.
5. How do I know when they’re done baking?
They should be golden brown and crispy to the touch. Taste one—if it’s still chewy, give it another 5–10 minutes.
Conclusion
Baked chickpeas are the ultimate homemade snack—healthy, crunchy, and bursting with flavor. Whether you’re craving something salty, spicy, or sweet, this simple legume can do it all. They’re packed with protein, fiber, and nutrients that support energy, digestion, and overall wellness.
Plus, they’re perfect for every lifestyle: vegan, gluten-free, kid-friendly, and customizable to suit any craving. With just a few pantry ingredients and some time in the oven, you’ll have a snack that outshines any store-bought version in taste, cost, and crunch.
So go ahead—stock up on chickpeas and start experimenting. Your taste buds (and your body) will thank you.