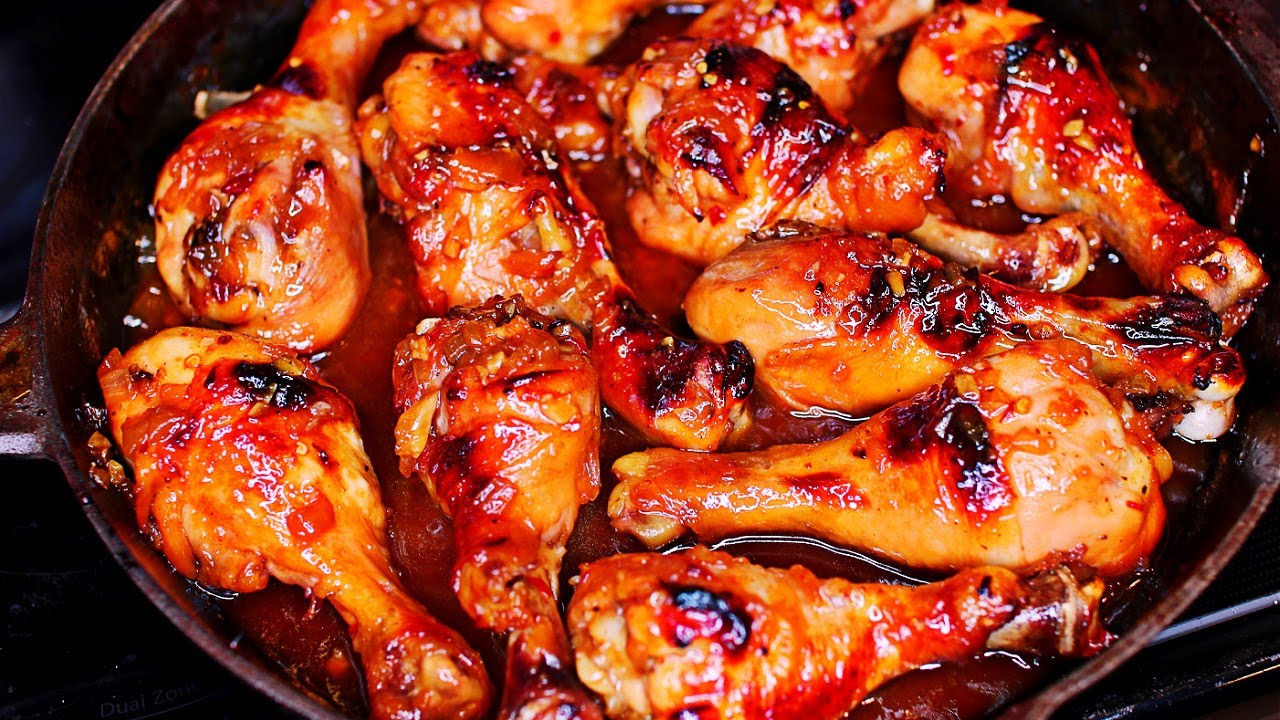
Baked Chicken Legs Recipe: When it comes to easy, comforting, and crowd-pleasing meals, baked chicken legs hit the sweet spot. They’re juicy, flavorful, and incredibly simple to make—perfect for beginners and seasoned home cooks alike. Whether you’re prepping a weeknight dinner or cooking for a weekend gathering, this dish will have everyone asking for seconds.
Baking chicken legs instead of frying them saves time, reduces cleanup, and delivers an equally satisfying crunch and flavor. Plus, you can customize the seasoning to fit your mood—whether you want something spicy, sweet, or savory.
This guide will walk you through everything: ingredients, preparation, step-by-step instructions, and even tips to make them extra crispy. So, tie on your apron and let’s get into it!
Benefits of Baking Chicken Legs
Why bake when you could fry or grill? Great question. Baking has its perks, and when it comes to chicken legs, it might just be the best method.
- Healthier Cooking Method: Baking doesn’t require oil for frying, making it lower in fat and calories. You still get the satisfying crispiness without deep-frying.
- Less Mess, More Flavor: Forget about oil splatters and the hassle of standing over the stove. Baked chicken legs need minimal babysitting. Pop them in the oven, and you’re free to focus on other parts of the meal—or just relax.
- Perfect for Meal Prep: Baked chicken legs store well, reheat beautifully, and stay juicy. You can bake a big batch at once and enjoy them throughout the week with different sides.
You also get to control the ingredients. No preservatives, no mystery oils—just real food. It’s comfort food without the guilt.
Ingredients You’ll Need
Getting the right ingredients is the first step to flavorful baked chicken legs. The good news? You probably already have most of these in your pantry.
Basic Ingredients
- 6 to 8 chicken legs (drumsticks)
- 2 tablespoons olive oil (or melted butter)
- 1 ½ teaspoons salt
- 1 teaspoon black pepper
- 1 teaspoon garlic powder
- 1 teaspoon onion powder
- 1 teaspoon paprika (smoked or sweet)
Optional Spices and Herbs
- ½ teaspoon cayenne pepper (for heat)
- 1 teaspoon Italian seasoning
- 1 tablespoon brown sugar (for caramelized crust)
- Fresh thyme or rosemary for garnish
Substitutes and Tips
- Olive oil can be replaced with avocado oil or melted coconut oil.
- For a low-sodium version, reduce salt and use garlic and herbs for flavor.
- Want a gluten-free option? All these ingredients are naturally gluten-free, just check the spice labels.
These ingredients come together for a perfect balance of savory, spicy, and slightly sweet. The key is seasoning generously—chicken legs can handle it!
Choosing the Right Chicken Legs
Believe it or not, the type of chicken leg you buy makes a difference. Here’s what to keep in mind:
Fresh vs Frozen
- Fresh chicken legs usually have better texture and cook more evenly.
- Frozen legs are fine too, just be sure to thaw them completely in the fridge overnight. Avoid defrosting in the microwave—it can start cooking the chicken unevenly.
Skin-on vs Skinless
- Skin-on chicken legs will give you that beautiful crispy finish.
- Skinless is a bit healthier but lacks that crunch. If you’re going skinless, bump up the spices for flavor.
Bone-in vs Boneless
- Bone-in legs are juicier and more flavorful.
- Boneless are quicker to cook but can dry out faster. Adjust baking times accordingly.
Choosing quality meat is step one for a winning dish. Look for chicken that’s plump, pale pink (not gray), and has no weird odor. Organic or free-range chicken often tastes better too.
Preparing the Chicken Legs
Before you pop anything in the oven, proper prep makes all the difference. Here’s how to set yourself up for delicious success.
- Clean & Pat Dry: Rinse chicken legs under cold water and pat them completely dry with paper towels. Moisture is the enemy of crispy skin.
- Trim Excess Fat: Use kitchen shears to snip off any loose skin or extra fat hanging from the legs. This prevents overly greasy spots and helps them cook evenly.
- Marinate or Rub:
- For extra juicy legs, marinate them in olive oil, lemon juice, garlic, and herbs for 4–6 hours or overnight.
- Short on time? Go with a dry rub. Coat the legs with oil and massage in the seasoning right before baking.
Either way, the goal is to let the flavors really sink in.
Essential Tools and Equipment
You don’t need a fancy kitchen setup to make amazing baked chicken legs, but having the right tools can make the process easier and give you better results.
Baking Tray or Dish
A sturdy, rimmed baking sheet or oven-safe dish is essential. Rimmed trays help keep any juices or melted fat from spilling over and creating a mess in your oven. You can also use a glass baking dish if that’s what you have on hand.
Wire Rack (Optional but Recommended)
Placing the chicken legs on a wire rack over your baking sheet helps the hot air circulate all around the chicken. This is the secret to getting that crispy skin—especially underneath. If you don’t have a rack, don’t worry. Just flip the chicken halfway through baking to crisp both sides.
Meat Thermometer
This tool is a game-changer. A digital meat thermometer ensures your chicken legs are cooked through without overcooking them. Chicken should be cooked to an internal temperature of 165°F (74°C), but for drumsticks, 175–180°F (79–82°C) gives a juicier result because of the extra connective tissue.
Other helpful items:
- Aluminum foil or parchment paper (for easy cleanup)
- Tongs for flipping
- Mixing bowl for seasoning
Step-by-Step Guide to Baking Chicken Legs
Now let’s dive into the actual cooking process. Follow this step-by-step guide, and you’ll be rewarded with juicy, flavorful, perfectly baked chicken legs every time.
Step 1: Preheat the Oven
Set your oven to 400°F (200°C). This is the sweet spot—hot enough to brown the skin and cook the meat without drying it out. Let it fully preheat before you put anything in.
Step 2: Season the Chicken
- In a bowl, toss the chicken legs with olive oil so the seasoning sticks.
- Add your spice mix (salt, pepper, garlic powder, onion powder, paprika, etc.).
- Use your hands or tongs to coat each leg evenly. Don’t be shy with the seasoning—chicken legs can handle bold flavors!
Step 3: Arrange on the Tray
- Line a baking sheet with foil or parchment paper.
- Place a wire rack on top, if using.
- Lay the chicken legs in a single layer, spaced out so they’re not touching. This helps them cook and crisp evenly.
Step 4: Bake
- Slide the tray into the center of the oven.
- Bake for 35–45 minutes, depending on size. Flip the legs halfway through cooking for even browning.
- Use a thermometer to check the thickest part. Look for 175°F (79°C) for tender, juicy meat.
Step 5: Broil (Optional)
Want extra crispy skin? Turn the oven to broil for the last 2–3 minutes. Keep a close eye on them—broiling works fast, and you don’t want them to burn.
Step 6: Rest Before Serving
Let the chicken rest for 5 minutes after baking. This allows the juices to redistribute, keeping the meat moist.
And that’s it! You just made golden, crispy, flavor-packed baked chicken legs with minimal effort.
Best Seasoning Blends for Chicken Legs
Let’s talk flavor. While a basic salt and pepper rub can go a long way, experimenting with spice blends is where the real fun begins. Here are some go-to favorites that’ll take your chicken to the next level:
Classic Garlic Herb Blend
- 1 tsp garlic powder
- 1 tsp dried thyme
- ½ tsp rosemary
- 1 tsp paprika
- Salt and pepper to taste
Spicy Cajun Rub
- 1 tsp smoked paprika
- 1 tsp cayenne pepper
- ½ tsp oregano
- ½ tsp onion powder
- Salt and pepper to taste
Sweet & Smoky BBQ Mix
- 1 tbsp brown sugar
- 1 tsp smoked paprika
- ½ tsp chili powder
- ½ tsp mustard powder
- Salt and black pepper
Asian-Inspired Seasoning
- 1 tsp five spice powder
- 1 tsp garlic powder
- 1 tsp sesame oil (add after baking)
- Garnish with sesame seeds and green onions
You can also buy pre-mixed seasoning blends, but making your own means total control over taste and salt levels.
How Long to Bake Chicken Legs
Cooking time depends on a few factors like oven temperature, size of the chicken legs, and whether they’re bone-in or boneless.
Here’s a quick reference table:
| Oven Temperature | Baking Time |
|---|---|
| 350°F (175°C) | 45–50 minutes |
| 375°F (190°C) | 40–45 minutes |
| 400°F (200°C) | 35–40 minutes (ideal) |
| 425°F (220°C) | 30–35 minutes |
Always use a meat thermometer to be sure. The internal temperature should hit 175°F to 180°F (79–82°C) for drumsticks. Higher than 165°F helps break down the connective tissue in the legs, making them more tender.
For ultra-crispy skin, increase the oven temp to 425°F during the last 10 minutes or hit them with a quick broil.
How to Get Crispy Skin
Crispy skin is what dreams are made of. But how do you get that golden-brown crunch in the oven?
Start Dry
Moisture is the enemy of crispiness. Pat the chicken dry with paper towels before adding oil or spices.
Use Oil or Fat
Coating the chicken in olive oil, avocado oil, or melted butter helps the skin brown evenly and crisp up during baking.
Don’t Overcrowd the Pan
Give each piece space. Crowded chicken means steaming instead of roasting. Use two trays if needed.
Cook at Higher Heat
Bake at 400°F or 425°F for best results. Or, broil for 2–3 minutes at the end to really crisp it up.
Use a Rack
A wire rack allows hot air to circulate underneath, helping the skin on all sides crisp up—not just the top.
Serving Suggestions
So you’ve baked the perfect chicken legs—crispy, juicy, and full of flavor. Now what? Time to serve them up with sides that complement the dish and turn your dinner into a full-on feast. Whether you’re keeping things casual or dressing it up for guests, here are some top-notch serving ideas.
Classic Comfort Sides
- Mashed Potatoes – Creamy mashed potatoes pair perfectly with baked chicken. Add a little garlic or sour cream for extra flavor.
- Corn on the Cob – Sweet, buttery corn is a nostalgic favorite and super easy to prepare alongside your chicken.
- Coleslaw – A crunchy slaw adds a cool, tangy contrast to the hot and savory chicken legs.
Healthy Pairings
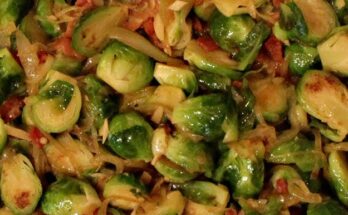
- Steamed Broccoli or Green Beans – Add color and nutrients with simple steamed veggies.
- Cauliflower Rice – Low-carb and surprisingly tasty when seasoned well.
- Garden Salad – Keep it fresh with lettuce, tomatoes, cucumbers, and a vinaigrette.
Starches and Grains
- Rice Pilaf – Add a little seasoning, toasted almonds, or dried cranberries for a flavor upgrade.
- Quinoa Salad – Great for a protein-packed, gluten-free side dish.
- Roasted Sweet Potatoes – Naturally sweet and delicious with a little cinnamon or chili powder.
Want to get fancy? Drizzle some balsamic glaze over roasted veggies or serve your chicken legs over a bed of creamy polenta. Whether you go simple or gourmet, the right side dish makes your baked chicken meal unforgettable.
How to Store Leftovers
Got leftovers? Lucky you! Baked chicken legs store really well and are just as tasty the next day—if not better. Here’s how to keep them fresh and flavorful:
Refrigeration Tips
- Let the chicken legs cool down completely before storing.
- Place them in an airtight container or wrap tightly in aluminum foil.
- Store in the fridge for up to 4 days.
Reheating Instructions
- Oven Method (Best for Crispy Skin): Preheat oven to 375°F (190°C), place chicken on a baking tray, and cover loosely with foil. Heat for about 15–20 minutes.
- Microwave Method (Faster but Less Crispy): Place on a microwave-safe plate, cover with a damp paper towel, and heat in 30-second intervals until hot.
- Air Fryer: Perfect for reheating while keeping the outside crispy. Just 5–6 minutes at 350°F (175°C) should do the trick.
Freezing for Later
- Wrap each chicken leg individually in foil or plastic wrap.
- Place in a freezer-safe bag or container.
- Label with the date and freeze for up to 3 months.
- To thaw, move to the fridge overnight before reheating.
Keeping leftovers means less cooking during the week, and baked chicken legs are versatile enough to repurpose into wraps, salads, or even sandwiches.
Common Mistakes to Avoid
Even a simple recipe like baked chicken legs can go sideways if you’re not careful. Here are a few common pitfalls and how to dodge them:
1. Overcrowding the Pan
This is the most common mistake. When the chicken pieces are too close together, they steam instead of roast. Always leave space between the legs for proper air circulation and even browning.
2. Not Drying the Chicken First
If the skin is wet, it won’t crisp up. Pat those chicken legs dry with paper towels before seasoning and baking. Moisture = soggy skin.
3. Underseasoning
Chicken legs can handle strong flavors, so don’t be afraid to go bold. Skimping on salt or spices leads to bland results.
4. Not Checking Internal Temperature
Guesswork is risky. Invest in a digital meat thermometer. Cooking just a few degrees under or over can mean the difference between juicy and dry chicken.
5. Forgetting to Rest the Chicken
Resting for just 5 minutes after baking helps lock in the juices. Cut into it too soon, and they’ll all run out onto the plate.
Avoid these rookie errors, and you’ll master baked chicken legs in no time.
Variations of the Recipe
The great thing about baked chicken legs? They’re a blank canvas. You can take the same cooking method and switch up the flavors to create entirely new dishes. Here are some mouthwatering variations to try:
1. BBQ Baked Chicken Legs
- Brush with your favorite BBQ sauce during the last 10 minutes of baking.
- Use hickory-smoked seasoning for that backyard-grill flavor.
- Serve with baked beans and coleslaw.
2. Honey Garlic Chicken Legs
- Mix 2 tbsp honey, 1 tbsp soy sauce, and 1 tsp minced garlic.
- Brush over the chicken halfway through baking and again before serving.
- Add a sprinkle of sesame seeds for a finishing touch.
3. Lemon Pepper Chicken Legs
- Marinate with lemon juice, lemon zest, and freshly ground pepper.
- Add garlic and thyme for an herby kick.
- Serve with roasted potatoes or couscous.
4. Buffalo-Style Chicken Legs
- Coat with buffalo sauce before and after baking.
- Serve with blue cheese or ranch dressing and celery sticks.
- Great for game day or party platters.
Each variation brings something different to the table—literally. You’ll never get bored of baked chicken legs with these flavor twists.
Nutritional Breakdown
Wondering what you’re really eating? Baked chicken legs are pretty balanced, especially if you don’t overload on sauces or extra fats. Here’s a general breakdown per serving (1 large chicken leg with skin, about 150g):
| Nutrient | Amount |
|---|---|
| Calories | ~220–250 kcal |
| Protein | ~22–25g |
| Fat | ~15g |
| Carbohydrates | 0–2g (depends on seasoning) |
| Fiber | 0g |
| Sugars | 0–1g (from sauces) |
To make the dish healthier:
- Remove the skin before eating (reduces fat)
- Use low-sodium seasonings
- Bake without added sugar or sweet sauces
Paired with vegetables or a fresh salad, this dish easily fits into a balanced diet.
FAQs about Baked Chicken Legs Recipe
1. Can I use chicken thighs instead of legs?
Yes, you can! Chicken thighs work great with the same seasonings and method. Just adjust the cooking time slightly—boneless thighs may cook a bit faster.
2. Should I marinate the chicken overnight?
If you have the time, absolutely. Marinating overnight allows flavors to sink in deeper. But even 30 minutes of marinating can make a noticeable difference.
3. What’s the best temperature to bake chicken legs?
400°F (200°C) is the sweet spot. It cooks the meat evenly and helps develop crispy skin. You can also go up to 425°F for faster cooking and extra crispiness.
4. How do I know when the chicken legs are done?
Use a meat thermometer. The internal temperature should reach 175°F–180°F (79–82°C) for juicy, fully cooked chicken legs.
5. Can I bake frozen chicken legs?
Technically, yes, but it’s not ideal. They won’t cook evenly and may turn out rubbery. It’s best to fully thaw chicken legs in the fridge before baking for the best results.
Conclusion
There you have it—the ultimate guide to baked chicken legs. From selecting the right ingredients and prepping like a pro to mastering crispy skin and experimenting with flavor, you now have everything you need to make this dish your own.
Baked chicken legs are affordable, easy, and endlessly customizable. Whether you’re cooking for your family, friends, or just yourself, this recipe brings flavor and comfort to any table. Once you try it, it’s bound to become a go-to in your kitchen.
So fire up that oven, season those legs, and let your cooking skills shine. Dinner is about to get a whole lot tastier.