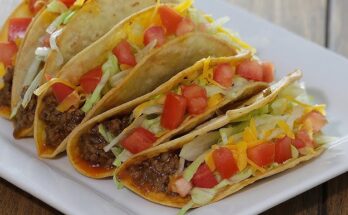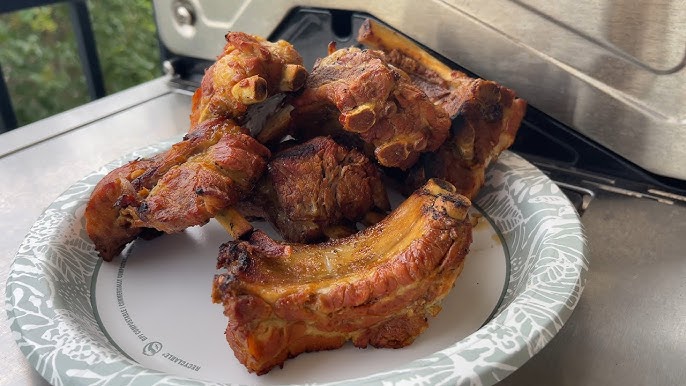
Baby Back Rib Recipe: There’s just something magical about a rack of baby back ribs, right? They’re the ultimate comfort food, perfect for summer barbecues, weekend family dinners, or even those chilly evenings when all you want is a hearty, flavor-packed meal. Juicy, smoky, and tender enough to fall off the bone, baby back ribs have earned their place as a backyard BBQ legend. But here’s the deal—you don’t need a fancy smoker or a degree in culinary arts to make killer ribs at home.
In fact, with a bit of prep, the right ingredients, and a few insider tips (which we’re about to cover), anyone can turn a simple rack of ribs into a mouthwatering masterpiece. Whether you’re a BBQ newbie or a seasoned grill master, this guide breaks it all down step by step so you can cook with confidence. Let’s get into the juicy details.
What Are Baby Back Ribs?
So, what exactly are baby back ribs? No, they’re not from baby pigs. The term “baby” just refers to the size—they’re smaller, more tender, and leaner than spare ribs. Baby back ribs come from the upper part of the pig’s ribcage, right where the ribs meet the spine. They’re curved, meaty, and usually weigh about 1.5 to 2 pounds per rack. That makes them ideal for quick cooking and easy eating.
They’re loved for their tenderness and sweet, mild pork flavor. And when cooked properly—whether in the oven, on the grill, or in a smoker—they become insanely juicy with a gorgeous caramelized crust on the outside. Plus, they’re pretty versatile. You can go with a classic BBQ rub, experiment with international flavors, or smother them in your favorite sauce. No matter how you do it, the result is always crave-worthy.
Difference Between Baby Back Ribs and Spare Ribs
Before we jump into the recipe, let’s clear up one of the most common questions: what’s the difference between baby back ribs and spare ribs?
| Feature | Baby Back Ribs | Spare Ribs |
|---|---|---|
| Location on Pig | Near the spine (upper ribs) | Lower ribs (toward belly) |
| Size & Shape | Smaller, curved, lean | Larger, flatter, meatier |
| Cooking Time | Cooks quicker | Takes longer |
| Flavor | Milder, more tender | Richer, more flavorful |
| Popular Uses | Oven-baking, grilling | Smoking, BBQ competitions |
Spare ribs are definitely tasty, but baby backs are usually more approachable for home cooks because they cook faster and require less trimming. Plus, their tenderness makes them a favorite for first-time rib makers.
What Makes the Perfect Baby Back Rib?
Want to know the secret to jaw-dropping, fall-off-the-bone ribs? It comes down to three key things:
- Low and slow cooking – Ribs need time to become tender. You can’t rush greatness.
- Flavorful dry rub – This is your flavor foundation. A good rub brings the pork to life.
- Finishing sauce – Whether it’s tangy, sweet, spicy, or smoky, a quality sauce adds that glossy, sticky deliciousness.
But here’s the kicker: technique matters just as much as ingredients. That’s why we’re walking you through the full process—no steps skipped, no secrets left behind.
List of Ingredients You’ll Need
Time to stock your kitchen! Here’s everything you’ll need to whip up the perfect rack of baby back ribs.
Dry Rub Ingredients
This is where the flavor magic begins. Mix these up in a bowl:
- 1/4 cup brown sugar
- 1 tbsp smoked paprika
- 1 tsp garlic powder
- 1 tsp onion powder
- 1 tsp ground black pepper
- 1 tsp salt
- 1/2 tsp chili powder
- 1/2 tsp cayenne pepper (optional for heat)
- 1/2 tsp mustard powder
BBQ Sauce Ingredients (Optional but Recommended)
You can use store-bought BBQ sauce, or make your own:
- 1 cup ketchup
- 1/4 cup apple cider vinegar
- 1/4 cup brown sugar
- 1 tbsp Worcestershire sauce
- 1 tbsp honey or maple syrup
- 1 tsp smoked paprika
- 1/2 tsp black pepper
- Dash of hot sauce (optional)
Other Essentials for Cooking
- 1–2 racks of baby back ribs
- Aluminum foil
- Baking sheet or roasting pan
- Wire rack (optional)
- Basting brush
- Meat thermometer
- Olive oil or mustard (to help the rub stick)
Tools You’ll Need to Make Ribs Like a Pro
You don’t need a state-of-the-art grill to make amazing ribs. Here’s what will make the process easier:
- Sharp knife (for trimming)
- Cutting board
- Oven or grill
- Tongs
- Foil wrap
- Basting brush or spoon
- Instant-read meat thermometer
Optional tools for serious rib lovers:
- Rib rack (keeps ribs upright for even cooking)
- Smoker box or wood chips (if grilling or smoking)
How to Choose the Best Baby Back Ribs at the Store
Not all ribs are created equal. Here’s how to pick the best rack:
- Look for even marbling – Fat = flavor. A good balance of meat and fat is ideal.
- Avoid “enhanced” ribs – Some are injected with saline. Check the label and avoid those if possible.
- Pick a fresh, pink color – Stay away from grayish or slimy ribs.
- Size matters – A rack around 2 pounds is perfect for feeding 2-3 people.
Pro tip: Ask your butcher to remove the membrane for you to save time at home.
How to Prep Your Ribs for Cooking
Prepping your ribs right is half the battle. Here’s what to do:
Removing the Membrane
On the back of the ribs, there’s a thin, silver skin-like membrane. It’s chewy and prevents flavor from soaking in. Here’s how to get rid of it:
- Flip the ribs bone-side up.
- Use a butter knife to lift the edge of the membrane.
- Grab it with a paper towel (for grip), then peel it off in one pull.
Trimming and Cleaning
- Rinse your ribs under cold water and pat dry with paper towels.
- Trim off excess fat or loose flaps of meat.
Now you’re ready for seasoning!
Making the Perfect Dry Rub (Flavor Foundation)
The dry rub is the flavor backbone of your baby back ribs. Think of it like a BBQ seasoning massage—it’s where the magic begins. A great dry rub not only infuses the meat with rich, savory notes but also creates that crave-worthy bark (crispy crust) as the ribs cook. The beauty of making your own rub? You get to control the flavor. Like it spicy? Add more cayenne. Want a smoky edge? Up the smoked paprika.
Let’s break down what each ingredient does:
- Brown sugar – Adds sweetness and helps with caramelization.
- Smoked paprika – Delivers depth and smokiness.
- Garlic & onion powder – Bring that savory, umami base.
- Salt & pepper – Essential for balance and punch.
- Chili & cayenne pepper – Add heat and complexity.
- Mustard powder – Gives a tangy bite that cuts through the richness.
Once you’ve mixed everything together, sprinkle it generously on both sides of the ribs. Don’t be shy—get in there with your hands and rub it deep into every nook and cranny. Want extra flavor? Let the ribs rest with the rub for a few hours in the fridge, or overnight if you’ve got time. This “marinating” allows the seasoning to soak deep into the meat.
Pro tip: Add a light coat of yellow mustard or olive oil before applying the rub. It helps the spices stick better and creates a flavorful crust during cooking.
Step-by-Step Guide to Cooking Baby Back Ribs
Now for the fun part—cooking those ribs! There are three popular ways to cook baby back ribs, and each one offers a slightly different flavor and texture. Let’s explore your options.
Option 1: Oven-Baked Ribs
Perfect for beginners or when the weather isn’t grill-friendly. Oven-baked ribs come out tender and juicy if done low and slow.
Option 2: Grilled Ribs
If you love that smoky char and slightly crispy edges, the grill is your best friend. You can use direct or indirect heat methods, but indirect gives the best results for tenderness.
Option 3: Smoked Ribs
For BBQ purists, smoking ribs over wood chips (like hickory, applewood, or mesquite) delivers unmatched flavor. This method takes time, but the payoff is phenomenal.
For this guide, we’ll walk you through the oven-baked method, which is the easiest and most accessible way to get incredible ribs at home.
Oven-Baked Baby Back Ribs Recipe – Full Instructions
Alright, here’s your complete, foolproof oven-baked rib guide. Follow these steps exactly and get ready for mind-blowing results.
Step 1: Preheat & Prep
- Preheat your oven to 300°F (150°C).
- Line a baking sheet with foil and place a wire rack on top (optional but helps airflow).
- Lay out your seasoned ribs on the foil, bone-side down.
If you’re cooking multiple racks, make sure they don’t overlap. Each rack needs space to cook evenly.
Step 2: Apply Rub & Marinate
- Coat your ribs with olive oil or mustard.
- Generously apply the dry rub on both sides.
- Wrap the ribs tightly in aluminum foil to lock in moisture.
- Let them rest for at least 30 minutes at room temperature, or refrigerate for up to 12 hours for deeper flavor.
Step 3: Bake Low & Slow
- Place foil-wrapped ribs in the preheated oven.
- Bake for 2.5 to 3 hours, depending on thickness.
- After baking, remove from the oven and let them rest in the foil for 10–15 minutes. This helps the juices redistribute and keeps them extra juicy.
Step 4: Add Sauce & Broil
- Carefully unwrap the ribs (they’ll be hot and tender).
- Brush a generous layer of your favorite BBQ sauce on both sides.
- Place the ribs back on the baking sheet, uncovered.
- Turn the oven to broil and cook for 5–7 minutes, watching closely so the sauce caramelizes but doesn’t burn.
And that’s it—your ribs are ready to serve!
How Long Should You Cook Baby Back Ribs?
Cooking time is critical when it comes to ribs. Undercooked ribs are tough and chewy. Overcooked ribs fall apart before you can even plate them. So, how do you get it just right?
Here’s a quick time guide:
| Cooking Method | Temperature | Time |
|---|---|---|
| Oven (wrapped) | 300°F / 150°C | 2.5 to 3 hours |
| Grill (indirect heat) | 275°F / 135°C | 2 to 3 hours |
| Smoker | 225°F / 107°C | 5 to 6 hours |
For oven cooking, aim for 2.5 to 3 hours wrapped in foil. This locks in moisture and slowly breaks down the connective tissue, resulting in ultra-tender meat.
How to Tell When Your Ribs Are Done
No one wants to cut into a rack of ribs only to find out they’re still tough. Here’s how to know your ribs are done:
- Meat Shrinkage: The meat pulls back from the bones about 1/4 to 1/2 inch.
- Bend Test: Pick up the ribs with tongs in the center. If the meat cracks slightly but doesn’t fall apart, they’re ready.
- Toothpick Test: Slide a toothpick between the bones. If it goes in easily, they’re tender.
- Internal Temp: Technically, pork is safe at 145°F (63°C), but ribs are best at 190–203°F (88–95°C) for max tenderness.
Don’t rush this step. Ribs that are undercooked will feel rubbery and chewy. Trust the process and your ribs will reward you.
Best BBQ Sauces to Use (Homemade or Store-Bought)
Sauce or no sauce? That’s the eternal BBQ debate. Some purists argue that a well-seasoned rib doesn’t need sauce, but let’s be honest—a sticky, sweet, tangy glaze can take things to a whole new level. The sauce is like the final coat of paint on your rib masterpiece.
Here’s a breakdown of your options:
Homemade BBQ Sauce (Recommended)
If you want full control over flavor, homemade is the way to go. It’s surprisingly easy to make and you probably already have most of the ingredients in your pantry. Here’s a simple go-to recipe:
Ingredients:
- 1 cup ketchup
- 1/4 cup apple cider vinegar
- 1/4 cup brown sugar
- 2 tbsp Worcestershire sauce
- 1 tbsp molasses or honey
- 1 tsp smoked paprika
- 1/2 tsp garlic powder
- 1/2 tsp onion powder
- A dash of hot sauce (optional)
Instructions:
- Combine all ingredients in a saucepan.
- Simmer on low heat for 10–15 minutes until thickened.
- Taste and adjust sweetness, heat, or tang to your liking.
This sauce stores well in the fridge for up to a week.
Best Store-Bought BBQ Sauces
Short on time? There are some excellent bottled options out there. Here are a few top picks:
- Sweet Baby Ray’s – Rich, sweet, and classic.
- Stubbs Original – Tangy with a smoky backbone.
- Bone Suckin’ Sauce – Great balance of sweet and vinegar.
- KC Masterpiece – Thick and smoky with a bold flavor.
Try a few different ones to see which you like best. Some people even mix store-bought sauces with their own spices for a semi-homemade twist.
Side Dishes That Go Perfectly with Baby Back Ribs
You’ve nailed the ribs—now let’s build the perfect plate. The right side dishes can elevate your meal from “pretty good” to “absolutely unforgettable.” Here are some of the best pairings:
Classic BBQ Sides
- Coleslaw – Crunchy, creamy, and cool—it balances the richness of the ribs.
- Cornbread – A little sweet, a little savory. Soaks up all that extra BBQ sauce.
- Mac and Cheese – Comfort food to the max.
- Potato Salad – Especially good with a tangy mustard-based dressing.
- Baked Beans – Smoky and sweet beans are a BBQ staple.
Fresh & Light Sides
- Grilled Corn on the Cob – Slather with butter and a sprinkle of chili lime.
- Garden Salad – A crisp, refreshing contrast to the heavy ribs.
- Roasted Veggies – Carrots, Brussels sprouts, or sweet potatoes are great choices.
Fun & Unexpected Add-Ons
- Pickles or Pickled Red Onions – A zingy, acidic punch that cuts through the fat.
- Fruit Salad or Grilled Pineapple – Sweetness that complements the BBQ.
- Garlic Bread – Because… carbs and BBQ go hand in hand.
No matter what sides you choose, just make sure they complement the flavors and keep things balanced.
Tips & Tricks for Fall-Off-The-Bone Tender Ribs
Want to make ribs that practically melt in your mouth? It’s all about technique. These tips will take your rib game from “meh” to “master.”
1. Remove the Membrane
It’s a thin, tough layer on the bone side of the ribs. Removing it ensures better texture and allows the rub to penetrate deeper.
2. Use a Dry Rub First
Don’t skip the rub. It seasons the meat deeply and helps form that crispy bark on the outside.
3. Low and Slow Is the Way to Go
Whether you’re baking, grilling, or smoking, cook at a low temperature (225°F–300°F) for several hours. Rushing ribs is a big no-no.
4. Wrap Them Up
Use foil (or butcher paper if smoking) to lock in moisture during cooking. It creates a steamy environment that makes the meat tender.
5. Sauce at the End
Never sauce ribs too early—they’ll burn. Wait until the last 10–15 minutes and broil or grill until caramelized.
6. Rest Before Slicing
Let ribs rest after cooking. This keeps juices inside and makes slicing easier.
7. Use a Thermometer
Don’t rely solely on time. Internal temp for fall-apart ribs should be around 190°F–203°F.
Common Mistakes to Avoid
Everyone makes mistakes—especially with ribs. But you don’t have to! Watch out for these common errors:
1. Skipping the Membrane Removal
If you leave it on, you’ll end up with chewy, rubbery ribs. Always remove it for best results.
2. Cooking Too Hot and Fast
High heat cooks ribs unevenly and dries them out. Keep the temperature low and consistent.
3. Not Wrapping in Foil
This step traps moisture and helps break down tough connective tissue. It’s key for tender ribs.
4. Applying Sauce Too Early
Sugar in BBQ sauce burns fast. Wait until the last few minutes of cooking to add it.
5. Overcooking or Undercooking
Use the bend test, toothpick test, or a thermometer to get it just right.
6. Forgetting to Rest
Letting ribs rest allows juices to settle, making them juicier and easier to handle.
How to Store & Reheat Leftover Ribs
Made more than you can eat? Lucky you. Leftover ribs are just as delicious the next day if you store and reheat them properly.
Storing Ribs
- Fridge: Wrap tightly in foil or place in an airtight container. Use within 3–4 days.
- Freezer: Wrap in foil and place in a freezer-safe bag. Can last up to 3 months.
Reheating Ribs (Without Drying Them Out)
Oven Method (Best)
- Preheat to 250°F.
- Wrap ribs in foil with a splash of water or broth.
- Heat for 20–30 minutes until warmed through.
Grill Method
- Wrap in foil and place over indirect heat.
- Warm for 10–15 minutes.
Microwave (Last Resort)
- Cover ribs with a damp paper towel.
- Microwave in 30-second intervals.
Avoid blasting them with high heat or they’ll dry out.
FAQs about Baby Back Rib Recipe
1. What’s the best temperature for cooking baby back ribs?
Low and slow is the key. For oven or grill, aim for 275–300°F. For smoking, 225°F works best.
2. Can I cook ribs in an air fryer?
You can, but results vary. Air fryers work best for reheating or finishing ribs. They don’t do “low and slow” well.
3. How do I make ribs more tender?
Wrap them in foil, cook at a low temp for several hours, and don’t skip the resting period.
4. Can I freeze leftover ribs?
Absolutely! Wrap them tightly in foil, then in a freezer-safe bag. Reheat in the oven for best results.
5. What wood is best for smoking ribs?
Hickory, applewood, and cherry are top choices. Hickory gives strong smoky flavor; apple and cherry are milder and slightly sweet.
Conclusion
Making perfect baby back ribs at home isn’t just doable—it’s fun and seriously rewarding. With the right cut of meat, a killer rub, and a patient “low and slow” cooking method, you’ll be serving up juicy, fall-off-the-bone ribs that rival any BBQ joint in town.
Whether you go sauce-heavy, prefer a dry rub finish, or experiment with smoking and grilling, there’s endless room for creativity. Just remember: good BBQ isn’t about perfection—it’s about flavor, love, and feeding people you care about.
So, get your hands dirty, fire up that oven or grill, and dig into the best rack of ribs you’ve ever made. You’ve got this.