Arm Roast Recipe: When it comes to hearty, comforting meals that feel like a warm hug on a plate, an arm roast is the ultimate winner. This underrated cut of beef, when cooked right, transforms into a juicy, tender, flavor-packed roast that will leave everyone at the table impressed and satisfied. Whether you’re cooking for Sunday dinner or planning a special family meal, this step-by-step arm roast recipe is all you need.
Let’s walk through the full process—from picking the right ingredients to slicing into that perfect piece of roast. No fluff, no confusing jargon. Just real, practical steps and pro tips to help you make the best arm roast ever.
Ingredients You’ll Need
A great arm roast starts with simple, quality ingredients. Here’s everything you’ll need to make it memorable:
Basic Ingredients for Arm Roast
- Beef Arm Roast (3 to 5 lbs) – The star of the show. Look for marbling; it means more flavor.
- Kosher Salt and Freshly Ground Black Pepper – Don’t skimp here; this forms your flavor foundation.
- Garlic (4–6 cloves, minced or smashed) – Garlic adds bold flavor and depth.
- Yellow Onion (1 large, sliced) – Adds natural sweetness when slow-cooked.
- Carrots (3–4, peeled and chopped) – For a touch of earthy sweetness.
- Celery (2–3 stalks, chopped) – Balances the sweetness of the carrots.
- Beef Broth or Stock (2–3 cups) – The liquid gold that keeps everything moist and flavorful.
- Olive Oil (2 tbsp) – Used for searing and sautéing.
- Thyme & Rosemary (fresh or dried) – These herbs complement beef beautifully.
- Bay Leaf (1 or 2) – Adds a background layer of flavor.
Optional Add-ins for Enhanced Flavor
- Red Wine (½ cup) – Adds richness and depth (optional but highly recommended).
- Tomato Paste (1 tbsp) – A spoonful can boost umami flavor.
- Mushrooms (sliced) – They soak up flavor and add a meaty texture.
- Potatoes (Yukon gold or red potatoes) – Throw them in for a complete one-pot meal.
Choosing the Right Cut of Meat
An arm roast comes from the shoulder part of the cow, which means it’s naturally tougher than other cuts like ribeye—but that’s actually a good thing. Why? Because with slow, low cooking, all that connective tissue breaks down into juicy, flavorful tenderness.
Pro Tip: If you’re buying from a butcher, ask for a well-marbled roast between 3–5 pounds. Too lean, and you risk dryness. Too fatty, and it can turn greasy.
Preparation Tips Before Cooking
Making the perfect arm roast doesn’t just start when it hits the heat. It begins with smart prep—because the little details make a big difference in the final result.
How to Properly Marinate Your Arm Roast
While not always necessary, marinating your roast can seriously amplify flavor. If you have time, try marinating it overnight in a mix of:
- Olive oil
- Red wine
- Garlic
- Worcestershire sauce
- Herbs like rosemary, thyme, and oregano
Place the roast in a resealable bag or a covered dish in the fridge. Flip it once or twice for even flavor distribution.
Shortcut? Rub the seasoning on 30 minutes before cooking and let it sit at room temp.
Prepping Your Vegetables
Veggies are more than just filler—they soak up the beefy juices and add richness. Here’s how to prep them:
- Chop carrots and celery into even pieces so they cook at the same rate.
- Slice onions into thick wedges—they’ll melt into the broth and add sweetness.
- If using potatoes, cut them in large chunks to prevent them from falling apart.
Don’t be afraid to get creative with your mix-ins. Parsnips, rutabaga, turnips—go wild if you love root veggies!
Best Tools and Equipment to Use
A great roast is as much about the method as the ingredients. Make sure you have:
- A heavy-bottomed Dutch oven or cast iron pot – Ideal for searing and slow braising.
- Tongs – For flipping and handling hot meat.
- Meat thermometer – Internal temperature matters more than time.
- Cutting board and sharp knife – Essential for slicing after the roast rests.
- Slow cooker or Instant Pot (optional) – Perfect for hands-off cooking days.
Step-by-Step Guide to Cooking Arm Roast
Making an arm roast isn’t complicated, but timing and technique matter. Follow these steps exactly, and you’ll be pulling a fork-tender, mouthwatering roast out of your oven or slow cooker in no time.
Step 1: Season the Roast Generously
Begin with a well-marbled beef arm roast, around 3–4 pounds. Pat it dry with paper towels and season liberally with salt, black pepper, garlic powder, and a touch of paprika. Don’t be shy—good seasoning builds the foundation of flavor.
Step 2: Sear the Roast for Flavor Lock-in
Heat a heavy-bottomed pot or Dutch oven over medium-high heat. Add a little oil and sear the roast on all sides until deep golden brown. This caramelization adds richness and depth that’ll pay off later.
Step 3: Create a Flavor Base with Aromatics
Remove the roast and sauté chopped onions, carrots, and celery in the same pot. Stir until softened and fragrant, scraping up the browned bits from the bottom—those are flavor gold.
Step 4: Add Liquid and Start the Slow Cooking
Return the roast to the pot and pour in about 2 cups of beef broth, red wine, or a mix of both. Add herbs like thyme and bay leaves. Bring it to a gentle simmer.
Step 5: Cook Low and Slow – Patience is Key
Cover the pot and cook on low heat (or in a 325°F oven) for 2½ to 3 hours until fork-tender.
Step 6: Check Doneness and Tenderness
When the roast easily pulls apart with a fork, it’s ready.
Step 7: Rest the Roast Before Slicing
Remove from heat and let it rest for 10–15 minutes. This allows the juices to redistribute, keeping every slice moist and flavorful. Serve with the rich pan gravy.
Best Cooking Methods for Arm Roast
There’s more than one way to cook a killer arm roast. Depending on your schedule and equipment, here’s how you can pull it off like a pro.
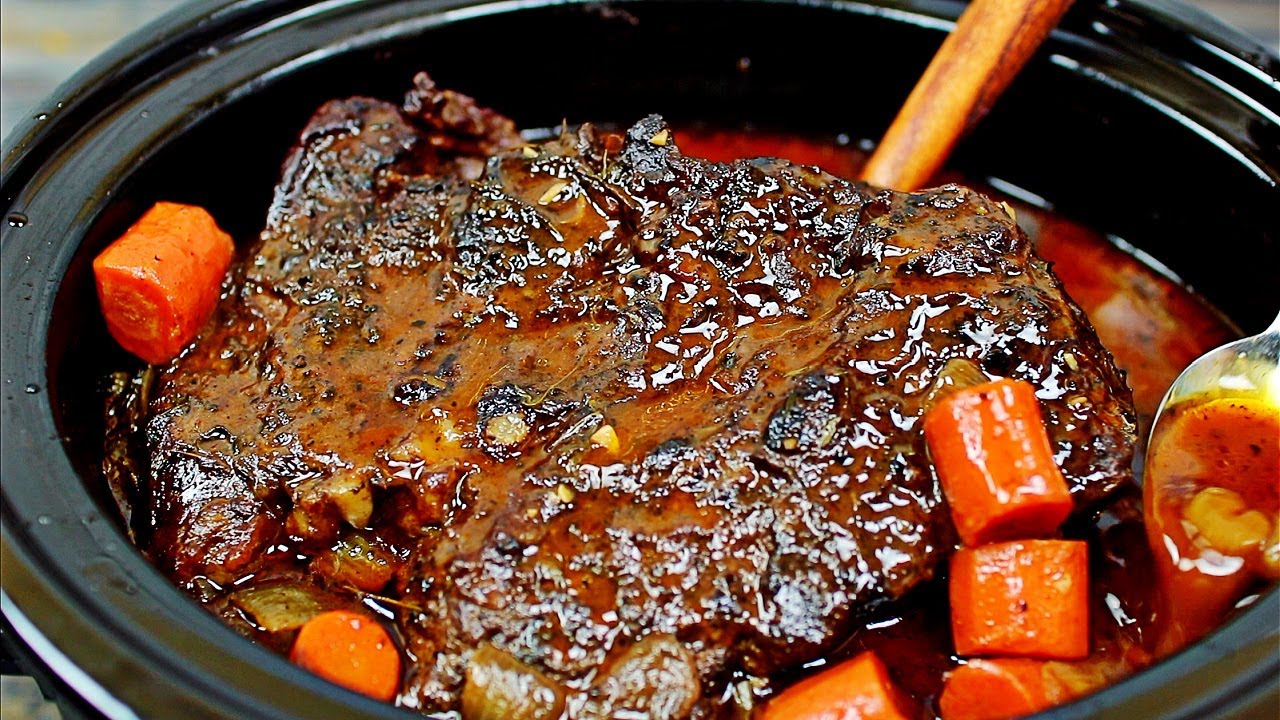
Slow Cooker Method
This is the ultimate set-it-and-forget-it approach. Just sear your meat first (do it—it’s worth the extra pan), then add everything to the slow cooker.
Steps:
- Place veggies and aromatics in the bottom.
- Add the seared roast on top.
- Pour in broth and wine.
- Cover and cook on low for 8–10 hours or high for 5–6 hours.
You’ll come home to a kitchen that smells like heaven.
Oven-Braised Method
This is the classic, old-school method—and honestly, it’s my favorite.
Steps:
- Use a Dutch oven.
- Sear the roast and build the base as described earlier.
- Add liquid, cover tightly, and transfer to a preheated oven at 300°F (150°C).
- Cook for 3 to 4 hours, checking occasionally.
The oven creates a slow, even heat that makes for incredibly tender meat and deep flavor.
Instant Pot/Pressure Cooker Method
Short on time? No problem. The Instant Pot is your best friend.
Steps:
- Use “Sauté” mode to sear the roast.
- Sauté veggies, deglaze the pot.
- Add roast, broth, and herbs.
- Pressure cook on High for 75–90 minutes depending on the size of your roast.
- Allow natural pressure release for 15–20 minutes.
You still get tender, juicy roast in a fraction of the time.
What to Serve with Arm Roast
An arm roast is rich, meaty, and savory—which means you’ll want sides that balance out that flavor. The good news? It goes with almost anything, whether you’re aiming for comfort food vibes or keeping things light.
Classic Sides that Pair Perfectly
If you’re going traditional, these are your go-to sides that always complement the deep flavors of a slow-cooked roast:
- Mashed Potatoes – Creamy and buttery, they soak up the rich gravy like a sponge.
- Buttered Green Beans – Simple, crisp, and fresh to cut through the heaviness.
- Roasted Brussels Sprouts – Caramelized and nutty, they add a beautiful texture.
- Dinner Rolls or Crusty Bread – Ideal for mopping up those flavorful juices.
- Gravy – Make it with the pan drippings for next-level deliciousness.
Pro Tip: Use the leftover braising liquid and veggies as a built-in gravy. Just blend it or reduce it on the stovetop until thickened.
Low-Carb and Keto-Friendly Options
Trying to cut back on carbs or follow a keto plan? No worries—arm roast fits perfectly into that lifestyle. Pair it with:
- Cauliflower Mash – Creamy and satisfying, just like the real deal.
- Zucchini Noodles – A light, fun base to catch the juices.
- Sautéed Spinach or Kale – Adds nutrients and bright color to your plate.
- Cabbage Steaks – Roasted with olive oil and garlic for a meaty texture.
These options give you all the richness of the roast without the starchy heaviness.
Make-Ahead Tips for Busy Days
Want to get a head start on your meal? Here’s how:
- Chop all your veggies the night before and store in airtight containers in the fridge.
- Season and marinate the roast overnight so it’s packed with flavor by morning.
- Use a slow cooker timer to start cooking mid-day if you’re not home.
- Make and refrigerate the full meal up to 2 days in advance—flavors only get better.
Trust me, the leftovers will be just as good (if not better) than the first day.
Storing and Reheating Leftovers
Got leftovers? Lucky you. Arm roast keeps beautifully, and there are so many ways to use it the next day.
How to Store Properly Without Drying Out
The key to keeping leftover roast juicy is moisture and airtight storage.
- Let the roast cool completely first.
- Store in an airtight container with some of the braising liquid—this prevents drying out.
- Refrigerate for up to 4 days, or freeze for up to 3 months.
Freezing tip: Use freezer-safe bags and squeeze out all the air. Lay flat for easier stacking.
Reheating Tips for Best Flavor
Don’t just nuke your leftovers! That’s a fast track to dry beef. Instead:
- Stovetop method: Simmer gently in a covered pan with a splash of broth until warmed through.
- Oven method: Cover tightly with foil and heat at 300°F for 20–30 minutes.
- Microwave (last resort): Use a microwave-safe dish with a lid or damp paper towel. Heat in short bursts.
Always reheat with moisture. That’s the secret to keeping the roast as tender as day one.
Creative Ways to Use Leftover Arm Roast
Leftovers don’t have to be boring. Reinvent them with these tasty ideas:
- Beef Tacos or Burritos – Shred and stuff in tortillas with salsa and cheese.
- BBQ Beef Sandwiches – Mix with barbecue sauce and pile onto buns with coleslaw.
- Beef Hash – Fry up chopped roast with potatoes, onions, and peppers.
- Beef & Veggie Soup – Simmer with broth, barley, or beans for a cozy bowl.
- Stir-Fry or Fried Rice – Chop and toss in a hot skillet with veggies and rice.
One roast, multiple meals. That’s how you stretch flavor and save time.
FAQs about Arm Roast Recipe
1. Can I cook arm roast without searing it first?
Yes, but you really shouldn’t. Searing locks in flavor and adds a deep, caramelized crust. If you’re short on time, you can skip it—but expect a slightly flatter taste.
2. How long should I cook a 3 lb arm roast?
That depends on your cooking method. In the oven at 300°F, expect about 3 to 3.5 hours. In a slow cooker on low, about 8 hours. Just make sure it’s fork-tender before serving.
3. What’s the difference between arm roast and chuck roast?
Both come from the shoulder area, but arm roast is a bit leaner and slightly firmer. Chuck roast has more marbling and fat. Both are great for slow cooking, but arm roast is a bit more structured when sliced.
4. How do I make my arm roast more tender?
Low and slow is key. Also, use enough liquid during cooking, let it rest after cooking, and slice against the grain. All of this ensures maximum tenderness.
5. Can I freeze leftover arm roast?
Absolutely! Let it cool completely, store with some braising liquid in a freezer-safe bag or container, and freeze for up to 3 months. Thaw in the fridge overnight and reheat gently with a splash of broth.
Conclusion
If you’ve made it this far, congrats—you’re officially ready to tackle the arm roast like a pro. From choosing the perfect cut and seasoning it to slow cooking it into tender perfection, every step of this guide is designed to help you master a meal that tastes like it came from grandma’s kitchen.
What makes arm roast so special is that it’s humble, affordable, and packed with flavor—when done right. And with this step-by-step guide, you’ve got all the tools you need to turn this underrated cut into a show-stopping dinner that’ll have everyone asking for seconds.
So go ahead—get that roast in the oven, grab your favorite side dishes, and enjoy the kind of comfort food that never goes out of style.
Bon appétit!