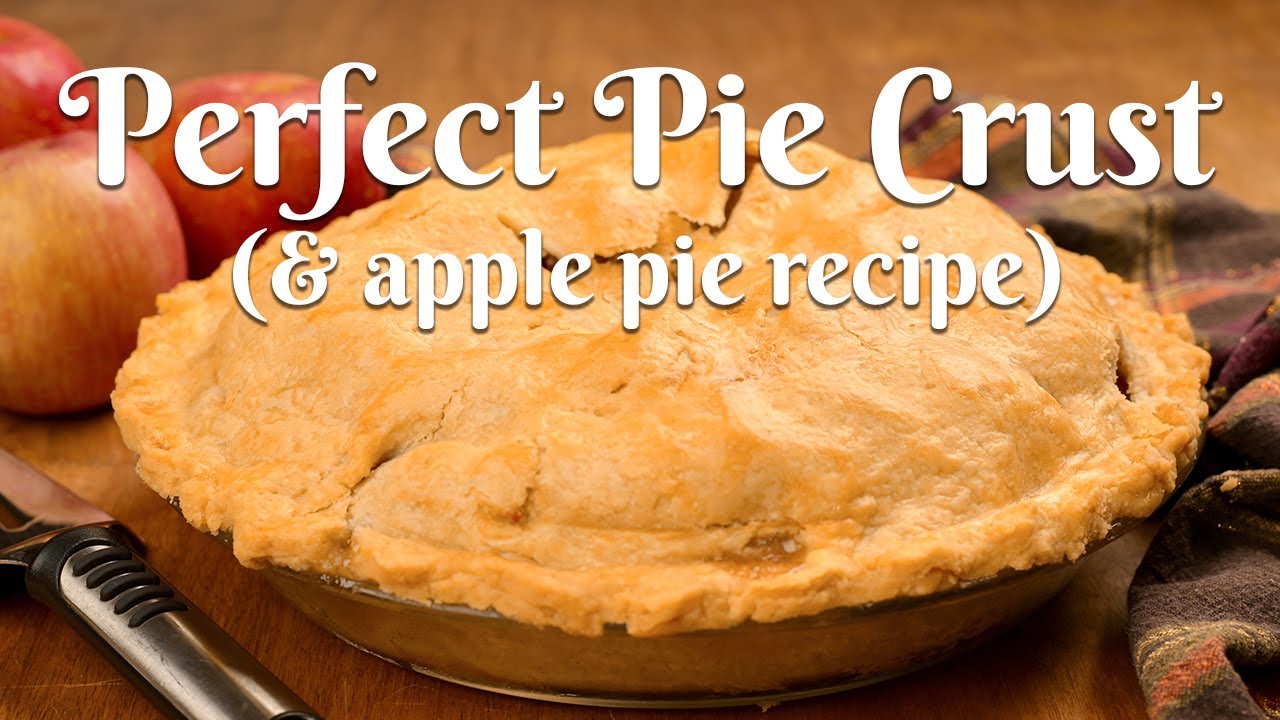
Apple Pie Crust Recipe: There’s something magical about a homemade apple pie, but let’s be honest—what really makes or breaks it is the crust. That golden, flaky, buttery shell isn’t just a container for your sweet apple filling. It’s the foundation, the structure, and in many ways, the heart of the pie. If your crust is soggy or too tough, even the best filling can’t save it. But when you get it right? Oh boy, it’s a slice of heaven.
In this guide, we’re going to demystify the process of making the perfect apple pie crust. Whether you’re a total beginner or you’ve tried and failed before, this step-by-step approach will make it easy. No fluff, just solid tips and a foolproof recipe that delivers every time. So, tie on that apron—we’re about to get baking.
Why the Crust Matters in Apple Pie
People often rave about the filling in an apple pie—cinnamon-sugar apples, tender and warm—but the crust is what takes the experience to the next level. Think about it: when you bite into a slice, the crust is the first and last thing you taste. A good crust balances the sweetness of the apples, offers texture, and holds everything together.
A poorly made crust can completely ruin the experience. If it’s too hard, it becomes a chore to chew through. If it’s too soft or soggy, it doesn’t provide any contrast to the filling. On the flip side, a perfect crust is light yet sturdy, slightly crisp but melt-in-your-mouth tender. It enhances the pie rather than overpowering or diminishing it.
When done right, the crust actually becomes the star of the show—crunchy edges, buttery flavor, and that rustic, golden look. That’s why taking a little extra time to get it just right is so worth it.
What Makes a Good Pie Crust?
So, what separates a mediocre crust from an amazing one? Three key factors: ingredients, technique, and temperature.
- Ingredients: The type and quality of ingredients you use directly affect the flavor and texture. Real butter gives the best taste, while flour choice can change how tender the crust is. Ice water is crucial to keeping the fat cold, which creates those glorious flaky layers.
- Technique: How you handle the dough makes a world of difference. Overmixing can result in a tough crust, while undermixing might leave it too crumbly. Learning to feel the dough’s texture is essential.
- Temperature: Cold is your best friend when making pie crust. Cold butter, cold water, even a chilled bowl if you can swing it. Keeping everything cold prevents the fat from melting before baking, which is what creates the flakiness we’re all chasing.
It’s not rocket science, but it’s a delicate balance of steps done right. Once you master it, you’ll never buy pre-made crusts again.
Essential Ingredients for Apple Pie Crust
Basic Ingredients You’ll Need
To create a buttery, flaky apple pie crust from scratch, you only need a handful of pantry staples. The trick lies not in the quantity, but the quality and proportions.
- All-purpose flour (2 ½ cups): It gives structure to the crust. Always spoon it into the measuring cup and level it off with a knife for accuracy.
- Unsalted butter (1 cup, chilled and diced): Butter is the flavor powerhouse. Unsalted gives you control over the salt content. Cut it into small cubes and refrigerate until use.
- Salt (1 tsp): Essential for enhancing the flavor of the crust.
- Granulated sugar (1 tbsp): Optional but adds a hint of sweetness that pairs well with apple filling.
- Ice water (6-8 tbsp): Keeps the dough together without warming the butter. Always use ice-cold water.
This is the classic foundation. Stick with these, and you’re already on your way to pie crust success.
Optional Add-Ins for Enhanced Flavor
If you’re feeling adventurous or want to tweak the flavor profile a bit, consider these additions:
- Cinnamon or nutmeg (¼ tsp): Adds a warm undertone that complements the apple filling.
- Apple cider vinegar (1 tsp): Helps tenderize the dough and gives a slight tang that offsets the sweetness.
- Lard or shortening (substitute half the butter): Some bakers swear by using half lard for a flakier texture.
But remember—simplicity is often the best route. If it’s your first time, go with the basic ingredients to get a feel for the process.
Tools and Equipment Needed
Kitchen Tools That Make It Easier
Sure, you can go old-school with just a fork and your hands, but having the right tools can make the process smoother and more efficient. Here’s what you’ll need:
- Mixing bowls: Preferably metal or glass to help keep the ingredients cool.
- Pastry cutter or fork: For cutting butter into the flour. If you don’t have one, two knives can work in a pinch.
- Rolling pin: Essential for rolling the dough evenly. If you don’t own one, a clean wine bottle will do.
- Plastic wrap: For chilling the dough. It keeps it moist and prevents drying out.
- Pie dish (9-inch): The final destination for your crust. Make sure it’s oven-safe.
- Measuring cups and spoons: Precision matters here.
You don’t need fancy equipment to make a great pie crust, but a few helpful tools can turn a potentially stressful process into a pleasant one.
Tips for Prepping Your Workspace
Before you dive in, spend a few minutes setting yourself up for success. Clear your counter and lightly flour the surface for rolling later. Have your ingredients measured and ready to go. Stick your butter in the freezer for 10 minutes before starting, and consider chilling your bowl too.
Creating a clean, cold, and organized environment makes it much easier to work fast—key to keeping the butter cold and the crust flaky.
Step-by-Step Instructions for Making Pie Crust
Step 1 – Mixing the Dry Ingredients
This is where the magic begins. In a large mixing bowl, combine 2 ½ cups of all-purpose flour, 1 tsp of salt, and 1 tbsp of sugar. Use a whisk or fork to ensure everything is evenly distributed. These dry ingredients form the base structure of your pie crust. The flour provides the body, the salt enhances flavor, and the sugar (though optional) adds a subtle sweetness that balances the savory butter and fruity filling.
It’s important to measure your flour accurately. Too much flour, and your crust will be dry and crumbly. Too little, and it’ll be sticky and hard to handle. Always use the spoon-and-level method—spoon flour into the measuring cup and level off with a knife. Don’t scoop directly from the bag; you’ll end up compacting it and throwing off your measurements.
By getting this step right, you set the tone for everything that follows. Don’t rush. Think of it as laying the foundation of a house—every good bake starts here.
Step 2 – Cutting in the Butter
Here’s where things start to get tactile. Grab your cold, diced butter from the fridge. Toss it into the dry mixture, and using a pastry cutter (or a fork, or even your fingers), start cutting it into the flour. The goal? To end up with a mixture that resembles coarse crumbs—pea-sized pieces of butter still visible.
This step is crucial because those chunks of butter are what will melt in the oven, creating steam pockets that lead to that beloved flakiness. If the butter melts now or is over-incorporated, the crust will turn out dense and tough.
A good tip: work quickly. Your hands are warm, and you don’t want that butter softening before it hits the oven. If you feel it getting too warm, pop the bowl in the fridge for a few minutes before continuing.
Some people prefer using a food processor for this step. It’s quicker and more consistent, but be careful not to over-pulse. Whether you go manual or electric, the key is to stop mixing once the flour and butter resemble a crumbly, textured mix—not a paste.
Step 3 – Adding Water and Forming Dough
Now comes the moment of transformation. Slowly add ice-cold water, one tablespoon at a time, to the butter-flour mix. Start with about 6 tablespoons, mixing gently with a fork or your hands after each addition. You want just enough water for the dough to come together without becoming wet or sticky.
Resist the urge to dump in all the water at once. Pie dough is fickle, and every batch of flour hydrates differently depending on the weather, humidity, and brand. Add the water gradually, just until you can press the dough together and it holds its shape without crumbling apart.
Once the dough is formed, divide it in half. Flatten each half into a disc about an inch thick and wrap tightly in plastic wrap. This makes it easier to roll out later and speeds up chilling. Remember, don’t knead the dough. You’re not making bread. Overworking activates the gluten in the flour and makes the crust tough instead of tender.
Step 4 – Chilling the Dough
Time for a break—both for you and the dough. Place your wrapped discs in the refrigerator for at least one hour, preferably two. If you’re not baking right away, the dough can be stored in the fridge for up to 3 days or in the freezer for 3 months.
Why is chilling so important? First, it allows the gluten to relax, which prevents the crust from shrinking during baking. Second, it firms up the butter again, ensuring that beautiful flakiness we talked about earlier.
Skipping this step might seem like a time-saver, but it’s not worth it. Unchilled dough is sticky, hard to handle, and bakes up greasy instead of crisp. So do yourself a favor and give it time to chill—your future pie will thank you.
Step 5 – Rolling Out the Dough
Once your dough is chilled and rested, it’s ready to roll—literally. Lightly flour a clean surface and place one disc of dough in the center. Sprinkle a little flour on top and start rolling from the center outward, rotating the dough every few rolls to maintain a circular shape.
Aim for a circle about 12 inches in diameter—big enough to fit a 9-inch pie dish with some overhang. If the edges crack as you roll, don’t panic. Gently pinch them back together or trim and patch as needed.
The key to rolling is gentle pressure and even movement. If the dough sticks, lift and flour underneath, but don’t overdo it—too much flour can toughen the crust. Once rolled, carefully transfer the dough to your pie dish by rolling it onto the pin and unrolling over the pan.
Ease it into the corners—don’t stretch it! Press gently so it molds to the shape. Trim any excess dough around the edges, leaving about an inch for crimping or folding. This is the base for your masterpiece.
Tips for a Flaky, Buttery Pie Crust
Cold Ingredients are Key
If there’s one golden rule in pie crust making, it’s this: keep everything cold. Why? Because cold ingredients—especially butter—are what create those dreamy, flaky layers. When chunks of cold butter hit the oven’s heat, they release steam. That steam creates little air pockets in the dough, which puff up into flakes as the crust bakes.
So how do you make sure everything stays chilly? Start by cutting your butter into cubes and popping it in the freezer for about 10 minutes before mixing. If your kitchen is especially warm, you can even chill your flour or mixing bowl. And when you’re adding water, make sure it’s ice-cold—we’re talking water straight from the fridge, maybe with a few ice cubes.
Working quickly is another way to maintain the cold. Don’t dawdle during mixing or rolling. If the dough starts to get sticky or greasy, that’s a sign the butter is melting. Just pause and put it in the fridge for 10–15 minutes. Trust me, the crust is worth the patience.
If you’re really serious about keeping things cool, use a marble rolling pin or countertop. Marble stays cold longer and helps keep your dough at the perfect temperature. Cold is your friend in pie crust making—embrace it.
Don’t Overwork the Dough
When it comes to pie crust, less is more—especially when mixing and handling the dough. Overworking it is one of the most common mistakes, and it’s what leads to a tough, chewy crust instead of a tender, flaky one.
Here’s why: flour contains gluten, a protein that provides structure. When you add water and start mixing, gluten begins to form. While a little gluten is necessary to hold the crust together, too much will make it rubbery. That’s great for bread, but not for pie.
The solution? Mix only until the dough just comes together. You should still see little flecks of butter—don’t try to smooth them out. Resist the urge to knead like you’re making pizza dough. Instead, gently gather the dough into a ball and flatten it into a disc with minimal handling.
Even when rolling out the dough, be gentle. Apply light, even pressure, and avoid rolling back and forth in the same spot. Rotate the dough as you go, and re-flour your surface sparingly. If the dough starts shrinking or feels elastic, that’s a sign of overworked gluten. Chill it again to relax it before continuing.
A light hand and a chill environment are the secrets here. Think of the dough as a delicate pastry, not a workout. The less you do, the better the crust will be.
Blind Baking the Crust (When and Why)
Blind baking—also known as pre-baking—is a step you might need depending on the type of pie you’re making. For some apple pies, especially those with juicy fillings or those that call for a very crisp bottom crust, blind baking can be a total game-changer.
What is Blind Baking?
Blind baking simply means baking the pie crust without the filling. This ensures the crust sets and starts crisping up before the wet ingredients hit it. It’s particularly useful for custard pies, cream pies, or even fruit pies where you want to prevent sogginess.
When to Blind Bake
If your apple pie filling is especially juicy or you’re using a lattice top and want to make sure the bottom crust stays firm, blind baking is a great idea. You might also blind bake if you like a super crisp, bakery-style finish to your crust.
How to Do It
After rolling your crust into the pan, prick the bottom all over with a fork. This prevents bubbling. Then line it with parchment paper or aluminum foil and fill it with pie weights, dry beans, or even uncooked rice. Bake at 375°F (190°C) for about 15–20 minutes until the edges are just starting to brown.
Remove the weights and bake for another 5–7 minutes to dry the base. Let it cool slightly before adding your apple filling.
This step might feel like extra work, but if you’ve ever cut into a soggy-bottom pie, you know it’s totally worth it.
Filling and Baking the Apple Pie
So, your crust is ready—flaky, chilled, and rolled to perfection. Now comes the fun part: filling it with that sweet, spiced apple goodness and baking it to golden perfection.
Preparing the Filling
The key to a great apple pie filling is balance. You want tartness, sweetness, and warmth from the spices. Here’s a classic apple filling recipe:
- 6–7 peeled and sliced apples (Granny Smith + Honeycrisp is a great combo)
- ¾ cup sugar
- 2 tbsp flour (for thickening)
- 1 tsp cinnamon
- ¼ tsp nutmeg
- 1 tbsp lemon juice
- Optional: 1 tsp vanilla extract or a pinch of allspice
Toss everything together in a large bowl and let it sit for 10–15 minutes. This allows the juices to begin releasing, which helps avoid a watery pie later.
Assembling and Baking
Add the apple filling to your prepared bottom crust. Dot the top with small cubes of butter—this melts and creates a silky, rich filling.
Next, add your top crust. This could be a full crust, a lattice, or cut-out shapes for a rustic look. Trim and crimp the edges to seal, then brush with an egg wash (1 egg + 1 tbsp milk) for a shiny, golden finish.
Cut a few slits in the top to let steam escape. Bake at 425°F (220°C) for 15 minutes, then reduce the heat to 375°F (190°C) and bake for another 35–45 minutes, or until the crust is deeply golden and the filling is bubbling.
Let the pie cool for at least 2 hours before slicing—this helps the filling set.
Common Mistakes to Avoid
Even experienced bakers can trip up on pie crust. Here are the most common errors and how to avoid them:
- Using warm ingredients – Always keep your butter, water, and even flour cold.
- Overmixing the dough – Mix until just combined. Visible butter chunks are a good sign.
- Skipping the chilling step – Always chill the dough before rolling and again before baking.
- Rolling the dough too thin or too thick – Aim for about 1/8 inch thick.
- Not venting the pie – Slits or a lattice are essential to release steam and prevent sogginess.
- Cutting the pie too soon – Let it cool to avoid a runny mess.
Avoid these, and you’ll be well on your way to pie perfection.
Storing and Reheating Leftover Pie
Apple pie rarely lasts long—but if you do have leftovers, proper storage makes all the difference in maintaining that lovely crust.
Storing
- Room Temperature: Apple pie can sit out for up to 2 days covered loosely with foil or plastic wrap.
- Refrigerator: For longer storage (up to 5 days), wrap the pie tightly and refrigerate. The crust will soften a bit, but still tastes great.
Reheating
To bring back some of that fresh-baked glory:
- Oven: Heat slices or the whole pie in a 350°F (175°C) oven for 10–15 minutes. This re-crisps the crust.
- Microwave: Works in a pinch, but the crust may turn soggy. Use short intervals (15–30 seconds) and avoid overheating.
Freezing is also an option. Wrap tightly and store for up to 3 months. Reheat from frozen at 375°F for 30–45 minutes.
Variations and Flavor Twists
The classic apple pie is iconic, but that doesn’t mean you can’t play with the flavors. Here are a few fun twists:
Dutch Apple Pie
Topped with a crumbly streusel instead of a second crust. Made with butter, flour, brown sugar, and cinnamon—like a dessert hybrid between pie and coffee cake.
Caramel Apple Pie
Mix caramel sauce into your apple filling or drizzle it over the top after baking. Adds a rich, indulgent sweetness.
Bourbon Apple Pie
Add a splash of bourbon to your filling. It enhances the apple flavor and adds a warm, spiced kick.
Spiced Chai Apple Pie
Replace cinnamon with chai spice mix—cardamom, ginger, and clove—for a unique twist that’s perfect for fall.
With just a few tweaks, your traditional pie can transform into something entirely new.
Serving Suggestions for Apple Pie
The beauty of apple pie lies not just in its taste but also in its versatility. Whether you’re serving it up fresh out of the oven or enjoying a chilled leftover slice, how you serve apple pie can elevate the entire experience.
Classic Pairings
- A scoop of vanilla ice cream: This is the ultimate combo—hot pie with cold, creamy ice cream. The vanilla flavor complements the cinnamon-spiced apples perfectly.
- Whipped cream: Light and airy, whipped cream adds a creamy texture without overpowering the pie.
- A slice of cheddar cheese: Sounds strange? Not in the Northeast! A sharp slice of cheddar adds a salty contrast that some say makes the pie even better.
Serving Temperature
Apple pie can be served warm, room temperature, or even cold. Each way offers a slightly different experience:
- Warm: Ideal right out of the oven or gently reheated. The filling is soft and gooey, the crust tender and aromatic.
- Room temperature: Allows the flavors to mellow and blend together.
- Cold: A firmer filling and a crisp bite, perfect for summer days or next-day leftovers.
Pair your pie with a cup of coffee, hot cider, or even a glass of dessert wine for a gourmet touch.
Whether it’s a holiday dessert or a midweek treat, how you serve your apple pie turns it into an experience, not just a dessert.
FAQs about Apple Pie Crust Recipe
Q1: What is the best flour to use for apple pie crust?
All-purpose flour is the most commonly used and versatile option for making apple pie crust. It provides the right balance of protein and starch, resulting in a tender yet sturdy crust.
Q2: Can I use butter instead of shortening for the pie crust?
Yes, you can use butter, shortening, or a mix of both. Butter adds rich flavor, while shortening creates a flakier texture. Combining the two gives you the best of both worlds.
Q3: Why does my pie crust shrink while baking?
Pie crust often shrinks if it’s not chilled properly or if it’s overworked. Be sure to chill your dough before rolling it out and again before baking. Also, avoid stretching the dough when placing it in the pie dish.
Q4: How do I make my apple pie crust flaky?
To achieve a flaky crust, use cold fat (butter or shortening) and ice water, and handle the dough as little as possible. Small chunks of fat in the dough melt during baking, creating flaky layers.
Q5: Can I freeze apple pie crust dough?
Absolutely! You can freeze the dough in a disc shape wrapped tightly in plastic wrap for up to 3 months. Thaw in the refrigerator before using.
Q6: Should I blind bake the pie crust before adding the apple filling?
Blind baking isn’t typically required for apple pie unless you’re using a very juicy filling or want a crispier bottom crust. If you do blind bake, prick the crust with a fork and use pie weights.
Q7: What’s the best way to prevent a soggy bottom crust?
Preheat your oven with a baking sheet inside and bake the pie on that sheet to help the bottom crust set quickly. You can also brush the bottom crust with a bit of egg white before adding the filling.
Conclusion
Making the perfect apple pie crust might seem intimidating at first, but once you understand the basics and master the techniques, it’s a skill that transforms your baking game. The secret lies in cold ingredients, gentle handling, and just a little bit of patience.
Whether you’re baking for a special occasion or just because you’re craving something nostalgic and delicious, a homemade apple pie—with a buttery, flaky crust—always hits the spot. And once you’ve nailed the crust, the possibilities are endless. Fruit pies, quiches, pot pies—you name it.
So go ahead, roll up your sleeves, and give it a try. Your kitchen will smell amazing, your taste buds will thank you, and your friends and family? They’ll be begging for another slice.