Apple Pie Crumble Topping Recipe: There’s something incredibly comforting about a slice of warm apple pie topped with a buttery, golden crumble. It’s the kind of dessert that fills your kitchen with the aroma of cinnamon, butter, and apples—and your heart with nostalgia. Apple Pie with Crumble Topping takes the traditional pie we all know and love and gives it a rustic twist with a sweet, crunchy topping that’s downright irresistible. It’s perfect for fall, holidays, or any day when you want to enjoy a dessert that feels like a hug in pie form.
This recipe combines sweet-tart apple filling with a rich, buttery crumb topping for the ultimate balance of flavor and texture. The crumble topping adds that satisfying crunch that a regular double-crust pie just can’t match. And the best part? It’s surprisingly easy to make from scratch—even for beginners!
Let’s get started by diving into why this pie is a must-make.
Why You’ll Love This Recipe
There are dozens of apple pie variations out there, so why choose this one? Let’s break it down:
- Perfect Texture Contrast: The tender, juicy apples beneath a crispy, buttery crumble create a mouthwatering combo you won’t forget.
- No Top Crust Needed: Making pie dough can be intimidating, but with this recipe, you only need one bottom crust. The topping does the rest.
- Customizable: You can play with the spices, swap in different fruits, or even add nuts to the topping.
- Crowd-Pleaser: Whether it’s Thanksgiving or a casual Sunday dinner, this dessert always disappears fast.
It’s one of those foolproof desserts that feels fancy but is secretly simple. Plus, it looks and tastes homemade in the best way possible.
The Difference Between Crumble, Crisp, and Cobbler
Before we move on, let’s clear up a common baking confusion: what exactly is the difference between a crumble, a crisp, and a cobbler?
- Crumble: Made with a topping of flour, butter, and sugar. No oats involved. The texture is sandy and buttery, more cake-like once baked.
- Crisp: Very similar to a crumble, but typically includes oats in the topping for a crunchier texture.
- Cobbler: Topped with a biscuit or cake-like batter instead of a crumble. It’s softer, and the dough rises during baking.
So, an Apple Pie Crumble is essentially apple pie with that classic flour-sugar-butter topping baked on top instead of a crust or biscuit.
Best Apples for Apple Pie Crumble
The apples you choose can make or break your pie. The goal is to strike a balance between sweetness and tartness, and ensure your apples hold their shape during baking.
Tart vs. Sweet Apples
- Tart Apples (like Granny Smith) bring a zesty contrast to the sweet crumble.
- Sweet Apples (like Fuji or Gala) are naturally juicy and reduce the need for added sugar.
A mix of both types creates depth of flavor and texture in your filling.
Top Apple Varieties to Use
- Granny Smith – Tart, crisp, holds shape well.
- Honeycrisp – Juicy, sweet-tart, very flavorful.
- Braeburn – Spicy-sweet, bakes beautifully.
- Jonagold – Sweet with just enough tang.
- Fuji – Super sweet, great in combination with tarter apples.
List of Ingredients You’ll Need
Let’s break it down so you’re not running to the store mid-bake.
For the Apple Filling:
- 6–7 medium apples (Granny Smith, Honeycrisp, or mix)
- 1/2 cup granulated sugar
- 1/4 cup brown sugar
- 2 tablespoons all-purpose flour
- 1 teaspoon cinnamon
- 1/4 teaspoon nutmeg
- 1 tablespoon lemon juice
- 1 teaspoon vanilla extract
For the Crumble Topping:
- 1 cup all-purpose flour
- 1/2 cup brown sugar (light or dark)
- 1/2 cup granulated sugar
- 1/2 teaspoon cinnamon
- Pinch of salt
- 1/2 cup (1 stick) unsalted butter, cold and cubed
For the Pie Base:
- 1 unbaked 9-inch pie crust (homemade or store-bought)
Optional Add-Ins to Elevate Flavor
Want to add your signature twist? Here are some extras:
- Chopped pecans or walnuts – Add crunch to the topping.
- Oats – For a crisp-style texture.
- Caramel drizzle – On top after baking = next level!
- Raisins or cranberries – For a fall-inspired filling.
Kitchen Tools You’ll Need
Make sure you have the following on hand:
- Mixing bowls
- Measuring cups and spoons
- Apple peeler/corer
- Sharp knife
- 9-inch pie dish
- Pastry cutter or fork (for crumble)
- Oven and cooling rack
Step-by-Step Guide to Make Apple Pie with Crumble Topping
Let’s walk through it from start to finish.
Step 1: Prep the Pie Crust
If you’re using store-bought, just place it into your pie dish and keep it chilled. If homemade, roll it out, transfer it to your pie pan, trim excess, and crimp the edges. Keep in the fridge while you prep the filling.
Step 2: Make the Apple Filling
- Peel, core, and thinly slice your apples.
- Toss them in a large bowl with lemon juice, both sugars, cinnamon, nutmeg, flour, and vanilla.
- Mix until the apples are coated and the mixture looks slightly syrupy.
Set aside to let the flavors mingle.
Step 3: Assemble the Crumble Topping
In another bowl, mix flour, sugars, cinnamon, and salt.
Add cold butter cubes and use a pastry cutter (or fork/fingers) to blend until the mix resembles coarse crumbs. You should see pea-sized pieces of butter.
This topping is where the magic happens—it’s sweet, buttery, and crunchy after baking.
Step 4: Assemble the Pie
- Spoon your apple mixture into the prepared crust. Press them down gently to minimize air pockets.
- Generously sprinkle the crumble topping all over the apples. Make sure it’s evenly covered.
Don’t press the crumble down too hard—you want it airy and light.
Step 5: Bake It to Perfection
- Preheat oven to 375°F (190°C).
- Place your pie on a baking sheet (to catch drips).
- Bake for 50–60 minutes until the topping is golden brown and the filling is bubbling.
If the top is browning too quickly, tent it with foil halfway through.
Let it cool at least 30 minutes before slicing. The filling needs time to set!
Pro Tips for the Perfect Crumble Topping
Getting that golden, buttery crumble just right can feel like a small victory—here’s how to make sure it turns out amazing every single time.
- Use cold butter: This is key. Cold butter creates those little chunks in the topping that melt slowly while baking, forming a crispy, golden texture.
- Don’t overmix: You want a crumbly texture, not a dough. Mix just until the butter is broken up into small pieces.
- Chill the topping before baking: Pop it in the fridge for 10–15 minutes before sprinkling over the apples. This helps maintain texture while baking.
- Even distribution is everything: Crumble shouldn’t be clumpy in one corner and sparse in another. Take your time and cover the apples well.
- Add a pinch of salt: It might sound odd, but salt enhances the sweetness and brings out the buttery flavor of the topping.
These tips aren’t just nice-to-haves—they’ll transform your crumble topping from good to unforgettable.
How to Serve Apple Pie Crumble
Serving this pie is almost as fun as eating it. Whether you’re setting it out for guests or sneaking a slice for yourself, the options are endless:
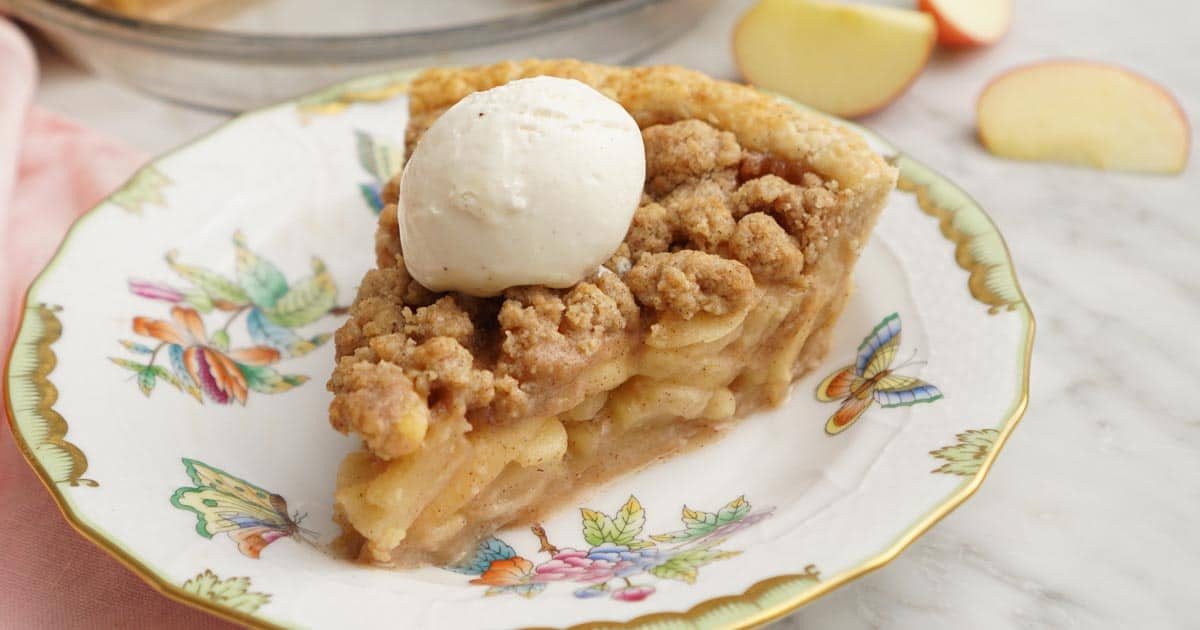
- Warm with ice cream: A classic. Vanilla ice cream melting into warm apple pie is perfection.
- Drizzle with caramel sauce: Store-bought or homemade, a little caramel adds depth and richness.
- Serve chilled: Some people actually prefer this pie cold—especially the next day when the flavors are even more developed.
- Add a dollop of whipped cream: Light and fluffy whipped cream balances the warm, dense filling beautifully.
Pro tip: Use a serrated knife and a pie server for cleaner slices. And don’t be shy with the toppings—there’s no such thing as too much ice cream.
Serving Suggestions & Pairings
Want to make a full dessert moment out of this apple pie crumble? Here are a few ideas:
Drink Pairings:
- Hot apple cider or mulled wine in the fall
- Strong coffee or espresso
- Cold milk for a nostalgic touch
Meal Pairings:
- Great finish to roast chicken or turkey dinners
- Ideal for holiday spreads with stuffing and mashed potatoes
- Lovely complement to brunch menus with quiches and fruit salads
Dessert Bar Addition:
- Serve in mini tart pans for individual portions
- Add labels and toppings so guests can customize with caramel, ice cream, or whipped cream
Whether you’re serving it after a formal dinner or bringing it to a picnic, this pie fits right in.
How to Store Leftovers
This pie is just as good the next day (some might argue even better). Here’s how to store it properly:
- Room Temperature: If you plan to eat it within a day, just cover the pie with foil or plastic wrap and leave it on the counter.
- Refrigerator: For up to 4–5 days, wrap the pie well and store in the fridge. The crumble might soften slightly, but reheating helps revive it.
- Reheating Tips:
- Warm slices in the oven at 350°F (175°C) for 10–15 minutes.
- A microwave works too, but it softens the topping. Try wrapping loosely with a paper towel to prevent sogginess.
Avoid storing the pie uncovered, or it’ll dry out fast. And definitely don’t forget about it—it’s way too good to waste.
Can You Freeze Apple Pie Crumble?
Absolutely! This pie is freezer-friendly, which makes it perfect for prepping ahead of holidays or events.
Freezing Before Baking:
- Assemble the pie (filling + topping) in a freezer-safe pie dish.
- Wrap tightly in plastic wrap, then foil.
- Label and freeze for up to 3 months.
- Bake from frozen—just add 15–20 extra minutes to the baking time.
Freezing After Baking:
- Let the baked pie cool completely.
- Wrap tightly with plastic and foil.
- Freeze for up to 3 months.
- Reheat in the oven at 350°F (175°C) until warmed through.
Freezing doesn’t impact flavor much, but the texture might change slightly. Still, it’s a great way to always have dessert on hand.
Common Mistakes and How to Avoid Them
Even seasoned bakers make mistakes sometimes—here’s how to steer clear of the most common apple pie crumble slip-ups:
- Soggy crust? Par-bake the bottom crust for 10 minutes before adding the filling. It helps prevent the dreaded soggy bottom.
- Too runny filling? Use flour or cornstarch to help thicken the apple juices during baking.
- Overbrowned topping? Tent the pie with foil during the last 20 minutes of baking if it starts browning too fast.
- Tough apples? Slice them evenly and not too thick. Uniform, thin slices cook through more evenly.
- Bland flavor? Don’t skimp on spices like cinnamon, nutmeg, and vanilla. They’re the soul of this pie.
Avoid these pitfalls and you’ll be well on your way to apple pie glory.
FAQs about Apple Pie Crumble Topping Recipe
1. Can I use store-bought pie crust?
Yes! A high-quality store-bought crust works perfectly and saves time. Just be sure to follow package instructions for baking.
2. What’s the best way to reheat apple crumble pie?
For best results, warm it in a 350°F oven for 10–15 minutes. This helps revive the crispy topping and heats the filling evenly.
3. How do I know when my pie is done?
The topping should be golden brown and the apple filling bubbling. Insert a knife—it should slide easily through the apples.
4. Can I make the crumble topping ahead of time?
Absolutely. Prepare it and store in the fridge for up to 3 days or freeze for up to a month. Sprinkle on when ready to bake.
5. Can I use other fruits instead of apples?
Yes! Pears, peaches, berries, or a mix can be substituted. Just adjust sugar and baking time based on the fruit’s moisture content.
Conclusion
Apple Pie with Crumble Topping is a celebration of flavor, texture, and tradition. It combines the nostalgic comfort of classic apple pie with the irresistible crunch of a buttery crumb topping. Whether it’s your first time baking from scratch or you’re a dessert pro, this recipe delivers every time. It’s flexible, forgiving, and endlessly delicious.
So next time you’re craving a slice of cozy, grab those apples and get baking—you’re just an oven away from pie perfection.