Apple Jam Recipe: Nothing hits the sweet spot quite like a spoonful of homemade apple jam. Whether you’re slathering it on warm toast in the morning or using it to elevate a baking recipe, this classic preserve never goes out of style. While store-bought apple jam may seem convenient, there’s something incredibly satisfying about making it from scratch—especially when you can control the ingredients, flavor, and texture to your liking.
This detailed, easy-to-follow guide will walk you through every step of the process—from picking the right apples to bottling up the final product. Whether you’re a seasoned home cook or just trying jam-making for the first time, this article will help you master the art of creating rich, delicious apple jam.
And don’t worry—this isn’t one of those “five-minute reads” that leaves you with more questions than answers. We’re going deep with ingredient lists, tools, troubleshooting tips, and even a few fun flavor variations to keep things exciting.
Ready to transform fresh apples into jars of golden goodness? Let’s get started.
Benefits of Making Apple Jam at Home
Making your own apple jam comes with a whole bunch of perks that store-bought versions simply can’t compete with.
Healthier Ingredients: When you make apple jam yourself, you’re in full control. You can skip the preservatives, artificial colors, and high-fructose corn syrup found in many commercial jams. Want to use organic apples? Go for it. Prefer a low-sugar version? Absolutely possible.
Custom Flavors: Fancy a little cinnamon? Maybe some ginger? Or how about a splash of bourbon for a grown-up twist? Homemade jam lets you experiment and create a flavor that’s uniquely yours.
Preserving Seasonal Produce: Apples are abundant and affordable in the fall. Making jam is an excellent way to preserve that bounty and enjoy the taste of autumn all year round.
Eco-Friendly and Economical: Reduce packaging waste, reuse jars, and save money in the long run. What’s not to love?
Types of Apples Best for Jam Making
Not all apples are created equal, especially when it comes to jam. The best jam comes from a balance of sweetness, tartness, and a nice, firm texture that doesn’t completely dissolve when cooked.
Best Varieties for Flavor:
- Granny Smith – Tart and firm, balances well with sugar.
- Honeycrisp – Sweet, juicy, and holds its texture.
- Fuji – Very sweet, pairs well with tart varieties.
- Braeburn – A nice mix of sweet and tangy.
Mixing Sweet and Tart Apples: The secret to a flavorful apple jam is using a mix. Combine tart apples like Granny Smith with sweeter ones like Fuji or Gala for a deeper, more complex flavor.
Apples to Avoid:
- Red Delicious – Too bland and mushy.
- McIntosh – Tends to break down too quickly, resulting in applesauce-like jam.
List of Ingredients You’ll Need
Here’s what you’ll need for a basic apple jam recipe that yields about 3–4 jars (250ml each).
Basic Ingredients:
- 4 cups finely chopped apples (about 6–7 medium apples)
- 2 cups granulated sugar (adjust to taste)
- 2 tablespoons lemon juice (freshly squeezed)
- ½ teaspoon cinnamon (optional, for flavor)
- ¼ cup water
Optional Add-ins for Flavor Variation:
- 1 tablespoon grated fresh ginger
- ½ teaspoon ground nutmeg
- 1 vanilla bean or 1 tsp vanilla extract
- A splash of bourbon or spiced rum
Ingredient Substitutions:
- Sugar: Use honey, maple syrup, or coconut sugar for a healthier alternative.
- Lemon Juice: Necessary for acidity and pectin; substitute with lime juice if needed.
- Pectin: Not required with apples (they contain natural pectin), but can be added for a firmer set.
Kitchen Tools & Equipment Required
Before you dive into cooking, make sure you have the right gear to make the process smooth and efficient.
Essential Tools:
- Large heavy-bottomed pot
- Cutting board and sharp knife
- Peeler or paring knife
- Measuring cups and spoons
- Wooden spoon or silicone spatula
- Sterilized glass jars with lids
Nice-to-Have Gadgets:
- Apple corer
- Jam funnel (for clean pouring)
- Jar lifter
- Candy thermometer (to check setting point)
Tips for Beginners:
- Don’t overcrowd your pot—jam needs space to boil properly.
- Keep a damp cloth nearby for spills and drips.
- Use wide-mouth jars for easy filling.
Preparation Before You Start
A little prep goes a long way in making your jam-making experience stress-free.
Washing and Peeling Apples:
Rinse apples thoroughly to remove any pesticides or wax. If using organic apples, peeling is optional, but most recipes benefit from peeled apples for a smoother texture.
Chopping Techniques:
Chop apples into small, even pieces. The smaller they are, the faster they cook and the smoother your jam will be.
Measuring Ingredients Accurately:
Don’t eyeball it. Use proper measuring cups to ensure the sugar-to-fruit ratio is balanced for both flavor and preservation.
Step-by-Step Guide to Making Apple Jam
Let’s break this down into bite-sized steps so nothing gets missed.
Step 1: Prepping the Apples
Wash, peel, core, and finely chop your apples. Try to get them into small ¼-inch cubes for even cooking. Toss them into a large bowl with lemon juice to prevent browning while you chop the rest.
Step 2: Cooking the Apples
In a heavy-bottomed pot, combine the chopped apples and water. Cook on medium heat for about 10–15 minutes, stirring occasionally, until the apples start to soften.
Step 3: Adding Sugar and Lemon Juice
Once the apples are soft, stir in the sugar and remaining lemon juice. Add cinnamon or other spices if you’re using them. Turn the heat to medium-high and bring the mixture to a rolling boil.
Step 4: Simmering and Stirring
Lower the heat to a simmer and stir frequently to prevent sticking. This part can take 30–45 minutes. You’ll notice the jam thicken as the water evaporates.
Step 5: Testing for Jam Consistency
Use the spoon or plate test (see next section) to check if your jam has set. If it wrinkles or holds shape, it’s ready.
Step 6: Sterilizing Jars
While the jam simmers, sterilize your jars in boiling water or a dishwasher with a high-heat setting. Place them upside down on a clean towel to dry.
Step 7: Pouring and Sealing
Carefully ladle hot jam into jars, leaving ¼-inch of headspace. Wipe the rims clean, seal with lids, and let cool at room temperature.
How to Test Jam Set Without a Thermometer
One of the most common questions when making jam is: How do I know it’s done? Great news — you don’t need a candy thermometer to get it right. There are a couple of tried-and-true methods to test if your apple jam has reached the perfect consistency.
The Spoon and Plate Method
- Chill a plate in the freezer while your jam is cooking.
- Once the jam seems thickened, drop a spoonful onto the cold plate.
- Let it sit for 30 seconds, then run your finger through the middle.
- If the jam leaves a clear trail and doesn’t flood back into place, it’s set.
This method mimics the texture jam will have once fully cooled in the jar. If it’s still runny, simmer for another 5–10 minutes and test again.
The Wrinkle Test
Another way to test your jam is by placing a dollop on the cold plate and gently pushing it with your finger.
- If the surface wrinkles and holds its shape, the jam is ready.
- If it runs or feels too thin, keep cooking.
Remember, jam thickens further as it cools. Don’t overcook — or you’ll end up with a gummy, overly sticky texture.
Flavor Variations You Can Try
While classic apple jam is incredible on its own, experimenting with flavors can take it to the next level. Here are a few mouthwatering combinations to try out:
1. Cinnamon-Apple Jam
Add ½ teaspoon ground cinnamon or a cinnamon stick during cooking. It adds a warm, cozy spice that pairs perfectly with apple.
2. Apple-Ginger Jam
Grate 1 tablespoon of fresh ginger and add it to your mix. The zing from ginger complements the sweetness of apples and adds a fresh twist.
3. Apple & Clove Holiday Blend
Add ⅛ teaspoon ground cloves and a pinch of nutmeg for a festive holiday-inspired jam. Ideal for gifting!
4. Apple Vanilla Bean Jam
Split one vanilla bean and scrape the seeds into your jam. Or use 1 tsp of vanilla extract at the end of cooking. This brings out a creamy, dessert-like finish.
5. Spiked Apple Jam
Add a tablespoon of bourbon or spiced rum during the last 5 minutes of cooking. It gives a subtle kick and makes a unique addition to a cheese platter or charcuterie board.
Pro Tip: Don’t go overboard with add-ins. A little goes a long way, and you still want the apple flavor to shine through.
Tips for a Successful Apple Jam Every Time
Even the simplest recipe can go sideways without a few key techniques. Keep these tips in mind to ensure your apple jam turns out perfect every single time.
1. Use a Wide, Shallow Pan
More surface area means faster evaporation, which helps your jam thicken evenly. Deep pots can take longer and risk burning the bottom.
2. Stir Constantly
As the sugar begins to caramelize, it can stick or scorch if left unattended. Keep that spoon moving — especially in the final 15 minutes.
3. Don’t Skip the Lemon Juice
Besides balancing flavor, lemon juice helps the jam set because it provides acidity and activates the natural pectin in apples.
4. Adjust Sugar to Taste
Not all apples are equally sweet. If using naturally sweet varieties like Fuji or Gala, you can reduce the sugar a bit. Just remember: sugar also helps preserve the jam.
5. Test for Set Before Bottling
There’s no rushing this. Bottling runny jam will only lead to disappointment. Take the time to do the plate test.
6. Label Your Jars
It sounds obvious, but once your jam goes into storage, you’ll want to know what flavor and date you made it. Use masking tape and a marker or print cute labels!
Storage and Shelf Life
So your jam is done, jarred, and looking glorious on the countertop. Now what? Let’s talk about how to store it properly to make it last.
Short-Term Storage (Refrigerated)
If you’re not planning to can your jam for long-term storage:
- Let jars cool completely at room temp.
- Store in the refrigerator.
- Use within 3–4 weeks.
Long-Term Storage (Pantry)
For jam that’s been properly canned and sealed:
- Keep jars in a cool, dark place (like a pantry or cupboard).
- Shelf life: 12–18 months.
- Once opened, refrigerate and use within 4 weeks.
Signs of Spoilage
- Mold or strange smell? Toss it.
- Bubbling or lid bulging? Toss it.
- Discoloration or crystalized sugar? Not unsafe, but quality has likely declined.
How to Can Apple Jam (Optional)
Canning is a great way to preserve your apple jam for months or even a year. It’s easier than you think — and completely worth the extra 30 minutes.
Water Bath Canning Steps:
- Place jars in boiling water and sterilize for 10 minutes.
- Fill hot jars with hot jam, leaving ¼-inch headspace.
- Wipe rims clean, place lids, and tighten rings just to fingertip-tight.
- Place jars in boiling water bath for 10 minutes.
- Remove and let cool on a towel. Listen for the satisfying “pop”!
Safety Tips:
- Always use clean, sterilized jars.
- Never reuse lids.
- Check the seal: the center of the lid should be indented and not move when pressed.
Creative Ways to Use Apple Jam
Apple jam isn’t just for toast. It’s a versatile spread that can elevate all kinds of recipes. Here are a few ways to enjoy it:
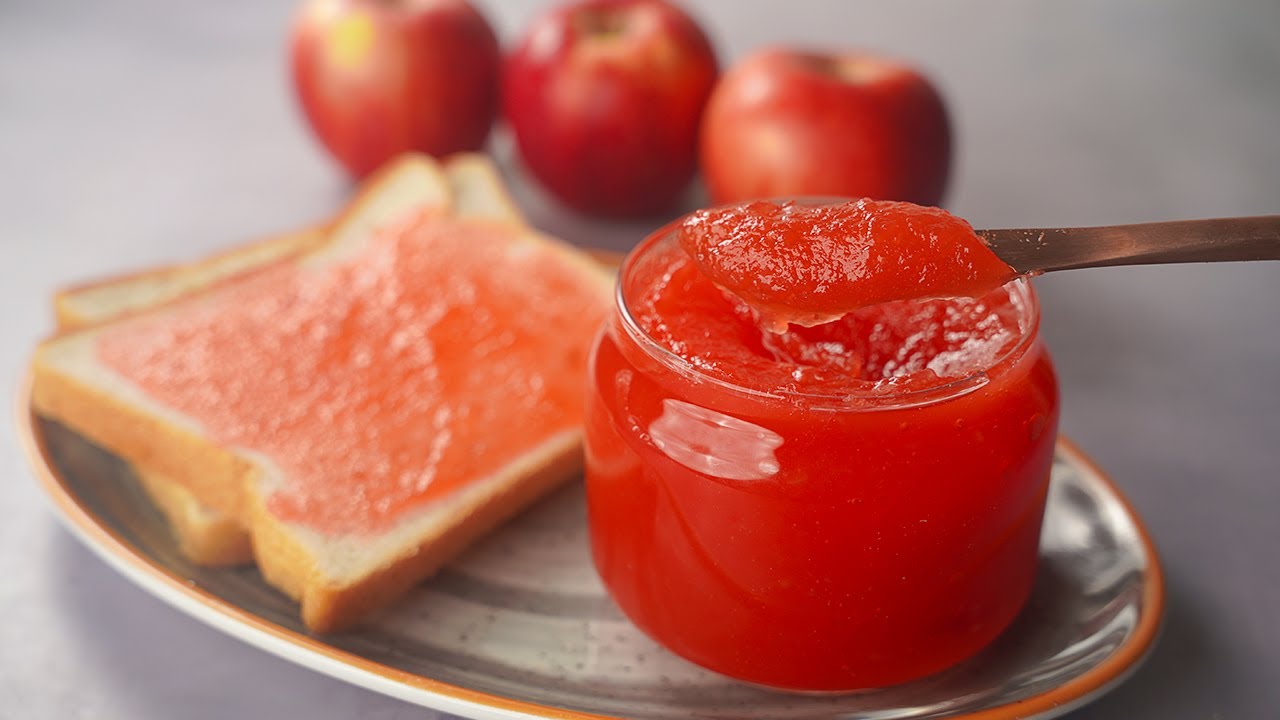
1. On Toast, Bagels, or Scones
The classic way. Add a pat of butter, and you’ve got a perfect breakfast.
2. As a Glaze
Brush over grilled pork, chicken, or roasted vegetables for a sweet finish.
3. In Baked Goods
- Swirl into muffin or cake batter.
- Fill thumbprint cookies.
- Layer between cake layers or inside pastries.
4. With Cheese Boards
Pair with sharp cheddar, brie, or goat cheese. Add crackers and wine — instant appetizer.
5. As a Gift
Homemade apple jam makes a thoughtful holiday gift. Dress up your jars with ribbon and a handwritten label.
Common Mistakes to Avoid
Even experienced jam-makers can hit a few bumps. Here are the most common pitfalls and how to avoid them:
1. Using Too Much Sugar
Sugar is essential, but too much can overpower the apple flavor or make the jam overly thick and sticky.
2. Not Sterilizing Jars
Skipping sterilization increases the risk of contamination and shortens shelf life.
3. Overcooking the Jam
Overcooked jam becomes hard and loses its fruity flavor. Remember: it thickens as it cools, so don’t wait until it looks fully set.
4. Inconsistent Apple Sizes
Unevenly chopped apples cook at different rates, which can lead to uneven texture. Chop small and uniform pieces.
5. Skipping the Set Test
If you bottle before testing for set, you might end up with syrup instead of spreadable jam. Always check!
FAQs about Apple Jam Recipe
1. Can I use green apples for jam?
Absolutely! Green apples like Granny Smith are perfect because of their high pectin content and tart flavor. Just balance them with a sweeter variety if you prefer.
2. Do I need to use pectin in apple jam?
Nope! Apples naturally contain a lot of pectin, especially when they’re slightly underripe. That’s why apple jam sets well without added pectin.
3. How do I fix runny jam?
Reheat the jam in a pot and simmer until thicker. You can also add a bit of lemon juice or natural pectin powder to help it set.
4. Can I freeze apple jam?
Yes! Let the jam cool, place it in freezer-safe containers, and freeze for up to 6 months. Just leave room at the top for expansion.
5. What’s the best sugar for apple jam?
Regular granulated sugar works best. You can use brown sugar or honey, but they may slightly alter the flavor and texture.
Conclusion
There you have it — your ultimate step-by-step guide to making delicious, homemade apple jam. From selecting the right apples to mastering the simmering process, this guide is your one-stop resource for jamming success. Whether you’re looking for a weekend kitchen project, a way to preserve fall’s harvest, or simply a sweet spread for your breakfast, apple jam checks all the boxes.
The best part? You can personalize it endlessly with spices, flavors, and even a splash of alcohol. And once you’ve nailed the process, you’ll never look at store-bought jam the same way again.
So grab a bag of apples, sterilize those jars, and let the magic begin. Your toast will thank you.