Apple Cider Donut Recipe: There’s something irresistibly nostalgic about the warm scent of spiced apple cider donuts wafting through your kitchen. These cakey, sugar-coated beauties are a fall favorite, often found at orchards and farmer’s markets. But what if you could enjoy them year-round, homemade, and still just as delicious? This guide will walk you through everything you need to know to make perfect apple cider donuts from scratch — rich with flavor, soft on the inside, with just the right amount of crunch outside.
Why You’ll Love These Donuts
Apple cider donuts are more than just a sweet treat — they’re a seasonal experience. Whether it’s fall or not, these donuts bring warmth and coziness to any kitchen. You’ll love their moist interior, subtle tang of apple, and sugary, slightly crisp coating. Plus, they’re easy enough for beginners and rewarding enough for seasoned bakers. Whether served warm with coffee or packed for a picnic, they’re always a hit.
- Flavor explosion: A delicious mix of cinnamon, nutmeg, and real apple cider.
- Perfect texture: Slightly crispy on the outside, soft and cakey inside.
- Easy to customize: From glazes to mix-ins, you can get creative.
Ingredients You’ll Need
Let’s dive into the simple but flavorful ingredients that make these donuts truly special.
For the Donuts:
- 1 1/2 cups apple cider (to be reduced)
- 2 cups all-purpose flour
- 1 tsp baking powder
- 1/2 tsp baking soda
- 1 tsp ground cinnamon
- 1/4 tsp ground nutmeg
- 1/2 tsp salt
- 1/2 cup granulated sugar
- 2 tbsp brown sugar
- 2 large eggs
- 1/2 cup buttermilk
- 1/4 cup unsalted butter, melted
- 1 tsp vanilla extract
For the Cinnamon Sugar Coating:
- 1 cup granulated sugar
- 1 tbsp cinnamon
- 4 tbsp melted butter (for brushing)
These pantry staples combine into something magical, especially once the cider is reduced and its flavor intensified.
Essential Tools and Equipment
Before you start mixing, let’s make sure you have all the right gear. Using the proper tools will help you nail the texture and shape of your donuts.
- Heavy-bottomed pot (for reducing the cider)
- Mixing bowls (for wet and dry ingredients)
- Electric mixer (optional, but makes mixing easier)
- Rolling pin (for flattening dough)
- Donut cutter or round cookie cutters (one large, one small)
- Candy thermometer (for oil temperature)
- Deep frying pan or Dutch oven
- Slotted spoon or spider strainer
- Cooling rack
- Paper towels (for draining excess oil)
- Pastry brush (for butter coating)
Having these on hand will make the process smoother and help prevent any kitchen mishaps.
Prepping the Apple Cider
This step is crucial — it’s how you get that concentrated apple flavor that makes these donuts stand out. Start with 1 1/2 cups of apple cider in a small saucepan over medium heat. Simmer it until it reduces down to about 1/2 cup. This typically takes 20–30 minutes.
Why reduce the cider? Because it intensifies the flavor. You’re removing water and concentrating the natural sweetness and tartness of the apples, giving your donuts a stronger, more vibrant apple profile.
Let it cool to room temperature before using it in your batter. You can even make this step ahead and store the reduced cider in the fridge for up to two days.
Making the Donut Batter
Now that your cider reduction is cooled and ready, it’s time to bring the batter together. This step is where all the rich flavors start merging.
Step-by-step batter prep:
- Mix the dry ingredients: In a large bowl, whisk together the flour, baking powder, baking soda, cinnamon, nutmeg, and salt. Set aside.
- Whisk the wet ingredients: In another bowl, beat the eggs, granulated sugar, brown sugar, melted butter, vanilla extract, and buttermilk. Stir in the cooled apple cider reduction.
- Combine: Slowly add the dry ingredients to the wet ingredients. Stir just until combined. The dough should be thick and slightly sticky.
Avoid overmixing! Overworking the dough can make your donuts tough instead of tender. Once your dough is ready, cover the bowl and chill it in the refrigerator for at least an hour. This makes the dough easier to roll out and helps prevent spreading during frying.
Shaping and Cutting the Donuts
After chilling, it’s time to turn your dough into those classic donut shapes.
- Flour your surface: Sprinkle flour on a clean countertop or baking mat to prevent sticking.
- Roll the dough: Use a rolling pin to roll the dough out to about ½ inch thickness. Don’t go too thin, or your donuts will lose their fluff.
- Cut the shapes: Use a donut cutter to cut out your donuts. If you don’t have one, use a round cookie cutter or even a glass, and a bottle cap to punch out the holes.
Don’t waste those holes! Fry them up too — they’re perfect bite-sized treats.
After cutting, place the donuts and holes on a parchment-lined baking sheet. Let them rest while you heat up your oil.
Frying the Donuts to Perfection
Frying is where your dough comes to life, turning into golden brown goodness. The key here is temperature control.
Heat the oil: Fill a deep skillet or Dutch oven with about 2 inches of oil. Use a candy thermometer to heat it to 350°F (175°C). Keep a close eye — if the oil’s too hot, the donuts burn outside and stay raw inside; too cool, and they absorb oil and become greasy.
Frying tips:
- Fry in small batches (2–3 donuts at a time) to keep the oil temperature steady.
- Fry each side for about 1–2 minutes, or until golden brown.
- Use a slotted spoon to remove and transfer to paper towels to drain.
Work quickly but carefully. Let the donuts cool slightly before moving on to the next step — the sugary finish!
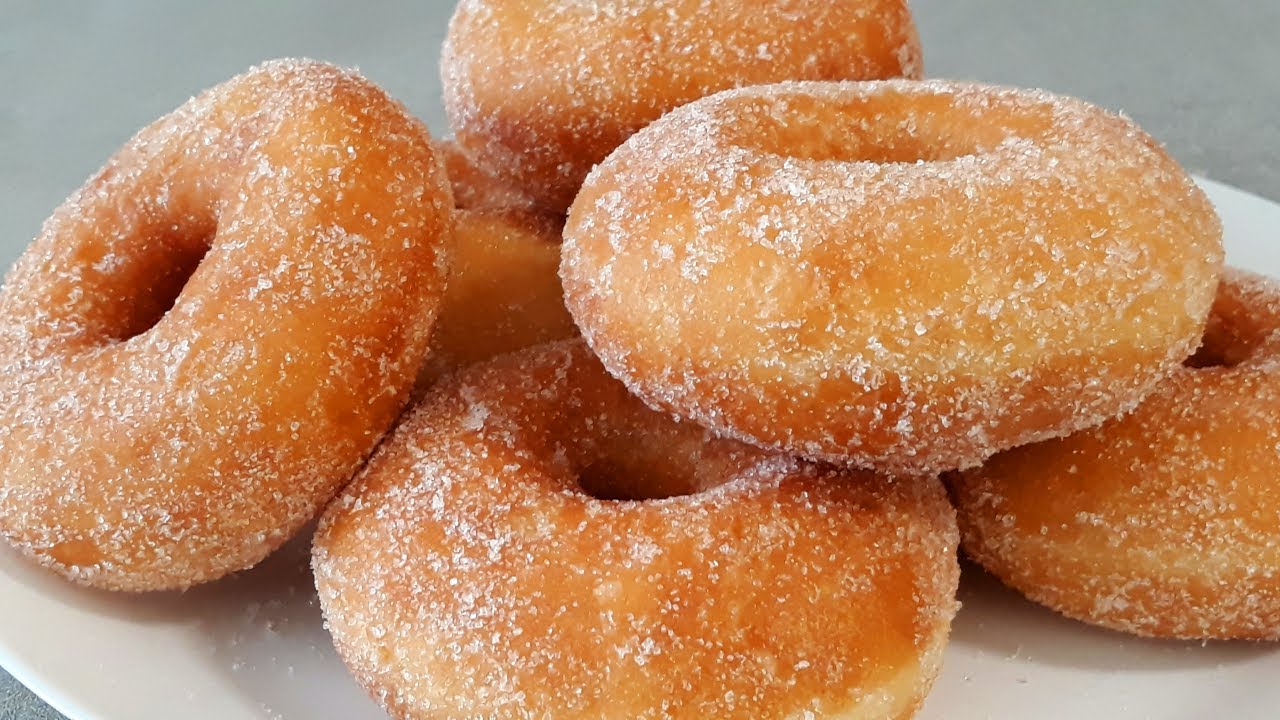
Coating with Cinnamon Sugar
This step turns your donuts from delicious to unforgettable. While the donuts are still warm, it’s time to coat them in that sweet cinnamon-sugar mix.
- Mix the coating: In a shallow bowl, stir together 1 cup sugar and 1 tbsp cinnamon.
- Butter it up: Lightly brush each donut with melted butter. This helps the sugar mix stick better.
- Coat generously: Roll or dip each donut in the cinnamon sugar mixture until fully coated.
The result? A mouthwatering outer layer that crackles with sweetness in every bite.
Tips for Perfect Apple Cider Donuts
To make sure your donuts come out amazing every time, keep these pro tips in mind:
- Use real apple cider: Avoid apple juice; cider has a deeper, more authentic flavor.
- Don’t skip the chilling: It makes the dough manageable and helps hold its shape.
- Keep oil temperature steady: Use a thermometer to maintain consistent frying heat.
- Don’t overcrowd the pan: Fry in small batches for even cooking.
- Serve fresh: These donuts are best warm on the day they’re made.
Mastering these small details will take your donut game to the next level, no matter your skill level.
Variations You Can Try
The beauty of apple cider donuts is how adaptable they are. Once you’ve mastered the classic version, why not explore some creative twists to add even more excitement?
1. Baked Apple Cider Donuts: Want a lighter version? Skip the frying and bake the donuts in a donut pan. They won’t have the same crunch but will still be soft and flavorful. Just preheat the oven to 350°F (175°C), fill your greased donut pan, and bake for 10–12 minutes.
2. Apple Cider Donut Holes: Those leftover centers from your cutouts? Turn them into poppable donut holes. Fry or bake them and coat them in sugar for a fun party snack.
3. Glazed Apple Cider Donuts: Mix powdered sugar with a splash of milk or cider to make a sweet glaze. Dip the cooled donuts for a shiny, sticky finish that adds another layer of flavor.
4. Filled Apple Cider Donuts: Try injecting donuts with apple butter or cinnamon cream for a surprise inside. You’ll need a piping bag and a bit of patience, but the payoff is worth it.
5. Spice it up: Experiment with spices like cardamom, clove, or ginger for an extra-warm and complex flavor.
Get playful! The only limit is your imagination — and maybe how many donuts you can eat in one sitting.
Storing and Reheating
If you’ve got leftovers (lucky you!), you’ll want to keep them fresh and tasty. Here’s how to store and revive your apple cider donuts:
Storing:
- Let the donuts cool completely.
- Store them in an airtight container at room temperature for up to 2 days.
- For longer storage, keep them in the fridge for up to 5 days, but they’re best fresh.
Freezing:
- Wrap each donut individually in plastic wrap.
- Store them in a ziplock freezer bag.
- Freeze for up to 2 months.
Reheating:
- Microwave: Heat for 10–15 seconds for a soft, warm texture.
- Oven: Bake at 300°F (150°C) for 5–7 minutes.
- Air fryer: Great for getting that crispiness back — try 2–3 minutes at 325°F (160°C).
Avoid reheating coated donuts in the microwave for too long — the sugar can get mushy or melt. For best results, re-coat with cinnamon sugar after warming.
Serving Suggestions
You can’t go wrong with serving these golden beauties fresh out of the fryer. But if you want to elevate your apple cider donut experience, try these ideas:
- Pair with warm apple cider or a hot mug of spiced chai tea.
- Add a scoop of vanilla ice cream on the side for a donut sundae.
- Dip them in caramel or chocolate sauce for dessert heaven.
- Serve with whipped cream and sliced apples for a brunch-worthy platter.
- Use them in trifles or parfaits with layers of whipped cream, apples, and crushed donut bits.
Whether you’re serving at a party or savoring solo on a cozy evening, apple cider donuts make every moment sweeter.
FAQs about Apple Cider Donut Recipe
1. Can I use apple juice instead of apple cider?
Technically yes, but the flavor won’t be as rich. Apple cider has a tangy, deeper taste that really shines through in the donuts.
2. What’s the best oil for frying donuts?
Canola oil or vegetable oil are both excellent choices — they have high smoke points and neutral flavors that won’t overpower the donuts.
3. Can I make these donuts without a donut cutter?
Absolutely! You can use two round cookie cutters or even a glass and a bottle cap to get the shape.
4. How do I know the oil is at the right temperature?
Use a candy thermometer. You’re aiming for 350°F (175°C). Too hot and the outside burns; too cool and they soak up oil.
5. Can I make the dough ahead of time?
Yes! You can prepare the dough a day in advance and refrigerate it. Just bring it to room temperature slightly before rolling and cutting.
Conclusion
There you have it — a full step-by-step guide to making irresistible apple cider donuts right in your kitchen. From reducing the cider to frying them golden and coating them in cinnamon sugar, every step brings you closer to one of the most comforting homemade treats out there. Whether you’re making them for a fall gathering, a weekend brunch, or just because you deserve it (you do!), these donuts deliver every time.
They’re warm, nostalgic, and completely satisfying. Once you try them, you’ll want to make them a regular tradition — not just for autumn, but all year long.