Angel Biscuits Recipe: Angel biscuits are a beautiful hybrid between fluffy dinner rolls and flaky Southern biscuits. Imagine the airiness of yeast rolls meeting the buttery flake of traditional biscuits—that’s exactly what angel biscuits bring to your plate. They rise like little pillows and practically melt in your mouth. If you’ve ever struggled with biscuits that turned out too dry or dense, angel biscuits are the answer to your biscuit prayers.
But here’s the twist: they include yeast and baking powder/soda. Most biscuits use just baking powder, which gives them that quick, no-rise characteristic. Adding yeast? That gives them an extra lift—literally and flavor-wise. They’re like clouds you can eat.
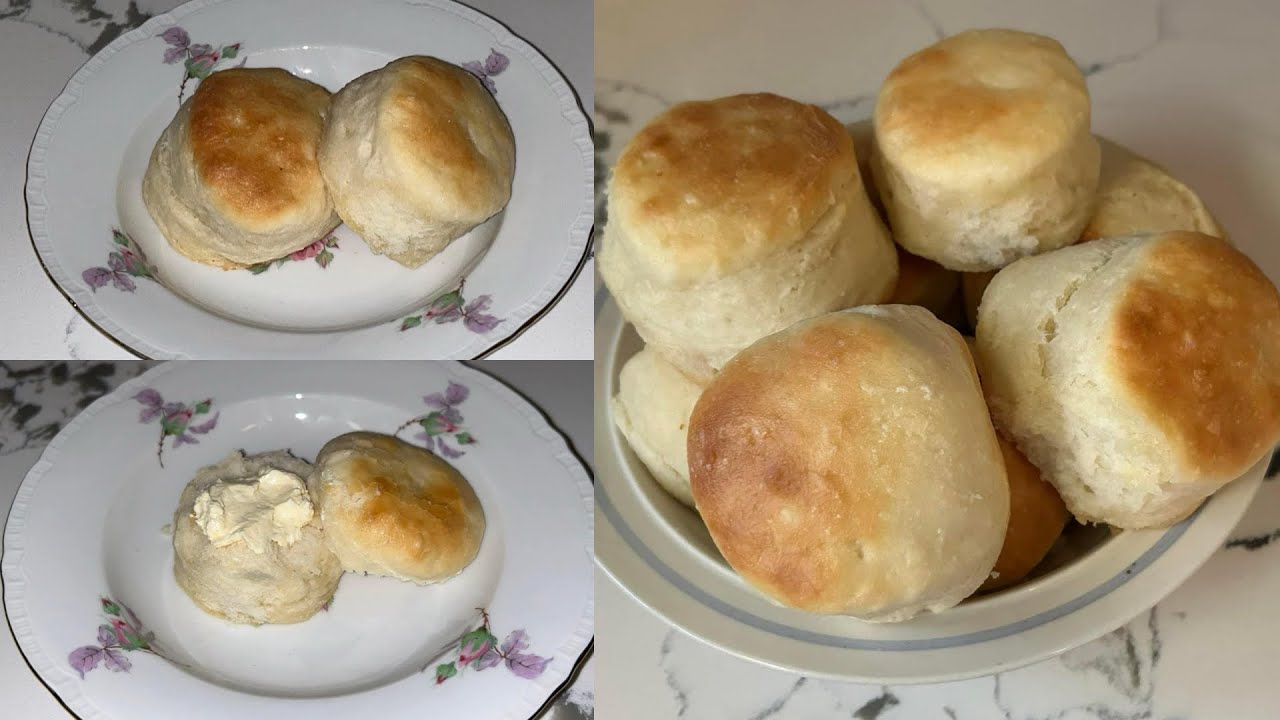
These biscuits are perfect for breakfast sandwiches, served with gravy, or simply with a pat of butter and a drizzle of honey. The flavor is mild yet rich, and the texture is just the right balance of tender, fluffy, and slightly crisp on the outside.
Why They’re Called “Angel” Biscuits
So what’s with the heavenly name? The term “angel” likely comes from their cloud-like softness and their lighter-than-air texture. It’s as if angels themselves had a hand in baking them—or at least that’s what your taste buds will be telling you. The texture is softer and airier than traditional Southern biscuits, and they practically float on your tongue. The name is more than just catchy—it’s a pretty accurate description.
This also explains why angel biscuits have stuck around for generations in Southern kitchens. They’re not just biscuits. They’re comfort food, tradition, and a little slice of heaven all rolled into one.
What Makes Them Different from Traditional Biscuits?
Angel biscuits are unique because they combine the best of all baking worlds:
- Leavening Combo: They use yeast, baking powder, and baking soda—most recipes use just one or two. That triple threat ensures they rise beautifully every single time.
- Tender Texture: Thanks to the yeast and buttermilk, they’re much softer and more tender than regular biscuits.
- More Forgiving: Because of the yeast, you have a bit more flexibility in timing. You can refrigerate the dough overnight, and they’ll still bake up beautifully the next day.
Traditional biscuits are great, no doubt, but they can be a little fussy. Angel biscuits? They’re like the easy-going cousin who still knows how to show up looking impressive.
Ingredients You’ll Need
Let’s talk about what you’ll need to make these heavenly biscuits. The best part? You likely already have most of these in your pantry and fridge.
Dry Ingredients Breakdown
- All-Purpose Flour (5 cups): Go for unbleached if possible. It gives a heartier texture while still keeping things light.
- Baking Powder (1 tbsp): The first leavening agent that gives the dough a quick rise in the oven.
- Baking Soda (1 tsp): Works with the buttermilk to give a light, airy texture.
- Sugar (2 tbsp): Just a little sweetness to balance the flavors.
- Salt (1 tsp): Essential to bring out all the other flavors.
Wet Ingredients Breakdown
- Unsalted Butter (½ cup or 1 stick): Cold and cubed. This gives the biscuit that signature flakiness.
- Shortening (½ cup): Helps make the texture extra tender and light.
- Buttermilk (2 cups): Adds tanginess and reacts with baking soda to help with rising.
- Active Dry Yeast (1 packet or 2¼ tsp): The magic behind that soft, cloud-like interior.
- Warm Water (¼ cup): Used to activate the yeast. Make sure it’s not too hot—just warm to the touch.
Tools and Equipment Needed
Before we start mixing and rolling, here’s what you’ll want on hand to make the process smooth:
- Large Mixing Bowl: You’ll need space to mix all those ingredients.
- Small Bowl for Yeast Activation
- Pastry Blender or Fork: To cut in the butter and shortening.
- Rolling Pin: To roll out the dough evenly.
- Biscuit Cutter or Glass: Round edges give you a cleaner rise.
- Baking Sheet: Preferably with parchment paper.
- Clean Kitchen Towel: To cover the dough while it rises.
These aren’t fancy tools—just the basics. And if you’re missing something like a pastry cutter, don’t stress. Two forks or even your fingers will do the trick in a pinch.
Step-by-Step Guide to Making Angel Biscuits
Step 1: Activating the Yeast
Start by dissolving your packet of yeast in the ¼ cup of warm water. Let it sit for about 5 to 10 minutes. You’ll know it’s ready when it looks frothy and bubbly on top—like a latte. If it doesn’t foam, your yeast might be expired. Don’t skip this step. It’s what gives your biscuits that soft, pillowy texture.
Step 2: Mixing the Dry Ingredients
In your large mixing bowl, whisk together the flour, baking powder, baking soda, sugar, and salt. Mixing these dry ingredients first ensures even distribution of the leavening agents, so every biscuit rises beautifully. This is where the science of baking kicks in—getting those proportions just right sets the stage for a soft, fluffy outcome.
Pro tip: If you want even lighter biscuits, sift the flour before measuring. It helps to aerate the flour and can make a noticeable difference in the texture of the final product.
Once your dry mix is ready, set it aside. This will act as the base to which you’ll add your fats and liquids next.
Step 3: Cutting in the Fats
Now it’s time to add the butter and shortening. Both should be cold—straight from the fridge. Cold fat is key for flaky layers because it melts during baking and creates steam, which puffs the dough.
Add your cubed butter and shortening to the flour mixture. Using a pastry blender, two forks, or your fingertips, work the fats into the flour until the mixture resembles coarse crumbs. Think pea-sized bits of butter scattered throughout the flour—that’s your goal.
Don’t overwork it. You’re not trying to cream the butter—you want little pockets of fat that will melt and create tender, flaky layers. Once everything’s well-blended, move on to the wet ingredients.
Step 4: Adding the Yeast Mixture and Buttermilk
Once your yeast is activated and frothy, pour it into the dry mixture, followed by the buttermilk. Stir gently with a wooden spoon or rubber spatula just until the dough comes together. It will be sticky—don’t panic. That’s exactly what we want.
If the dough seems dry (which can happen based on flour brand or humidity), you can add a tablespoon of buttermilk at a time until it comes together. But avoid overmixing! A few lumps are totally fine. Overworking the dough activates the gluten, which can lead to tough biscuits.
Once the dough is combined, turn it out onto a lightly floured surface and get ready to roll.
Step 5: Rolling and Cutting the Dough
Lightly flour your surface and gently pat or roll out the dough to about ½ to ¾ inch thick. Don’t go thinner, or your biscuits won’t rise as much.
Now grab your biscuit cutter (or the rim of a glass) and cut straight down—don’t twist! Twisting the cutter can seal the edges of the biscuit and prevent them from rising properly. Dip your cutter in flour between cuts to avoid sticking.
Transfer your cut biscuits to a parchment-lined baking sheet. Place them close together if you want softer sides or spaced out for crispier edges.
Once you’ve cut out your first round, gently gather the scraps, re-roll, and cut again. Try not to re-roll more than once—too much handling can toughen the dough.
Step 6: Letting the Dough Rise
This step is where the yeast magic happens. Cover your biscuit tray with a clean kitchen towel and let them rise for about 30 to 45 minutes in a warm, draft-free spot. They won’t double in size like bread dough, but they should puff up noticeably.
If you’re short on time, you can pop the tray into a slightly warm (but turned-off) oven to speed up the rise. Just don’t skip this part—it’s what gives angel biscuits their signature fluff.
Step 7: Baking to Perfection
Preheat your oven to 400°F (200°C) while the biscuits finish rising. Once hot, slide in your tray and bake for 12 to 15 minutes, or until the tops are golden brown.
Keep an eye on them—every oven bakes a little differently. If your oven has hot spots, rotate the tray halfway through for even browning.
Optional (but highly recommended): As soon as the biscuits come out, brush the tops with melted butter. It adds flavor, softness, and that beautiful bakery-style finish.
Step 8: Cooling and Serving
Let your biscuits cool slightly on the tray for about 5 minutes before serving. They’ll still be warm, soft, and fragrant—basically irresistible.
Serve them fresh with butter, jam, honey, or gravy. Want to turn them into breakfast sandwiches? Add eggs, cheese, and sausage or bacon. Or enjoy them alongside fried chicken or a bowl of chili for dinner.
Angel biscuits are incredibly versatile and taste just as amazing with sweet toppings as they do with savory dishes.
Tips for Perfect Angel Biscuits
- Keep everything cold: Cold butter and shortening are key to creating steam and getting that fluffy, flaky texture.
- Don’t overmix: This can’t be stressed enough. The more you work the dough, the tougher your biscuits will be.
- Let them rise: Giving them that proofing time helps the yeast develop and makes them lighter.
- Use fresh ingredients: Especially your baking powder and yeast—old leavening agents can ruin your rise.
- Bake in a hot oven: A fully preheated oven ensures your biscuits start rising immediately and get that beautiful golden crust.
These tips are small, but they make a big difference.
Variations and Add-ins
One of the best things about angel biscuits? They’re endlessly customizable. Whether you’re going for something savory or sweet, there are dozens of ways to switch up the flavor without compromising the texture.
Cheddar Angel Biscuits
Craving something cheesy? Add 1 to 1½ cups of shredded sharp cheddar cheese to your dry ingredients before adding the wet. You can even throw in a pinch of cayenne or black pepper for a little heat. The cheese melts into the layers and gives you a savory, melty interior that pairs perfectly with soups or chili.
Herbed Angel Biscuits
Fresh herbs like rosemary, thyme, or chives are perfect for turning your biscuits into a more gourmet treat. Add 2 to 3 tablespoons of finely chopped herbs into the flour mixture before the liquid goes in. This version is fantastic served with roasted meats or alongside a holiday meal.
Sweet Cinnamon Angel Biscuits
If your sweet tooth is calling, add 2 tablespoons of sugar and 1 teaspoon of ground cinnamon to the flour mixture. You can also sprinkle the tops with cinnamon sugar before baking. Serve these with honey butter or use them as a base for shortcakes!
Serving Suggestions
Angel biscuits aren’t just for breakfast. Here are some creative and delicious ways to enjoy them all day long.
Breakfast Ideas
- Slather with butter and jam
- Make egg, cheese, and sausage breakfast sandwiches
- Drizzle with honey or maple syrup
- Serve under sausage gravy for classic biscuits and gravy
Lunch Pairings
- Use as sandwich buns for chicken salad or pulled pork
- Serve with tomato soup for a Southern spin on grilled cheese
- Slice in half and toast lightly for an upgraded BLT
Dinner Complements
- Use as a side for fried chicken, pot roast, or BBQ ribs
- Pair with mashed potatoes and gravy for comfort food heaven
- Top with a slice of ham and honey mustard
Angel biscuits are incredibly versatile and go with just about anything. Once you try them, they’ll become a staple in your kitchen.
Common Mistakes to Avoid
Even though angel biscuits are pretty forgiving, here are some common slip-ups you’ll want to steer clear of:
- Overmixing the dough: This toughens the biscuits and prevents proper rising.
- Using warm or soft butter: Cold butter is key for flaky layers. Always start with chilled fats.
- Skipping the rise: Letting the biscuits rest and rise helps develop flavor and structure.
- Incorrect oven temperature: If your oven runs too cool, biscuits won’t puff. Always preheat and use an oven thermometer if needed.
- Twisting the cutter: Remember—press straight down and lift up. Twisting seals the edges and prevents the biscuits from rising fully.
These little mistakes can make the difference between “meh” biscuits and unforgettable ones.
Nutritional Information (Estimated Per Biscuit)
| Nutrient | Amount |
|---|---|
| Calories | 220–250 |
| Total Fat | 12g |
| Saturated Fat | 6g |
| Carbohydrates | 26g |
| Protein | 4g |
| Sugar | 2g |
| Sodium | 300mg |
These values can vary slightly depending on your portion size, add-ins, and exact ingredients. But in moderation, they’re totally worth it!
Make-Ahead and Freezing Instructions
If you’re like most people, the idea of fresh-baked biscuits without the last-minute hassle is chef’s kiss. Here’s how to prep angel biscuits ahead of time:
Refrigerating the Dough
Once the dough is mixed, cover it tightly and refrigerate for up to 5 days. That’s right—this is one of the rare biscuit recipes where the dough gets better with time. The flavors develop more deeply, and the rise improves too. Just pull out the dough, roll, cut, rise, and bake when ready.
Freezing the Dough
Cut out your biscuits and place them on a tray lined with parchment paper. Freeze until solid (about 1-2 hours), then transfer to a zip-top bag or airtight container. They’ll keep for up to 2 months.
When ready to bake, place frozen biscuits on a tray, let them rise at room temperature for 30 to 45 minutes, and bake as usual.
Freezing After Baking
Baked biscuits can also be frozen. Wrap tightly and freeze for up to 2 months. To reheat, place in a 350°F (175°C) oven for about 10 minutes until warm and fluffy again.
Gluten-Free or Dairy-Free Alternatives
Got dietary restrictions? No worries—angel biscuits can still be part of your life with a few tweaks.
Gluten-Free Option
Substitute the all-purpose flour with a high-quality 1:1 gluten-free baking flour. Make sure it includes xanthan gum for structure. The texture may be slightly different but still delicious.
Dairy-Free Option
Use plant-based butter or margarine and swap the buttermilk with unsweetened almond milk mixed with 1 tablespoon of vinegar or lemon juice. This combo mimics the tang and acidity of buttermilk.
Some shortening brands are already dairy-free, but always check the label.
FAQs about Angel Biscuits Recipe
1. How long does angel biscuit dough take to rise?
Usually 30 to 45 minutes, depending on room temperature. You want the dough to puff slightly before baking.
2. Can I make angel biscuits ahead of time?
Yes! The dough can be refrigerated for up to 5 days or frozen after cutting for longer storage.
3. What’s the difference between angel biscuits and regular biscuits?
Angel biscuits use yeast in addition to baking powder and soda, giving them a lighter, fluffier texture.
4. Do I need a biscuit cutter?
Nope! A drinking glass works just fine. Just don’t twist when cutting—press straight down.
5. Can I skip the yeast?
Technically yes, but then you’re making regular baking powder biscuits—not angel biscuits. The yeast gives them their signature softness.
Conclusion
Angel biscuits are more than just a recipe—they’re a tradition, a comfort, and a delicious baking win no matter your skill level. Whether you’re making them for a holiday feast, a lazy Sunday breakfast, or a weekday dinner side, they bring that buttery, soft, irresistible magic every single time.
So don’t be surprised if these become a staple in your kitchen. One batch is all it takes to understand why they’ve earned their heavenly name.